Kevin Thies- Project 9

Kthies sketch
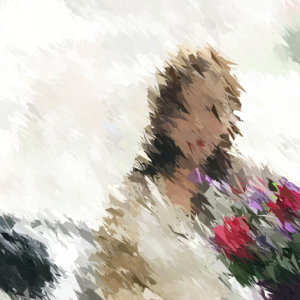
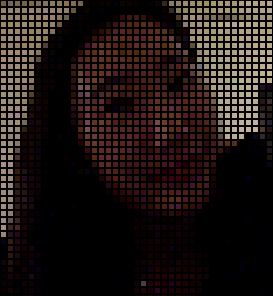
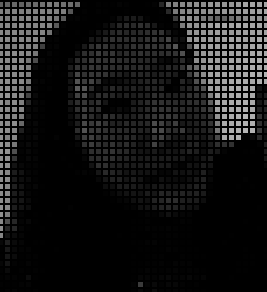
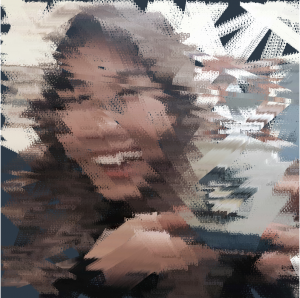
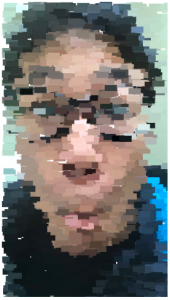
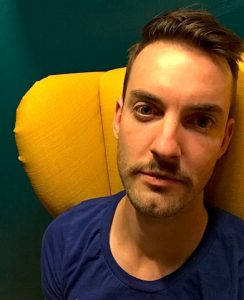
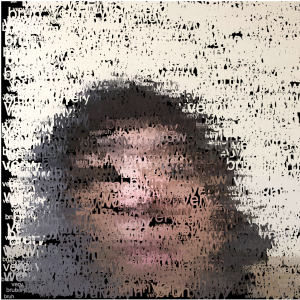
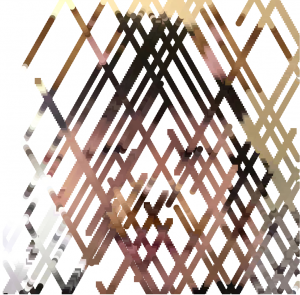
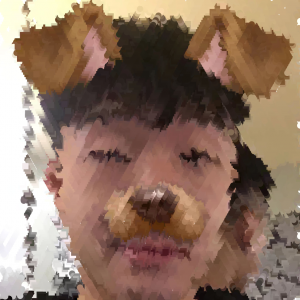
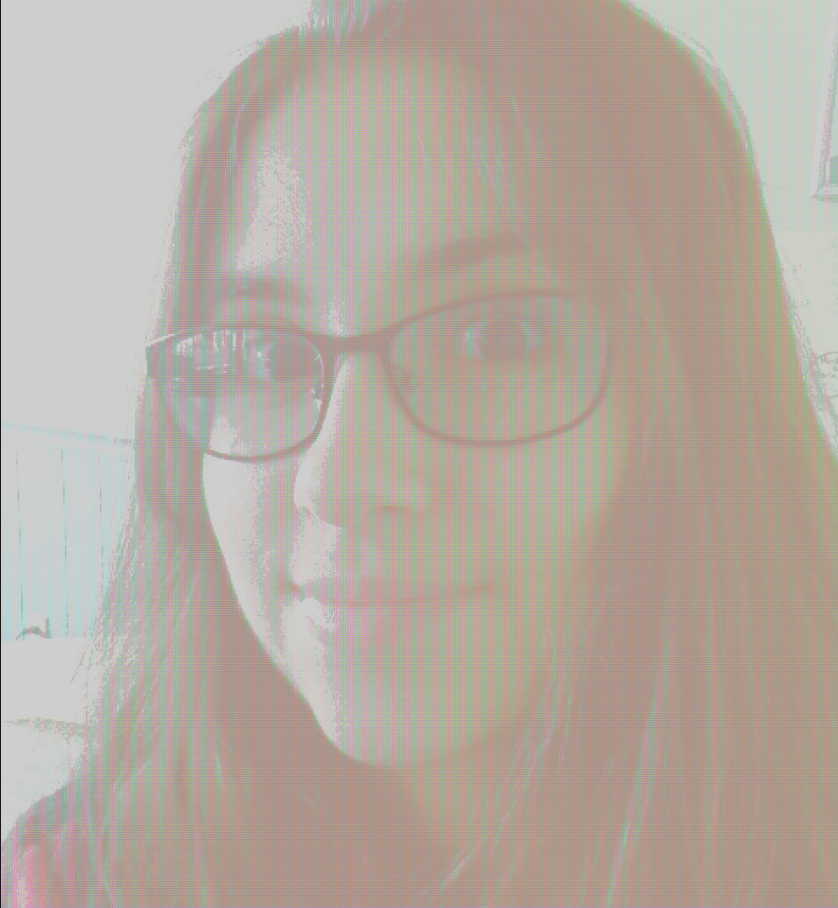
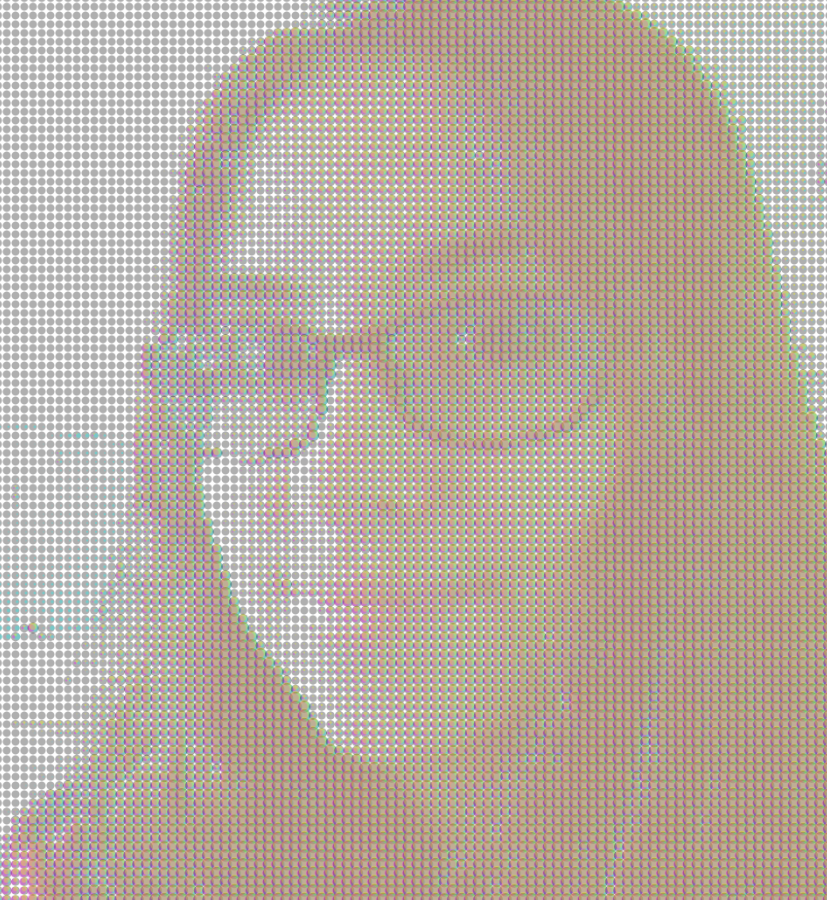
So originally, I was planning on doing just a greyscale image that used the white space to display grayscale, but my friend Raven (pictured) has been working on a project related to superheros, which made me think of comics and how those were printed early on, so I expanded the project scope to take an image and break it down into simulated CMYK values (it’s just RGB in the end because screens) with each of those being slightly offset from the analyzed pixel. I think it turned out really well and makes cool-looking images!

This is when the distance between “pixels” is 1

This is when the distance between “pixels” is 5
// Kevin Thies
// Section C
// kthies@andrew.cmu.edu
// Project 09 - Computational Portrait

var portrait;           // the image
var pixels = [];        // holds the pixels
var step = 6;           // distance between "pixels"
var radiusV;            // radius of value circles
var radiusR;            // radius of red circles
var radiusG;            // radius of green circles
var radiusB;            // radius of blue circles
var rgb = [];           // holds RGBA values of pixels


// preload image
function preload() {
    var myImageURL = "https://i.imgur.com/sveeELP.jpg";
    portrait = loadImage(myImageURL);
}

function setup() {
    createCanvas(480, 520);
    background(255);
    portrait.loadPixels();
    noLoop();
    noStroke();
}

function draw() {
    // get a grid of positions one step apart

    for(var x = 0; x < width; x += step) {
        for(var y = 0; y < height; y += step) {

            // value ===============================================

            // kept darker than the color values to just balance it out
            // RGB is structured the same way, just not using brightness but direct
            // R, G, and B values

            // sets the radius of the circle, remapping the value of color/brightness
            // to a circle between 0 and step * 1.3 in diameter
            // with step > 1, it means the colors can overlap, hiding the white background
            radiusV = map( brightness( portrait.get(x * 2, y * 2) ),
                          255, 0,
                          0, step * 1.5 );

            // sets the fill color with transparency
            fill(0, 0, 0, 80);

            // draws the ellipse at the point
            ellipse(x, y, radiusV, radiusV);

            // RGB ==================================================

            // rgb takes on the [R, G, B, A] values as an array
            rgb = portrait.get(x * 2, y * 2);

            print(rgb[0] + "  " + rgb[1] + "  " + rgb[2] + "  " + rgb[3]);
            // by filling the color with 255 of not that color, when stacked up the
            // colors match - ex. red = 0,255,255 g = 255,0,255 b = 255, 255, 0
            // basically I translated RGB to CMY

            // red / cyan
            radiusR = map(rgb[0],
                          255, 0,
                          0, step * 1.3);
            fill(0, 255, 255, 80);
            ellipse(x + step / 5, y, radiusR, radiusR);

            // green / magenta
            radiusG = map(rgb[1],
                          255, 0,
                          0, step * 1.3);
            fill(255,0,255, 80);
            ellipse(x - step / 5, y, radiusG, radiusG);

            // blue / yellow
            radiusB = map(rgb[2],
                          255, 0,
                          0, step * 1.3);
            fill(255,255,0,80);
            ellipse(x, y - step / 5, radiusB, radiusB);
        }
    }
}

Christine Seo – Project 09

sketch

//Christine Seo
//Section C
//mseo1@andrew.cmu.edu
//Project 9

var sisterImg;

function preload() {
	//loading the picture
    sisterImg = loadImage("Sister.png");
}

function setup() {
	//set up canvas
    createCanvas(480, 480);
    background(0);
    sisterImg.loadPixels();
    //load 200 times in a minute
    frameRate(200);
}

function draw() {
    var px = random(width);
    var py = random(height);
    var cx = constrain(floor(px), 0, width-1); //constraining the placement of pixels
    var cy = constrain(floor(py), 0, height-1);
    var colorAtLocationXY = sisterImg.get(cx, cy);

    //draw traingles
    noStroke();
    fill(colorAtLocationXY);
		triangle(px-random(20), py-random(20), px-random(20), py-random(20), px+random(20), py+random(20));

}

Potential Final Image
Original image of my sister

I created an abstract portrait of my sister holding flowers.  I wanted to use randomly sized triangles to represent the pixels. I was quite happy with the result as it made the portrait quite abstract but you could still tell what the picture is to a certain degree.


Project-09-Portrait-Veronica

sketch

//Veronica Wang
//Section B
//yiruiw@andrew.cmu.edu
//Project-09

var underlyingImage;

function preload() {
    //loading image from URL
    var myImageURL = "https://i.imgur.com/25qNlPj.jpg";
    underlyingImage = loadImage(myImageURL);
}

function setup() {
    createCanvas(480, 480);
    background(0);
    //loading pixels from image
    underlyingImage.loadPixels();
    //drawing speed
    frameRate(220);
}

function draw() {
    //random pixel from image
    var px = random(width);
    var py = random(height);
    //constraining pixel to canvas
    var ix = constrain(floor(px), 0, width-1);
    var iy = constrain(floor(py), 0, height-1);
    var theColorAtLocationXY = underlyingImage.get(ix, iy);

    noStroke();
    fill(theColorAtLocationXY);
    push();
    //rotate pixel
    translate(px, py);
    rotate(random(0, PI));
    //scale pixel
    scale(random(0.5, 3));
    //draw pixel as rectangles
    rect(0, 0, 10, 6);
    pop();
}

This is an abstract portrait of my friend Yang. I decided to use randomly sized and rotated rectangles to represent the pixels to create a confetti looking effect. The result ended up looking quite abstract.

Original image
Digital Portrait

Curran Zhang- Project 09- Portrait

sketch

/*Curran Zhang
 curranz
 Project 9
 Section A
 */

var Ball = [];
var img = ['https://i.imgur.com/6PlJkcb.jpg',
           'https://i.imgur.com/MIU3YvB.jpg']
                     
var dir;
var picIndex = 1;
var currentIndex = 0;

function preload(){
  pic = loadImage(img[picIndex]);
}

function setup(){
  createCanvas(480,480);
  pic.loadPixels();
  background(50);
  dir = random(5,10);
}

function properties(px,py,pdy){
  b = { x: px,
        y: py,
        dy: pdy,
        speed: ballSpeed,
        ball: ballMake,
        bSize: random(3,6)
      }
  return b; 
}

function ballMake(){
  var xx = constrain(floor(this.x),0,width-1);
  var yy = constrain(floor(this.y),0,height-1);
  var pix = pic.get(this.x, this.y);

  fill(pix)
  stroke(0);
  strokeWeight(0.1);
  ellipse(this.x, this.y, this.bSize, this.bSize);
}

function ballSpeed(){
  this.y += this.dy * random(.1,.3);
}

function draw(){
  //Creating an array of all the individual balls
  newBall =[];
  for (var i = 0; i <Ball.length; i++) {
    var b = Ball[i];
    b.speed();
    b.ball();
    newBall.push(b);
  }
  Ball = newBall;

 //Applying all the drawn properties onto the canvas
  var bb = properties(random(width), 0, dir);
  Ball.push(bb);
}

/*
//Failed attempt to shuffle through the array to switch the image
function mouseClicked(){
picIndex = int(random(0,1))
        while (currentIndex == picIndex){
         picIndex = int(random(0,1))
        }
        currentIndex = bodyIndex;
}
*/

For this project, I used pictures from my friend Kelly. I tried to create a snow falling effect of the individual pixels. I tried to place the pictures into an array which would eventually shuffle through with mouseClicked(), however it would just freeze up. Even though it didn’t work, I am satisfied with the glittery effect that it produces.

Droopy Effect in the Begining
Final Product


Sarah Yae – Project 9 – Section B

sketch

//Sarah Yae
//smyae@andrew.cmu.edu
//Section B
//Project 9

var basepic;
var sqsize = 5;
var click = 0; 

//Load Image
function preload() {
    var myportrait = "https://i.imgur.com/ZUZbO4M.png";
    basepic = loadImage(myportrait);
}

//Translates original image 
function setup() {

    createCanvas(275, 300);
    background(0);
    basepic.loadPixels();

//Makes certain pixels into rectangles after retrieving that pixel's color 
    for (var x = 2; x < width; x += (sqsize + 2)) {
        for (var y = 2; y < height; y += (sqsize + 2)) {
            var color = basepic.get(x,y);
            fill(color);
            noStroke();
            rect (x, y, sqsize, sqsize);
        }
    }

}

//Turns image into black and white once mouse pressed 
function mousePressed() {

    createCanvas(275, 300);
    background(0);
    basepic.loadPixels();

    for (var x = 2; x < width; x += (sqsize + 2)) {
        for (var y = 2; y < height; y += (sqsize + 2)) {
            var r = basepic.get(x,y)[1]; //Retrieves a pixel's 1st value in its array 
            fill(r, r, r);
            noStroke();
            rect (x, y, sqsize, sqsize);
        }
    }

}

Once you click on the image, the translated image turns black and white. I had a hard time figuring out how  to change the image black and white, but I used pixel array to make it work.

Translated Image with Color
Translated Image into Black and White

Katherine Hua – Project-09 – Portraits

sketch

/* Katherine Hua
Section A
khua@andrew.cmu.edu
Project-09-Portrait */

var klaire; 
var x;
var y;
var dx;
var dy;
var color;

function preload() {
    var imageLink = "https://i.imgur.com/DijwpWY.jpg"; //link of image
    klaire = loadImage(imageLink); //loading image onto canvas
}

function setup() {
    createCanvas(500, 500);
    background(42, 57, 70);
    klaire.loadPixels(); //loading pixels of image 
    frameRate(500); //making it draw faster
    x = random(width); //randomizing x between constraints of width
    y = random(height); //randomizing y between constraints of height
    dx = random(-1,1); //randomizing direction
    dy = random(-1,1); //randomizing direction
}

function draw() {   
    var ix = constrain(floor(x), 0, width-1);
    var iy = constrain(floor(y), 0, height-1);
    color = klaire.get(ix, iy); //getting pixel color according pixel position in comparison to pixel in image
    fill(color); //making color at this pixel position the same color as in the image's pixel position
    textSize(10);
    text("loading", x, y);


    x += dx * 5 ;
    y += dy * 5  ;
    //when the word "loading" hits the edge of the canvas, direction is changed randomly
    if (x > width || x < 0) {
        dx = -dx;
        dy = random(-1, 1);
    }  
    if (y > height || y < 10) {
        dy = -dy;   
        dx = random(-1, 1);     
    } 

    
}

For this project, I chose my portrait to be of my twin sister, Klaire (because I miss her). She goes to school on the west coast in California, so the only times we can see each other now are breaks. I chose to use text to create compute the portrait of her. I like how when all the text builds up, it begins to look like strokes of paint instead of text.

This is what is looks like at the very beginning. The text “loading” is drawn randomly across the canvas. Each time it hits a wall, it will change direction at a random angle and speed.

As more and more build on top of each other, the image starts coming together to create this.

This is the original portrait of Klaire. <3

Justin Yook – Project 09

customPix

// Justin Yook
// jyook@andrew.cmu.edu
// Section C
// Project 09

var underlyingImg;

function preload() {
    var imgURL = "https://i.imgur.com/25HDnhA.jpg";
    underlyingImg = loadImage(imgURL);
}
function setup() {
    createCanvas(270, 480);
    background(255);
    underlyingImg.loadPixels();
    frameRate(60);
}

function draw() {
    var x = random(width);
    var y = random(height);
    var px = constrain(floor(x), 0, width-1);
    var py = constrain(floor(y), 0, height-1);
    var theColorAtLocationXY = underlyingImg.get(px, py);

    noStroke();
    fill(theColorAtLocationXY);
    rect(x, y, 20, 10);
}

For the portrait, I used my friend’s face. I kept playing around with the style of points being drawn, but I decided on a long rectangle because it reminded me of actual old paintings; in addition, the slight obscurity of his face made it look less boring. I also set the frame-rate to be higher so it paints the portrait faster.

Finished portrait
Original photo

Philip Gates – Project 09 – Computational Portrait

sketch

var img;
var x = 0;
var y = 0;
var circle = 20;
var dirX = 1;
var dirY = 1;

function preload() {
    img = loadImage("https://i.imgur.com/YA5ZxuZ.jpg");
}

function setup() {
  createCanvas(391, 480);
  imageMode(CENTER);
  noStroke();
  background(255);
  img.loadPixels();
}

function draw() {

  var pix = img.get(x, y); //gets color of pixel at location x,y
  fill(pix);    //fills circle with that color
  ellipse(x, y, circle, circle); //draws circle

  x+=random(10) * dirX; //sets horizontal wobbly direction for traveling "snake"
  y+=random(10) * dirY; //sets vertical wobbly direction for traveling "snake"

  //code below: if snake goes out of bounds in canvas
  //then restart in a random location
  //with new snake size and reversed direction

  if (x > width || x < 0) {
    x=floor(random(width));
    circle=random(10,25);
    dirX = -dirX;
  }

  if (y > height || y < 0) {
    y=floor(random(height));
    circle=random(10,25);
    dirY = -dirY;
  }

}

I enjoyed this project quite a bit. I chose to go the narcissistic route and make a self-portrait, mostly because I recently painted my apartment and took this selfie against the new wall, and I really like the color palette of this photo.

I started with the pointillism example for reference, but I knew I wanted to make a portrait that gradually filled in with moving lines, rather than random dots/points. What ended up emerging was this kind of “snake” made up of circles moving across the canvas.

Here’s the original photo:

Project 09 – Portrait

index

var underlyingImage;
var textChoice;

function preload() {
    var me = "https://i.imgur.com/UDfjk6L.jpg";
    underlyingImage = loadImage(me);
}

function setup() {
    createCanvas(500, 500);
    background(0);
    underlyingImage.loadPixels();
}

function draw() {
    var px = random(width);
    var py = random(height);
    var ix = constrain(floor(px), 0, width);
    var iy = constrain(floor(py), 0, height);
    var theColorAtLocationXY = underlyingImage.get(ix, iy);
    
    //randomizes text between three choices
    textChoice = random(0, 1000)

    noStroke();
    //size of text changes as mouse moves to right
    textSize(mouseX / 50)
    fill(theColorAtLocationXY);
    if (textChoice > 600) {
    	text("bruh", px, py);
    } else if (textChoice < 600 & textChoice > 400) {
    	text("wow", px, py);
    } else {
    	text("very", px, py);
    }
}

//press mouse to reset
function mousePressed() {
	background(0);
}

For this project, I wanted to channel the energy of memes to shape an appropriate photo of myself. I was very surprised to learn how simple it is to use images and extract colors for certain pixels, which will be helpful in creating future projects.

A half-rendered image of myself.

Shirley Chen – Project 09 – Portrait

sketch

// Shirley Chen
// Section B
// junfanc@andrew.cmu.edu
// Project 09

var myPic; 
var x;
var y;
var dx;
var dy;
var colAtPoint;
var count = 0;

function preload() {
    var myPiclink = "https://i.imgur.com/uktbZVu.jpg";
    myPic = loadImage(myPiclink);
}


function setup() {
    createCanvas(480, 480);
    background(255);
    myPic.loadPixels();
    x = random(width);
    y = random(height);
    dx = random(-1,1);
    dy = random(-1,1);
    frameRate(20);
}


function draw() {   
    
// get the pixel color for the geometry
    var ix = constrain(floor(x), 0, width-1);
    var iy = constrain(floor(y), 0, height-1);
    colAtPoint = myPic.get(ix, iy); 
    noStroke();
    fill(colAtPoint);
//If the number of pressing the mouse is even, then draw ellipse
    if (count % 2 == 0){
        ellipse(x, y, 10);
    }
//If the number of pressing the mouse is odd, then draw sqaure
    else{
        rect(x,y,10,10);
    }

//Update the coordinates of the geometry
    x += dx * 5 ;
    y += dy * 10  ;

//Make the geometry bounces back when it hits the boundry
    if (x > width || x < 0) {
        dx = -dx
    }  
    if (y > height || y < 0) {
        dy = -dy        
    } 

    
}

//When the mouse clicked there is a new serie of geometry being drawn with oppsite direction
function mousePressed() {
    count += 1;
    x = mouseX;
    y = mouseY;
    dx = -dx;
    dy = -dy;

}

For this project I used one of my best friends photo. I used two different geometries – square and circle to gradually reveal the photo by displaying pixels of the photo. The displaying geometry will change between these two by the user clicking the mouse. The square and circle would bounce back when they hit the boundary of the canvas. Therefore, the image will gradually show up at the paths that are drawn by these geometries.


Twenty Second Later

Two Minutes Later

Final