Sophia Kim – Project 09 – Sec C

sketch

// Sophia S Kim
// Section C 1:30
// sophiaki@andrew.cmu.edu 
// Project-09-Portrait

var friendImage;

//function that loads the image
function preload() {
  var myImageUrl = "https://i.imgur.com/kEQsen9.jpg"; 
  friendImage = loadImage(myImageUrl); 
}

function setup() {
  createCanvas(310, 480); 
  background(0); 
  imageMode(CENTER);
  friendImage.loadPixels(); 
  //loads the image using pixels 
  frameRate(5000); 
}

function draw() {
  var positionX = random(width); 
  var positionY = random(height); 
  //positions the pixels randomly (x & y values random)
  var constrainX = constrain(floor(positionX), 0, width); 
  var constrainY = constrain(floor(positionY), 0, height);
  //constrains the randomly assigned positions within the canvas
  var colorGet = friendImage.get(constrainX, constrainY); 
  //retrieves color from image pixels to a random position

  noStroke();
  fill(colorGet); 
  ellipse(positionX - 5, positionY, 2, 2); 
  //left eye for smiley face
  ellipse(positionX + 5, positionY, 2, 2);
  //right eye for smiley face
  noFill();
  stroke(colorGet); 
  strokeWeight(2); 
  arc(positionX, positionY + 5, 7.5, 3, 0, radians(180));
  //the smile part (arc) of the smiley face
}

function mousePressed() {
  textSize(18); 
  fill(168, 217, 255);
  textStyle(BOLD);
  noStroke();
  text("get me water!", mouseX, mouseY);
}

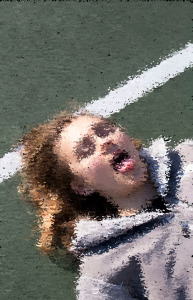
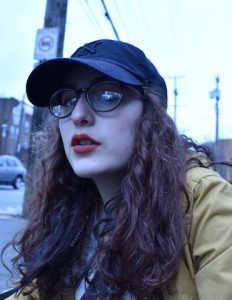
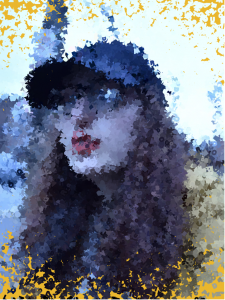
I chose to do a portrait of Jaclyn that I took last semester at the tennis courts. I knew that I didn’t want to just use simple shapes for the pixels. Instead, I chose to use smiley faces, because Jaclyn is really funny, goofy, and happy. I am really glad I have a friend like her 🙂

Because her tongue is sticked out in the photo, I immediately thought of dehydration and water.
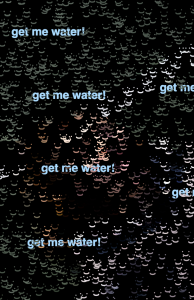
beginning of the portrait with some clicks (“get me water!”)
finished portrait without clicks


Dani Delgado Project-09

Click to increase frameRate!

sketch

/* Dani Delgado
Section E
ddelgad1@andrew.cmu.edu
Project-09
*/

//global variable for calling image
var sunset;
//global variables for adjusting the frame rate and size of the rects
var pixNo = 0;
var fr = 15;

function preload() {
	//load the underlaying image into the canvas
    var picture = "https://i.imgur.com/BBnFAII.jpg";
    sunset = loadImage(picture);
}

function setup() {
	//set the overall canvas settings
    createCanvas(480, 320);
    background(250, 240, 230);
    frameRate(fr);

    //draw the underlaying image
    sunset.loadPixels();    
}

function draw() {
    //first set variables to draw the rects at random locations
    var rx = random(width);
    var ry = random(height);
    //constrain these rectangles to the canvas
    var pixx = constrain(floor(rx), 0, width - 1);
    var pixy = constrain(floor(ry), 0, height - 1);
    //create this variable to call the colors from the underlaying image
    var colPix = sunset.get(pixx, pixy);
    //create the variables for size and roundness adjustments
    var size;
    var round;
    //create the variable that sets the objects at diff angles
    var pixAng = random(radians(360));

    //these if statements change the size and roundness of the rects based on quantity 
    if (pixNo < 600) {
        size = 20;
        round = 1;
    } else if (pixNo < 1200) {
       	size = 16;
       	round = 2;
    }else if (pixNo < 1800) {
    	size = 12; 
    	round = 4;
    } else if (pixNo < 2400) {
    	size = 8;
    	round = 6; 
    } else {
    	size = 5;
    	round = 5;
    }

    pixNo ++; 
    
    //set rect color and stroke
    noStroke();
    fill(colPix);

    //draw the rects
    push(); 
    translate(rx, ry);
    rotate(pixAng); 
    rect(0, 0, size, size, round);
    pop();
}

function mousePressed() {
	//this function will increase frame rate whenever mouse is pressed
	fr += 10;
	fr = constrain(fr, 15, 125);
	frameRate(fr);
}


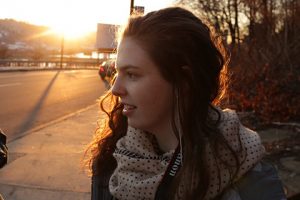
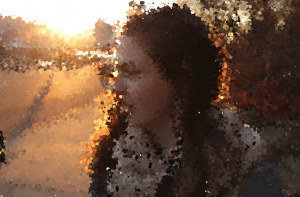
For this project, I decided to use a picture I took of my friend Margot last year! I enjoyed the project, despite struggling with it at first (my colors were all messed up and flashing for a while). I played around with a few ideas, including using different shapes and having the pixels be denser in certain areas, but I ultimately decided on making it a quantity based portrait where the more “pixels” appear, the smaller and rounder they get (however, this was done in a step-down sort of way rather than a smooth way). I also added the “click to increase frameRate” feature because of how impatient I was to see the final product appear and I figured other people would get impatient too.

Original picture
Final computed portrait


Carley Johnson Portrait

sketch

/*Carley Johnson
Section E
cbjohnso@andrew.cmu.edu
Project 9
*/

var img;

function preload() {
    img = loadImage("https://i.imgur.com/evcbg0y.jpg");
}

function setup() {
  createCanvas(400, 580);
  imageMode(CENTER);
  noStroke();
  background(18, 121, 80);
  img.loadPixels();
 
}

function draw() {
  //change angle of the stroke
  var angle = random(360);
  var x = floor(random(img.width));
  var y = floor(random(img.height));
  var pix = img.get(x, y);
  
  //make "paint stroke"
  //push();
  //rotate(radians(angle));
  fill(pix, 128);
  rect(x, y, 30, 10, 10, 10, 0, 10);
  //pop();


}

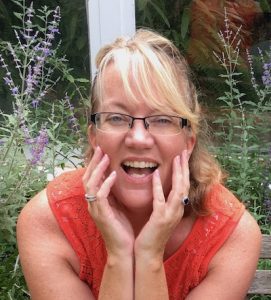
This is my mother. I chose this picture for the smile, which is so fun and genuine. I actually really like this project, I missed them from last week. I feel like I learn more from the projects because I have more room to experiment and mess around with code from scratch, as opposed to the set, set of ways I can solve an assignment. I suppose that’s a very artist thing of me to say, though.

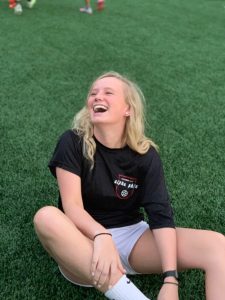
This is the original photo, isn’t she cute?!

Erin Fuller Project-09-Portrait

//Erin Fuller
//SectionA
//efuller@andrew.cmu.edu
//Project 09

var img;

function preload() {
    img = loadImage("https://i.imgur.com/4QKnX6El.jpg"); //imgur image link
}

function setup() {
    createCanvas(480, 480);
    noStroke();
    background(0);
    img.loadPixels();
}

function draw() {
    var imgW = img.width; 
    var imgH = img.height;

    for (var i = 0; i < imgW; i++) { //searches x pixels
        for (var j = 0; j < imgH; j++){ //searches y pixels
            var c = img.get(i, j); //gets colors for all pixels
            var val = brightness(c); //gets brightness from colors
            var s = map(val, 0, 255, 0, 20); //maps brightness to circle size
            
            var pix = img.get(i, j); // gets color at each pixel
            fill(pix); //colors pixels
            
            if (i%12 === 0 & j%12 === 0) {
                ellipse(i, j, s, s); //draws ellipse at every 12th pixel
            } 
        }
    }
}

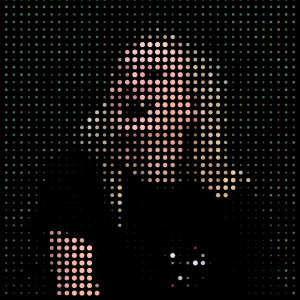
I used a picture of my friend Mae (original photo shown below) as a base for my computational portrait. To create the resulting computational image, I pointillized the photo by drawing the circles every 12 pixels (in both x and y-direction). Each circle uses the color of the pixel at the center of each ellipse, but the size is determined by the brightness of the pixel. Therefore, as you can see she is wearing a black shirt, so those circles are much smaller than her face.

Original Image
Process Screenshot

With a better photo, a more frontal headshot photo, I think the generated image may have a more successful result.

Judy Li-Project-09-Portrait

judyli: Portrait Project 09

/*
Judy Li
Section A
judyli@andrew.cmu.edu
Project-09
*/

var friendsImage;

function preload() {
    var myImageURL = "https://i.imgur.com/1nenA0cl.jpg";
    friendsImage = loadImage(myImageURL);
}

function setup() {
    createCanvas(480, 480);
    background(0);
    friendsImage.loadPixels();
    frameRate(100);
}

function draw() {
    var px = random(width);
    var py = random(height);
    var ix = constrain(floor(px), 0, width-1);
    var iy = constrain(floor(py), 0, height-1);
    var theColorAtLocationXY = friendsImage.get(ix, iy);

    noStroke();
    fill(theColorAtLocationXY);
    push();
    scale(random(.25, 3));
    ellipse(px, py, 6, 6);
    pop();

    noStroke();
    var sizeP = random(5, 10);
    var theColorAtTheMouse = friendsImage.get(mouseX, mouseY);
    fill(theColorAtTheMouse);
    ellipse(mouseX, mouseY, sizeP);
}

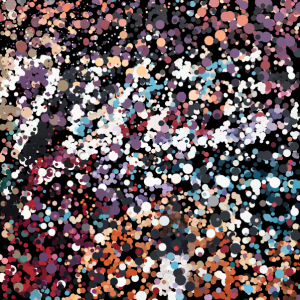
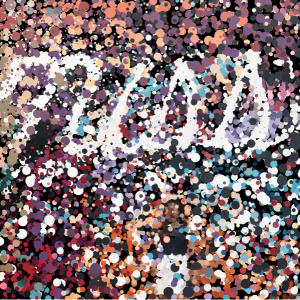
For this project, I wanted to create a portrait of my friend that showcases our fun and bubbly excursion in the Nolita area of New York. Because the background is full of color and is very vibrant, I wanted the computational background to resemble that as well. I added in the function of the mouse so that the user and control the parts he/she want to make prominent, such as the background text and the person herself!

Computationally made
Computationally made with the use of a mouse

Eliza Pratt – Project 09

sketch

/*
Eliza Pratt
Section E
elpratt@andrew.cmu.edu
Project - 09
*/

var pic;
var dev = 50; //starting deviation for coordinate positon

//array of letters to be drawn
var letter = ["A", "B", "C", "D", "E", "F", "G", "H", "I", 
                "J", "K", "L", "M", "N", "O", "P",  "Q", 
                "R", "S", "T", "U", "V", "W", "X", "Y", "Z"];

//loads image
function preload() {
    var friends = "https://i.imgur.com/7k2A67W.jpg";
    pic = loadImage(friends);
}

function setup() {
    createCanvas(360, 480);
    background(235, 184, 16);
    imageMode(CENTER);
    pic.loadPixels();

}

function draw() {

    //selects a random size
    var r = random(6, 10);

    //selects a random angle 
    var angle = random(360);

    //incrementally increases the deviation of coordinates 
    //after a certain number of frames
    if (frameCount > 600) dev = 100;
    else if (frameCount > 1000) dev = 240;

    //randomly assigns position
    var px = randomGaussian(width / 2, dev);
    var py = randomGaussian(height / 2, dev);

    //contrains random values to the canvas
    var picX = constrain(floor(px), 0, width);
    var picY = constrain(floor(py), 0, height);

    //retrieves color from pixel at random coordinate
    var col = pic.get(picX, picY);


    strokeWeight(2);
    stroke(col);
    noFill();
    textSize(r);

    //retrieves a random index for the letter array
    var i = floor(random(25));

    //draws and rotates letter
    push();
    translate(px, py);
    rotate(radians(angle));
    text(letter[i], 0, 0);
    pop();

}


This project was a lot of fun, and I think really helped me understand more about coding with images! I spent a lot of time experimenting with different ways to project the image – vertical lines, spirals, etc. I decided on letters because I thought it would be cool to have a variety of complex shapes to compose a single image. This is an image of my friend Dani that I took last year.

Rendering:

Emily Zhou –– Portrait

click the pickle to begin.

var img;
var pickle;
var pickleX;
var pickleY;
var runDraw = false;

function preload() {
    img = loadImage("https://i.imgur.com/ZZ3qlai.jpg");
    pickle = loadImage("https://i.imgur.com/EHVwUGX.png");
}

function setup() {
    createCanvas(480, 320);
    imageMode(CENTER);
    strokeWeight(5);
    background(255);
    img.loadPixels();

    pickleX = width / 2;
    pickleY = height / 2;
    image(pickle, pickleX, pickleY);
}

function draw() {
    if (runDraw) {
        var x = floor(random(img.width));
        var y = floor(random(img.height));
        var col = img.get(x, y);
        fill(col, 128);
        text("pickle", x, y);
    }
}

function mousePressed() {
    if (dist(mouseX, mouseY, pickleX, pickleY) < 50) {
        background(255);
        runDraw = true;
    }
}

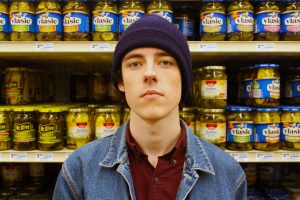
The original photo.
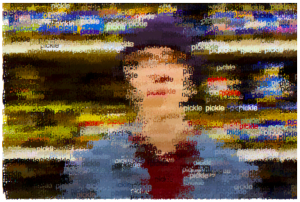
Pickle text rendering.

The original photo shows my friend Sebastian standing in front of the pickle shelf at Giant Eagle. I went off the pickle theme and implemented a pickle button to begin the rendering of the image in text “pickle”. Lot of pickles.

Jenny Hu — Project 09 Portrait

jenny’s sketch

//Jenny Hu
//Section E
//jjh1@andrew.cmu.edu
//Project 09

var underlyingImage;
var coffeeImage;

function preload() {
    var myImageURL = "https://i.imgur.com/raTslIA.jpg";
    var myCoffeeURL = "https://i.imgur.com/6kkGXgx.png";
    coffeeImage = loadImage(myCoffeeURL);
    underlyingImage = loadImage(myImageURL);
}

function setup() {
    createCanvas(400, 600);
    background(255);
    underlyingImage.loadPixels();
    frameRate(10);
}

function draw() {
    //variables needed for drawing the pixels over and over again
    var xa = random(width);
    var ya = random(height);
    var xb = random(width);
    var yb = random(height);
    var xc = random(width);
    var yc = random(height);

    var ixa = constrain(floor(xa), 0, width-1);
    var iya = constrain(floor(ya), 0, height-1);
    var ixb = constrain(floor(xb), 0, width-1);
    var iyb = constrain(floor(yb), 0, height-1);
    var ixc = constrain(floor(xc), 0, width-1);
    var iyc = constrain(floor(yc), 0, height-1);

    var theColorAtLocationXaYa = underlyingImage.get(ixa, iya);
    var theColorAtLocationXbYb = underlyingImage.get(ixb, iyb);
    var theColorAtLocationXcYc = underlyingImage.get(ixc, iyc);

    //open ellipses
    noFill();
    stroke(theColorAtLocationXaYa);
    strokeWeight(1);
    ellipse(xa, ya, 15, 15);

    //big rectangle
    fill (theColorAtLocationXbYb);
    noStroke();
    rect(xb, yb, 10, 10);

    //small rectangle
    fill (theColorAtLocationXcYc);
    noStroke();
    rect(xc, yc, 5, 5);

}

//call the coffee image when you click
function mousePressed() {
  image(coffeeImage, mouseX-75, mouseY-75, 150, 150);
}

I loved the textural quality individual shapes gave to this project— like in the brief, it was nice to see this transforming effect happen as I generated the pixels across the canvas.

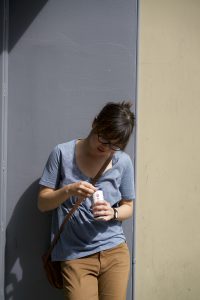
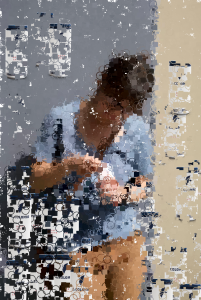
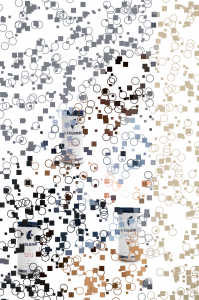
My image is of my friend, Adella, who is pictured here opening a bottle of La Colombe. Rightfully so, I thought it would be interesting and fun to add a La Colombe image as the user clicks around. Doing so, makes the image feel even more artificial/generated, and even ad-like. In some ways, it contextualizes the image.

adella in the original photo
resulting image screenshot
beginning screenshot, with a few mouse presses

Jamie Dorst Project 09 Portrait

sketch

/*
Jamie Dorst
jdorst@andrew.cmu.edu
Project 09
Section A
*/

var underlyingImage;

function preload() {
    var myImageURL = "https://i.imgur.com/Dd4CnQI.jpg";
    underlyingImage = loadImage(myImageURL);
}

function setup() {
    createCanvas(360, 480);
    background(0);
    underlyingImage.loadPixels();
    frameRate(30);
}

function draw() {
    // variables
    // first line coordinates
    var x1 = random(width);
    var y1 = random(height);
    // make line stroke bigger further from the face (slightly above center)
    var distBtwn = dist(width / 2, (height / 2) - 100, x1, y1);
    var sw = map(distBtwn, 0, 350, 2, 10);
    // picture colors
    var ix = constrain(floor(x1), 0, width-1);
    var iy = constrain(floor(y1), 0, height-1);
    var theColorAtLocationXY = underlyingImage.get(ix, iy);
    // second line coordinates
    // make lines shorter closer to the center
    var xy = map(distBtwn, 0, 350, 5, 30);
    var x2 = x1 + xy * random(-2, 2);
    var y2 = y1 + xy * random(-2, 2);
    // randomize stroke caps
    var num = random(2);
    var sCap;

    // assign stroke values
    if (floor(num) === 0) {
        sCap = SQUARE;
    } else if (floor(num) === 1) {
        sCap = ROUND;
    }
    strokeCap(sCap);
    strokeWeight(sw);
    stroke(theColorAtLocationXY);
    // draw lines
    line(x1, y1, x2, y2);
}


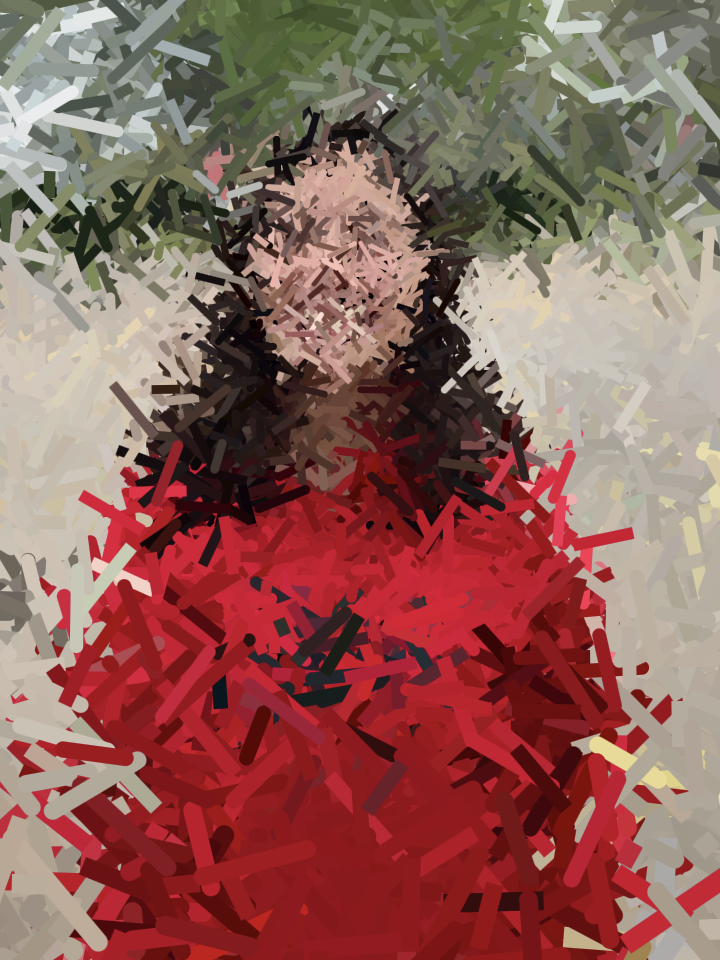
For this project, I was inspired by the idea of a painting. I decided to make it draw using lines, and I had it randomly select a stroke cap to emulate even more a random brush stroke. I also made it so that closer to the face, the strokes are shorter and thinner, so that more detail can be achieved. Toward the outside of the canvas, the strokes get longer and thicker. Overall I thought this project was pretty fun to do and try out with different photographs.

A screenshot of the (possible) finished product