cmhoward-project-05

sketch-396

function setup() {
	createCanvas(400, 400);
	noLoop();
	noStroke();
	background('black');
}

function draw() {
	drawGrid();
}

function drawGrid() {
//set circle Size  
	var circleSize = 10;
//increasing or decreasing variable
	var dir = 1;
//x position	
	for (var x = 10; x < width; x += 20) {
//alternates columns, sets circleSize initial value to be different 
		dir = -dir;
		if (dir == 1) {
			circleSize = 5;
		}
		else {
			circleSize = 15;
		}
//counter switches from increasing circleSize to decreasing circleSize 
		var counter = 0;
		var red = 150;
//y position
    	for (var y = 10; y < height; y += 20) {
//gradient color based on increasing or decreasing dir 
    		red += dir * 10;
    		fill(red, 0, 0);
//draw circles
            ellipse(x, y, circleSize, circleSize);
//increase or decrease after every 5 circles 
            counter += 1;
            if (counter % 5 == 0) {
            	dir = -dir; 
            }
            circleSize += dir * 3;
        }
    }
}

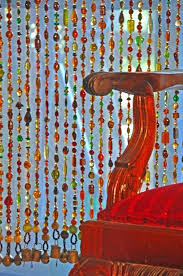
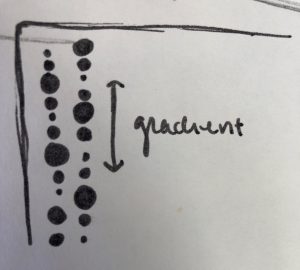
For this project I was inspired by decorative beads, as wallpaper and door beads both have similar space dividing properties, as well as specific aesthetic qualities.

I wanted to create a pattern that was both repetitive and rhythmic, so I created alternating columns of gradually increasing and decreasing ellipses. There begins to be a hierarchy of size and color that draws your eye around the canvas, similar to how door beads change your perspective of a space.

Alessandra Fleck – Project 05 Wallpaper

sketch

//Name: Alessandra Fleck 
//Class Section : B
//Email: afleck@andrew.cmu.edu
//Project-05


function setup() {
    createCanvas(600, 500);
    noStroke();
}

function draw() {
    background(0);

    // Base ellipses in a dull gray

    for (var y = 0; y < height+25; y += 50) {
        for (var x = 0; x < width+25; x += 50) {
            stroke(255);
            strokeWeight(0.40);
            fill(62,81,82);
            ellipse(x, y, 50, 50);
        }
    }

    //negative space from circles

    for (var y = 0; y < height+25; y += 50) {
        for (var x = 0; x < width+25; x += 50) {
            fill(29,26,34);
            quad(x+35, y+30, x+90, y+25, x+55, y+70, x+30, y+80);
        }
    }

    //creates the small white checks by twisting a smaller quadrangle 

    for (var y = 0; y < height+25; y += 50) {
        for (var x = 0; x < width+25; x += 50) {
            fill(255);
            quad(x+15, y+20, x+30, y+15, x+15, y+50, x+30, y+20);
        }
    }
     // Creates the small "fish eyes" in a dull gold

    for (var y = 0; y < height+25; y += 50) {
        for (var x = 0; x < width+25; x += 50) {
            fill(151,160,127);
            arc(x + 80, y + 80, 10, 10, 5, PI + QUARTER_PI);
        }
    }

    //olive shape with organe strike through edge of gold "fish eyes"
    for (var y = 0; y < height+25; y += 50) {
        for (var x = 0; x < width+25; x += 50) {
            fill(151,160,127);
            stroke(255, 102, 0);
            fill(53,74,59);
            line(x + 20, y + 20, x+ 10, y+10);
            line(x+20, y+20, x+50, y+50);
            stroke(0, 0, 0);
            bezier(x+50, y+50, x+50, y+10, x+20, y+20, x+50, y+50);
        }
    }

    noLoop(); // save computation -- no animation
}

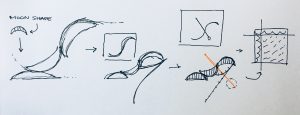
For this project, I wanted to try making something inspired by Japanese print. Such as the image shows below.

Image result for japanese print patterns

I played with the idea of two directional patterns. Where there is a dynamic flow in one direction and a sharp streak in another. This can be seen in the cool green curvy background with the bright orange streaks in the opposite direction. One thing I would work on if I were to continue this project, if is the fine detail accuracy of each stroke to one another (making sure that they are are flush with one another).

KadeStewart-Project05-Wallpaper

sketch

//Kade Stewart
//Section B
//kades
//Project-05


function setup() {
    createCanvas(480, 480);
    background(128);

    noStroke();
}


function draw() {

    var dim = 8;
    for (x = 0; x < dim; x++) {
        for (y = 0; y < dim; y++) {
            tile(x * width/dim, y * height/dim, width/dim, height/dim);
        }
    }


}

function tile(x, y, w, h) {
    fill(14,174,158); //light blue
    triangle(x, y, x, y + h, x + w/2, y + h/2);

    fill(255,209,80); //orange
    triangle(x + w, y, x + w, y + h, x + w/2, y + h/2);

    fill(12,18,111); //dark blue
    triangle(x, y, x + w, y, x + w/2, y + h/2);

    fill(240,240,240); //off-white
    triangle(x, y + h, x + w, y + h, x + w/2, y + h/2);

}

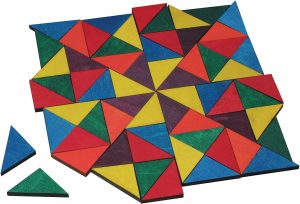
My wallpaper is meant to be viewed in a number of different ways. The tiles could be seen as squares of four triangles, as triangles made up of other triangles, or as a pyramid dark blue sky, yellow-orange side in the light, lighter blue in the shade, white ground). I was inspired by my favorite elementary school playtime activity – mosaic tiles.

Victoria Reiter – Project 05 – Wallpaper

sketch

/*
Victoria Reiter
Section B
vreiter@andrew.cmu.edu
Project - 05
*/

function setup() {
    // sets up canvas dimensions
    createCanvas(600, 480);
    // establishes background color
    background(250, 250, 180);
}

function draw() {
    // establishes initial coordinates for x and y
    var x = - 50;
    var y = 0;
    // creates a horizontal and vertical grid using a for() loop to draw
    // the flowers
    for (var i = 0; i < 20; i++) {
        for (var j = 0; j < 20; j++) {
            flower(x + j * 60, y + i * 60); 
    }
}
    // creates a horizontal and vertical grid using a for() loop
    // to draw the butterflies
    for (var k = 0; k < 200; k++) {
        for (var l = 0; l < 200; l++) {
            butterfly(x - 850 + l * 200, y - 50 + k * 120);
        }
    }
    noLoop();
}

// function which draws the entirety of the flower
function flower(x, y) {
    flowerStem(x, y);
    flowerPetals(x, y);
    stem(x, y);
    leaves(x + 15, y - 15);
} 

// function to draw the stem
function stem(x, y) {
   strokeWeight(7);
    stroke(0, 155, 0);
    line(x, y, x + 85, y - 35);
}

// function to draw the leaves
function leaves(x, y) {
    noStroke();
    // leaf color
    fill(0, 190, 0);
    // actual leaves
    ellipse(x, y - 1, 24, 10);
    ellipse(x + 25, y + 9, 24, 10);
    ellipse(x + 21, y - 10, 24, 10);
    strokeWeight(2);
    // leaf vein color
    stroke(100, 230, 100);
    // each leaf also has a little line to represent its veins
    line(x - 12, y - 1, x + 12, y - 1);
    line(x + 13, y + 9, x + 37, y + 9);
    line(x + 9, y - 10, x + 33, y - 10);
}

// function to draw the stems branching to the petals
function flowerStem(x, y) {
    strokeWeight(4);
    stroke(0, 190, 0);
    // actual stem
    line(x + 56, y - 27, x + 46, y - 43);
    // each stem also has a little bulb
    ellipse(x + 46, y - 43, 7, 7);
    line(x + 55, y - 18, x + 72, y + 2);
    ellipse(x + 72, y + 2, 8);
    line(x + 70, y - 33, x + 78, y - 60);
    ellipse(x + 78, y - 60, 8);
    line(x + 79, y - 28, x + 100, y - 3);
    ellipse(x + 100, y - 3, 10);
    line(x + 85, y - 35, x + 105, y - 57);
    ellipse(x + 105, y - 57, 11);
}

// function to draw flower petals
function flowerPetals(x, y) {
    noStroke();
    // main petal color
    fill(255, 125, 165);
    // petal 1
    ellipse(x + 43, y - 55, 23);
    //petal 2
    ellipse(x + 75, y + 12, 25);
    //petal 3
    ellipse(x + 74, y - 70, 20);
    // petal 4
    ellipse(x + 104, y + 10, 21);
    // petal 5
    ellipse(x + 108, y - 70, 27);
    fill(255, 65, 105);
    // sub-petal 1
    ellipse(x + 39, y - 45, 13);
    ellipse(x + 52, y - 55, 11);
    // sub-petal 2
    ellipse(x + 67, y + 6, 13);
    ellipse(x + 81, y + 4, 10);
    ellipse(x + 64, y + 15, 11);
    // sub-petal 3
    ellipse(x + 70, y - 61, 16);
    // sub-petal 4
    ellipse(x + 100, y + 5, 12);
    ellipse(x + 112, y + 8, 9);
    // sub-petal 5
    ellipse(x + 97, y - 63, 14);
    ellipse(x + 109, y - 58, 10);
    ellipse(x + 119, y - 64, 13);
    // detail color in petals
    fill(185, 0, 25);
    // sub-sub-petal 1
    ellipse(x + 32, y - 50, 9);
    ellipse(x + 48, y - 50, 8);
    // sub-sub-petal 2
    ellipse(x + 64, y + 2, 8);
    ellipse(x + 74, y + 4, 10);
    ellipse(x + 60, y + 9, 8);
    //sub-sub-petal 3
    ellipse(x + 78, y - 65, 13);
    ellipse(x + 62, y - 67, 8);
    // sub-sub-petal 4
    ellipse(x + 92, y + 9, 8);
    ellipse(x + 108, y + 5, 9);
    // sub-sub-petal 5
    ellipse(x + 102, y - 60, 9);
    ellipse(x + 90, y - 65, 10);
    // other detail color in petals
    fill(255, 205, 205);
    // many sub petals 1
    ellipse(x + 40, y - 67, 11);
    ellipse(x + 52, y - 60, 8);
    // many sub petals 2
    ellipse(x + 64, y + 16, 8);
    ellipse(x + 77, y + 9, 10);
    ellipse(x + 67, y + 23, 7);
    // many sub petals 3
    ellipse(x + 78, y - 79, 10);
    ellipse(x + 66, y - 71, 8);
    // many sub-petals 4
    ellipse(x + 94, y + 18, 12);
    ellipse(x + 114, y + 14, 9);
    // many sub-petals 5
    ellipse(x + 103, y - 69, 9);
    ellipse(x + 90, y - 64, 8);
    ellipse(x + 121, y - 74, 10);
}

// function to draw the entirety of the butterfly
function butterfly(x, y) {
    push();
    scale(.5);
    butterflyBody(x, y);
    butterflyWings(x, y);
    pop();
}

// function to draw butterfly's thorax
function butterflyBody(x, y) {
    // black but not entirely opaque body
    stroke('rgba(0, 0, 0, .7)');
    strokeWeight(10);
    line(x -5, y + 35, x + 20, y);
}

// function to draw butterfly's wings
function butterflyWings(x, y) {
    strokeWeight(2);
    stroke(90, 0, 90);
    // orange-ish color of wings
    fill('rgba(240, 130, 40, .6)');
    // top wing
    ellipse(x, y, 25, 40);
    // bottom wing
    ellipse(x - 15, y + 20, 40, 30);
    // brown color of spots in wings
    fill('rgba(110, 70, 30, .5)');
    // details in the wings
    ellipse(x - 20, y + 15, 16, 8);
    ellipse(x - 2, y + 20, 6, 8);
    ellipse(x - 13, y + 25, 5, 5);
    ellipse(x - 4, y - 7, 6, 9);
    ellipse(x + 4, y, 6, 5);

}

My project this week was inspired by my Chinese name. My dearest friend gave me my name in Chinese, and I really cherish having it as my name. It is 孟薇 (Mèng wēi), where the name 薇 is the name of a pretty pink flower. So for this week’s project I wanted to recreate the flower which represents my name!

Image found by typing the flower “myrtle” into Google
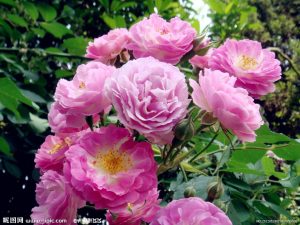
Image found by typing the flower “薇” into Baidu, the Chinese search engine

I first drew out a sketch of what I wanted to recreate, then listed the elements I would need to recreate it.
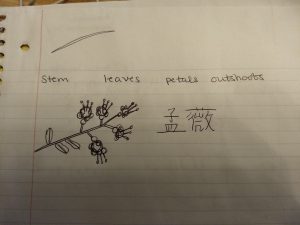
My preliminary sketch alongside my Chinese name 孟薇

I used the technique we saw in lecture where we create one large function composed of multiple smaller functions, each handling a particular aspect of the larger one. So for example I made “leaf” “petals” etc. their own function, then called them all under the broader “flower” function.

When I was finished, I really liked the product, but wanted to add the butterflies to make it more complex and practice layering for() loops.

I actually sew my own clothes, and the idea of having a skirt I sewed made out of fabric I designed/coded sounds really cool! I think I may take out the butterflies if I ever ordered it but I should look into that!
Shirley Chen – Project – 05 – Wallpaper

sketch

// Shirley Chen
// Section B
// junfanc@andrew.cmu.edu
// Project-05


function setup() {
  createCanvas(600, 450);
  noStroke();
}
 
function draw() {
  background(255, 230, 178);
  noLoop();
  
//Draw the background dots pattern
  for (var y = 30; y < 450; y += 50) {
    for (var x = 30; x < 600; x += 50) {
      fill(137, 188, 157);
      ellipse(x, y, 4, 4);
    }
  }

//Draw the background orangle line pattern
  for (var y = 50; y < 450; y += 120) {
    for (var x = 50; x < 600; x += 120) {
      strokeWeight(4);
      stroke(252, 155, 85);
      line(x, y, x+4, y+2);
    }
  }
  
//Draw the background blue line pattern
  for (var y = 10; y < 450; y += 60) {
    for (var x = 20; x < 600; x += 200) {
      strokeWeight(2);
      stroke(129, 182, 211);
      line(x+5, y, x, y+7);
    }
  }

//Draw grid for the smiling watermelon
  for (var y = 0; y < 450; y += 80) {
    for (var x = 0; x < 600; x += 200) {
      noStroke();
      push();
      translate(x, y);
      drawMellon();
      pop();
    }
  }

//Draw grid for the screaming watermelon
  for (var y = 0; y < 450; y += 100){
    for (var x = 100; x < 600; x += 200){
      push();
      translate(x, y);
      drawTiltedMellon();
      pop();
    }
  }
}


function drawMellon(){
//Draw the skin of the watermelon
    fill(86, 135, 109);
    arc(50, 50, 60, 60, 0.2*PI, 0.45*PI);
//Draw the fruit of the watermellon
    fill(226, 133, 143);
    arc(50, 50, 50, 50, 0.2*PI, 0.45*PI);
//Drawing the face for the smiling watermellon
    stroke(6);
    strokeWeight(2);
    line(52, 58, 54, 62);
    line(56, 55, 60, 59);
    noFill();
    strokeWeight(1);
    arc(50, 50, 40, 40, 0.3*PI, 0.4*PI)


}

function drawTiltedMellon(){
//Draw the skin of the watermelon
    fill(86, 135, 109);
    arc(50, 50, 80, 80, 0.5*PI, 0.75*PI);
//Draw the fruit of the watermelon
    fill(226, 133, 143);
    arc(50, 50, 70, 70, 0.5*PI, 0.75*PI);
//Drawing the face for the screaming watermelon
    stroke(6);
    strokeWeight(2);
    line(40, 56, 43, 60);
    line(39, 62, 43, 60);
    line(50, 58, 46, 60);
    line(50, 62, 46, 60);
    fill(216, 55, 49);
    strokeWeight(1);
    ellipse(45, 70, 5, 10);
    noFill();
    strokeWeight(1);
    arc(45, 50, 40, 40, 0.3*PI, 0.4*PI)
    arc(50, 40, 50, 80, 0.5*PI, 0.65*PI)
}

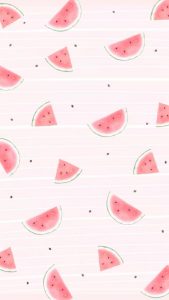
For this wallpaper project, I created two variation of watermelon, smiling watermelon and screaming watermelon. I used the “for” loop command to create two sets of grid to define the position of the watermelon. And I add two kinds of faces on the watermelon. For the background, I also used “for” loop to add dot and line pattern with different color and stroke weight. In general, this project is very fun to work with and helps me get more practice on the “for” loop command.

Lingfan Jiang- Looking Outwards 05

This project is done by four students from the University of Hertfordshire in 2016. I am always a big fan of 3d animation. Being an architecture student myself, I also do a lot of photorealistic renderings, and I understand how hard they are and how long they take to make perfect light and shadow. For animations, it is definitely even harder to do. I am always amazed by the smooth and realistic movement from the main character. The details of these characters are just incredible.

Also, animations are also very good ways to present ideas that sometimes cannot be accomplished in normal films. For example, different from other videos that calling on protecting the planet, the artists uses an alien background and hides the theme to the very end which really surprises me in the end. The authors really presented their idea well within three minutes.

Furthermore, it is also very surprising to to know that the project was done by four university students with some help from others, because the quality of the whole video and the idea behind it are both fascinating.

Lingfan Jiang – Project 05 – Wallpaper

lingfanj-project05

//Lingfan Jiang
//Section B
//lingfanj@andrew.cmu.edu
//Project-05

var tx; //triangle positions
var tw = 60; //triangle width

function setup() {
    createCanvas(600, 600);
}

function draw(){
    background(229, 249, 224);
    translate(-150, -200); //make sure the pattern fills canvas

    for (var tx = 0; tx < 800; tx += (1.25 * tw)){ //make sure the distance between the triangles stays 1.25 in x axis
        for (var j = 0; j < 20; j++){ //make the pattern repeats in the y axis

            fill(163, 247, 181);
            stroke(229, 249, 224);
            strokeWeight(10); //create a different visual effect where one group of triangles has lineweight and the other don't
            //calculating the positions of each points using tw and tx
            //basically all the triangles are based on the first triangle created in the left up corner
            triangle(tx + (j * tw / 4), (sqrt(3) * tx / 5) + (j * 3 * sqrt(3) / 4 * tw),
                    tx + tw + (j * tw / 4), (sqrt(3) * tx / 5) + (j * 3 * sqrt(3) / 4 * tw),
                    tx + tw / 2 + (j * tw / 4), (sqrt(3) * tx / 5) + (sqrt(3) * tw / 2) + (j * 3 * sqrt(3) / 4 * tw));


            fill(64, 201, 162);
            noStroke();
            //calculating the other group of triangles using tw and tx
            triangle(tx + 0.75 * tw + (j * tw / 4), (sqrt(3) * tx / 5) + (sqrt(3) * tw) / 4 + (j * 3 * sqrt(3) / 4 * tw), 
                    tx + 1.75 * tw + (j * tw / 4), (sqrt(3) * tx / 5) + (sqrt(3) * tw) / 4 + (j * 3 * sqrt(3) / 4 * tw), 
                    tx + 1.25 * tw + (j * tw / 4), (sqrt(3) * tx / 5) - (sqrt(3) * tw) / 4 + (j * 3 * sqrt(3) / 4 * tw));
        }
    }
}

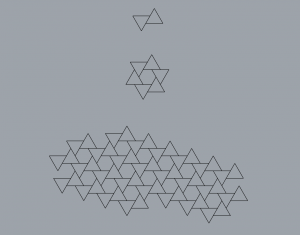
This is the starting idea of my wallpaper, and I really liked how triangles form the hexagon in the middle. However, when I get into the codes, I realized the difficulties to code triangles. In order to form the triangles, I have to calculate the positions of each point and the distance with other ones so that they could form the hexagon perfectly. It is also hard to lay out those triangles since they do not array in the x or y-axis directly. Instead, they move diagonally. Therefore, it is harder to use the nested loop. In the end, I played a little bit with line weights and color to make it look nicer and more interesting.

Sarah Yae Project 05 Section B

sketch

//Sarah Yae
//Section B
//smyae@andrew.cmu.edu
//Project-05

//variables for arc 
var uparc_x;
var uparc_y;
var arc_w = 100;
var arc_h = 50;

//variables for dots 
var px;
var py;
var yx;
var yy; 


function setup() {
    createCanvas(500, 500);
    background(213,196,161);
}

function draw() {

//upper green arc
for (var uparc_y = 50; uparc_y < 500; uparc_y += 100) {
    for (var uparc_x = 50; uparc_x < 500; uparc_x += 100) {
            noFill ();
           stroke (177,194,122);
            strokeWeight (3);
            arc(uparc_x, uparc_y, arc_w, arc_h, PI, TWO_PI);
        }
    }

//upper blue arc
for (var uparc_y = 100; uparc_y < 600; uparc_y += 100) {
    for (var uparc_x = 50; uparc_x < 500; uparc_x += 100) {
            noFill ();
            stroke (180,216,231);
            strokeWeight (3);
            arc(uparc_x, uparc_y, arc_w, arc_h, PI, TWO_PI);
        }
    }

//pink dots
for (var py = 25; py < 500; py += 50) {
    for (var px = 50; px < 500; px += 200) {
            fill(255,195,194);
            noStroke();
            ellipse(px,py,10,10);
        }
    }

//yellow dots
for (var yy = 25; yy < 500; yy += 50) {
    for (var yx = 150; yx < 500; yx += 200) {
            fill(253,253,150);
            noStroke();
            ellipse(yx,yy,10,10);
        }
    }

noLoop();

}

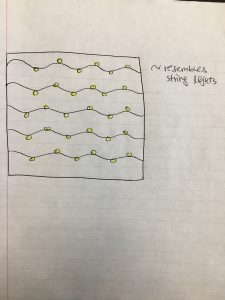
I was originally planning on doing a wallpaper that resembles string lights:

Sketch: green strings and yellow lights on a beige background

However, I realized that as I was creating the wallpaper, it was more aesthetically pleasing to do different patterns and colors, rather than just string lights. I used a lot of pastel colors, to evoke a soft feeling.

Sarah Yae Looking Outwards 5 Section B


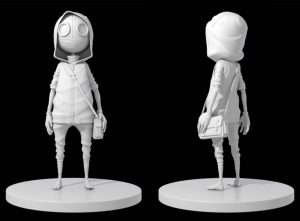
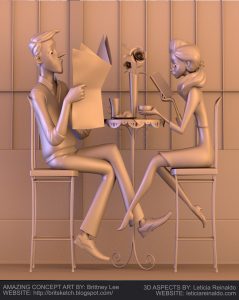
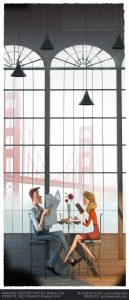
I admire this project, ‘Morning Fog’ because the artist was able to render a realistic, yet 3D cartoon characters in a picturesque setting. It almost feels as if the characters could move in any moment. The shadowing used in this 3D generated work makes the artwork more realistic.  The realistic background and the decorations used make the background more alive. However, the cartoon aspect of this work is shown from the physical appearance of human characters. In order to create this artwork, I suppose she used applications like Photoshop, Maya or ZBrush to create this artwork.

Morning Fog  was created by Leticia Gillet in 2015. Link to the work is: https://leticiarg.artstation.com/projects/Bv5or

Morning Fog by Gillet


Shirley Chen – Looking Outward -05

The advancement in technology has made 3D graphic easier to be produced and popular as a new type of art. With the increasingly appearing 3D graphic arts, both the viewers and artists are given a innovative way of thinking art that is beyond the 2D constrain. 3D graphics usually creates a feeling of future and represents surrealism. This new way of creating art inspires a Vienna-based artist, Bianka Oravecz, to generate 3D arts including globular-looking masses, crystalline, geological, and abstract forms. She just transitioned to three-dimensional art this year, after eight years of working with two-dimensional graphic design.

Working with three-dimensional art, Oravecz mainly focuses on issues including technology, female identity, and biology. She also explores micro and macro worlds, virtual fields, and landscapes. For her, playing with forms and shapes in 3D graphic can convey the “falling apart of meanings”. She wants to create innovative, never-before-seen imagery, and explore the mixture of physical and virtual.

Three Dimensional Image Created by Bianka Oravecz