Caroline Song – Project 03 – Dynamic Drawing

sketch

//Caroline Song
//Section E
//chsong@andrew.cmu.edu
//Project 03 - Dynamic Drawing

var speed = 3;
var distX = 0;
var distY = 1;
var rectX = 300;
var rectY = 300;
var rectWidth = 50;
var rectHeight = 300;

function setup (){
    createCanvas(480, 640);
}

function draw(){
//change background color when mouse cursor is on lower half of canvas
    if(mouseY > height/3){
        background(255, 96, 71);
       } else{
       background ("black");
       }

//constantly moving yellow rectangle
    rect(rectX, rectY, rectWidth, rectHeight);
    fill(245, 236, 66);
    noStroke();
    rectX = rectX + distX * speed;
    rectY = rectY + distY * speed;

    if (rectY >= height){
        rectY = -rectHeight;
    }

//when mouse pressed, shapes change from circle to rectangle. 
//shapes will also change colors
    push();
    if(mouseIsPressed){

        //yellow rectangle following mouse cursor when mouse pressed
        rectMode(CENTER);
        rect(mouseX, mouseY, 100, 100);
        fill(245, 149, 66);
        noStroke();

        //blue rectangle when mouse pressed
        rectMode(CENTER)
        rect(400 - mouseX, 300 + mouseY, 75, 75);
        fill(66, 135, 245);
        noStroke();

        //purple rectangle when mouse pressed
        rectMode(CENTER);
        rect(width/2 + mouseX, height/2 - mouseY, 300, 300);
        fill(188, 66, 245);
        noStroke();

        //orange rectangle when mouse pressed
        rectMode(CENTER);
        rect(480, 400, 60, 60);
        fill(245, 236, 66);
        noStroke();

        //yellow rectangle in corner when mouse pressed
        rectMode(CENTER);
        rect(0, 0, 300, 300);
        fill(71, 255, 169);
        noStroke();

    } else {

        //yellow circle
        ellipse(mouseX, mouseY, 200, 200);
        fill(66, 245, 135);
        noStroke();

        //pink circle
        ellipse(400 - mouseX, 300 + mouseY, 300, 300);
        fill(232, 152, 245);
        noStroke();

        //blue circle
        ellipse(width/2 + mouseX, height/2 - mouseY, 100, 100);
        fill(152, 245, 228);
        noStroke();

        //orange circle
        rectMode(CENTER);
        rect(480, 400, mouseX, mouseY);
        fill(245, 236, 66);
        noStroke();

        //yellow rectangle
        rectMode(CENTER);
        rect(0, 0, mouseX, 300);
        fill(71, 255, 169);
        noStroke();

    }
    pop();

}

Coming up with an idea for my dynamic drawing was one of the most challenging parts for me, because there seemed to be so many things to choose from that I didn’t know where to start. However, once I began, I decided to focus on how shapes can interact and flow together in a single piece, creating my final dynamic drawing.

Charmaine Qiu – LookingOutwards – 03

MIT’s computer fabrication group tackles problems in digital manufacturing and computer graphics. The group develops new technology that brings changes to people’s lifestyles. One of their recent projects that intrigues me is the computer-aided knitting technology. “InverseKnit” is a system where automating knitted garments is made possible. It was created by a PhD student Alexandre Kaspar and his colleges. With a photo of knitted patterns, the system is able to translate the information into instructions to the machine, which makes the clothing following the instructions. This technology allows designers to create and actualize designs efficiently. 

Examples of products made by the lab through the 3D knitting system

Technologies like 3D knitting that visualizes the designer’s ideas efficiently can greatly assist the productivity of the design process, and i think that it would have greater potential in the future.

Here is a link for more information: https://www.csail.mit.edu/news/computer-aided-knitting

YouieCho-Project-03-Dynamic-Drawing

sketch

/*Youie Cho
  Section E
  minyounc@andrew.cmu.edu
  Project-03-Dynamic-Drawing*/

function setup() {
    createCanvas(480, 640);
    rectMode(CENTER);
}

function draw() {
    //background changes color based on mouse movement
    background(mouseX, mouseY, 180);
    //gray boundary frames background
    noFill();
    stroke(150);
    strokeWeight(5);
    rect(width / 2, height / 2, width, height);
    // mouseX is limited to 70-350
    var m = max(min(mouseX, 350), 70);
    var size = m * 350.0 / 480.0;
    strokeWeight(2);
    //purple square (rectangle)
    fill(210, 171, 255);
    rect(50 + m * 190.0 / 480.0, 200.0, size, size);
    //pink square
    fill(255, 207, 236);
    size = 350 - size;
    rect(150 + m * 190.0 / 480.0, 200.0, size, size);
    //blue square
    fill(179, 255, 255);
    size = 350 - size;
    rect(200 + m * 190.0 / 480.0, 200.0, size, size);

    /*yellow squares translate and rotate based on mouse movement
      color warmth changes based on mouseY*/
    stroke(200);
    strokeWeight(1);
    fill(255, mouseY + 150, 100);
    //yellow square 1
    push();
    translate(mouseX * 2.1, mouseY * 2.1);
    rotate(radians(mouseX / 10));
    rect(100, 250, 20, 20);
    pop();
    //yellow square 2
    push();
    translate(mouseX * 1.3, mouseY * 1.3);
    rotate(radians(mouseX / 10));
    rect(150, 290, 20, 20);
    pop();
    //yellow square 3
    push();
    translate(mouseX * 0.7, mouseY * 0.7);
    rotate(radians(mouseX / 10));
    rect(210, 340, 20, 20);
    pop();
    //yellow square 4
    push();
    translate(mouseX * 0.3, mouseY * 0.3);
    rotate(radians(mouseX / 10));
    rect(280, 400, 20, 20);
    pop();
    //yellow square 5
    push();
    translate(mouseX * 0.1, mouseY * 0.1);
    rotate(radians(mouseX / 10));
    rect(360, 470, 20, 20);
    pop();


    /*pink circles translate based on mouse movement
      they vary in size and rate of rotation*/
    fill(255, 110, 131);
    stroke(100);
    //pink circle 1
    push();
    translate(p5.Vector.fromAngle(millis() / 1000, 150));
    rotate(radians(mouseX / 10));
    ellipse(250, 400, 20, 20);
    pop();
    //pink circle 2
    push();
    translate(p5.Vector.fromAngle(millis() / 950, 150));
    rotate(radians(mouseX / 10));
    ellipse(255, 395, 30, 30);
    pop();
    //pink circle 3
    push();
    translate(p5.Vector.fromAngle(millis() / 900, 150));
    rotate(radians(mouseX / 10));
    ellipse(260, 390, 40, 40);
    pop();
    //pink circle 4
    push();
    translate(p5.Vector.fromAngle(millis() / 850, 150));
    rotate(radians(mouseX / 10));
    ellipse(265, 385, 50, 50);
    pop();
    //pink circle 5
    push();
    translate(p5.Vector.fromAngle(millis() / 800, 150));
    rotate(radians(mouseX / 10));
    ellipse(270, 380, 60, 60);
    pop();
    //pink circle 6
    push();
    translate(p5.Vector.fromAngle(millis() / 750, 150));
    rotate(radians(mouseX / 10));
    ellipse(275, 375, 70, 70);
    pop();
    //pink circle 7
    push();
    translate(p5.Vector.fromAngle(millis() / 700, 150));
    rotate(radians(mouseX / 10));
    ellipse(280, 370, 80, 80);
    pop();
}

It was fun to try controlling range of colors and creating movements that can change over time based on mouse movement.

Jina Lee – Looking Outwards 03

https://n-e-r-v-o-u-s.com/projects/albums/hyphae/

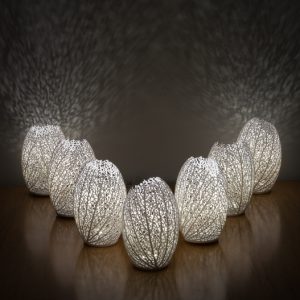
As I was looking up computational fabrication, I stumbled upon the Hyphae Lamp. The co-founders are Jess Louise-Rosenberg and Jessica Rosenkrantz. In the science world, hyphae performs a variety of functions in fungi. In this context, Hyphae is a series of 3D-printed lamps that were inspired by the “vein structures that carry fluids through organisms from the leaves of plants to our own circulatory systems.” They were able to build it by looking at the stages of leaves, starting from when they were seeds to when they were fully grown. Each lamp is unique because it is completely one of a kind. They are 3D-printed in nylon plastic. They are run by eco-friendly LEDS.

This is a photo of lights.

As I was looking up computational fabrication, I stumbled upon the Hyphae Lamp. In the science world, hyphae performs a variety of functions in fungi. In this context, Hyphae is a series of 3D-printed lamps that were inspired by the “vein structures that carry fluids through organisms from the leaves of plants to our own circulatory systems.” They were able to build it by looking at the stages of leaves, starting from when they were seeds to when they were fully grown. Each lamp is unique because it is completely one of a kind. They are 3D-printed in nylon plastic. They are run by eco-friendly LEDS. It was made with c++ using CGAL.

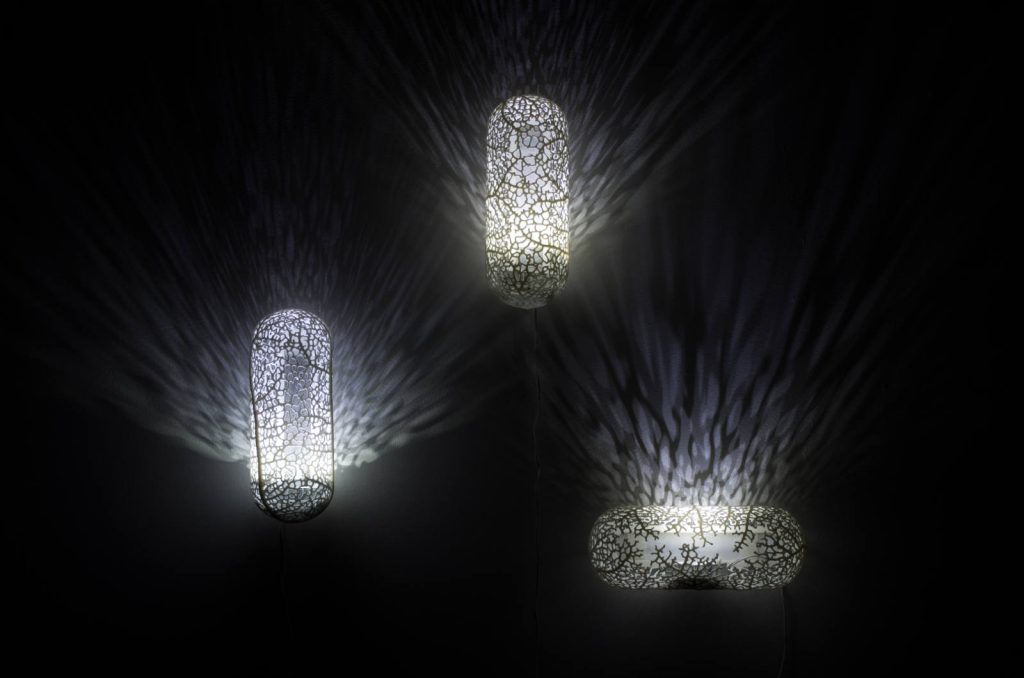
The lamps do not all posses the same shape. Some are chandeliers while others are just wall lights or lamps.

I thought that this project was interesting because I usually don’t see designs being influenced by science. I felt more connected to this project since last semester, in design, we created lamps out of paper. Being able to see the designer’s process and inspiration allowed me to better understand the purpose of the idea.  In the video, you are able to see the process of the lamp being built and it made me feel like I was watching the actual process of a leaf growing its veins. I enjoyed how the lamps do not posses the same body shape. Some are more circular while others are more natural and not a certain shape. There were even jewelry that followed the same algorithm and material. Overall, I really enjoyed researching this project because it is not just an aesthetic design. It educates people on hyphae while also acting as a lamp.

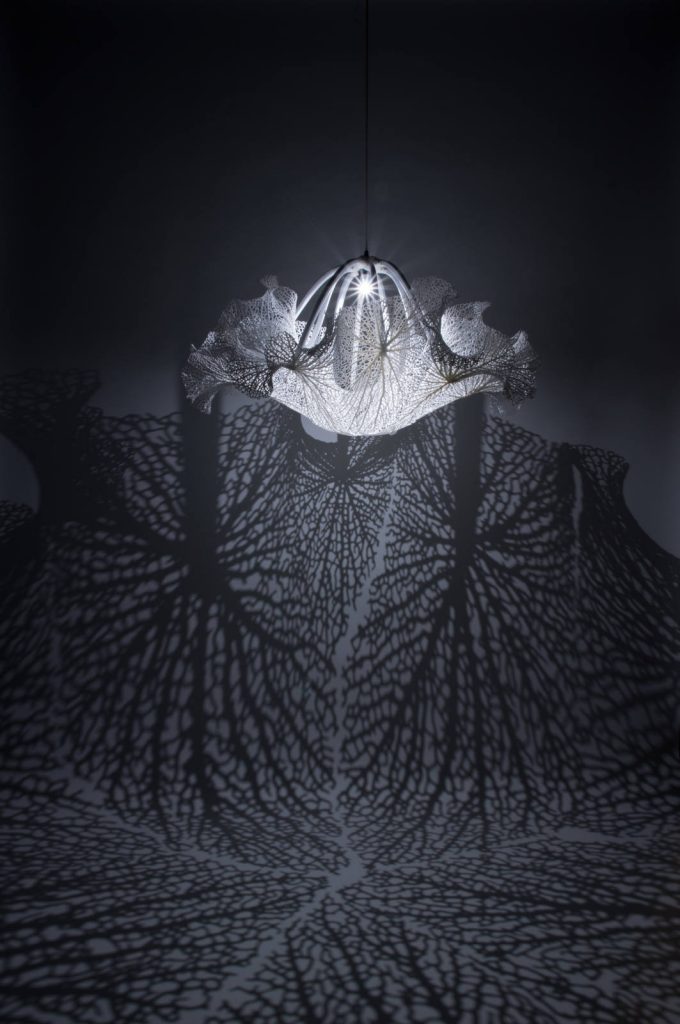
This lamp is the chandelier.
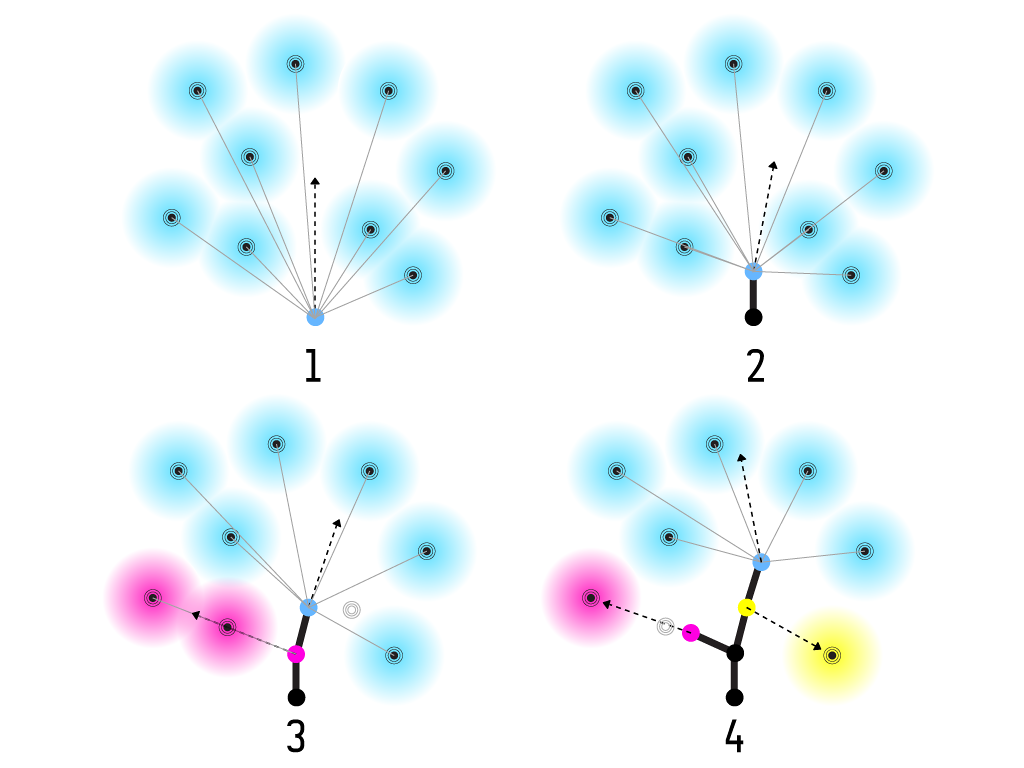
This is the algorithm diagram used to produce the lamps.

Mihika Bansal – Project 03 – Dynamic Drawing

sketch

/*
Mihika Bansal 
Section E 
mbansal@andrew.cmu.edu
Project-01
*/
var angle1 = 0; //rotates one direction
var angle2 = 0; //rotates the other direction
var rgb1 = 0; //random color generator 1
var rgb2 = 0; //random color generator 2
var dimension = 20; //size of elements
function setup() {
    createCanvas(600, 480);
  }

function draw() {

    rgb1 = random(0, 300); //randomizing here creates the flashing effect 
    rgb2 = random(0,275); 
    dimension = random(5, 60);
    
    if (mouseX < width / 2) { //determine if the mouse is on the left of the canvas 
        background(0, 0, 51);
        push();
        rotate(radians(angle1)); //creating the rows of shapes in the top left corner
        fill(rgb1 * 0.2, rgb2 * 0.5, rgb1 * 0.8); // the multiplication randomizes the color more
        rect(mouseY * 0.8, mouseY * 0.5, dimension, dimension);
        fill(rgb2 * 0.5, rgb2 * 0.3, rgb1 * 0.6); 
        ellipse(mouseY * 0.3, mouseY * 0.2, dimension, dimension); //the distance from the rotation point is dependent on the position of mouse y 
        fill(rgb1 * 0.85, rgb2 * 0.9, rgb1 * 0.7);
        ellipse(mouseY, mouseY, dimension * 1.5, dimension * 1.5); 
        fill(rgb1 * 0.7, rgb2 * 0.65, rgb1 * 0.7);
        rect(mouseY * 1.3, mouseY * 1.3, dimension * 2, dimension * 2);
        pop();
        angle1 += 2; 

        push(); 
        translate(width - 5, height - 5); //creating the line of shapes in the bottom right corner
        rotate(radians(angle2));
        fill(rgb1 * 0.2, rgb2 * 0.5, rgb1 * 0.8);
        rect(mouseY * 0.8, mouseY * 0.5, dimension, dimension);
        fill(rgb2 * 0.5, rgb2 * 0.3, rgb1 * 0.6); 
        ellipse(mouseY * 0.3, mouseY * 0.2, dimension, dimension); 
        fill(rgb1 * 0.85, rgb2 * 0.9, rgb1 * 0.7);
        ellipse(mouseY, mouseY, dimension * 1.5, dimension * 1.5); 
        fill(rgb1 * 0.7, rgb2 * 0.65, rgb1 * 0.7);
        rect(mouseY * 1.3, mouseY * 1.3, dimension * 2, dimension * 2);
        pop(); 
        angle2 -= 2; 
    }
    else { //when mouse is on right of screen
        background(77, 0, 0);
        push();
        rotate(radians(angle1));
        fill(rgb1 * 0.25, rgb2 * 0.4, rgb1 * 0.71);
        rect(mouseY * 0.8, mouseY * 0.57, dimension, dimension);
        fill(rgb2 * 0.5, rgb2 * 0.3, rgb1 * 0.6); 
        ellipse(mouseY * 0.3, mouseY * 0.2, dimension, dimension); 
        fill(rgb1 * 0.8, rgb2 * 0.9, rgb1 * 0.7);
        ellipse(mouseY, mouseY, dimension * 1.5, dimension * 1.5); 
        fill(rgb1 * 0.7, rgb2 * 0.65, rgb1 * 0.7);
        rect(mouseY * 1.3, mouseY * 1.3, dimension * 2, dimension * 2);
        pop();
        angle1 -= 2; 

        push(); 
        translate(width - 5, height - 5);
        rotate(radians(angle2));
        fill(rgb1 * 0.2, rgb2 * 0.54, rgb1 * 0.8);
        rect(mouseY * 0.86, mouseY * 0.5, dimension, dimension);
        fill(rgb2 * 0.5, rgb2 * 0.35, rgb1 * 0.64); 
        ellipse(mouseY * 0.3, mouseY * 0.2, dimension, dimension); 
        fill(rgb1 * 0.85, rgb2 * 0.9, rgb1 * 0.7);
        ellipse(mouseY, mouseY, dimension*1.5, dimension * 1.5); 
        fill(rgb1 * 0.77, rgb2 * 0.65, rgb1 * 0.7);
        rect(mouseY * 1.3, mouseY * 1.3, dimension * 2, dimension * 2);
        pop(); 
        angle2 += 2; // changes angle 
       
    }

}


With this piece I worked with direction of the rotation being dependent on the position of the mouse. I also made the distance of each element dependent on the y position of the mouse. This project was interesting and helpful in understanding the random function and the rotation function.

Margot Gersing – Looking Outwards – 03

sound vibration printed clay pot

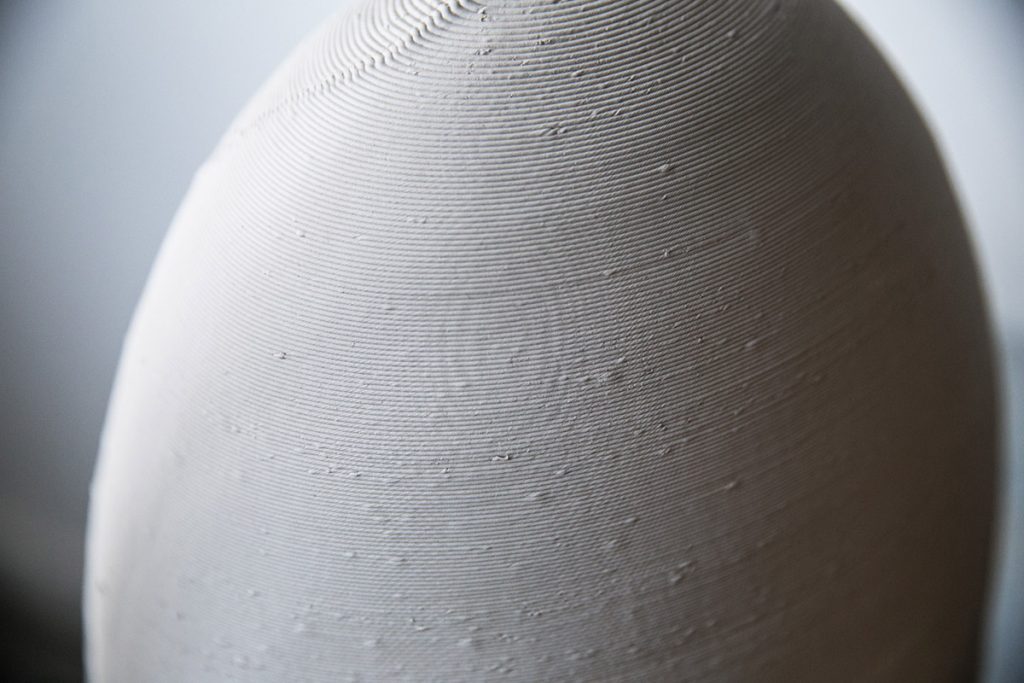
This week the project that I was really interested in was a collaboration between Olivier Van Herpt and Ricky Van Broekhoven Solid Vibration project (2005). I actually saw this a long time ago and it has stuck with me because I found it so interesting.

Video of the pots being printed.
Morie pattern (Wikipedia)

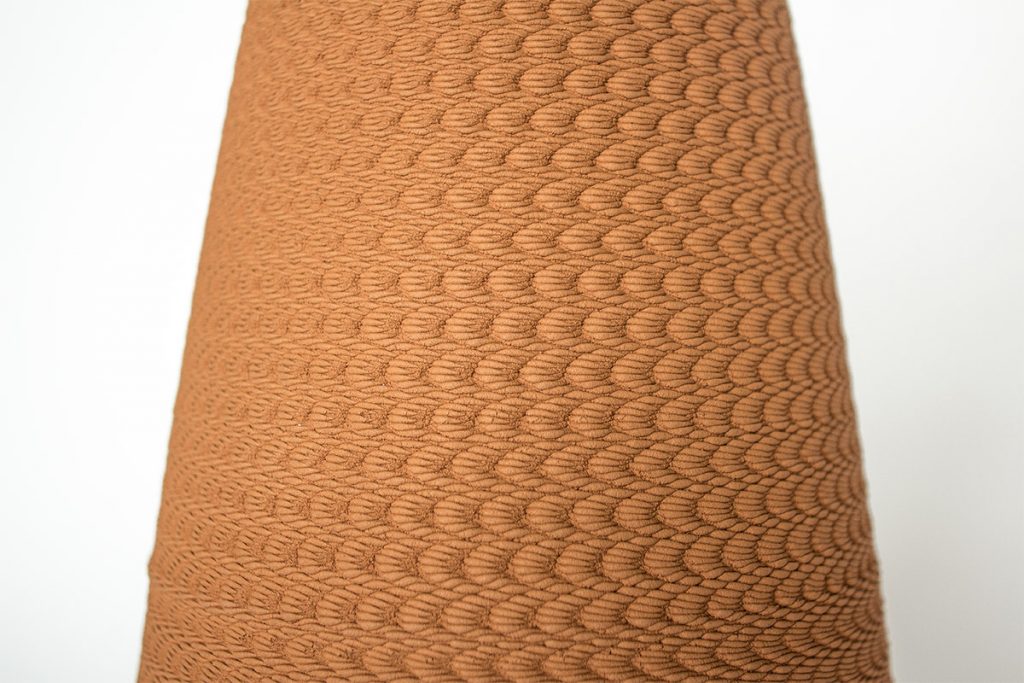
Van Herpt began by using a 3D printer to make pottery but noticed that the sounds and vibrations from the machinery was creating moiré patterns. Van Herpt wanted to embrace this so he enlisted Broekhoven, a sound designer’s, help. These patterns were an error but they inspired the pair to make art from the sound waves.

They did this by printing the pot onto a surface that was sitting on a speaker. As the speaker moved with the vibrations, this translated into the clay.

Close up of moiré patterns from the vibrations
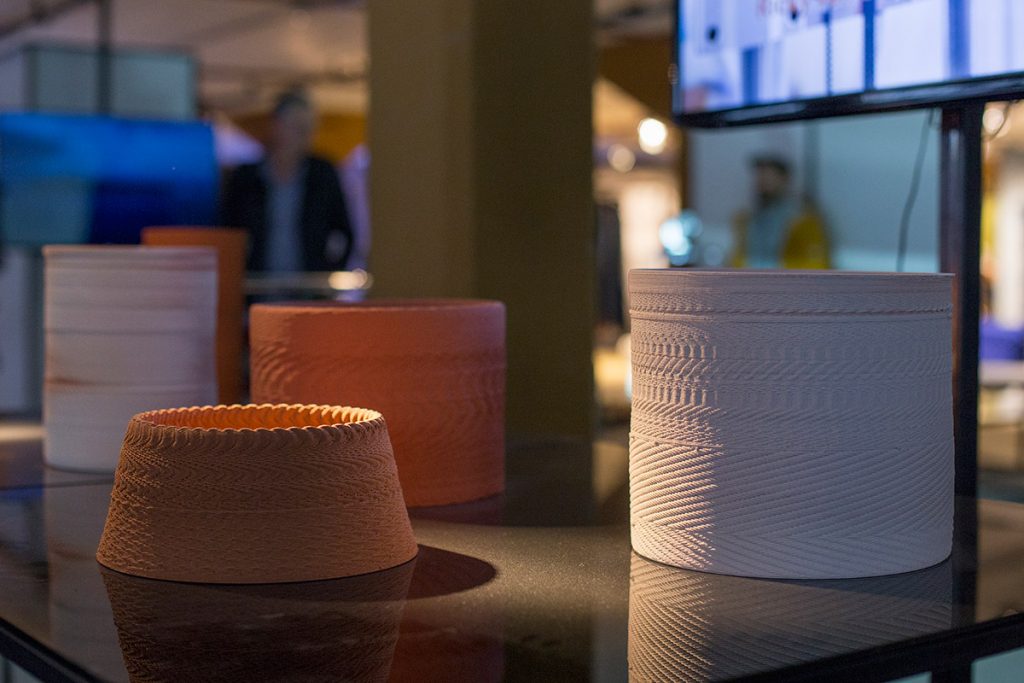
More printed pots in gallery showing

Olivier Van Herpt Site (source of images and video)

Note: I am unsure of what specific algorithms were used to print.

Alice Cai_project03_dynamic drawing

sketch


//Alice Cai
//Section E
//alcai@andrew.cmu.edu
//Project 3

//global variables
var angle = 0


//canvas setup and original background
function setup(){
    createCanvas(640,480);
    background(220);
}

function draw() {
    stroke(mouseX, mouseY);
    strokeWeight(10);
    //color controls changes at half canvas 
    if (mouseX < width / 2){
    fill(mouseY ^ 2, mouseY ^ 2, mouseX ^ 2); 
} else {
    fill(mouseX ^ 2,mouseY ^ 2,mouseY ^ 2); 

}
    
//ellipse positioning
    push();
    translate(mouseX, mouseY);
    rotate(radians(angle) / 100);
    ellipse(0, 0, mouseX, mouseY);


    pop();
    angle = angle + mouseX;

//color controls changes at half canvas for second ellipse
    stroke(mouseX, mouseY);
    if (mouseX > width / 2){
    fill(mouseX / 5,mouseY * 3,mouseY); 
} else {
    fill(mouseX, mouseX, mouseY / 2); 
}
//ellipse2 positioning,not center of mouse, size and position is opposite of original

    push();
    translate(640 - mouseX, 480 - mouseY);
    rotate(radians(angle) / 100);
    ellipse(0, 0, mouseX, mouseY);
    pop();
    angle = angle + mouseX;
    

}

This is my dynamic drawing! It quite literally is dynamic drawing. I started this by using our lab exercises with spinning square moving with the mouse. Then, I changed it to a circle, added another circle, and offset one of them through translate. One of the circles moves opposite of the mouse. I did this by using the previous assignment, with Width/height – mouseX/mouseY. Then, I moved background to set up so that the background doesn’t reset and you can see all the circles that are drawn. The colors of the stroke weight and the circle fills are all controlled by mouseX and mouseY coordinates, as well as the speed of the spinning.

Jamie Park – Project – 03

sketch

//Jamie Park           jiminp@andrew.cmu.edu
//15-104        Section E        Project #3

function setup(){
    createCanvas(640,480);
}

//angle variable for the rotating square
var angle = 0;

function draw(){
    background (0);
    noStroke();
    rectMode(CENTER);

    //rectangle on the right top corner that changes colors
    fill(100, mouseX, 200);
    rect(540, height / 6, 200, 160, 30, 0, 15, 20);

    //square on the left bottom that rotates when the mouse is moved
    push();
    translate(80, 390);
    rotate(180 + mouseX / 50, 300 + mouseY / 50);
    fill(mouseX, mouseX, mouseY);
    ellipse(30, 30, 70, 70);
    pop();
    angle = angle + 2;

    //bottom right square that changes size and color when the mouse is moved
    fill(mouseX, mouseY, 245);
    rect(width * 0.7, height * 0.7, mouseY, mouseY, 20);

    //ellipse on top of a rectangle that changes size and color
    fill(mouseX, mouseY, mouseY);
    ellipse(width * 0.7, height* 0.7, mouseX / 2, mouseX / 2);

    //the rectangles that shift y axis when the mouse is moved
    fill(255, 110, 163);
    rect(mouseX + 50, height / 3, 70, 300, 10);
    fill(194, 252, 3);
    rect(mouseX, height / 3, 100, 220, 10);
    fill(82, 217, 255);
    rect(mouseX + 150, height / 7, 60, 40, 10);
}

I had a lot of fun manipulating the colors, size, position and angle of various elements using x and y coordinates of the mouse. It’s interesting to see the various things one can do through using mouse coordinate!

Joseph Zhang –– Project –– 03 


Throughout the process of making this piece of interactive art, I was really focused on the relationship between the mouse and the shapes and how to change the temporal speed of movement. Often times, I would divide mouseX or mouseY by a number to have a slower animation than the actual speed of the mouse.

sketch

// Joseph Zhang
// Section E
// haozhez@andrew.cmue.edu
// Project-03: Dynamic Drawing

function setup() {
    createCanvas(480, 640);
}
 
function draw() {
    //Changes color depending on mouseX and mouseY position
    background(mouseY, mouseX, 200);
    noStroke();

    // resizing rectangle (left) - width increases by a factor of -mouseX / 2
    rect(480, 500, (-mouseX / 2), 60);

    // right resizing rectangle (right) - width increases by a factor of mouseX / 2
    rect(0, 100, (mouseX / 2), 60);

    // Rotating + Resizing Purple-to-Pink Rectangle
    push();
        rectMode(CENTER);
        // Trailing mouse parallax
        translate(180 + mouseX / 10, 430 + mouseY / 10);
        //Rotates rectangle depending on mouseX position
        rotate(radians(-mouseX / 3));
        //Changes color depending on mouseX position
        fill(170 + mouseX,180,210);
        //Drawing rectangle – width increases by a factor of mouseX / 4
        rect(0, 0, 160 + mouseX / 4, 160);
    pop();

    // Rotating Purple Squares
    push();
        rectMode(CENTER);
        translate(200,450);
        fill(170,160,210);
        //Rotates Rectangle depending on – mouseX position divided by 10
        rotate(radians(mouseX/10));
        //Drawing rectangle
        rect(0, 0, 130, 130);
    pop();

    // Resizing Black-to-White Ellipse
    push();
        // Trailing mouse parallax – position moves at a speed of mouseX divided by 10
        translate(200 + mouseX / 10, 200 + mouseY / 10);
        //Changes color depending on mouseX position
        fill(255 - mouseX)
        //Drawing ellipse
        ellipse(0, 0, -40 + (mouseY + mouseX) / 3, -40 + (mouseY + mouseX) / 3);
    pop();
}

Mihika Bansal – Looking Outwards – 03

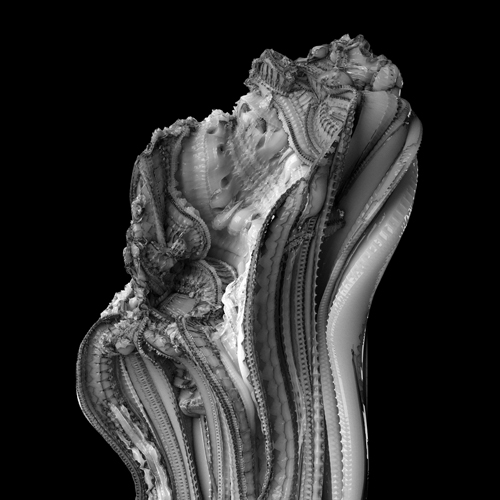
One piece of digital fabrication work that I find to be particularly interesting is the Arabesque Wall. This piece is particularly interesting due to the large variety of shapes and textures the artist is able to integrate into the piece. The different patterns that are made would be impossible to make by hand so it really demonstrates the true capabilities of machine and what they can do in terms of creating new and unique items.

The actual software is based on the tilting of the surfaces. The software works on this point until a structure that is composed of multiple surfaces and points comes about. The mathematical precision of this piece is also very interesting and something that could use more exploration.

The artists of this piece are Benjamin Dillenburger and Michael Hansmeyer. The actual printing of the piece took 4 days.

Link to Project: http://benjamin-dillenburger.com/arabesque-wall/

Taken from the website that details information about the project.