//i was inspired by beaches and shells that found there cause i am from Socal

var wValue= [];
var e = 100;
var j = e;

function setup() {
  var canvas = createCanvas(600, 220);

  for (let x = 0; x <= width + 990; x += e) {
    for (let y = 0; y <= height + 200; y += j) {

      var object = {};

      //colors
      object.r = random(0, 255);
      object.g = random(0,255);
      object.b = random(0, 255);
      //sizes
      object.s = random(40, 50);

            wValue.push(object);
    }
  }
}

function draw() {
  pattern();
}

function pattern() {

  background(0, 0, 0);


  var counter = 0;
  for (let x = 0; x <= width + 990; x += e) {
    for (let y = 0; y <= height + 200; y += j) {

      //colors
      let val = wValue[counter];
      counter++; // count to next object for next loop

      let r = val.r;
      let g = val.g;
      let b = val.b

      //sizes
      let s = val.s;

      push();
      scale(0.4);
      translate(x, y + 80);
      stroke(r, g, b);
      strokeWeight(5);
      noFill();
      for (let i = 0; i < 10; i++) {
        fill(255);
        ellipse(9, 20, s, s); //shell
        rotate(PI / 4);
      }
      pop();


    }
  }
}Month: October 2021
Project 05 – Wallpaper
//gnmarino
//Gia Marino
//Section D

var sizeChange = .1; //makes everything 1/10th the original size

function setup() {
    createCanvas(600, 600);
    background(121, 181, 177); //cyan

}

function draw() {

    fill(250, 250, 236); //cream
    stroke(169, 96, 0); //dark orange

    scale(sizeChange);

    // makes the 1st row of mandalas and alternates every other row
    // continues till it reaches border of canvas
    for (var xSpacing = 0; xSpacing < 10000; xSpacing += 900){
        for (var ySpacing = 0; ySpacing < 10000; ySpacing += 1800){
            //push and pop makes it so spacing doesn't compound
            push();
            mandala(xSpacing, ySpacing);
            pop();

        }
    }

    // makes 2nd row of mandalas and alternates every other row
    //continues till it reaches the point where it will not be on the page
    for (var xSpacing = -450; xSpacing < 9000; xSpacing += 900){
        for (var ySpacing = 900; ySpacing < 10000; ySpacing += 1800){
            //push and pop makes it so spacing doesn't compound
            push();
            mandala(xSpacing, ySpacing);
            pop();
        }
    }
    //draws diamond pattern
    for (var dxSpacing = 450; dxSpacing < 9000; dxSpacing += 900){
       for (var dySpacing = 450; dySpacing < 10000; dySpacing += 900) {
           //push and pop makes it so spacing doesn't compound
           push();
           diamond(dxSpacing, dySpacing);
           pop();
        }
    }

    noLoop();
}

function diamond (x2, y2) {
    // translate with parameters allows the loop functions in draw to move the whole design easily
    translate(x2, y2);

    //push and pop to avoid settings effecting other functions
    push();
    translate (300, 300);
    noStroke();
    fill(169, 96, 0); //dark orange
    triangle (-30, 0, 30, 0, 0, 30);
    triangle(-30, 0, 30, 0, 0, -30);

    pop();
}

function mandala(x, y) {
    // translate with parameters allows the loop functions in draw to move the whole design easily
    translate (x, y);

    //whole shape is roughly 500 X 600 pixels before scaling
    threeLeafShape();
    circleBorder();
    flowerAndCircle();
}

function threeLeafShape() {

    //push pop makes it so the settings in this function doesn't effect other functions
    push();

    //moves top leaf to the middle of the mandala
    translate(200, 0);
    strokeWeight(5);

    //draws top leaf
    beginShape();
    vertex(100, 200);
    quadraticVertex(70, 125, 0, 100);
    quadraticVertex(60, 90, 85, 115);
    quadraticVertex(90, 40, 50, 20);
    quadraticVertex(115, 40, 115, 115);
    quadraticVertex(135, 85, 175, 80);
    quadraticVertex(120, 125, 100, 200);
    endShape();

    //push pop makes it so the translation and rotation for the bottom leaf does not effect top leaf
    push();
    //translate and rotate moves bottom leaf so it's mirrored directly undernenth top leaf
    translate(200, 600);
    rotate(radians(180));

    //draws bottom leaf
    beginShape();
    vertex(100, 200);
    quadraticVertex(70, 125, 0, 100);
    quadraticVertex(60, 90, 85, 115);
    quadraticVertex(90, 40, 50, 20);
    quadraticVertex(115, 40, 115, 115);
    quadraticVertex(135, 85, 175, 80);
    quadraticVertex(120, 125, 100, 200);
    endShape();

    pop ();

    pop();

}

function circleBorder () {

    //push pop makes it so the settings in this function doesn't effect other functions
    push();

    //translate to center of canvas to make it easier to make a border in a circular formation
    translate(300, 300);
    strokeWeight(4);

    //radius of basline circle for the tiny circles to follow and make a border along
    var r = 250;

    //makes tiny circle border on right side
    //constrained from theta -55 to theta 55 so circles do not collide with the 2 leaf shapes
    for (var theta = -55; theta < 55; theta += 15) {
        cx = r * cos(radians(theta));
        cy = r * sin(radians(theta));
        circle(cx, cy, 40);

    }
    //makes tiny circle border on left side
    //constrained from theta 125 to theta 235 so circles do not collide with the 2 leaf shapes
    for (var theta = 125; theta < 235; theta += 15) {
        cx = r * cos(radians(theta));
        cy = r * sin(radians(theta));
        circle(cx, cy, 40);

    }

    pop();
}

function flowerAndCircle () {

    //(push pop 1)push and pop make it so translated origin does not effect next function
    push();


    //puts origin in center so it is easier to draw in a circular formation
    translate (300, 300);

    //circle around flower
    //push and pop so nofill doesn't effect flower
    push();
    noFill();
    strokeWeight(5);
    circle(0, 0, 200);
    pop();

    //flower center
    strokeWeight(5);
    circle (0, 0, 35);

    //draws 8 flower petals that rotates around the center origin
    for (theta = 30; theta <= 360; theta += 45){
    //(push pop 2)
    //the push and pop in this loop makes it so it rotates only 45 each time and not 45 + theta
    push();
    rotate(radians(theta));
    ellipse( 55, 0, 45, 20);
    //pop uses push 2
    pop();
    }
    //this pop uses push 1
    pop();
}
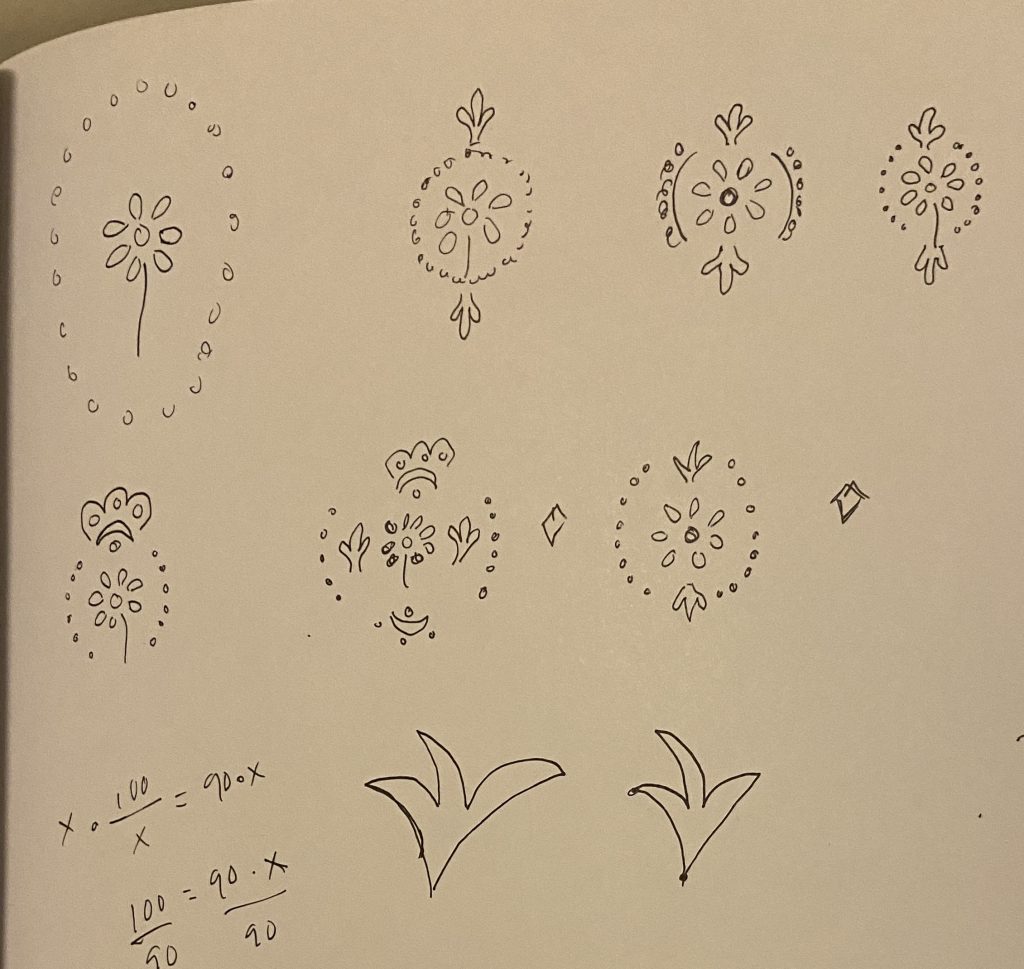
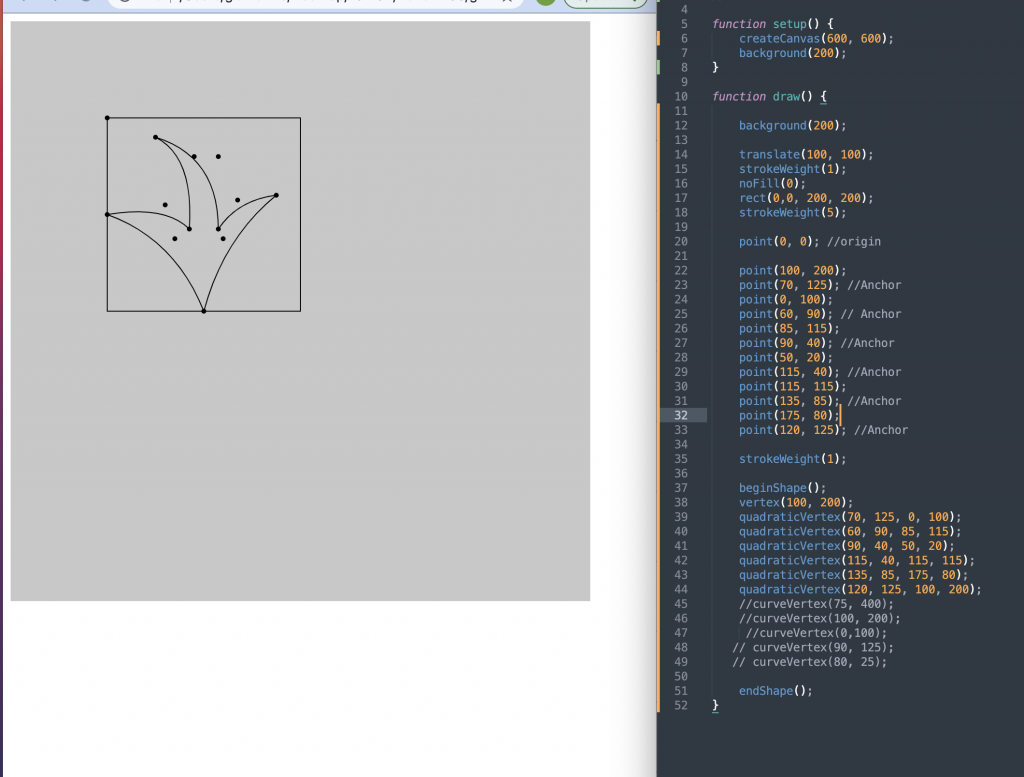
I started off with deciding a design that I could then repeat over and over. Then after I decided, I made the design in a 500×600 pixels dimensions. Then I scaled it down and looped it. Then I felt like the pattern needed something in-between the mandala I created so I made a diamond and made a separate nested loop to repeat it so it went in the empty spaces. I had to make two nested loops for the mandala so the columns were staggered and not lined up perfectly. For the circle border I used polar coordinates so I could space it out and also not have to complete the circle. But for the flower I had to use rotation so the ellipse turned and went in a circle.
Looking Outwards 05
I’ve chosen to investigate the early stages of mainstream animated movies – I found a cool video of the early development stages of the movie Toy Story, just when “3D” animation was taking off.
I’d imagine that the process for animation back then was different than it is today – we have programs like Maya and Blender to help us render, process, and rig 3D models now.
Toy Story looked a lot different in this video than it did on release, and we can see the character design process (Woody was almost a villain!)
Tom Hanks seemed to have played an important role in determining the direction of the plot and characters.
https://www.youtube.com/watch?v=t2ejwJ0QXvs
Toy Story
Various Animators – Andrew Stanton & Pete Docter (named in the video)
Project-05
//Nami Numoto
//Section A
//mnumoto

var x = 0;
var y = 0;

function setup() {
    createCanvas(600, 300);
    background(191, 231, 242); //pastel blue
}

function kirby(x, y) {
    stroke(0); //black outline
    fill(224, 0, 91); //kirby feet pink! (feet come first because layers)
    ellipse(x + 20, y + 35, 40, 20);
    ellipse(x - 20, y + 35, 40, 20);
    fill(243, 165, 170); //kirby main body/face pink! + arms as well
    ellipse(x + 40, y + 10, 30, 25); //right arm ellipse
    ellipse(x - 40, y + 10, 30, 25); //left arm ellipse
    ellipse(x, y, 80, 80); //face ellipse
    fill(235, 104, 150); //kirby blush pink!
    ellipse(x - 20, y, 10, 5);
    ellipse(x + 20, y, 10, 5);
    //eyes going like ^^
    line(x + 8, y - 5, x + 12, y - 15); //right
    line(x + 12, y - 15, x + 16, y - 5);
    line(x - 8, y - 5, x - 12, y - 15); //left
    line(x - 12, y - 15, x - 16, y - 5);
    //i don't think i like the mouth actually, not with the ^^ eyes.. leave it off
}

function draw() {
    //set of loops for more-unit columns
    for(let i = 0; i <= 3; i += 1) {
        for(let column = 0; column <= 4; column += 1) {
            kirby(x + (200 * column), y + i * 100);
        }
    }
    //set of loops for less-unit columns
    for(let i = 0; i <= 2; i += 1) {
        for(let column = 0; column <= 3; column += 1) {
            kirby(x + (200 * column) + 100, y + i * 100 + 50);
        }
    }
}
I’ve made a Kirby wallpaper – I didn’t want to copy Kirby in his original form exactly, so I made him smiling with his eyes 🙂
This was a lot of fun, I hope to make more drawings like this.
Project 5: Wallpaper
// John Henley; jhenley; 15-104 section D

function setup() {
    createCanvas(590, 395);
    background(0);
}

function draw() {
    for (var x = 10; x <= 590; x+= 30) { // vertical lines
        linesVertical(x);
    }
    for (var y = 10; y <= 390; y += 30) { // horizontal lines
        linesHorizontal(y);
    }
    for (var y = 10; y <= 390; y += 15) { // circles columns
        for (var x = 10; x <= 590; x+= 15) { // circles rows
            circles(x, y);
        }
    }
noLoop();
}

function circles(x, y) { //circle function
    stroke(0);
    fill(random(0, 255));
    circle(x,y,random(5, 15));
}

function linesVertical(x) { //vertical lines function (random lengths)
    stroke(255);
    line(x, random(0, 390), x, random(0,390));
}

function linesHorizontal(y) { //horizontal lines function (random lengths)
    line (random(0, 590), y, random(0,590), y)
}
For my wallpaper, I wanted to make a row of lit up circles, almost like an old-fashioned light-up sign. Each of the circles is like a bulb, and despite the pattern with the “for” loops, I made it so the diameter of the circles was chosen randomly to make the image’s picture seemingly change with each refresh. To add visual interest, I added perpendicular lines, chosen with random lengths, cutting through the circles.
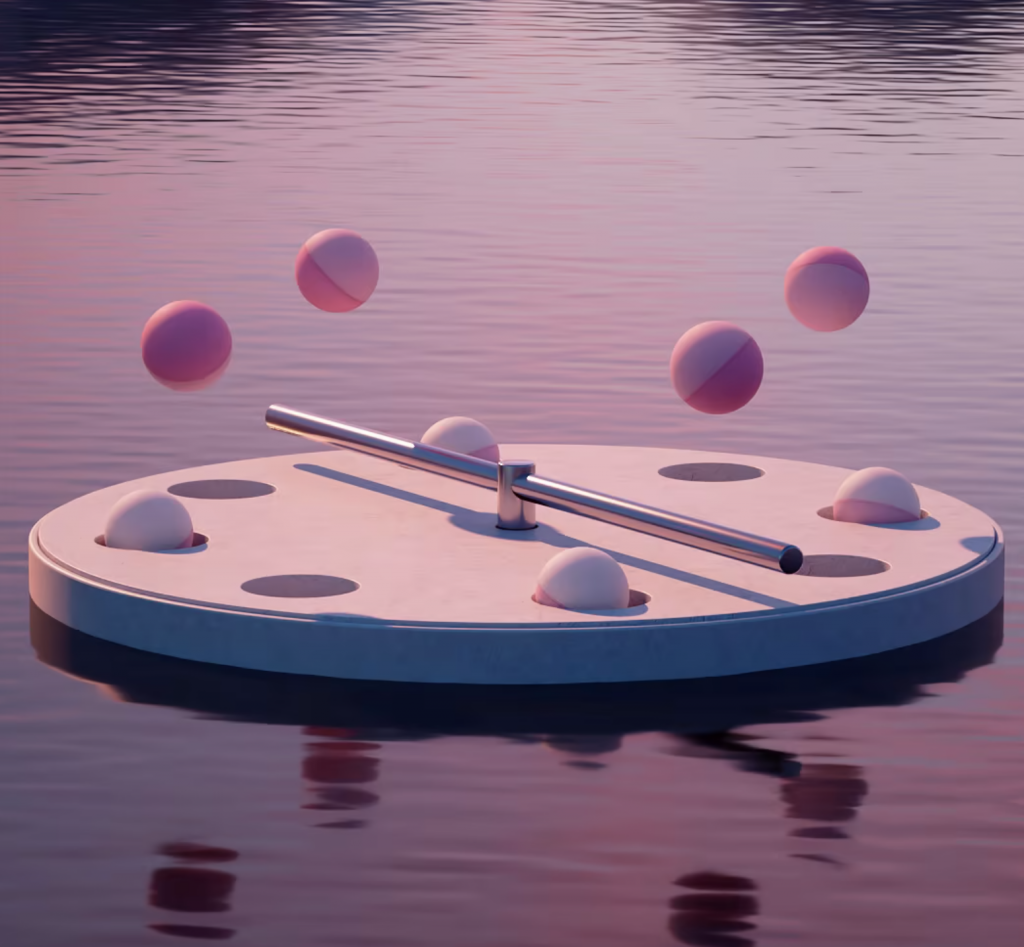
LO5: 3D Computer Graphics
I really admire the work by artist and designer Jon Noorlander. He explored 3D
generative forms in a beautifully fantastical and fun way. One specific example of his work was his piece entitled “Slime.” The piece itself is simply a looping aninimation of two balls of pink slime mushing and pulling across the canvas. However, it is very satisfying to watch, and is simply a fun animation. Noorlander engages bold, strong colors to create pieces that are engaging and exciting to watch and discover. While I’m not sure exactly, I imagine that the piece was rendered in Cinema 4D similar program to achieve the surface texture and reflections.
Slime. – Jon Noorlander | Design & Direction
Jon Noorlander – “Slime”
Project 5
// Michelle Dang
// Section D
//mtdang@andrew.cmu.edu
//Assignment-05-A
var s = 30;

function setup() {
    createCanvas(600, 600);
    background(231, 194, 105);
}
function draw() {
    //shape 1 loop
        for (var y = 100; y<600; y+=100) {
            for (var x = 100; x< 600; x+=100) {
                shape1(x, y);
            }
        }
//shape 2 loop
      for (var y = 50; y<600; y+=100) {
            for (var x = 50; x< 600; x+=100) {
                shape2(x,y);
            }
        }
}
//shape with blue rectangle
function shape1(x, y) {
    fill(245, 161, 97);
    ellipse(x, y,  s+50, s);
    ellipse(x, y, s, s+50);

    fill(232, 109, 78)
    ellipse(x, y, 50, 50)
    ellipse(x, y, 50, s);
    ellipse(x, y, s, 50);

    fill(150, 150, 86);
    ellipse(x, y, 10, 10);
}
//shape with salmon-colored middle
function shape2(x,y) {
    fill(39, 68, 86);
    rect(x-25, y-25, 50, 50);

    fill(150, 100, 150);
    ellipse(x, y,  s+50, s);
    ellipse(x, y, s, s+50);

    noFill();
    ellipse(x, y, s, s);
    ellipse(x, y, s, 50);

    fill(100, 100, 255);
    ellipse(x, y, 10, 10);

}
noLoop();
I took inspiration from kaleidoscopes.
Project 5: Wallpaper
var xp = 50;//startingx
var yp = 50;//startingy


function setup() {
    createCanvas(600, 600);
    angleMode(DEGREES);//using degrees instead of radians
}

function draw(){
    background(237, 224, 212);
    noStroke();
    for (var row = 0; row <= 10; row++){
        for (var col = 0; col <= 10; col++){
            drawCougar(row*90, col*90);//loop drawing
        }

    function drawCougar(x, y){
            push();
            translate(x-20, y-20);
            fill(221, 184, 146);
            ellipse(xp-20,yp-15,20,30);
            ellipse(xp+20,yp-15,20,30);

            fill(127, 85, 57);
            ellipse(xp,yp+20,35,30);//front mouth
            ellipse(xp-20,yp-15,20,30);
            ellipse(xp+20,yp-15,20,30);


            fill(176, 137, 104);
            ellipse(xp,yp,60,60);//head

            push();
            translate(10,10);
            rotate(7);
            fill(221, 184, 146);
            ellipse(xp-10,yp+5,20,27);//left mouth
            pop();

            push();
            rotate(353);
            fill(221, 184, 146);
            ellipse(xp,yp+25,20,27);//right mouth
            pop();

            fill(0);
            ellipse(xp-20,yp,5,10);//left eye
            ellipse(xp+20,yp,5,10);//right eye
            ellipse(xp,yp+5,20,10);//nose
            pop();
    }

 }

}
I started the project by sketching out ideas. Then, I moved to p5.js and created one drawing, and embedded a loop to make it repeat, creating the pattern and effect. I think figuring out how to employ a for loop was the most challenging for me. However, I really liked how my wallpaper turned out in the end. The project provided me with a better understanding of loops and functions.
Looking Outwards 05: 3D Graphics
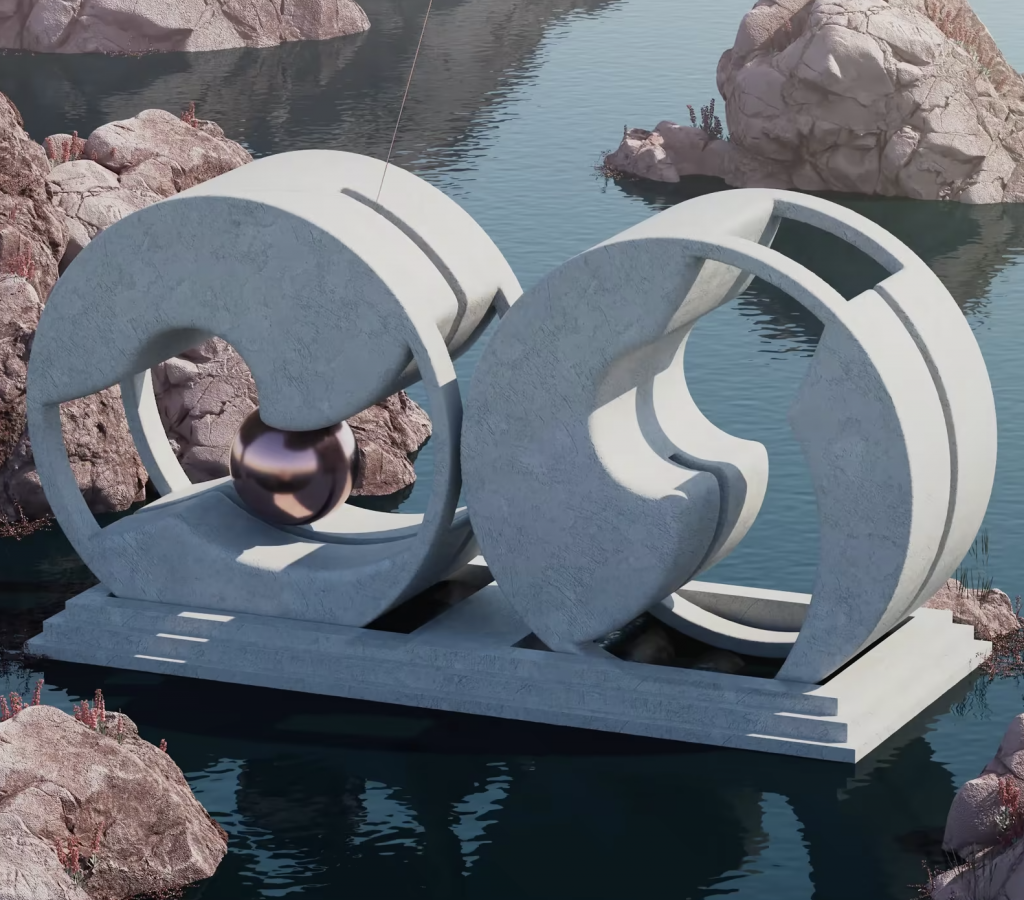
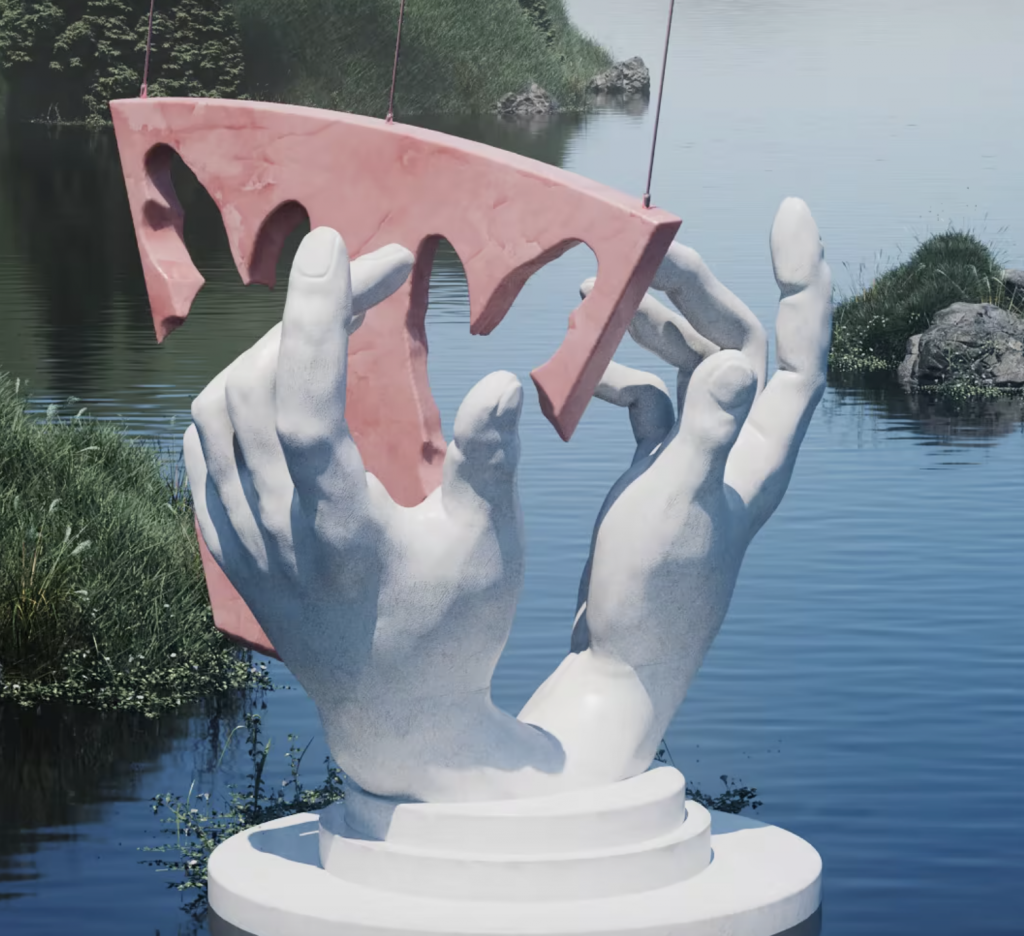
A piece of 3D computer art that I find inspiring is Synchronism by artist Andreas Wannerstedt. This piece is a set of three looping videos that show the synchronization between moving elements. I am familiar with Wannerstedts work, and what I love about all of his videos is that they create a very short yet satisfying loop that is visually beautiful. Each element is perfectly timed, and the pieces are so dynamic that you have to watch the loop a few times to really understand all of the parts. A lot of his graphics are also extremely photo representational and seem like they could really be sculptures or installations. From the look of the video, it seems like a 3d computer software was used to create these pieces. In his process, you can also see that he sticks to a certain graphic style that mixes bright colors with textures from nature or more industrial materials.
Piece: Synchronism
Link: https://andreaswannerstedt.se/synchronism
Project 05: Wallpaper
function setup() {
    createCanvas(600, 400);
    background(250, 220, 137);
}

function draw() {
    noStroke();
    for(i = -1; i < 3; i++) {
        fill(250, 162, 137);
        rect(70 + i * 210, 0, 50, 400);
        for(j = 0; j < 2; j++) {
            fill(202, 227, 152);
            arc(200 + i * 210, 70 + j * 250 - (i % 2) * 50, 140, 120, radians(80), radians(250));
            fill(250, 220, 137);
            arc(210 + i * 210, 70 + j * 250 - (i % 2) * 50, 140, 120, radians(80), radians(250));
            fill(204, 112, 138);
            circle(200 + i * 210, 45 + j * 250 - (i % 2) * 50, 17);
            circle(213 + i * 210, 55 + j * 250 - (i % 2) * 50, 17);
            circle(213 + i * 210, 70 + j * 250 - (i % 2) * 50, 17);
            circle(200 + i * 210, 75 + j * 250 - (i % 2) * 50, 17);
            circle(187 + i * 210, 55 + j * 250 - (i % 2) * 50, 17);
            circle(187 + i * 210, 69 + j * 250 - (i % 2) * 50, 17);
            fill(209, 158, 71);
            circle(200 + i * 210, 61 + j * 250 - (i % 2) * 50, 20);
            circle(165 + i * 210, 90 + j * 250 - (i % 2) * 50, 18);
            circle(180 + i * 210, 105 + j * 250 - (i % 2) * 50, 12);
        }
        for(j = 0; j < 2; j++) {
            fill(202, 227, 152);
            arc(200 + i * 210, 200 + j * 250 - (i % 2) * 50, 140, 120, radians(280), radians(100));
            fill(250, 220, 137);
            arc(190 + i * 210, 200 + j * 250 - (i % 2) * 50, 140, 120, radians(280), radians(100));
            fill(204, 112, 138);
            circle(200 + i * 210, 175 + j * 250 - (i % 2) * 50, 17);
            circle(213 + i * 210, 185 + j * 250 - (i % 2) * 50, 17);
            circle(213 + i * 210, 200 + j * 250 - (i % 2) * 50, 17);
            circle(200 + i * 210, 205 + j * 250 - (i % 2) * 50, 17);
            circle(187 + i * 210, 185 + j * 250 - (i % 2) * 50, 17);
            circle(187 + i * 210, 199 + j * 250 - (i % 2) * 50, 17);
            fill(209, 158, 71);
            circle(200 + i * 210, 191 + j * 250 - (i % 2) * 50, 20);
            circle(230 + i * 210, 220 + j * 250 - (i % 2) * 50, 18);
            circle(215 + i * 210, 235 + j * 250 - (i % 2) * 50, 12);
        }

    }
    noLoop();
}
This project was very difficult, yet I enjoyed making a repetitive 2D design. I originally made it on Adobe Illustrator to get an idea of what I wanted, and the final outcome is very similar to what I wanted it to be. I used three different for loops for the rectangles and the two different columns of flowers.
![[OLD SEMESTER] 15-104 • Introduction to Computing for Creative Practice](../../../../wp-content/uploads/2023/09/stop-banner.png)