![[OLD SEMESTER] 15-104 • Introduction to Computing for Creative Practice](../../../../wp-content/uploads/2023/09/stop-banner.png)
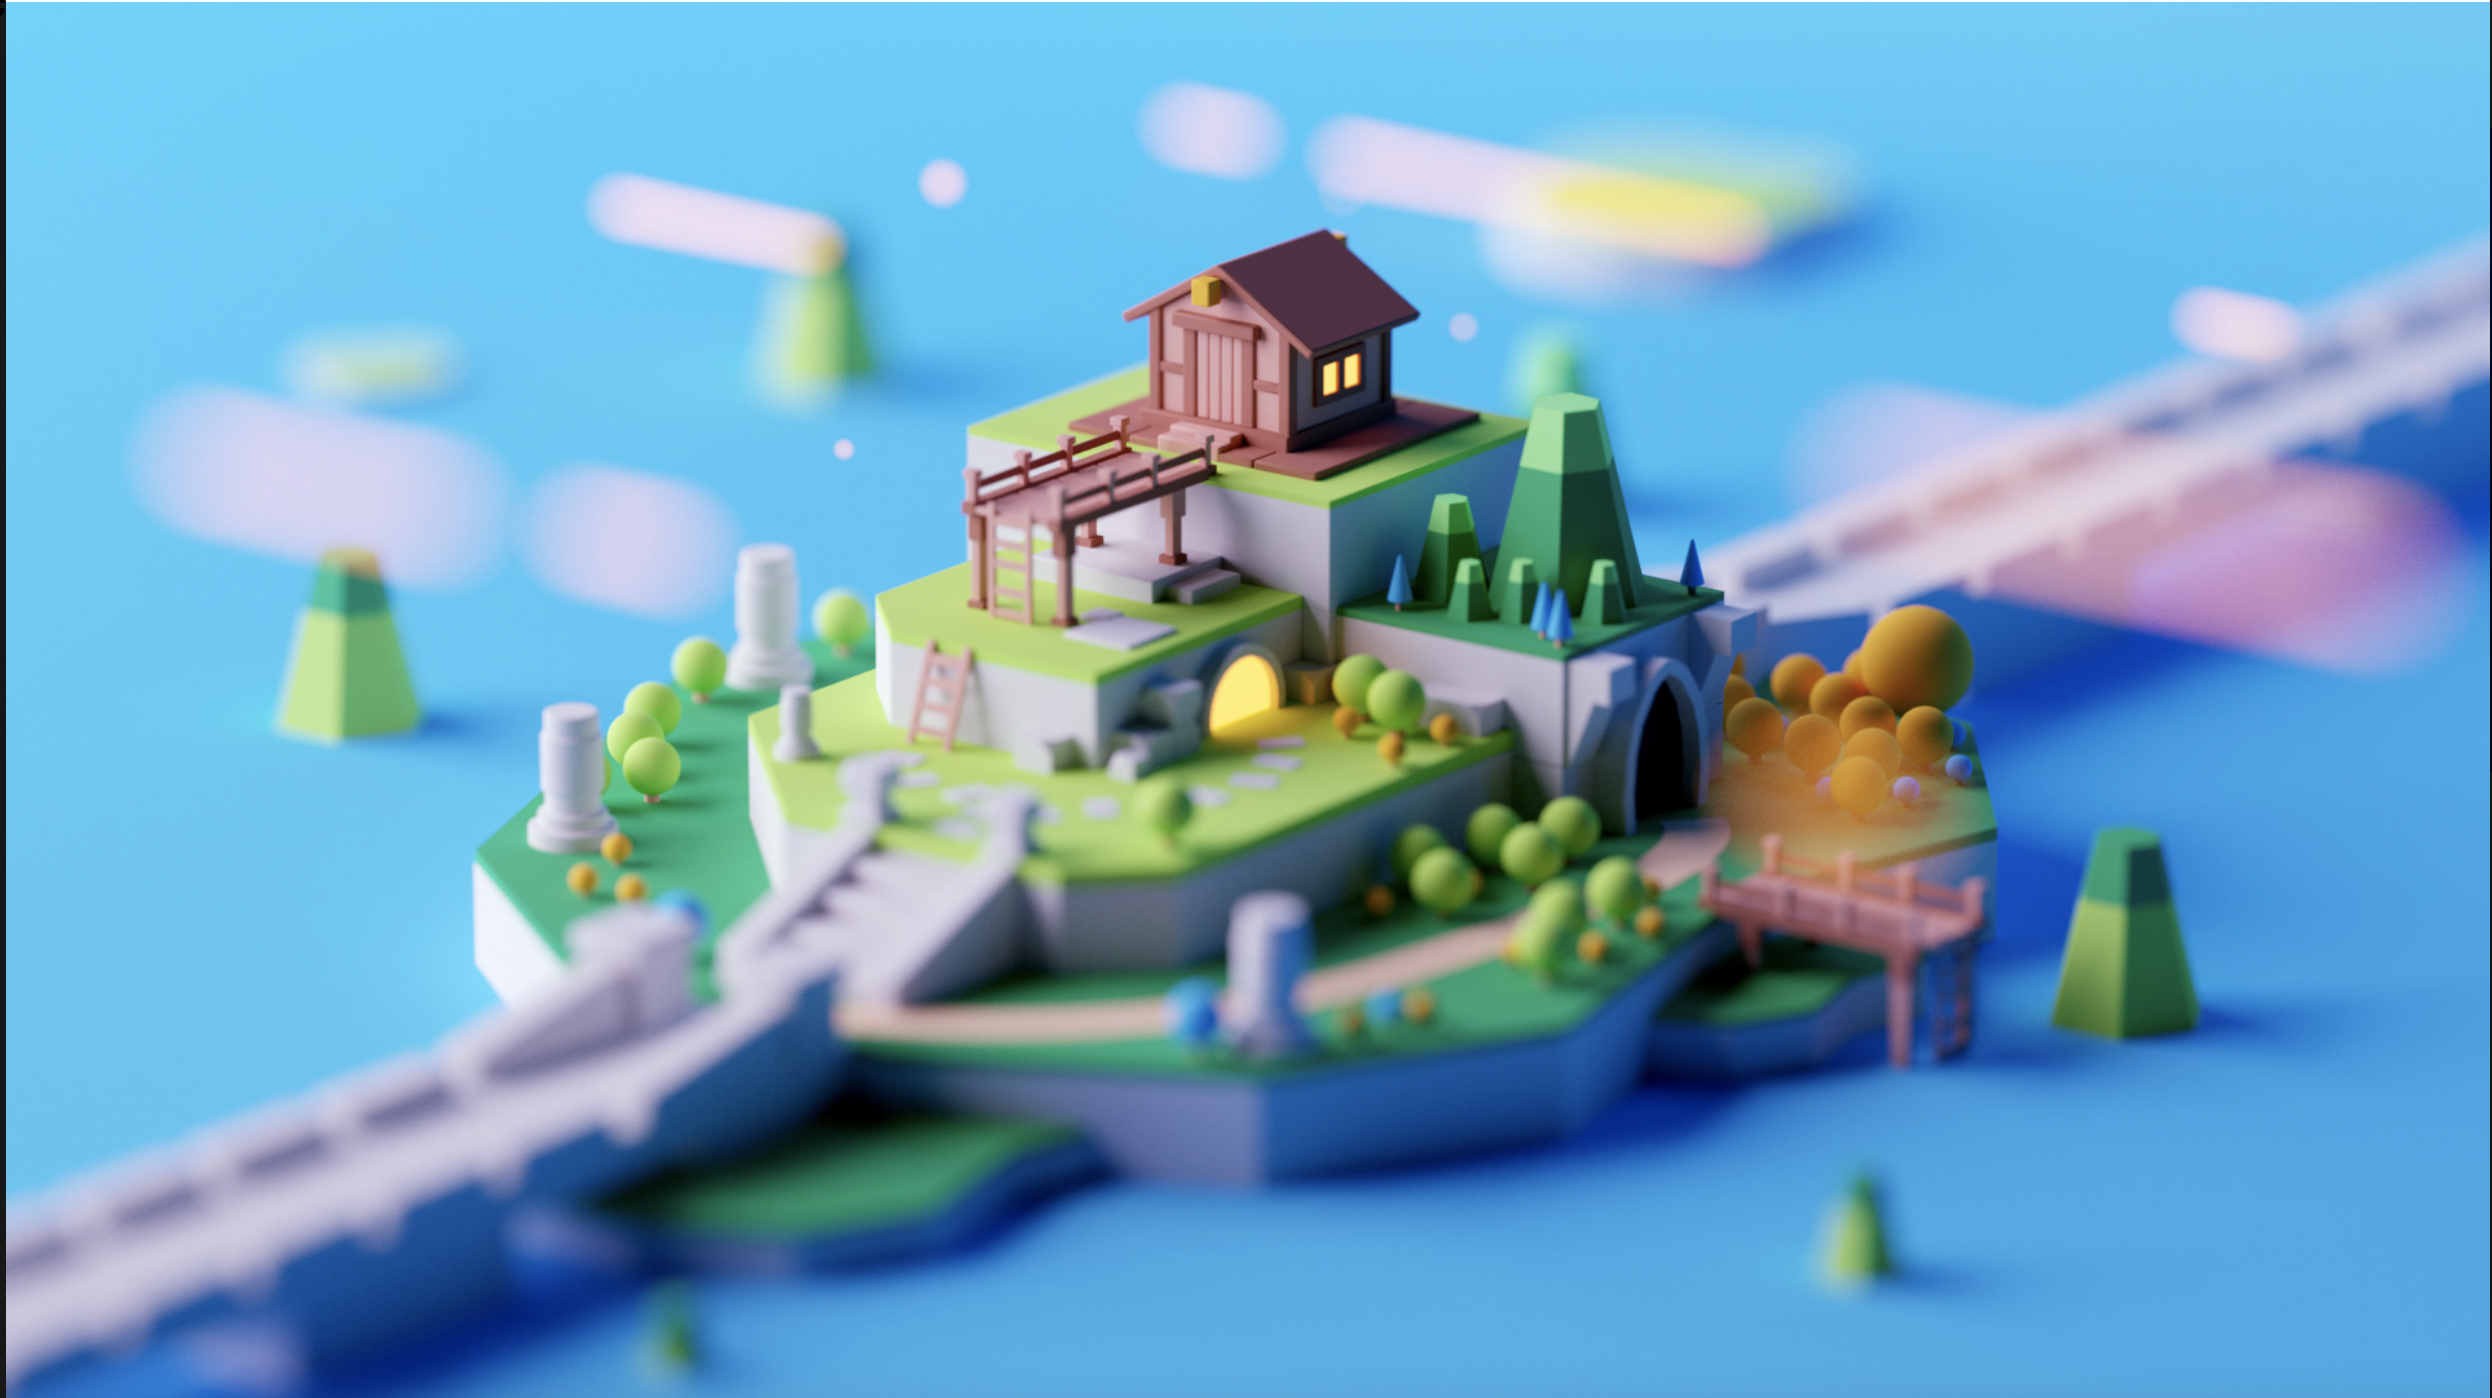
I love Gustavo Henrique’s 3D style. The use of color and the softness of form creates a child-like, fantastical scene. He emphasizes simplicity that is full of details as he states, “All constructions were modelled in a very simple way. Most of my designs are simple but full of details.” He is motivated to inspire other people through his art. His style reminds me of a game-like environment or a rendering of a physical toy. He is able to capture the feeling of being toy-like through manipulating the camera settings. He uses a 150mm focal length and a high aperture to create a blurred background and achieve a miniature feel to his work.
Category: SectionD
Project 5: Wallpaper
var x = 5
var y = 5
var w = 5
var h = 20
var dx = 8

function setup() {
    createCanvas(500, 500);
    background(220);
}

function draw() {
    for (hirow = 0; hirow < 5; hirow += 1) { // higher rows
        x = 5 + hirow*130
        for (hicol = 0; hicol < 5; hicol += 1) { // higher columns
            squiggle();
            y = 5 + hicol*154
        }
    }
    for (lorow = 0; lorow < 5; lorow += 1) { // lower rows
        x = 53 + lorow*130
        for (locol = 0; locol < 5; locol += 1) { // lower columns
            squiggle();
            y = 100 + locol*154
        }
    }
}

function squiggle() { // diamond of arcs w/ ellipses
    noFill();
    strokeWeight(1);
    stroke(107, 70, 27);
    for (arccount = 0; arccount < 7; arccount += 1) {
        y += 3
        arc(x + arccount*dx, y, w, h, 3*PI/2, PI/2);
        arc(x + arccount*dx, y+h, w, h, -3*PI/2, -PI/2);
        arc(x + arccount*dx, y+2*h, w, h, 3*PI/2, PI/2);
        arc(x + arccount*dx, y+3*h, w, h, -3*PI/2, -PI/2);
    }
    ellipse(x + 7*dx, y+h, 11, 15);
    ellipse(x + 7*dx, y+3*h, 11, 15)
}
For my wallpaper, I drew inspiration from this design circa 1805. I thought the handmade recurring pattern, most likely created through block printing, would be fun to convert to a digital format. While I took the diamond shape from the original design, I opted for a more minimalist approach that didn’t need to align exactly to be visually interesting.
LO 5: 3D Computer Graphics
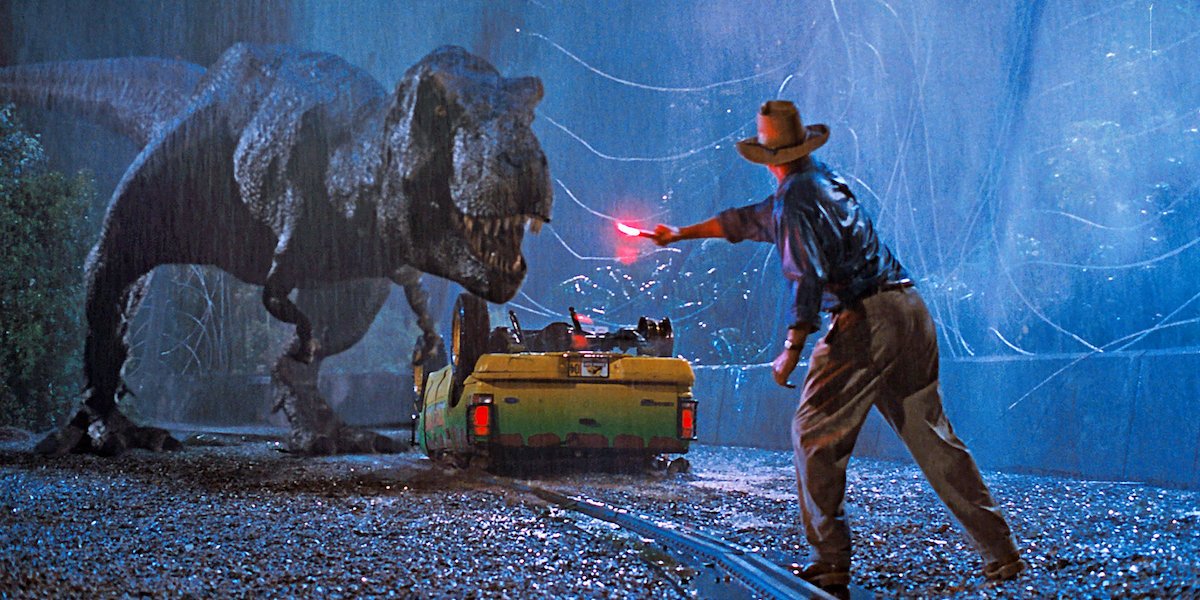
The piece of 3D Computer Graphics I’m studying this week is widely regarded as one of the best early works of CGI to date. The creation of the dinosaurs in Jurassic Park (1993) is an interesting endeavor and product for multiple reasons. First, as a dramaturgy major, I view movie visuals in terms of how they relate to the plot. In the case of Jurassic Park, the realistic appearance of the dinosaurs was paramount to the success of the movie. Second, the technical skill was unparalleled at the time. To give the dinosaurs the appearance of real weight and depth, the movie used a combination of animatronics and CGI. The computer generated work focused on texture and light to give a realistic 3D effect.
Project 05: Wallpaper
sketch
//Julianna Bolivar
//jbolivar@andrew.cmu.edu
//Section D
//Project 05: Wallpaper


function setup() {
    createCanvas(400, 400); //canvas
    background(225, 99, 71); //orange background
}

function draw() {
    for (var row = 0; row < 10; row ++){
        for (var col = 0; col < 10; col ++){
            drawSection(row*45, col*75);
        }
    }
}

function drawSection(x, y){
    push();
    translate(x-55, y-20);
    stroke("black");
    noFill();
    stroke(0);
    //stem 1
    curve(0, 5, 68, 19, 68, 56, 10, 60);
    curve(65, 10, 68, 30, 75, 40, 115, 65);
    //stem 2
    curve(115, 35, 90, 35, 90, 60, 115, 65);
    //stem 3
    curve(95, 60, 75, 70, 75, 80, 90, 80);

    //flower 1
    noStroke();
    fill("white");
    circle(70, 20, 5);
    circle(75, 20, 5);
    circle(66, 22, 5);
    circle(68, 15, 6);
    circle(73, 16, 6);
    circle(64, 18, 4);
    circle(79, 17, 4);
    circle(61, 23, 3);
    //flower 2
    circle(90, 35, 5);
    circle(86, 32, 5.5);
    circle(95, 34, 5.5);
    circle(89, 29, 4.5);
    circle(93, 31, 4);
    //flower 3
    circle(75, 70, 3);
    circle(73, 68, 4);
    circle(77, 68, 3);
    circle(75, 66, 2);
    circle(78, 71, 2);
    circle(71, 70, 2);
    pop();
}
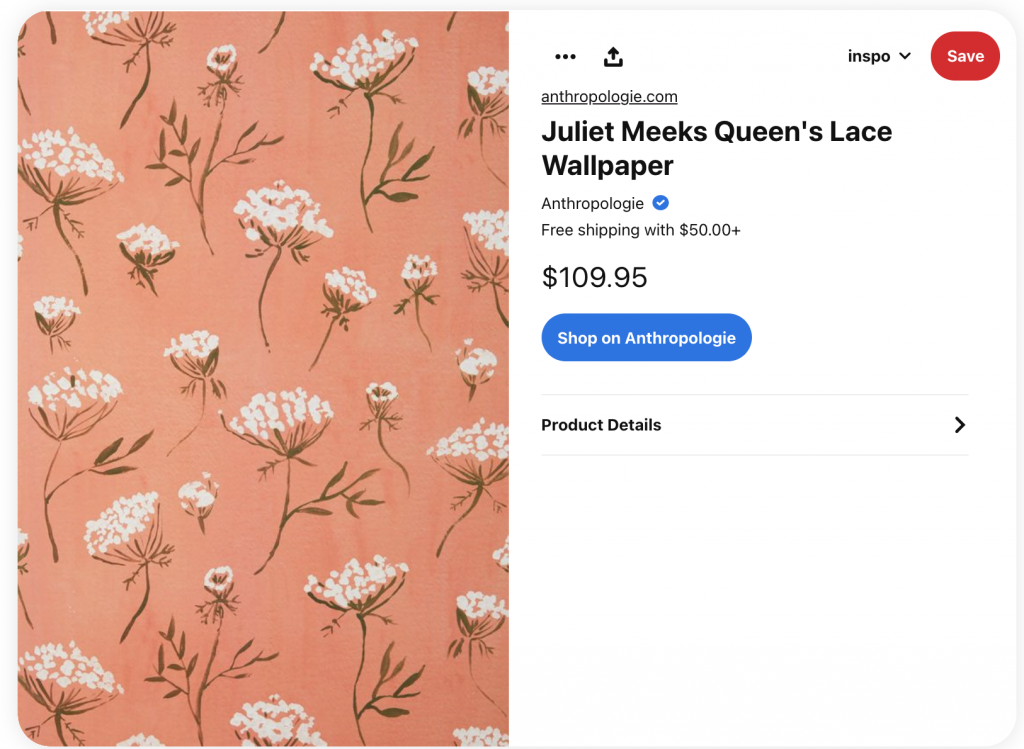
I was inspired by this wallpaper I found on Pinterest. I did 3 different flowers in a repeating pattern. I’m really proud of myself for this project! I’m happy with how it turned out.
LO-05: 3D Computer Graphics
For this LO, I decided to look at the fashion website Dress-X which features digital clothing and is founded by Daria Shapovalova and Natalia Modenova. All the clothes are generated through 3D computer graphics instead of being physically manufactured so you will have to send them a photo of yourself, which will be sent back to you with the clothes photoshopped onto it. Some of the brands featured on the website do not use 3D digital design methods, so Dress-X has to create digital graphics for them. Since designers spend a lot of time creating intricate details on their physical clothes, the 3D artists have to also be careful in how they capture those physical properties and translate them into a digital space. They focus on creating 3D models that could also work in reality, keeping track of function and form. However, what I find the most interesting about this service is that you can try on the clothes using the Dress-X app, where AR is used to morph the clothes to your body as you move around. I supposed the app heavily relies on AI to identify the body and morph the clothes around it. Dress-X aims to reduce waste that comes from physical clothing production, such as the carbon footprint of manufacturing and increasing textile waste.
Project 5: Wallpaper
function setup() {
createCanvas(600, 540);
}
function draw() {
background(195, 230, 241);
//steam
for (var yUp = 85; yUp <= 500; yUp += 127) {
for (var xUp = 75; xUp <= 600; xUp += 148) {
steam(xUp, yUp);
}
}
//pan
for (var yYah = 43; yYah <= 450; yYah += 128) {
for (var xYah = 24; xYah <= 580; xYah += 148) {
pan(xYah, yYah);
}
}
//egg
for (var y = 80; y <= 500; y += 128) {
for (var x = 47; x <= 550; x += 148) {
egg(x, y);
}
}
//handle
for (var yUp = 85; yUp <= 500; yUp += 127) {
for (var xUp = 94; xUp <= 600; xUp += 148) {
handle(xUp, yUp);
}
}
function egg(x, y) {
//whites
noStroke();
fill("white")
circle(x + 3, y, 35)
circle(x + 8, y + 5, 35)
circle(x + 2, y + 7, 30)
//shadow on whites
//gray
noStroke();
fill(215, 215, 215)
circle(x + 11.5, y + 8.5, 17)
//white
fill("white")
circle(x + 8.5, y + 5.5, 21)
//yolk shadow
fill(222, 181, 67)
circle(x - 2, y - 3, 13)
//yolk
noStroke();
fill(237, 193, 72)
circle(x -3, y - 3, 11)
//yolk highlight
noStroke();
fill("white")
circle(x - 4, y - 5, 3)
}
function pan (x, y) {
//outer
fill(161, 161, 161)
circle(x + 30, y + 40, 76.5)
//inner
fill(0)
circle(x + 30, y + 40, 72)
//most inner
fill(80, 80, 80)
circle(x + 30, y + 40, 54)
}
function handle(x, y) {
push();
//translate(x,y)
rectMode(CENTER);
//rotate(radians(40))
//handle
fill(0)
rect(x + 26, y, 55, 13, 10)
//connector
fill(196, 196, 196)
rect(x, y, 6, 18, 2)
pop();
//hole
fill(195, 230, 241)
ellipse(x + 42, y, 10, 5)
}
}
function steam(x, y) {
noStroke();
//positive space
fill(245, 250);
ellipse(x + 5, y - 40, 35, 15)
ellipse(x - 5, y - 50, 35, 14)
ellipse(x - 3, y - 59, 30, 10)
//negative space
fill(195, 230, 241)
ellipse(x - 3, y - 39, 28, 10)
ellipse(x + 6, y - 50.5, 28, 9)
ellipse(x - 13, y - 60, 28, 8)
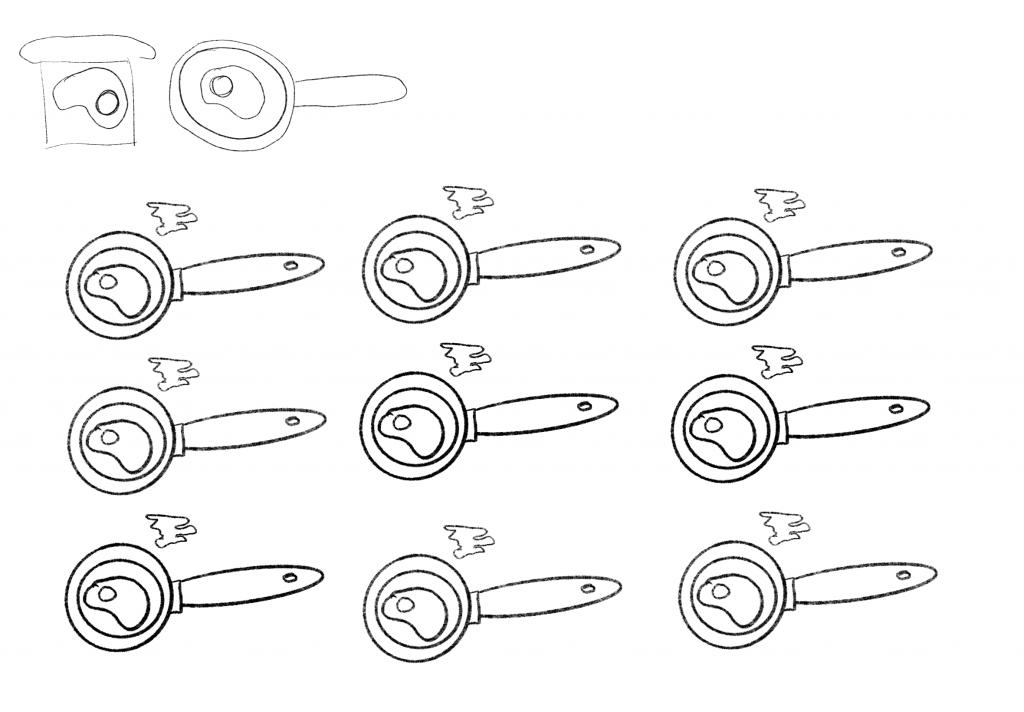
}This project was really fun. The hardest part was understanding what details should be added to make the wallpaper seem more dimensional and dynamic. The process was very additive in that I had to iterate a few times to see what was missing in the wallpaper compositionally.
LO 5: 3D Computer Graphics

Link: https://y2kaestheticinstitute.tumblr.com/post/623999407028862976/collection-of-works-by-digital-artist-paul-wiley
Artist: Paul Wiley
Year: 1990s-2000s
Although I was not able to find titles to any specific pieces, the collection of 3D computer graphics that Paul Wiley created titled “FuturoCity” throughout the 1990s and 2000s. The scenes that he creates are vibrant and fantastical and creates a sense of fun and excitement. The art that is created with code is fun and although its style is considered outdated now, I think they are still interesting to look at now because of how quickly the world of computer generated images have changed. Wiley’s artistic style is captured well in this medium because it allows for relatively quick generations of fantastical landscapes that would take much longer if done by hand as it would have back then.
LO 05: 3D Computer Graphics
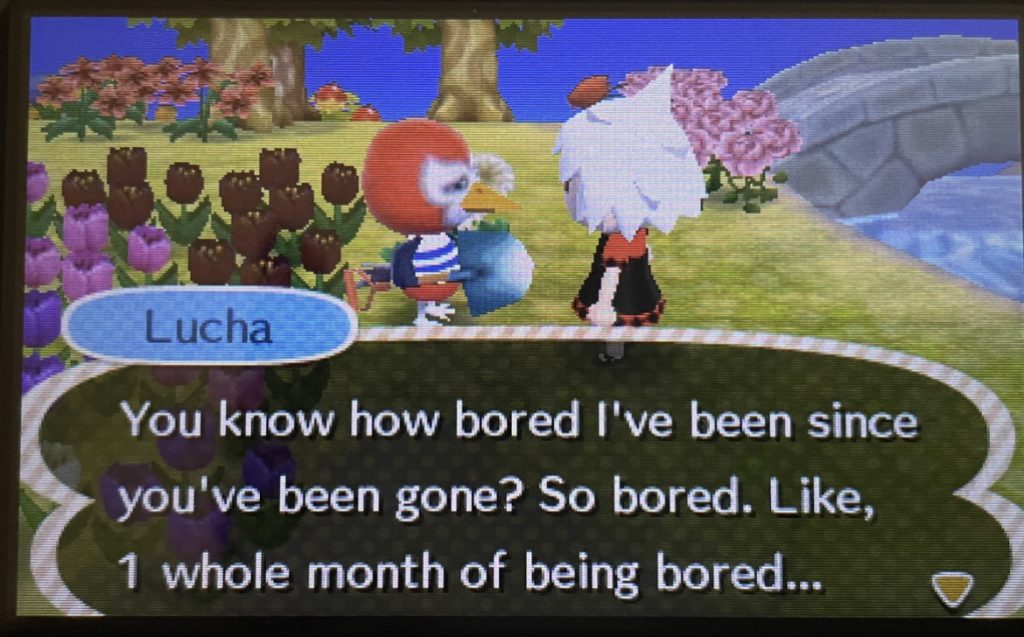
Animal Crossing: New Leaf was released by Nintendo for the Nintendo 3DS in 2012. It’s the 4th iteration in the Animal Crossing series, the predecessor to its incredibly successful sequel, Animal Crossing: New Horizons, which reportedly sold over 31 million copies as of December 2020. Just New Horizons makes up about 47% of all sales in the series of games. Still, as advanced and exceptional as New Horizons is, New Leaf has a charm that keeps players coming back even a decade after the initial release. New Leaf is full of content as a life simulation game, with over 333 possible animal villagers (not including special characters). With time the gameplay may get repetitive, and New Horizons has the same problem. But New Leaf has the added factors of characters with stronger personalities, a beautiful soundtrack, and that sense of nostalgia that has players still thinking fondly of New Leaf. Despite not having modern, clean graphics, the pixelated quality is charming and doesn’t get in the way of gameplay. While nicer graphics certainly look good, it doesn’t make up for content and playability.

Project 5, Modern Wallpaper
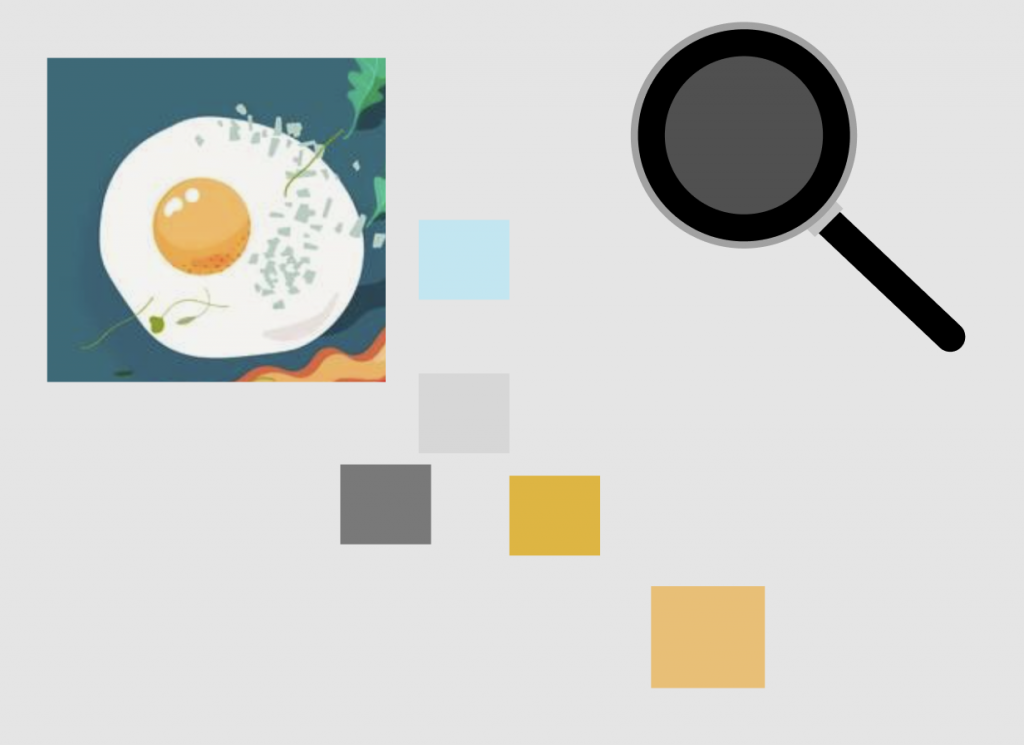
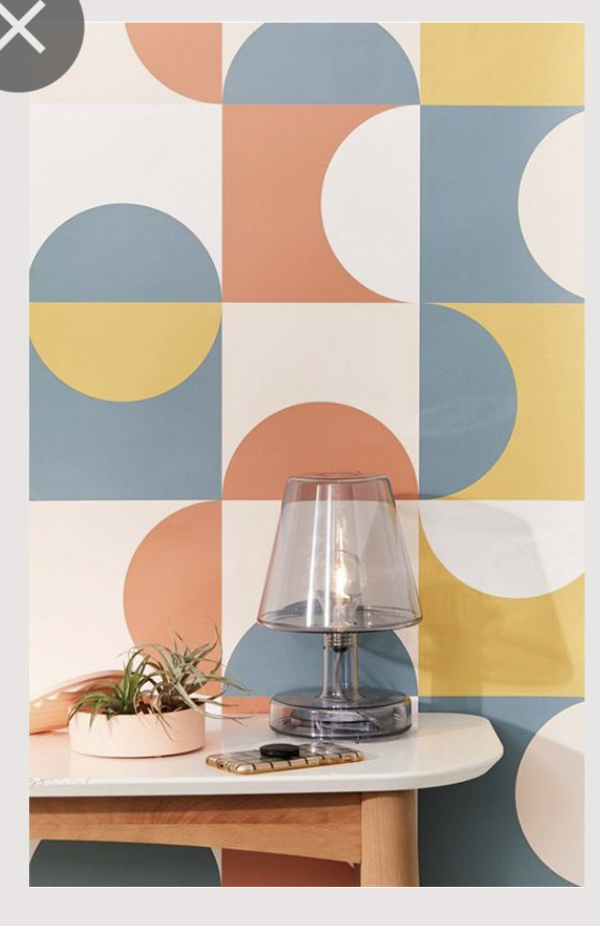
At first I was thinking of making a really old type of Renaissance wallpaper design with line flowers, but then I came across a few photos of modern wall paper designs and liked them much better. I decided to model my work after this photo specifically because I liked the simple pattern with the colors.
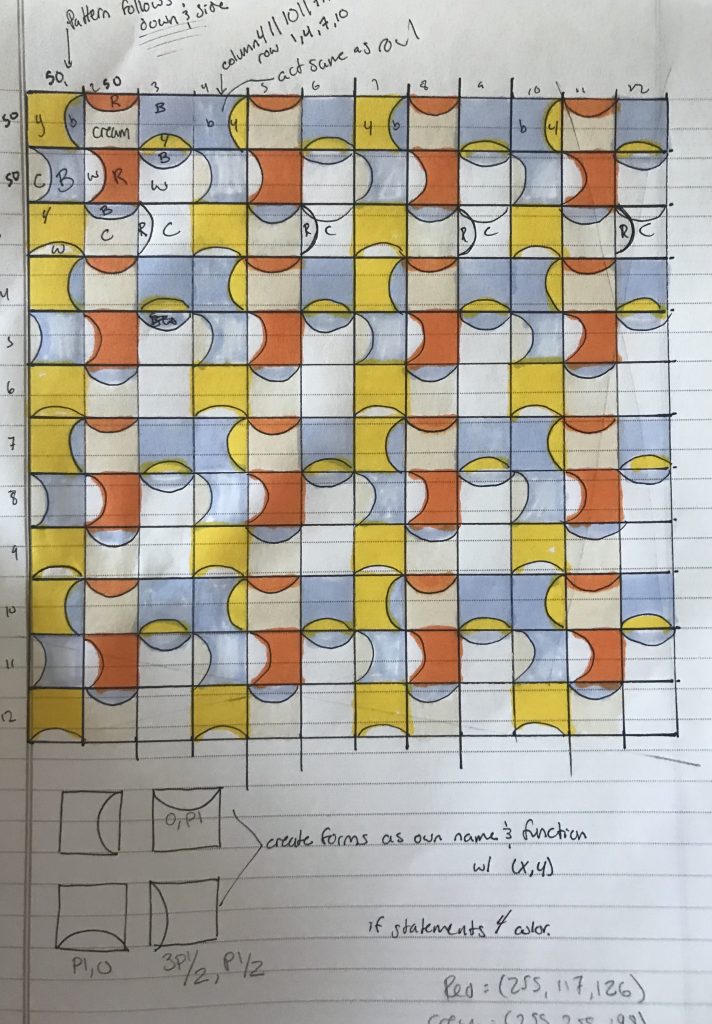
I mapped it out in my notebook in order to keep track of which blocks I had already made. As I made one color block and looped it correctly, I would color it in in my notepad. I also made a shape and color code to keep my code easier for myself to read.
//Georgia Miller
//Section D
//ghmiller@andrew.cmu.edu
//Project-05-A
function setup() {
    createCanvas(600, 600);
    background(220);
}

function draw() {
    for(let row = 1; row <= 10; row += 3){
        for(let col = 1; col <= 10; col += 3){
            blockArcRYB((50 * col)- 50, (50 * row)- 50);
        }
    }
    for(let row = 1; row <= 10; row += 3){
        for(let col = 2; col <= 11; col += 3){
            blockArcTCR((50 * col)- 50, (50 * row)- 50);
        }
    }
    for(let row = 1; row <= 10; row += 3){
        for(let col = 3; col <= 12; col += 3){
            blockArcBBY(( 50 * col)- 50,( 50 * row)- 50);
        }
    }
    for(let row = 3; row <= 12; row += 3){
        for(let col = 1; col <= 10; col += 3){
            blockArcBYW((50 * col)- 50,(50 * row)- 50);
        }
    }
    for(let row = 2; row <= 12; row += 3){
        for(let col = 1; col <= 10; col += 3){
            blockArcLCB((50 * col)- 50,(50* row)- 50);
        }
    }
    for(let row = 2; row <= 11; row += 3){
        for(let col = 2; col <= 11; col += 3){
            blockArcLRW((50 * col)- 50,(50 * row)- 50);
        }
    }
    for(let row = 3; row <= 12; row += 3){
        for(let col = 2; col <= 11; col += 3){
            blockArcTCB((50 * col)- 50,(50 * row)- 50);
        }
    }
    for(let row = 2; row <= 12; row += 3){
        for(let col = 3; col <= 12; col += 3){
            blockArcTWB((50 * col)- 50,(50 * row)- 50);
        }
    }
    for(let row = 3; row <= 12; row += 3){
        for(let col = 3; col <= 12; col += 3){
            blockArcLCR((50 * col)-50,(50 * row)- 50);
        }
    }
}
function blockArcRYB(x,y) { //block with arc on the right side with yellow rect blue arc
    strokeWeight(0);
    fill(255, 245, 0); //yellow
    rect(x, y, 50, 50);
    fill(117, 135, 255); //blue
    arc(x + 50, y + 25, 50, 50, PI/2,(3 * PI)/2);
}

function blockArcTCR(x,y) { //block with arc on the top with cream rect red arc
    strokeWeight(0);
    fill(255, 225, 190); //cream
    rect(x, y, 50, 50);
    fill(255, 177, 126); //red
    arc(x + 25, y, 50, 50, 0, PI);
}

function blockArcBBY(x,y) { //block with arc on the bottm with blue rect yellow arc
    strokeWeight(0);
    fill(117, 135, 255); //blue
    rect(x, y, 50, 50);
    fill(255, 245, 0); //yellow
    arc(x + 25, y + 50, 50, 50, PI, 0);
}
function blockArcBYW(x,y) { //block with arc on the bottm with yellow rect white arc
    strokeWeight(0);
    fill(255, 245, 0); //yellow
    rect(x, y, 50, 50);
    fill(255); //white
    arc(x + 25, y + 50, 50, 50, PI, 0);
}
function blockArcLCB(x,y) { //block with arc on the left with blue rect cream arc
    strokeWeight(0);
    fill(117, 135, 255); //blue
    rect(x, y, 50, 50);
    fill(255, 225, 190); //cream
    arc(x, y + 25, 50, 50, (3 * PI)/2, PI/2);
}
function blockArcLRW(x,y) { //block with arc on the left with blue rect cream arc
    strokeWeight(0);
    fill(255, 177, 126); //red
    rect(x, y, 50, 50);
    fill(255); //white
    arc(x, y + 25, 50, 50, (3 * PI)/2, PI/2);
}
function blockArcTCB(x,y) { //block with arc on the top with cream rect blue arc
    strokeWeight(0);
    fill(255, 225, 190); //cream
    rect(x, y, 50, 50);
    fill(117, 135, 255); //blue
    arc(x + 25, y, 50, 50, 0, PI);
}
function blockArcTWB(x,y) { //block with arc on the top with white rect blue arc
    strokeWeight(0);
    fill(255); //white
    rect(x, y, 50, 50);
    fill(117, 135, 255); //blue
    arc(x + 25, y, 50, 50, 0, PI);
}
function blockArcLCR(x,y) { //block with arc on the left with blue rect cream arc
    strokeWeight(0);
    fill(255, 225, 190); //cream
    rect(x, y, 50, 50);
    fill(255, 177, 126); //red
    arc(x, y + 25, 50, 50, (3 * PI)/2, PI/2);
}
Week 5 LO Slug Race
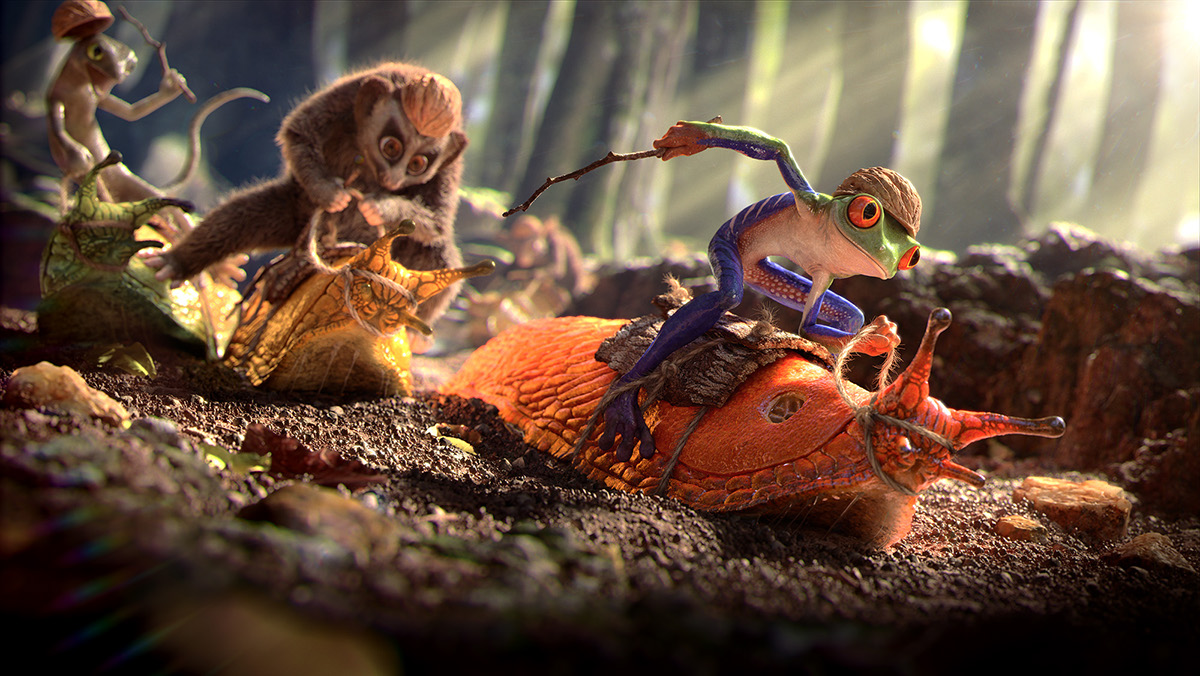
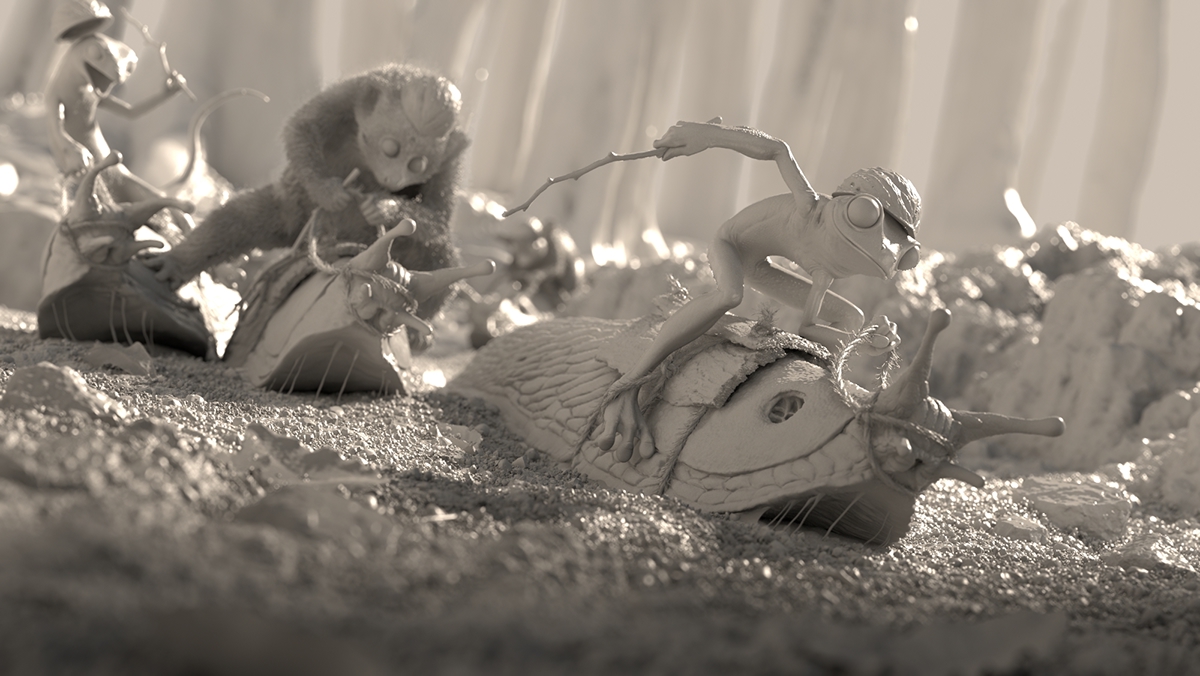
When looking for 3D computer Graphics I found Fabricio Moraes and Guilherme Formeti’s project Slug Race that they were able to make from scratch. As someone who has a love for animals I found the project funny and compelling to look at. I really had no idea how something so realistic was possible, especially because it looked like the whole landscape was actually real and the light looked so realistic as well. I was able to watch a video on the making of it, and even without the words containing words it helped to know that the artists did field work and were able to find images of the background to work with after going out into the woods themselves. I thought this was very cool to see especially because from my experience people do not comprehend how hard it is to create images without reference. I thought the 3d sculpting that was done for the characters and the slugs especially was very detailed and time consuming. I like how whimsical this piece is compared to some of the artist’s typical works.
https://fabriciomoraes.com/slug-race