jdperez Final Project

For my final project, I threw together a little synth with an interface to change between types of waves, as well as add a lowpass filter, high pass filter, or bandpass filter.

The basic functionality of the synth is you can use your top row of keys to play a chromatic scale starting with Q, moving stepwise through the row (Q -> P) and then the last three half steps are in the next row down (ASD). You can adjust where the chromatic scale lies on the keyboard by pressing the arrow keys. The left and right arrow keys will shift the octave a half step up or down, and then the up and down arrow keys will shift the entire scale an octave up or down. You can do this while playing a note to have some cool effects. Another note, the keyboard is made to be able to play multiple notes at the same time, so play around with harmonies and stuff! The only issues come up when the notes frequencies become too close, and start phasing with each other… Also, if you are playing a perfect 6th and try to play a third note, the third note will not play. I’m not entirely sure how to fix these bugs.

Currently, the envelope for the filters are pre-set. Moving forward I’d like to implement some sliding-bar controls to control the envelopes. Also, the documentation on the p5.sound bandpass filter is very little, so I was not entirely sure how to control the range or location of the bandpass.

Other than these things the synth should work great! For maximum effect, use headphones. Put on a song you like on youtube or something, and try and jam out to it.

Enjoy.


sketch

//Jonathan Perez
//Section B
//jdperez@andrew.cmu.edu
//my music synth

//notes: could be much more efficient using objects and array that represents the keyboard. Consider initializing keyboard and having function calls
 
var keys = [] //holds all the keys in the diatonic scale including octave

//variable fill color for the buttons, allows selected button to highlitght
var fill1 = 255; //sine menu fill
var fill2 = 255; //triangle menu fill
var fill3 = 255; //square menu fill
var fill4 = 255; //sawtooth menu fill
var fill5 = 255; //lowPass menu fill
var fill6 = 255; //highPass menu fill
var fill7 = 255; //bandPass menu fill

 //create a key object that holds all the information for the oscillator,
 //the oscillator itself, and functions to adjust the oscillator
function synthKey(halfstep) {
    this.halfstep = halfstep; //indicates where in the chromatic scale the note is
    this.wave = "triangle" //type of wave the oscillator generates
    this.osc = new p5.Oscillator();
    this.env = new p5.Env();
    this.lowPass = new p5.LowPass();
    this.highPass = new p5.HighPass();
    this.bandPass = new p5.BandPass();
    this.fenv = new p5.Env(); //env for filters
    //set the frequency and wave type for the oscillator as well as
    //its envelope. Then start the oscillator so we can play the note anytime
    this.setup = function() {
        this.osc.setType(this.wave);
        this.osc.freq((261.63 * pow(2, this.halfstep / 12)));

        //this.env = new p5.Env();
        this.env.setADSR(0.01, 1.2, 0.3, 0.1);
        this.env.setRange(.5, 0);
        this.osc.amp(this.env);

        this.osc.start();
    }
    //now add some functionality to adjust where the diatonic scale
    //starts and ends, both step-wise and by octaves
    this.halfstepUp = function() {
        this.halfstep += 1;
        this.osc.freq((261.63 * pow(2, this.halfstep / 12)));
    }
    this.halfstepDown = function() {
        this.halfstep -= 1;
        this.osc.freq((261.63 * pow(2, this.halfstep / 12)));
    }
    this.octaveUp = function() {
        this.halfstep += 12;
        this.osc.freq((261.63 * pow(2, this.halfstep / 12)));
    }
    this.octaveDown = function() {
        this.halfstep -= 12;
        this.osc.freq((261.63 * pow(2, this.halfstep / 12)));
    }
    //function to change wave type
    this.changeType = function(type) {
        this.osc.setType(type);
    }
    //basic functions to tell the env to attack or release
    this.attack = function() {
        this.env.triggerAttack();
        this.fenv.triggerAttack();
    }
    this.release = function() {
        this.env.triggerRelease();
        this.fenv.triggerRelease();
    }
    this.setFilter = function(filterType) { //filter type will be indicated by 0 or 1
        if(filterType == 0) { // 0 maps to low pass filter
            this.osc.disconnect();
            this.osc.connect(this.lowPass);
            this.lowPass.freq(this.fenv);
            print("lowPass!")
        } else if(filterType == 1) { // 1 maps to high pass
            this.osc.disconnect();
            this.osc.connect(this.highPass);
            this.highPass.freq(this.fenv)
            print("hightPass!")
        } else if(filterType == 2) { // 2 maps to band pass
            this.osc.disconnect();
            this.osc.connect(this.bandPass);
            this.bandPass.freq(this.fenv);
            this.bandPass.res(10);
            print("bandPass!")
        }
    }
    this.setFilterEnv = function(A, D, S, R, startRange, endRange) {
        this.fenv.setADSR(A, D, S, R);
        this.fenv.setRange(startRange, endRange);
        //connect envelope to the filters
        this.lowPass.freq(this.fenv);
        this.highPass.freq(this.fenv);
        this.bandPass.freq(this.fenv);
    }
}

function setup() {
    createCanvas(400, 400);
    background(200);
    for(i = 0; i < 13; i++) {
        keys.push(new synthKey(i));
        keys[i].setup();
    }
}

function draw() {
    background(200);
    var rectHeight = 45
    var rectWidth = 90
    masterVolume(.5);

    //MAKE BUTTONS FOR WAVE TYPE
    stroke(0);
    strokeWeight(1);
    //make boxes
    rectMode(CENTER)
    fill(fill1);
    rect(width/2, height/2 - 2 * rectHeight, rectWidth, rectHeight);
    fill(fill2);
    rect(width/2, height/2 - rectHeight, rectWidth, rectHeight);
    fill(fill3);
    rect(width/2, height/2, rectWidth, rectHeight);
    fill(fill4);
    rect(width/2, height/2 + rectHeight, rectWidth, rectHeight);
    fill(fill5);
    rect(width/2 - rectWidth, height/2 + 150, rectWidth, rectHeight);
    fill(fill6);
    rect(width/2, height/2 + 150, rectWidth, rectHeight);
    fill(fill7);
    rect(width/2 + rectWidth, height/2 + 150, rectWidth, rectHeight);
    //label boxes
    fill(0);
    textAlign(CENTER)
    textSize(20)
    text("sine", width/2, height/2 - 2 * rectHeight);
    text("triangle", width/2, height/2 - rectHeight);
    text("square", width/2, height/2);
    text("sawtooth", width/2, height/2 + rectHeight)
    text("lowPass", width/2 - rectWidth, height/2 + 150);
    text("highPass", width/2, height/2 + 150);
    text("bandPass", width/2 + rectWidth, height/2 + 150);
}

//MENU CONTROLS
function mouseClicked() {
    //variables for all of the menu box locations
    var rectHeight = 45;
    var rectWidth = 90;
    var rightWaveMenu = width/2 + rectWidth/2;
    var leftWaveMenu = width/2 - rectWidth/2;
    var topFilterMenu = height/2 + 150 - rectHeight/2;
    var bottomFilterMenu = height/2 + 150 + rectHeight/2;
    var lowPassLeft = width/2 - 1.5 * rectWidth;
    var lowPassRight = width/2 - .5 * rectWidth;
    var highPassRight = width/2 + .5 * rectWidth;
    var bandPassRight = width/2 + 1.5 * rectWidth;

    //WAVE FORM MENU CONTROLS

    //if clicked within sine box
    if(mouseX < rightWaveMenu & mouseX > leftWaveMenu
        && mouseY < height/2 - 1.5 * rectHeight && mouseY > height/2 - 2.5 * rectHeight) {
        //make all keys sine waves
        for(i = 0; i < keys.length; i++) {
            keys[i].changeType("sine");
        }
        //highlight currently selected box
        fill1 = color(150, 255, 255);
        fill2 = 255;
        fill3 = 255;
        fill4 = 255;
    } else if(mouseX < width/2 + rectWidth/2 & mouseX > width/2 - rectWidth/2
        && mouseY < height/2 - .5 * rectHeight && mouseY > height/2 - 1.5 * rectHeight) {
        //make all keys triangle waves
        for(i = 0; i < keys.length; i++) {
            keys[i].changeType("triangle");
        }
        //highlight currently selected box
        fill1 = 255;
        fill2 = color(150, 255, 255);
        fill3 = 255;
        fill4 = 255;
    } else if(mouseX < width/2 + rectWidth/2 & mouseX > width/2 - rectWidth/2
        && mouseY < height/2 + .5 * rectHeight && mouseY > height/2 - .5 * rectHeight) {
        //make all keys square waves
        for(i = 0; i < keys.length; i++) {
            keys[i].changeType("square");
        }
        //highlight currently selected box
        fill1 = 255;
        fill2 = 255;
        fill3 = color(150, 255, 255);
        fill4 = 255;
    } else if(mouseX < width/2 + rectWidth/2 & mouseX > width/2 - rectWidth
        && mouseY < height/2 + 1.5 * rectHeight && mouseY > height/2 + .5 * rectHeight) {
        //make all keys sawtooth waves
        for(i = 0; i < keys.length; i++) {
            keys[i].changeType("sawtooth");
        }
        //highlight currently selected box
        fill1 = 255;
        fill2 = 255;
        fill3 = 255;
        fill4 = color(150, 255, 255);
    

    //FILTER MENU CONTROLS
    } else if(mouseY < bottomFilterMenu & mouseY > topFilterMenu &&
        mouseX > lowPassLeft && mouseX < lowPassRight) {

        for(i = 0; i < keys.length; i++) {
            keys[i].setFilter(0);
            keys[i].setFilterEnv(0.3, 1.2, 1000, 0.1, 8000, 400);
        }
        //highlight currently selected box
        fill5 = color(190, 160, 255);
        fill6 = 255
        fill7 = 255

    } else if(mouseY < bottomFilterMenu & mouseY > topFilterMenu &&
        mouseX > lowPassRight && mouseX < highPassRight) {

        for(i = 0; i < keys.length; i++) {
            keys[i].setFilter(1);
            keys[i].setFilterEnv(0.3, 1.2, 1000, 0.1, 8000, 400);
        }
        //highlight currently selected box
        fill5 = 255
        fill6 = color(190, 160, 255);
        fill7 = 255

    }else if(mouseY < bottomFilterMenu & mouseY > topFilterMenu &&
        mouseX > highPassRight && mouseX < bandPassRight) {

        for(i = 0; i < keys.length; i++) {
            keys[i].setFilter(2);
            keys[i].setFilterEnv(0.3, 1.2, 1000, 0.1, 8000, 400);
        }
        //highlight currently selected box
        fill5 = 255
        fill6 = 255
        fill7 = color(190, 160, 255);

    }
}
 
 // --------- KEYBOARD CONTROLS, ONE CHROMATIC SCALE ----------
function keyPressed() {
    if(key === 'Q') {
        keys[0].attack();
    } else if(key === 'W') {
        keys[1].attack();
    } else if(key === 'E') {
        keys[2].attack();
    } else if(key === 'R') {
        keys[3].attack();
    } else if(key === 'T') {
        keys[4].attack();
    } else if(key === 'Y') {
        keys[5].attack();
    } else if(key === 'U') {
        keys[6].attack();
    } else if(key === 'I') {
        keys[7].attack();
    } else if(key === 'O') {
        keys[8].attack();
    } else if(key === 'P') {
        keys[9].attack();
    } else if(key === 'A') {
        keys[10].attack();
    } else if(key === 'S') {
        keys[11].attack();
    } else if(key === 'D') {
        keys[12].attack();


        //KEYSIGNATURE CONTROLS
    } else if(keyCode === LEFT_ARROW) {
        for(i = 0; i < keys.length; i++) {
            keys[i].halfstepDown();
        }
    } else if(keyCode === RIGHT_ARROW) {
        for(i = 0; i < keys.length; i++) {
            keys[i].halfstepUp();
        }
    } else if(keyCode === DOWN_ARROW) {
        for(i = 0; i < keys.length; i++) {
            keys[i].octaveDown();
        }
    } else if(keyCode === UP_ARROW) {
        for(i = 0; i < keys.length; i++) {
            keys[i].octaveUp();
        }
    }
    
}

function keyReleased() {
    if(key === 'Q') {
        keys[0].release();
    } else if(key === 'W') {
        keys[1].release();
    } else if(key === 'E') {
        keys[2].release();
    } else if(key === 'R') {
        keys[3].release();
    } else if(key === 'T') {
        keys[4].release();
    } else if(key === 'Y') {
        keys[5].release();
    } else if(key === 'U') {
        keys[6].release();
    } else if(key === 'I') {
        keys[7].release();
    } else if(key === 'O') {
        keys[8].release();
    } else if(key === 'P') {
        keys[9].release();
    } else if(key === 'A') {
        keys[10].release();
    } else if(key === 'S') {
        keys[11].release();
    } else if(key === 'D') {
        keys[12].release();
    }
}

jdperez Project 12 – Project Proposal

For my final project, I’d like to propose a generative landscape at a more detailed and complex scale than our prior project. Specifically, there are a number of aspects that I’d like to implement into this animation.

One, I plan on using L-systems to generate some of the shapes implemented into the terrain. Perhaps most obviously plants, but also on a more abstract level, L-systems could be used to generate interesting backgrounds/horizons.

Two, I want this project to be distinct from our prior project in the sense that the program will generate a singular landscape that the “player” can roam around in. I like the idea of creating a space that is constant, since then there can be much more attention to detail by the audience. Also, with a scrolling generated landscape, there is no stillness…  and I think stillness is a quality I enjoy in artwork, and look to implement in my own.

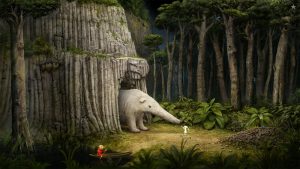
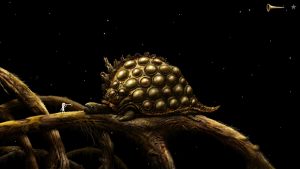
Three (though this is more of an optional aspect), I am considering making my landscape a sort of collage, or mixed media landscape. I mean this in the sense that I would create physical objects that I then take pictures of to implement into the animation. This idea was largely inspired by Samorost 3: an artistic video game, actually largely renown for its soundtrack.

A screenshot from Samorost 3, showing the main character interacting with some kind of anteater
A stylized turtle sitting on the edge of a comet that is actually a root system of some sort of massive tree.

jdperez Looking Outwards 12

My final project will mostly be focusing on animation, so my primary focus for this weeks looking outwards was aesthetic inspiration, as well as interesting ways of generating animations.

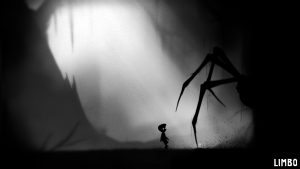
So, while doing research, my largest aesthetic inspiration came from the game Limbo, created by the video game studio Playdead in 2010.

A screenshot of Limbo gameplay.

Limbo is characterized by this sort of disturbing, nightmare-scape. I’d like to incorporate this same beautiful, nightmare mood into my own work.

I think what I admire most about Limbo is its capability to create something so disturbing, but so breathtakingly beautiful at the same time.


After that, I was trying to think of the animation from a coding sense. That’s when I stumbled upon L-systems, actually mentioned in another student’s looking outwards from a few weeks ago. After some initial research, the subject sounded super interesting, and I went looking for artists using L-systems in their animations.

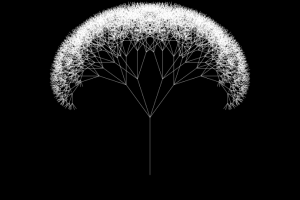
William Chyr came up pretty fast when I googled L-systems, and his work seemed to adequately demonstrate to me the potential of L-systems in regards to visual aesthetic.

A program using L-systems to generate a plant-like image

The above image is probably the simplest of Chyr’s pieces, but also really concisely describes the visuals of L-systems. What interested me more than just his still images, though, were the animations that developed over time.

I think that seeing the program rapidly increase in complexity to form a full image is much more impactful or interesting. It captures the viewers wonder, as he or she watches a line begin to split and branch out without any idea of what the final shape will be.

SaveSave

jdperez Looking Outwards 11

For this week’s looking outwards, I looked at Ryoji Ikeda. Ikeda is a musician/visual artist that uses mathematical complexity and aesthetic to create his work. Much of his work uses raw audio forms, such as the sine wave, at the edge of the human ability to hear. With this audio, he switches between using them to create tones and percussion, with beat patterns emerging throughout many of his pieces.

The visuals are an extremely important aspect to some of his pieces, one of which is called “The Transfinite”. This was a massive installation at the Park Avenue Armory in New York.

What I really appreciate about Ikeda’s work is how it bridges multiple disciplines effectively. As I’ve mentioned in many of my prior looking outwards posts, this is what I aspire to do in my own work.

jdperez Project 11

Although I wouldn’t say that this project is polished or complete, I think it was a great learning opportunity for me. While playing around with a turtle, or many turtles, creating hundreds of thin lines, I realized that turtle graphics (or at least that style of turtle graphics) allowed me to create an entirely different aesthetic — one reminiscent of hand drawing.

This is a bit ironic, since the final product is not that reminiscent of hand drawing…

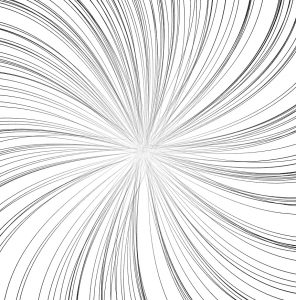
After I had gotten all excited about making these pencil sketch images, I began to play around with more abstract drawings. There were a bunch of these that I was playing around with, and honestly I’m not sure which I like best compositionally, but the last one I worked on was this eyeball-esque shape.

open stage of curling process

The program takes a bunch of straight lines, and bends them towards the center, creating the illusion of a hard circle filled with a bunch of ellipses.

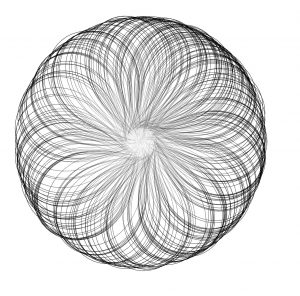
mid way through curling

Then, as the line reaches the center, sin() switches from positive to negative, and it bends in the other direction, moving out towards the parameter.

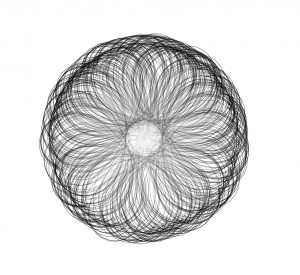
final and most condensed stage

The lines then proceed to curl again towards the center, creating a sort of loose rim around the circle. I enjoy the slowing effect as the line curls, since it creates the feeling of tension or elasticity. I hope you enjoy!

sketch

//Jonathan Perez
//Section B
//jdperez@andrew.cmu.edu
//Project 11
var t1; //turtle
var r0 = [] //initialized random radii from center
var face1 = [] //initialized random face
var face2 = [] //second initialzed face before drawing line
var w = .25 //starting angle

function curl(d) {
    //function that produces the furling and unfurling effect
    //the w variable is incremented to return values from 1 to -1 smoothly
    //and the value is scaled by d / 9
    return sin(2 * PI * (w)) * d / 9; 
}


function drawLine() {
    t1.penDown();
    for (var i = 0; i < 53; i++) {
        var d = t1.distanceTo(240, 240); //turtle distance from center
        t1.setWeight(d / 400 + 0.00); //line thickens as it gets further from center
        t1.forward(10);
        t1.left(curl(d)); //
        if (t1.x > width || t1.x < 0 || t1.y > height || t1.y < 0) {
            return;
        }
    }
}


function setup() {
    createCanvas(480, 480);
    t1 = makeTurtle(240, 240);
    for (var i = 0; i < 250; i++) {
        //create the starting points for each line
        face1.push(random(360));
        r0.push(random(0 + random(20)));
        face2.push(random(360));
    }
}

function draw() {
    //background(200, 200, 170);
    background(255)
    //fill(0);
    //ellipse(width/2, height/2, 37, 37)
    t1.setColor(0);
    t1.setWeight(0.3);
    for (var i = 0; i < 250; i++) {
        t1.penUp();
        //go to respective starting position
        t1.goto(width/2, height/2);
        t1.face(face1[i]);
        t1.forward(r0[i]);
        t1.face(face2[i]);
        //draw line
        drawLine();
    }
    w += .0025
}

//------------------------------------------

function turtleLeft(d) {
    this.angle -= d;
}
 
 
function turtleRight(d) {
    this.angle += d;
}
 
 
function turtleForward(p) {
    var rad = radians(this.angle);
    var newx = this.x + cos(rad) * p;
    var newy = this.y + sin(rad) * p;
    this.goto(newx, newy);
}
 
 
function turtleBack(p) {
    this.forward(-p);
}
 
 
function turtlePenDown() {
    this.penIsDown = true;
}
 
 
function turtlePenUp() {
    this.penIsDown = false;
}
 
 
function turtleGoTo(x, y) {
    if (this.penIsDown) {
      stroke(this.color);
      strokeWeight(this.weight);
      line(this.x, this.y, x, y);
    }
    this.x = x;
    this.y = y;
}
 
 
function turtleDistTo(x, y) {
    return sqrt(sq(this.x - x) + sq(this.y - y));
}
 
 
function turtleAngleTo(x, y) {
    var absAngle = degrees(atan2(y - this.y, x - this.x));
    var angle = ((absAngle - this.angle) + 360) % 360.0;
    return angle;
}
 
 
function turtleTurnToward(x, y, d) {
    var angle = this.angleTo(x, y);
    if (angle < 180) {
        this.angle += d;
    } else {
        this.angle -= d;
    }
}
 
 
function turtleSetColor(c) {
    this.color = c;
}
 
 
function turtleSetWeight(w) {
    this.weight = w;
}
 
 
function turtleFace(angle) {
    this.angle = angle;
}
 
 
function makeTurtle(tx, ty) {
    var turtle = {x: tx, y: ty,
                  angle: 0.0, 
                  penIsDown: true,
                  color: color(128),
                  weight: 1,
                  left: turtleLeft, right: turtleRight,
                  forward: turtleForward, back: turtleBack,
                  penDown: turtlePenDown, penUp: turtlePenUp,
                  goto: turtleGoTo, angleto: turtleAngleTo,
                  turnToward: turtleTurnToward,
                  distanceTo: turtleDistTo, angleTo: turtleAngleTo,
                  setColor: turtleSetColor, setWeight: turtleSetWeight,
                  face: turtleFace};
    return turtle;
}

SaveSave

Jonathan Perez Looking Outwards 9

For this weeks Looking Outwards, I found ikrsek’s looking outwards 5 to be particularly interesting, which discussed the work of Hayden Zezula.

Hayden Zezula is an animator who creates designs for companies such as HBO, Adidas, and Adult Swim. To sum his work up in a word… unsettling.

A lot of Zezula’s work, to me, explores the relationship between 2D and 3D. This perhaps differs or expands a bit from ikrsek’s description of his work as a “3D style on a 2D screen”.

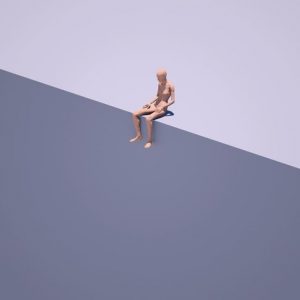
Hayden Zezula’s “end”, a gif depicting a 3D human leaning over and covering his/her face with his/her hands in a 2D landscape.

This image on “end” for instance, shows a 3 dimensional figure sitting on a pretty 2 dimensional surface. The relationship between the two is both visually and thematically interesting.

Also, as ikrsek mentions, much of Zezula’s work has to do with texture. This, to me, is the most interesting aspect of his work.

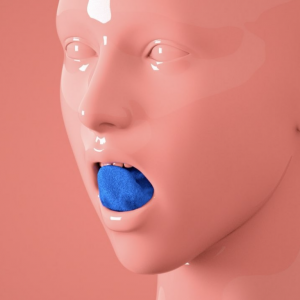
Hayden Zezula’s “Options” gif, displaying a plastic-like human face and a fuzzy, synthetic tongue

The image above shows the kind of unsettling contrast between textures that Zezula likes to use. In fact, it’s much more unsettling if you watch the gif, since part of texture/material is shown through movement (for example, the tongue sort of ripples when it hits the top of the mouth). Not only is this visually really interesting, but actually I think Zezula is working with deeper ideas of the relationship between synthetic and organic things, like how organic things like humans and plants can be defiled by synthetic things; How what should be organic can be “replaced” by something synthetic; and how unnatural organic things can be when twisted and manipulated.

Check out his work for yourself at

his instagram: https://www.instagram.com/zolloc/

or his website: http://zolloc.com/work/


jdperez Project 9

This project was SO MUCH FUN. I had way too many ideas for just this week, so after I finish this post I’ll probably go back to making portraits.

At first I had only abstract concepts to work towards. Like gravity was definitely something I wanted to play around with. Unfortunately, I ran into issues with how ridiculously long it took to load the program every time I ran it…. there was no way I was going to be able to make anything that complicated. I was worried that I might not even finish the project! (every time I loaded the image it took on average 7 minutes to load. That’s like 8 an hour).

So, a good portion of my work on this project was figuring out how to make it run faster. After reading around on the reference page, I figured out if I used loadPixels, I could directly access the pixels[] array, and thus get the pixels information way faster. And.. hurray the code runs almost instantly!

I had a couple hours left, so I didn’t have room to be QUITE as ambitious as I wanted to be for this project (I was honestly going to turn in like 5 different codes as variations on a theme). Nonetheless, I think it turned out pretty well. I wanted to get a sort of old video game aesthetic going, so first I coded that up.


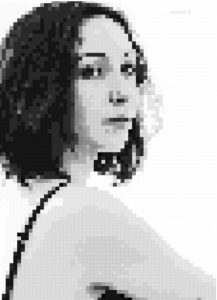
First step in the process. transforming the image into these block-ey pixels and getting the contrast right.

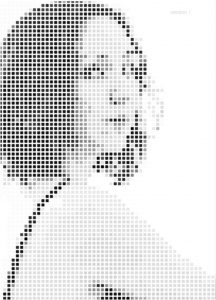
I played around with the size of the squares used to create the image, and the contrast between the darker parts (like the hair and lips) and the lighter parts (skin), but ultimately settled on the image above. Next, I (accidentally) made the stroke() color on the square pixels 10 below the fill color. This gave the image a more tile-esque look to it — closer to that old video game vibe I was going for. I decided to play around with that (intentionally this time), and settled on a white stroke. The reason being, is I wanted to print out the image on a huge poster, and have the affect of a bunch of separated squares, instead of a filled canvas.

Second step in the process. I was playing around with adding a border around the block pixels, and decided I liked the white border.

At this point, I felt like the portrait was pretty good, but I wanted to do something a little bit more. Also, I just wanted to do something with code that is a bit out of my comfort zone… so I implemented objects into the portrait. I made each “tile” start at the bottom of the canvas, and slide upwards at varying speeds until it reached its correct location on the canvas.

I particularly like the effect that occurs around the bottom of the hair, as the dark pixels are sliding under the lighter pixels that have already reached their destination.

Click the in the image below if you want to see the program run again!

sketch

//Jonathan Perez
//Section B
//jdperez@andrew.cmu.edu
//Project 9

var img;
var rectSize = 9 //size of square pixels
var margin = 1 //gap between square pixels


function preload() {
    img = loadImage("https://i.imgur.com/DjcKS6b.jpg");
}

function myTile(x, y, finalY, dy, color) {
    this.x = x
    this.y = y
    this.finalY = finalY
    this.dy = dy
    this.color = color
    this.draw = function() {
        rectMode(CENTER);
        stroke(255);
        strokeWeight(margin+1) // creates a white border around the tiles for visual emphasis and irregularity
        rect(this.x, this.y, rectSize, rectSize);
    };

    this.move = function() {
        if(this.y > this.finalY) {
            this.y = this.y - this.dy; //move the tile upwards
        }
        
    };
}

var myTile
var allTiles = [];

function setup() {
    createCanvas(img.width, img.height);
    background(200); 
    pixelDensity(1); //scales pixelDensity to image
    image(img, 0, 0)
    loadPixels(); //loads pixel array
    for(y = 0; y < img.height; y += rectSize+margin) { //scans through one row at a time from top to bottom
        for(x = 0; x < img.width; x += rectSize+margin) { //scans through all of the pixels in the row
            var d = pixelDensity();
            var off = (y * width + x) * d * 4; //location of the R value of x and y coordinate in pixel array
            var bright = pixels[off];
            
            if(bright  < 30) { //checks current pixels brightness against current brightest pixel
                allTiles.push(new myTile(x, height+(rectSize/2), y, random(2,4), 0));
            } else if(bright < 40 & bright >= 30) {
                allTiles.push(new myTile(x, height+(rectSize/2), y, random(2,4), 20));
            } else if(bright < 60 & bright >= 40) {
                allTiles.push(new myTile(x, height+(rectSize/2), y, random(2,4), 40));
            } else if(bright < 70 & bright >= 60) {
                allTiles.push(new myTile(x, height+(rectSize/2), y, random(2,4), 60));
            } else if(bright < 80 & bright >= 70) {
                allTiles.push(new myTile(x, height+(rectSize/2), y, random(2,4), 70));
            } else if(bright < 90 & bright >= 80) {
                allTiles.push(new myTile(x, height+(rectSize/2), y, random(2,4), 130));
            } else if(bright < 100 & bright >= 90) {
                allTiles.push(new myTile(x, height+(rectSize/2), y, random(2,4), 140));
            } else if(bright < 110 & bright >= 100) {
                allTiles.push(new myTile(x, height+(rectSize/2), y, random(2,4), 140));
            } else if(bright < 120 & bright >= 110) {
                allTiles.push(new myTile(x, height+(rectSize/2), y, random(2,4), 150));
            } else if(bright < 130 & bright >= 120) {
                allTiles.push(new myTile(x, height+(rectSize/2), y, random(2,4), 160));
            } else if(bright < 140 & bright >= 110) { //switch from lower bound to upper bound
                allTiles.push(new myTile(x, height+(rectSize/2), y, random(2,4), 175));
            } else if(bright < 170 & bright >= 140) {
                allTiles.push(new myTile(x, height+(rectSize/2), y, random(2,4), 210));
            } else if(bright < 200 & bright >= 170) {
                allTiles.push(new myTile(x, height+(rectSize/2), y, random(2,4), 220));
            } else if(bright < 220 & bright >= 200) {
                allTiles.push(new myTile(x, height+(rectSize/2), y, random(2,4), 230));
            } else if(bright < 240 & bright >= 220) {
                allTiles.push(new myTile(x, height+(rectSize/2), y, random(2,4), 250));
            } else if(bright < 260 & bright >= 240) {
                allTiles.push(new myTile(x, height+(rectSize/2), y, random(2,4), 255));
            }
            
        }
    }
    print(img.width, img.height)


}

function draw() {
    scale(.65);
    background(255);
    for(i = 0; i < allTiles.length; i++) {
        fill(allTiles[i].color);
        allTiles[i].draw();
        allTiles[i].move();
        
    }
}

function mouseClicked() {
    for(i = 0; i < allTiles.length; i++) {
        allTiles[i].y = height + rectSize/2
        
    }
}

Jonathan Perez Looking Outwards 7

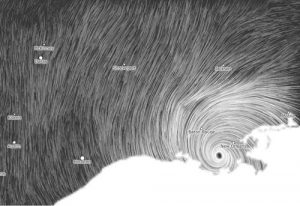
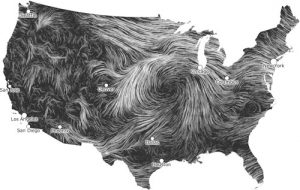
wind map of hurricane isaac

This is a project called Wind Map, by Martin Wattenburg. It takes in surface wind data from the National Digital Forecast Database once per hour, and generates these images based off of that information.

What I enjoy about this project is how it bridges the gap between informational and emotionally representative. Looking at these images, I can both see what the wind patterns were like in that moment and feel the emotion of that wind.


I believe that, when representing information, there is an opportunity to represent much more than just numbers. I almost feel like saying there is a humane obligation to representing more than just numbers… information has real impact in peoples lives, and thus has an emotional quality to it on some scale. Maybe a good example (though maybe a bit extreme) is death counts. Seeing a bar graph of death counts in different wars takes all of the humanity out of that information.

SaveSave

Jonathan Perez Project 7

sketch

//Jonathan Perez
//Section B
//jdperez@andrew.cmu.edu
//Project 7

var a = 100 // inner asteroid diagonal radius
var b = 100 // second inner asteroid diagonal radius
var a2 = 200 //outer astroid diagonal radius
var b2 = 200 //second outer astroid diagonal radius
var lineArrayX = [a, a, a, a, a, a, a, a, a, a, a, a, a, a, a, a, a]
var lineArrayY = [0, 0, 0, 0, 0, 0, 0, 0, 0, 0, 0, 0, 0, 0, 0, 0, 0]
var lineLength = 30
var lineSize = 5
function setup() {
    createCanvas(480, 480);
    background(255);
}

function draw() {
    background(255);
    mouseDistX = dist(mouseX, height/2, width/2, height/2); //X distance from center
    mouseDistY = dist(width/2, mouseY, width/2, height/2); //Y distance from center
    a = map(mouseDistX, 0, 240, 0, 150) //maps X distance from center to max a value
    b = map(mouseDistY, 0, 240, 0, 150); //maps Y distance from center to max b value
    a2 = map(mouseDistX, 0, 240, 0, 300); //maps X distance from center to max a2 value
    b2 = map(mouseDistY, 0, 240, 0, 300); //maps Y distance from center to max b2 value
    traceAstroid(height/2, width/2, a, b);
    drawAstroid(height/2, width/2, a2, b2);
}


//drawing line asteroid
function traceAstroid(x, y, a, b) {
    asteroidX =  a * pow(cos(millis()/1000), 3);// x parametric for an astroid x = acos^3(t)
    asteroidY =  b * pow(sin(millis()/1000), 3);// y parametric for an asteroid y = asin^3(t)
    push();
    translate(x, y);
    for(i = 0; i < lineArrayX.length; i++) {
        fill(255 - i*255/lineArrayX.length); //fades line into background
        noStroke();
        if(i < lineArrayX.length - 1){ //if not the leading point
            //trails behind the leading point
            lineArrayX[i] = lineArrayX[i+1] 
            lineArrayY[i] = lineArrayY[i+1]
        } else { //if the leading point
             //next X and Y coordinates
            lineArrayX[i] = asteroidX
            lineArrayY[i] = asteroidY
        }
        ellipse(lineArrayX[i], lineArrayY[i], lineSize, lineSize);
        ellipse(-lineArrayX[i], -lineArrayY[i], lineSize, lineSize);
    }
    pop();
}


//outer asteroid
function drawAstroid(x, y, a2, b2) {
    push();
    translate(width/2, height/2);
    rotate(TWO_PI/8); //eighth rotation so that inner astroid touches the inside walls
    for(i = 0; i < 472; i++) { // 472 stops the astroid exactly halfway down the vertical sides
        asteroidX2 = a2 * pow(cos(i/200), 3); // x parametric for an astroid x = acos^3(t)
        asteroidY2 = b2 * pow(sin(i/200), 3); // y parametric for an asteroid y = asin^3(t)
        fill(0);
        noStroke();
        ellipse(asteroidX2, asteroidY2, lineSize, lineSize);
        ellipse(-asteroidX2, -asteroidY2, lineSize, lineSize);
    
    }
    pop();
}

I thought this project was super fun… I haven’t had the chance to do any sort of geometry or math in a while, and this was a nice way to sort of flex those old muscles.

To start off, I just clicked around on the geometry site provided for us. I was just looking for a curve that both looked feasible to implement (with out smoke coming out of my ears) and aesthetically interesting. Eventually I stumbled across the astroid, and decided, sure, let’s use that.

After that, I just started playing around with how I could draw the shape and modify it. I knew right off the bat that I wanted to do something with a trailing point… so that was actually the first part I coded. After that I added the second rotated astroid (to make the whole image an astroid evolute).

On their own, these shapes aren’t super exciting. Originally, since the astroid is a hypocycloid, I was going to play around with the number of points in the curve (instead of just four points). Instead, I went a rotation direction instead. Well, I say rotation, but nothing is truly rotating in the image. In the code, the distance between diagonal points is being altered, to create the illusion of rotation. I thought that was pretty cool, especially with the trailing point moving around. To me this animation feels like a card turning around on one point.

Jonathan Perez Project 6

sketch

//Jonathan Perez
//Section B
//jdperez@andrew.cmu.edu
//Project-6


function setup() {
    createCanvas(480, 480);
    background(255);
}

function draw() {
    var y1 =-50
    var y2 = -200
    var dy1 = random(-1, 1);
    var dy2 = random(-1, 1);
    var irisColor = 0 //lower bound on random greyscale for second hand
    var irisColor2 = 10 //upper bound on random greyscale for second hand
    var irisFill; // iris coloring
    var brightCap; // max greyscale value iris color can be

    //iris darkness caps
    if(hour() >= 0 & hour() < 7) { //almost black at night-time
        brightCap = 100
    } else if(hour() >= 7 && hour() < 8) { //light grey during sunrise
        brightCap = 200
    } else if(hour() >= 8 && hour() < 19) { //light grey to white during the day
        brightCap = 300
    } else if (hour() >= 19 && hour() < 20) { //same as sunrise
        brightCap = 200
    } else { //same as night-time
        brightCap = 100
    }

    push();
    translate(width/2, height/2);


    push();
    rotate(minute() * TWO_PI/60);
    stroke(0);
    strokeWeight(1);
    line(0, 0, 0, -height); //minute hands
    pop();

    //pupil detail
    push();
    if(hour() <= 12) {
        rotate(hour() * TWO_PI/12);
    } else {
        rotate(hour() * TWO_PI/12 + TWO_PI/24); //offsets to continue creating more vertices
    } 
    stroke(0);
    fill(0);
    rect(-30, -30, 60, 60); //stacked squares to create a star-pupil shape
    pop();


    //iris detail
    push();
    rotate(millis() * TWO_PI/60000);
    for(i = 0; i < 80; i++) {
    if(irisColor2 < brightCap) { 
        irisColor += 3.5
        irisColor2 += 3.5
    }
    irisFill = random(irisColor, irisColor2);
    strokeWeight(2);
    fill(irisFill);
    point(0, y1); //inner detail
    point(0, y2); //outer detail
    if(y1 + dy1 < -120) {
        dy1 = random(1.5); //max range is 120
    } else if(y1 + dy1 > 0) {
        dy1 = random(-1.5);
    }
    if(y2 + dy2 < -200) { //max range is 200
        dy2 = random(1.5);
    } else if(y2 + dy2 > -100) {
        dy2 = random(-1.5);
    }
    y2 += dy2;
    y1 += dy1


    }

    pop();
}

For this project, I wanted to mimic the circular shape of the traditional clock in something organic. Incidentally, while playing around with some random behavior, I stumbled across the human eye as inspiration.

This project feels pretty incomplete, and I would like to implement some changes relating color to time. For instance, perhaps the color of the iris could mimic the color of the sunset or something.