jennyzha – final project

Final_Project

sketch

// Jenny Zhang
// jennyzha
// Section D 
// Final Project

var img;
//setting a global variable for picture the user can paint
var col = [0, 0, 0, 0];
//setting a an initial color for the paintbrush color
var aSlider;
//setting a global variable for the slider that will control the width of the brush
var SizeOfBrush = 10;
//setting initial SizeOfBrush for the width of the brush

function preload() {
    var imgs = [];
    //preloading all of the possible images the user can paint into an array

    imgs[0] = "http://i.imgur.com/UyyTNyF.png";
    imgs[1] = "http://i.imgur.com/sW4fWRP.png";
    imgs[2] = "http://i.imgur.com/6HBfsCu.png";    
    imgs[3] = "http://i.imgur.com/60ITEbG.png";
    imgs[4] = "http://i.imgur.com/Zli7OsC.png";
    imgs[5] = "http://i.imgur.com/ztRhRts.png";
    imgs[6] = "http://i.imgur.com/Qx8zJO4.png";    
    imgs[7] = "http://i.imgur.com/mzxbto4.png";
    imgs[8] = "http://i.imgur.com/vXdn15r.png";
    imgs[9] = "http://i.imgur.com/shwrAy5.png";
    imgs[10] = "http://i.imgur.com/manEqm3.png";
    imgs[11] = "http://i.imgur.com/oh8iKpK.png";
    imgs[12] = "http://i.imgur.com/oh8iKpK.png";
    imgs[13] = "http://i.imgur.com/306OVy6.png";
    imgs[14] = "http://i.imgur.com/xJVNo7U.png";
    imgs[15] = "http://i.imgur.com/4mv8uhP.png";
    imgs[16] = "http://i.imgur.com/MvNo2DV.png";
    imgs[17] = "http://i.imgur.com/dxlMoKR.png";
    imgs[18] = "http://i.imgur.com/mxti4c2.png";
    imgs[19] = "http://i.imgur.com/hDtDFhD.png";
    imgs[20] = "http://i.imgur.com/shwrAy5.png";
    
    var num = floor(random(0, imgs.length));
    //randomly choosing a picture from the array to paint
    img = loadImage(imgs[num]);
    //assigning the image to the variable img
}

function setup() {
    createCanvas(800, 650);
    background(145, 200, 200);

    aSlider = createSlider(10, 50, SizeOfBrush);
    aSlider.position(670, 620);
    //creating the slider, placing it at the bottom of the canvas

    fill(250);
    noStroke();
    rect(0, 300, 800, 650); 
    //creating the canvas that the user will draw on 

    fill(145, 200, 200);
    noStroke();
    rect(0, 590, 800, 650); 
    //creating the canvas that the user will draw on 

    fill(0);
    textSize(20);
    text("Paint Away!", 0, 20);
    //writing the title of the page

    fill(0);
    textSize(15);
    text("Click on the painting to choose your color, then paint by clicking on the bottom canvas provided.", 0, 40); 
    //writing the instructions to choosing your color    

    fill(0);
    textSize(15);
    text("Move the slider in the bottom right corner to change the size of your paint brush.", 0, 55); 
    //writing the instructions to choosing your paintbrush size
}

function mousePressed(){
    SizeOfBrush = aSlider.value();
    //setting the width of the brush SizeOfBrush to the slider value
    //this is adapted from lab 15

    if (mouseX > 0 & mouseX < 800 && mouseY > 0 && mouseY < 350) {
        col = get(mouseX, mouseY);
    }
    //creating a restriction that the user can only get their color from the provided image

    else if  (mouseX > 0 & mouseX < 800 && mouseY > 350 && mouseY < 600 - SizeOfBrush/2){
        fill(color(col));
        ellipse(mouseX, mouseY, SizeOfBrush);
    }
    //telling the program that anywhere else besides the picture, they can draw a single ellipse

    fill(145, 200, 200);
    rect(70, 615, 250, 15);
    //effectively "erases"/"refreshes" the text every time the draw function is called

    fill(0);
    textSize(12);
    text("Your brush color is (" + col + ")", 70, 625); 
    //creates a text box telling you your current paintbrush color
    //this is adapted from assignment 11A, text rain
}

function mouseDragged() {
    SizeOfBrush = aSlider.value();
    //setting the brush size to the slider value

    if (mouseX > 0 & mouseY > 0 && 
        mouseX < 800 && mouseY > 300 && 
        mouseY < 600 - SizeOfBrush/2) {
            noStroke();
            fill(color(col));
            //setting the restriction so that when the mouse is dragged the user can draw in the provided canvas area

            ellipse(mouseX, mouseY, SizeOfBrush);
    }
}

function draw() {
    image(img, 0, 60); 
    //place current picture the user will draw

    fill(color(col));
    rect(10,595,50,50);
    //creates the square in the botton that shows the current color the user is using
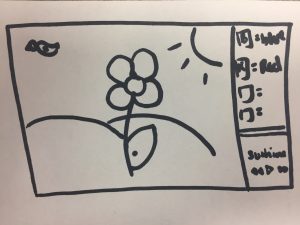
}

My final project is essentially a virtual coloring book. The steps are very simple and easy. All you have to do is refresh the page if you don’t want to paint the painting provided until you are satisfied with the one loaded. Next, choose your first color to paint with by clicking on the color in the painting. Afterwards, choose the thickness of your brush by sliding the slider in the bottom right corner. Finally, click or drag across the bottom half of the screen, or your “canvas” to draw!

*unfortunately, wordpress is unable to handle the canvas size of the program, that being said, please refer to the attached zip file for the full effect – thank you!*

jennyzha – looking outwards 12

For looking outwards 12 I already decided the type of projects I was looking for since I was relatively set on what I wanted to be my final project – an interactive digital coloring book.

http://whichlight.com/

First in my search, I found “whichlight,” who focuses in interactive and technical art. His passion, however, is something that comes across extremely clear not only in his work but in his about me statement: “I make media and products that invite people to be expressive, playful, and creative.” It was this optimism and happiness so clear in his work that I was drawn to his work and that further inspired my own idea.

His projects are playful, colorful, interactive, and just make people happy – exactly what I want for my project. Nonetheless, one thing I realized from viewing his projects is that there isn’t much purpose, but rather they are generally fun things to do while passing the time. Maybe adding some kind of “goal” in his projects would help drive more usage?

http://www.nanikawa.com/projects/everygallery 

The second project I found interesting was by a company called Nanika, “founded with the aim to explore interaction between man and machine beyond traditional input and output.” Of their collection, the EveryGallery project for Nokia was one of my favorites.

The idea was mixing the old with the new, framing digitally rendered photos with antique-esque frames to complement each other. While the the idea behind it was beautiful, what I found great about the project was actually the technique of brushstrokes. It sparked an idea for my own project of varying brush strokes somehow, making the process more independent for the user and to have more range in final project. Additionally, I think something Nanika could have incorporated more was the end user, possibly having pictures of them drawn instead of a pre-made stranger.


jennyzha – Project 12

For my final project I plan on making an interactive digital coloring book. This coloring book will feature a playlist based on the picture (happier music for happier scenes, calmer music for calmer scenes, etc.). The program would generate a different picture every time the user refreshed the page and then the user would have the option to change the color of their brush based (possibly?) a key stroke (b = blue, r = red, etc.) or possibly have them just be filled in based on the original image’s color. Having a strong passion for music and art, I think I will have a lot of fun with this project, choosing pictures, matching music, and overall creating a fun program to use.

jennyzha – project 11

sketch

// Jenny Zhang
// jennyzha@andrew.cmu.edu
// Section D 
// Project 11

function setup() {
    createCanvas(480, 380);
    background(165,236,250);

//making the hilly background

    noStroke();
    fill(0,255,0);
    ellipse(300,380,650,650);

    noStroke();
    fill(0,200,0);
    ellipse(100,380,550,550);

    noStroke();
    fill(178, 255,102);
    ellipse(400,380,850,350);
}

function mousePressed(){
    
    var flower = makeFlower(mouseX,mouseY); //creates flowers wherever you click 
    flower.setColor(color(random(220,255),random(50,255),random(50,100))); //sets random colors ranging from red to orange to yellow
    flower.setWeight(1) //sets the weight for the lines of the flowers
    var size = random(1,15); //setting random sizes for the flowers
   
    for(var i = 0; i < 1000; i++) {
        flower.penDown();
        flower.forward(size);
        flower.right(30);
        flower.forward(size);
        flower.right(30);
        flower.forward(size);
        flower.right(30);
        flower.forward(size);
        flower.right(30);
        flower.forward(size);
        flower.right(30);
        flower.forward(size);
        flower.penUp();
        flower.right(100);
        flower. right(30);
        flower.setWeight(1);    
    }
}

function turtleLeft(d){
  this.angle-=d;
}

function turtleRight(d){
  this.angle+=d;
}

function turtleForward(p){
  var rad=radians(this.angle);
  var newx=this.x+cos(rad)*p;
  var newy=this.y+sin(rad)*p;
  this.goto(newx,newy);
}

function turtleBack(p){
this.forward(-p);
}

function turtlePenDown(){
  this.penIsDown=true;
}

function turtlePenUp(){
  this.penIsDown = false;
}

function turtleGoTo(x,y){
  if(this.penIsDown){
    stroke(this.color);
    strokeWeight(this.weight);
    line(this.x,this.y,x,y);
  }
  this.x = x;this.y = y;
}

function turtleDistTo(x,y){
  return sqrt(sq(this.x-x)+sq(this.y-y));
}

function turtleAngleTo(x,y){
  var absAngle=degrees(atan2(y-this.y,x-this.x));
  var angle=((absAngle-this.angle)+360)%360.0;return angle;
}

function turtleTurnToward(x,y,d){
  var angle = this.angleTo(x,y);
  if(angle< 180){
    this.angle+=d;
  }
  else{
    this.angle-=d;
  }
}

function turtleSetColor(c){
  this.color=c;
}

function turtleSetWeight(w){
  this.weight=w;
}

function turtleFace(angle){
  this.angle = angle;
}

function makeFlower(tx,ty){
  var turtle={x:tx,y:ty,angle:0.0,penIsDown:true,color:color(0),weight:1,left:turtleLeft,
  right:turtleRight,forward:turtleForward, back:turtleBack,penDown:turtlePenDown,
  penUp:turtlePenUp,goto:turtleGoTo, angleto:turtleAngleTo,
  turnToward:turtleTurnToward,distanceTo:turtleDistTo, angleTo:turtleAngleTo,
  setColor:turtleSetColor, setWeight:turtleSetWeight,face:turtleFace};
  return turtle;
}

I created a hilly spring terrain, where the user’s clicks create flowers wherever they click. With each click, the color is varied randomly between colors of red to yellow, as are the sizes. I kept the stroke weight consistent since when varied, if it is too thick the large flowers look too blurry and when too thin you can’t see them as well.

jennyzha – project 10

sketch

//Jenny Zhang
//jennyzha@andrew.cmu.edu
//Section D
//Project 10

var bird1;
var bird2;
var bird3;

var bird1X = 500;
var bird1Y = 150;
var bird2X = -200;
var bird2Y = 100;
var bird3X = 650;
var bird3Y = 200;

var birdWidth = 40;
var birdHeight = 30;

var cloud1;
var cloud2;
var cloud3;

var cloud1X = 700;
var cloud1Y = 60;
var cloud2X = 540;
var cloud2Y = 40;
var cloud3X = 700;
var cloud3Y = 60;

var cloudWidth = 40;
var cloudHeight = 30;

function preload() {
	bird1 = loadImage("https://i.imgur.com/nqLPhAm.png");
	bird2 = loadImage("https://i.imgur.com/nqLPhAm.png");
	bird3 = loadImage("https://i.imgur.com/nqLPhAm.png");
	
	cloud1 = loadImage("https://i.imgur.com/rkkaoGb.png");
	cloud2 = loadImage("https://i.imgur.com/rkkaoGb.png");
	cloud3 = loadImage("https://i.imgur.com/rkkaoGb.png");
}

function setup() {
	createCanvas(480,280);
	frameRate(120);
}

function draw(){
	background(248,248,255);
	drawhill();
	drawhill1();
	drawhill2();
	drawbird();
	drawcloud();
}


//draws the hilly background
var terrainSpeed = 0.00095;
var terrainSpeed1 = 0.0008;
var terrainSpeed2 = 0.00065;
var hill = 0.020;

function drawhill() {  
    noStroke();
    fill(154,205,50); 

    beginShape();
        for (x=0; x < width; x++) {
            var t = (x * hill) + (millis() * terrainSpeed);
            var y = map(noise(t), 0, .95, 120, 300);
            vertex(x, y);
            vertex(0, height);
            vertex(width, height);
        }
    endShape();
}

function drawhill1() {  
    noStroke();
    fill(85,107,47); 

    beginShape();
        for (x=0; x < width; x++) {
            var t = (x * hill) + (millis() * terrainSpeed1);
            var y = map(noise(t), 0, .8, 140, 300);
            vertex(x, y);
            vertex(0, height);
            vertex(width, height);
        }
    endShape();
}

function drawhill2() {  
    noStroke();
    fill(0,100,0); 

    beginShape();
        for (x=0; x < width; x++) {
            var t = (x * hill) + (millis() * terrainSpeed2);
            var y = map(noise(t), 0, .65, 160, 300);
            vertex(x, y);
            vertex(0, height);
            vertex(width, height);
        }
    endShape();
}


//draws the birds
function drawbird() {
	image(bird1, bird1X, bird1Y, birdWidth, birdHeight);
	bird1X -= random(1,2);
	bird1Y -= random(-0.5,0.5);

	if (bird1X < -birdWidth) {
		bird1X = 500;
	}

	image(bird2, bird2X, bird2Y, birdWidth, birdHeight);
	bird2X += random(0,0.5);
	bird2Y += random(-0.5,0.5);

	if (bird2X < -birdWidth) {
		bird2X = -100;
	}

	image(bird3, bird3X, bird3Y, birdWidth, birdHeight);
	bird3X -= random(0,2);
	bird3Y -= random(-0.5,0.5);

	if (bird3X < -birdWidth) {
		bird3X = 650;
	}
}

function drawcloud() {
	
	image(cloud1, cloud1X, cloud1Y, cloudWidth, cloudHeight);
	cloud1X -= random(0,2.5);
	cloud1Y -= random(-.25,.25);

	if (cloud1X < -cloudWidth) {
		cloud1X = 690;
	}

	image(cloud2, cloud2X, cloud2Y, cloudWidth, cloudHeight);
	cloud2X -= random(0,2.5);
	cloud2Y -= random(-.25,.25);

	if (cloud2X < -cloudWidth) {
		cloud2X = 530;
	}

	image(cloud3, cloud3X, cloud3Y, cloudWidth, cloudHeight);
	cloud3X -= random(0,2.5);
	cloud3Y -= random(-.25,.25);

	if (cloud3X < -cloudWidth) {
		cloud3X = 600;
	}	
}

With the cold weather coming upon us, I decided to create a spring theme as I begin to miss the warmer weather. Importing pictures from imgur using the preload function for the birds and clouds, I had them come flying across the screen as the code ran. As for the landscape/background, at first, I only had two hills for the terrain, but didn’t think it was enough and added the third layer. The same was true for the birds and clouds. At first I only had the birds, but then decided to import the clouds as well to create a fuller scene. Ultimately using the noise function, while playing with the inputs each time I was able to create a sense of depth.

jennyzha – Looking Outwards 10

Vera-Maria Glahn is a managing director and partner at FIELD, “create[ing] expressive and dynamic artworks for digital platforms: audio-visual installations, experiences for web and mobile, and shareable digital artefacts.” Glahn received her undergraduate education from the Gymnasium Theodorianum for Abitur, Arts, German, English, and Philosophy, and her Masters in Visual Communication from Kunsthochschule Kassel.

Barricade SS15: ssbarricade8 by FIELD.IO

As a member of FIELD, Glahn as worked on many astonishing projects, such as the Adidas by Stella McCartney: Barricade SS15 campaign. This particular project caught my eye because, as a business major with a concentration in Marketing, I found these works particularly eye-catching, effective, and beautiful.Barricade SS15: ssbarricade5 16x9 by FIELD.IOBarricade SS15: ssbarricade4 16x9 by FIELD.IO


Glahn uses “dynamic flow fields precisely mapped into the scene, emphasize Caroline Wozniacki’s powerful moves, creating a visual balance of technical precision and fluid elegance. The print and motion graphics launched in two sets, timed with the Australian Open and the French Open.” The outcome is truly the perfect balance between technical precision and fluid elegance. It promotes the sheer power of the players, the velocity of the ball, all while, at the same time, emphasizing the feminine qualities of the women in the most visually eloquent way.

Barricade SS15: ssbarricade3 by FIELD.IO

jennyzha – Project 09

sketch

// Jenny Zhang
// jennyzha
// Section D
// Project 09

var jennyzha;

function preload() {
    var Image = "https://i.imgur.com/c3AjAad.jpg";
    jennyzha = loadImage(Image);
}

image(jennyzha);

function setup() {
    createCanvas(480, 480);
    background(0);
    jennyzha.loadPixels();
    frameRate(10);
}

function draw() {
    var px = random(width);
    var py = random(height);
    var ix = constrain(floor(px), 0, width-1);
    var iy = constrain(floor(py), 0, height-1);
    var ColorXY = jennyzha.get(ix, iy);

    push();
    stroke(ColorXY);
    strokeWeight(1);
    line(px, py, px, py + 30); 
    pop();

    stroke(ColorXY);
    strokeWeight(1);
    line(mouseX, mouseY, mouseX, mouseY + 30); 
}

This project took me a lot of trial and error, interestingly enough, not because of the code but because of imgur and the image itself. First, after seeing that my code would not load, and feeling fairly confident in my code itself, I realized that I had used the wrong url for the image on imgur. Second, after the code started to run the way I wanted it to, I saw that it was loading just the background. This is when I realized that it was because the image was over 1000X1000 pixels and my canvas was only the max requirement, 480X480. I quickly went back to the original image, shrunk it down and the code worked perfectly.

Looking Outwards – 09

During Week 5, my friend Asher Blackburn made a looking outwards post that I found particularly eye catching since it pertained to one of my favorite music artist’s album art – Flume.

In his post, he talks about Jonathan Zawada and his mathematically computed flowers that are so realistic it was as if they were photoshopped pictures of flowers. Asher, comments on how bold and righteous it is of Zawada to take the harder route of utilizing 3D animations algorithms rather than simply painting the flowers and I would definitely agree. When taking a closer look into the animated flowers, it is truly astounding the realism and detail that the algorithms were able to generate.

Looking Outwards – 08

“Dear Data” is by two women, Giorgia Lupi and Stefani Posavec. Lupi is an information designer in NYC, and Posavec is a designer in London. The two women actually only met twice, at EYEO 2013 and 2014, where, in between they had a year-long collaborative data project. The challenge was both in their data collection and in their data visualizations. With every postcard they sent to each other, they would visualize something new in their daily lives, using a new creative visual system.

In their presentation, I love their camaraderie with each other, it makes the entire presentation come alive. Another aspect I really loved was the visualization of everything, i.e. the map of where they lived and the traveling their post cards did. Showing and explaining some of their postcards was also very helpful in regards to really understanding what went on during their processes. I loved how innovative some of the projects were, from using materials such as lipsticks, the design of the visualization, to just the topic of the data, these two women proved to be truly restless in regards to finding something new with every postcard. Nonetheless, overall the entire presentation was extremely powerful because of its structure, and clarity in their thinking, the timeline, and data visualization explanation.

jennyzha – looking outwards 07

This project stemmed from a request made by the Dalai Lama himself, in 2014, to design an Atlas of Human Emotion. The purpose of the atlas was to design a map that would ultimately guide emotional travelers, and help people find a state of calm.

A couple of key atlas concepts include the fact that emotions are at the core of what makes us human and are distinct from one another. Furthermore, these emotions have several states, varying in intensity which, within each emotion, each emotional state has actions associated with it caused by a trigger. Finally, each emotion is associated with a particular Mood and a clearer understanding of one’s Emotions can contribute to the feeling of a Calm State.

What I really love about this is how much consideration went into the flawless integration and transition of the data into the visualization. It’s attention to detail, keeping the key Atlas concepts in mind throughout the creation process, making sure different features would represent those different concepts.

Atlas of Emotions