katieche-project-07

katieche-07

/*
katie chen
katieche@andrew.cmu.edu
project 07
section E
*/

function setup() {
    createCanvas(480, 480);
}

function draw() {
    background(255, 210, 190);
    var mx = constrain(mouseX, 60, 450);

push();
beginShape();
    // points 
    var n1 = 400;
    // big circle radius
    var a1 = 100;
    // small circle radius
    var b1 = map(mx, 0, width, 0, 10);
    // distance from center of the interior circle to P (what draws the line)
    var h1 = map(mx, 0, width, 0, 300);

    noFill();
    stroke(255, 222, 221);
    strokeWeight (0.2);
    translate(width/2, height/2); //center the object
    for(var i = 0; i < n1; i++) {
        var t = map(i, 0, n1, 0, TWO_PI); 
        var x1 = (a1-b1)*cos(t) + h1*cos(t*(a1-b1)/b1)
        var y1 = (a1-b1)*sin(t) + h1*sin(t*(a1-b1)/b1)
        vertex(x1, y1);
endShape();
    }
pop();

push();
beginShape();
    // points
    var n = 400;
    // big circle radius
    var a = map(mouseY, 0, height, 0, 200);
    // small circle radius
    var b = 10;
    // distance from center of the interior circle to P (what draws the line)
    var h = map(mouseX, 0, width, 0, 200);
    noFill();
    stroke(255, 231, 226);
    strokeWeight (0.2);
    translate(width/2, height/2); //center the object
    for(var i = 0; i < n; i++) {
        var t = map(i, 0, n, 0, TWO_PI); 
        var x = (a-b)*cos(t) + h*cos(t*(a-b)/b)
        var y = (a-b)*sin(t) + h*sin(t*(a-b)/b)
        vertex(x, y);
endShape();
    }

pop();


}

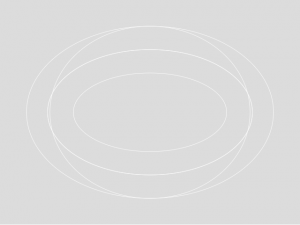
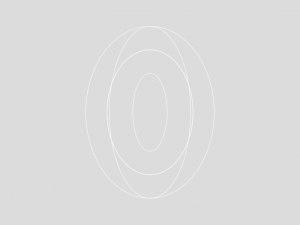
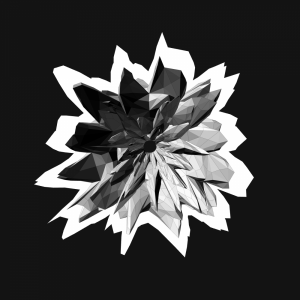
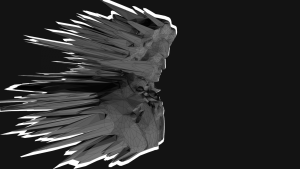
I wanted to create 2 shapes, one that has less points and shows more of the shape being drawn, and one that’s super complicated. The pinker shape is more complicated so I constrained it before it jumbles into a solid donut shape.

The white line shape is what I like more since if you place your mouse near the center-left hand side of the canvas and move your mouse from the top to the bottom of the canvas, you can kind of see the spirograph being drawn. Moving your mouse from left to right makes the swirls bigger.

katieche-project-06

katieche-06

/*
katie chen
section e
project 06
katieche@andrew.cmu.edu
*/

function setup() {
    createCanvas(300, 300);
}

function draw() {
	var h = hour();
	var m = minute();
	var s = second();
	angleMode(DEGREES);

	// make it 12 hours!
	if (h > 11) {
		h = h - 12;
	}

	else {
		h=h;
	}

	background (196, 220, 255);
	textAlign(CENTER);
	text(h+":"+m+":"+s, width/2, 40);

	noStroke();

	// minute / rabbit rising
	push();
	fill (250);
	ellipse (150, 370-m, 100, 170);
	ellipse (125, 290-m, 20, 90);
	ellipse (175, 290-m, 20, 90);
	fill (250, 210, 196);
	ellipse (120, 325-m, 10, 10);
	ellipse (180, 325-m, 10, 10);
	fill (0);
	ellipse (125, 320-m, 7, 7);
	ellipse (175, 320-m, 7, 7);
	pop();

	//hour / sun
	push();
	fill (255, 235, 127);
	ellipse (260*h/11, 100, 40, 40);
	noFill();
	stroke(255, 236, 170);
	strokeWeight (2);
	ellipse (260*h/11, 100, 55, 55);


	pop();
	//seconds / clouds 
	push();
	fill (250);
	ellipse(300*s/59, 100, 30, 30);
	ellipse(300*s/59, 105, 50, 20);
	ellipse(370*s/59, 140, 40, 30);
	ellipse(380*s/59, 145, 80, 20);
	ellipse(220*s/59, 125, 60, 20);
	ellipse(210*s/59, 120, 40, 20);
	ellipse(260*s/59, 140, 40, 10);
	pop();


}

I wanted to do something completely different from the traditional rotating clock. I tried to create more of a story, where the sun and clouds move horizontally like in real life and the rabbit rises and sinks.

katieche-looking outwards 06

I chose the randomness project done by Linyi Dai, an architecture student at RISD, after seeing her work posted on an article about randomness in computation. As seeen from the video above, the project is simple as it generates what appears to be a series of random lines and shapes over time. In the written portion of her project, she talks about how she opted for pseudo-randomness, creating an unpredictable interaction between the patterns she’s already derived. I thought what she had written about randomness, stating that it was used in a generative manor to overcome the creative limitations of the creator, was really interesting and meaningful. Initially, I didn’t have much of an interest or understanding of why randomness was used so often, but following her comments I can see why.

https://www.fastcodesign.com/3052333/the-value-of-randomness-in-art-and-design
http://lostritto.com/risd2015spring-seminar/?cat=5

katieche-project 05

katieche-05

// katie chen
// project 05
// section E
// katieche@andrew.cmu.edu

function setup (){
	createCanvas (480, 480);
	background (230);

	var c = 80; // how close together they are in a row
    var lh = 80; // line height
    var w = 80; // width
    rectMode(CENTER);

    for (var y = 0; y < 9; y++) {
        var z = 9;
        for (var x = 0; x < z; x++) {
            //var z = 10;
            var py = y * lh;
            var px = x * c;

            noFill();
            stroke(220);
            
            if (y % 2) {
                var z = 8;
                strokeWeight(1);
                stroke(240);
                rect(px+(0.5*c), py, w, w);
                rect(px+(0.5*c), py, 50, 50);
                // white horizontal long rectangles
                stroke(250);
                strokeWeight(2);
                rect(px, py, 70, 20);
                // white diagonals
                stroke(250);
                strokeWeight(2);
                //line (px-30, py-30, px+30, py+30);
                //line (px-30+(2*c), py-30, px+30, py+50);
                //line (px-30+(2.2*tw), py-30, px+30, py+50+(2.2*tw));

            }

            else {
            	strokeWeight(1);
            	stroke(240);
                rect(px, py, 70, 30);
                rect(px, py, 30, 60);
                strokeWeight(2);
            	stroke(250);
                rect(px, py, 75, 10);
                rect(px, py, 10, 70);
                // white vertical long rectangles
                stroke(250);
                strokeWeight(2);
                rect(px+(0.5*c), py, 20, 150);
                // white diagonals
                stroke(250);
                strokeWeight(2);
                //line (px-30, py-30, px+30, py+30);
                //line (px-30+(2*c), py-30, px+30, py+50);
                //line (px-30+(2*tw), py-30, px+30, py+50+(2*tw));

             }
        }
    }
    noLoop();

}

function draw (){
		
}

For this project, I started off by looking at existing wallpapers for inspiration. After doing some sketching, I tried to recreate my sketches but then started going into a different direction and doing more guess and check. I knew I wanted to keep a neutral and subtle palette.

katieche – project 04

katieche-04

 	var x = 200;
 	var curve = 400;
 	var v = 7;


function setup() {
	createCanvas (400, 300);
}

function draw(){
		background(240);

	for (var i = 0; i<=500; i++) {
		strokeWeight (0.2);
		stroke (180);
		// bottom left
		line(i*v, height, x, height-i*v);
		// bottom right
		line (mouseX, i*v, i*v, mouseY);
		// top right
		line(x, i*v, width-(i*v), 0); 
		// top left
		line(i*v, mouseY, mouseX, i*v);

	}

}

This project was difficult for me as it was hard for me to understand which values to multiply to which variable. It was a lot of guess and check and hard to get the curves to do exactly what I wanted, but I think the end result is pretty fun to play with.

katieche – looking outwards 04

shimon the robot

Shimon is a robot first of his kind created at Georgia Institute of Technology. Unlike some robots who just make beeping noises and call that a song, Shimon actually has four arms and knows how to play traditional, analog instruments. He has been programmed with over 5,000 songs, two million motifs, riffs, and licks. Particularly, he specializes in the marimba. A lot of robots can play preprogrammed songs, as did Shimon for the beginning of his lifetime, but what’s fascinating about Shimon is that he now is able to play original compositions! Researchers are still working on how to improve his musical abilities, as current original compositions are a little sporadic since Shimon can’t think in long term structures as well. If you pay attention to his song, it seems like the music is produced in short bursts that complete the song.

katieche – looking outwards 03


Ever since I was young, I had an interest in fashion, so when I saw Iris Van Herpen’s 3D generative work, I was very intrigued. Unfortunately her website only showcased examples and videos of her work and not how the work was made, so I had to search for other articles. Some of her pieces are hand molded, however, a lot are also 3D printed work as she collaborated with Stratasys’ unique Objet Connex multi-material 3D printing technology. They aim to use generative art to create non-traditional pieces that “animate the body in an organic way,” (dezeen) utilizing computational methods. Although I was unable to find what exact programs or languages she uses to generate her pieces, I did find that for her Magnetic Motion SS 2014 Paris Fashion Week show she collaborated with Canadian architect Philip Beesley and used a combination of advanced computation, synthetic biology, and mechatronics engineering to create the line.

her work
article about her collaboration with Stratasys

katieche – project 03 – dynamic drawing

katieche-03

// alters:
// dot position
// line length
// line and dot color
// speed that dots follow cursor
// angle of lines

// dot 1
var x = 300;
var y = 300;
var diffx = 0;
var diffy = 0;

// dot 5
var a = 320;
var b = 240;
var diffa = 0;
var diffb = 0;

// dot 3
var c = 320;
var d = 240;
var diffc = 0;
var diffd = 0;

// dot 4
var e = 320;
var f = 320;
var diffe = 0;
var difff = 0;

// dot 2
var g = 270;
var h = 220;
var diffg = 0;
var diffh = 0;

function setup() {
    createCanvas(640, 480);
    background(220);
}

function draw() {
	background(0);
    
    stroke(500-mouseX);
    // lines that follow cursor
    // line 1
    line(320, 240, mouseX, mouseY);
    // line 2
    var mx = map(mouseX, 0, width, mouseX, mouseY);
    line(320, 240, mx, mouseY);
    // line 3
    var mx = map(mouseX, 0, width, mouseX, mouseY);
    line(320, 240, mx, mouseY);
    // line 4
    var mx = map(mouseX, 0, width, mouseX, mouseY);
    line(320, 240, mx, mouseY);
    // line 5
    var mx = map(mouseX, 100, width,mouseX, mouseY);
    line(320, 240, mx, mouseY);

    // longer lines
    stroke(320-mouseX);
    // line 1
    var mx = map(200, mouseY, width, -260, 380);
    line(320, 240, mx, mouseY);
    // line 2
    var mx = map(-mouseX, 40, width, 760, -180);
    line(320, 240, mx, mouseY);
    // line 3
    var mx = map(mouseX, 30, width, -260, 100);
    line(320, 240, mx, mouseY);
    // line 4
    var mx = map(-mouseX, 300, width, 660, 190);
    line(320, 240, mx, mouseY);

    // dot 1 (slow)
    // dots are in order: slow to fast
    noStroke();
	diffx = mouseX - x;
    diffy = mouseY - y;
    x = x + 0.01*diffx;
    y = y + 0.01*diffy;
    fill (250-mouseY);
    ellipse(x, y, 10, 10);

    // dot 2
    diffg = mouseX - g;
    diffh = mouseY - h;
    g += 0.03*diffg;
    h += 0.03*diffh;
    fill (240-mouseX);
    ellipse(g, h, 35, 35);

    // dot 3
    diffc = mouseX - c;
    diffd = mouseY - d;
    c = c + 0.05*diffc;
    d = d + 0.05*diffd;
    fill (240-mouseX);
    ellipse(c, d, 30, 30);

  	// dot 4
    diffe = mouseX - e;
    difff = mouseY - f;
    e += 0.07*diffe;
    f += 0.07*difff;
    fill (300-mouseY);
    ellipse(e, f, 25, 25);

   	// dot 5 (fastest)
    diffa = mouseX - a;
    diffb = mouseY - b;
    a = a + 0.1*diffa;
    b = b + 0.1*diffb;
    fill (500-mouseX);
    ellipse(a, b, 20, 20);

}

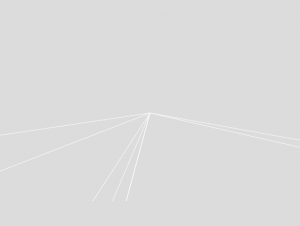
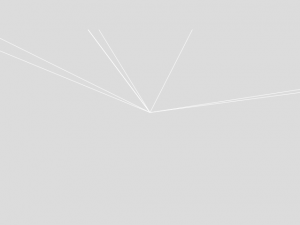
This project was hard for me since it was so open ended, I didn’t know where to start or where to go, so I referenced the notes a lot. I knew I wanted to do something abstract, so I started with a few interactive functions that I thought were cool (ie. the dots following the cursor, and the lines changing based on the mouse position), and then played around with the code from there. Here are a few things I first tried:

I wanted to combine some of these functions but the circles and the lines just looked too crowded together so I switched to the dots that follow the cursor, so it seems like the lines follow the dots.

katieche – looking outwards 02

HE_Mesh


After looking through some of the creators’ works and researching definitions, I felt still confused by the concept of generative art. However, of all the creators I looked at, the work of Frederik Vanhoutte caught my attention. He created amazing HE_mesh works, purely as a hobby which I respect. HE_Mesh* is a Java library for making polygonal mesh creations. It contains no display functionality of its own, but it’s meant to be used with processing. Vanhoutte describes the program as an “after-hours hobby” and is more of a toy than worth production strength. You can see a few of his works below.

katieche – project 02 variable face

katieche-02

// Katie Chen
// 9:30 AM Class
// katieche@andrew.cmu.edu
// Assignment-02

var eyeSize = 20;
var earWidth = 50;
var earHeight = 55;
var headHeight = 200;
var headWidth = 220;
var ewSize = 30;
var cSize = 25;
var ccSize = 25;
var x = 6;
var y = 4;
var v = 6;
var z = 5;

 
function setup() {
    createCanvas(480, 640);
}
 
function draw() {
    background(207, 228, 247);

    // head
    strokeWeight(0);
    stroke(250);
    strokeCap(ROUND);
    fill (250);
    beginShape();
    	// top right
		curveVertex(headWidth/2, headHeight);
		// top left
		curveVertex(headWidth*2, headHeight);
		// bottom right
		curveVertex(headWidth*2, headHeight*2);
		// bottom left 
		curveVertex(headWidth/2, headHeight*2);
	endShape(CLOSE);

	// ears
    fill (250);
    var earL = width / 2 - headWidth * 0.25;
    var earR = width / 2 + headWidth * 0.25;
    ellipse(earL, headHeight, earWidth, earHeight);
    ellipse(earR, headHeight, earWidth, earHeight);

    // cheeks
    fill (255, 221, 211);
    noStroke();
    var cL = width / 2 - headWidth * 0.25 - 10;
    var cR = width / 2 + headWidth * 0.25 + 10;
    var dist = 25
    ellipse(cL, height / 2 + dist, cSize, cSize);
    ellipse(cR, height / 2 + dist, ccSize, ccSize);
    
    // eyes
    fill (250);
    strokeWeight(1);
    stroke (0);
    var ewL = width / 2 - headWidth * 0.25;
    var ewR = width / 2 + headWidth * 0.25;
    ellipse(ewL, height / 2, ewSize, ewSize);
    ellipse(ewR, height / 2, ewSize, ewSize);
    fill (0);
    var eL = width / 2 - headWidth * 0.25;
    var eR = width / 2 + headWidth * 0.25;
    ellipse(eL, height / 2, eyeSize, eyeSize);
    ellipse(eR, height / 2, eyeSize, eyeSize);

    // left eyebrow
    stroke (0);
    strokeWeight(y);
	strokeCap(ROUND);
    line(eL - 7, 290+x, eL +7, 290+y);

	// right eyebrow
    strokeWeight(y);
	strokeCap(ROUND);
    line (eR - 7, 290+v, eR +7, 290+z);


}
 
function mousePressed() {
    headWidth = random(150, 250);
    headHeight = random(200, 300);
    eyeSize = random(10, 30);
    cSize = random(20, 40);
    ewSize = random(20, 40);
    earWidth = random(15, 75);
    earHeight = random(55, 120);
    dist = random(20, 30);
    ccSize = random(20, 40);
    x = random(0, 10);
    y = random(0, 10);
    v = random(0, 10);
    z = random(0, 10);
}

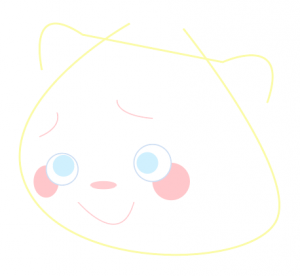
I started the project with the template and shapes that I felt more comfortable playing around with (ellipses, lines, rectangles, etc.), before trying new shapes. For me, the body was the hardest to construct since I tried curveVertex(); for the first time, and even now, it doesn’t necessarily look the way I intended it to (it kind of just looks like a marshmallow now which I guess I’m also okay with). A lot of my project did come from happy accidents (i.e I was trying to make cheeks but ended up making ears, etc.) which I thought was fun, but it’d also be neat to eventually be confident enough in coding that I can actually make what I intend to make.

In terms of planning, I didn’t do anything much last project so I decided I’d try to make something in illustrator first (as seen below) this time and then recreate it with code. Unfortunately after a string of accidental shapes and still not being able to understand how to make curves, I ended up just kind of making everything on a whim for my final!