cmhoward-project-05

sketch-396

function setup() {
	createCanvas(400, 400);
	noLoop();
	noStroke();
	background('black');
}

function draw() {
	drawGrid();
}

function drawGrid() {
//set circle Size  
	var circleSize = 10;
//increasing or decreasing variable
	var dir = 1;
//x position	
	for (var x = 10; x < width; x += 20) {
//alternates columns, sets circleSize initial value to be different 
		dir = -dir;
		if (dir == 1) {
			circleSize = 5;
		}
		else {
			circleSize = 15;
		}
//counter switches from increasing circleSize to decreasing circleSize 
		var counter = 0;
		var red = 150;
//y position
    	for (var y = 10; y < height; y += 20) {
//gradient color based on increasing or decreasing dir 
    		red += dir * 10;
    		fill(red, 0, 0);
//draw circles
            ellipse(x, y, circleSize, circleSize);
//increase or decrease after every 5 circles 
            counter += 1;
            if (counter % 5 == 0) {
            	dir = -dir; 
            }
            circleSize += dir * 3;
        }
    }
}

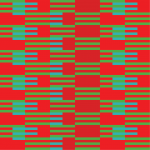
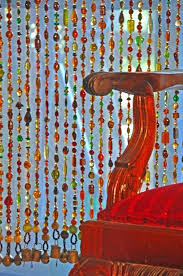
For this project I was inspired by decorative beads, as wallpaper and door beads both have similar space dividing properties, as well as specific aesthetic qualities.

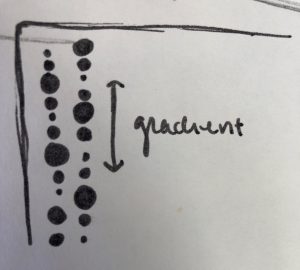
I wanted to create a pattern that was both repetitive and rhythmic, so I created alternating columns of gradually increasing and decreasing ellipses. There begins to be a hierarchy of size and color that draws your eye around the canvas, similar to how door beads change your perspective of a space.

Alessandra Fleck – Project 05 Wallpaper

sketch

//Name: Alessandra Fleck 
//Class Section : B
//Email: afleck@andrew.cmu.edu
//Project-05


function setup() {
    createCanvas(600, 500);
    noStroke();
}

function draw() {
    background(0);

    // Base ellipses in a dull gray

    for (var y = 0; y < height+25; y += 50) {
        for (var x = 0; x < width+25; x += 50) {
            stroke(255);
            strokeWeight(0.40);
            fill(62,81,82);
            ellipse(x, y, 50, 50);
        }
    }

    //negative space from circles

    for (var y = 0; y < height+25; y += 50) {
        for (var x = 0; x < width+25; x += 50) {
            fill(29,26,34);
            quad(x+35, y+30, x+90, y+25, x+55, y+70, x+30, y+80);
        }
    }

    //creates the small white checks by twisting a smaller quadrangle 

    for (var y = 0; y < height+25; y += 50) {
        for (var x = 0; x < width+25; x += 50) {
            fill(255);
            quad(x+15, y+20, x+30, y+15, x+15, y+50, x+30, y+20);
        }
    }
     // Creates the small "fish eyes" in a dull gold

    for (var y = 0; y < height+25; y += 50) {
        for (var x = 0; x < width+25; x += 50) {
            fill(151,160,127);
            arc(x + 80, y + 80, 10, 10, 5, PI + QUARTER_PI);
        }
    }

    //olive shape with organe strike through edge of gold "fish eyes"
    for (var y = 0; y < height+25; y += 50) {
        for (var x = 0; x < width+25; x += 50) {
            fill(151,160,127);
            stroke(255, 102, 0);
            fill(53,74,59);
            line(x + 20, y + 20, x+ 10, y+10);
            line(x+20, y+20, x+50, y+50);
            stroke(0, 0, 0);
            bezier(x+50, y+50, x+50, y+10, x+20, y+20, x+50, y+50);
        }
    }

    noLoop(); // save computation -- no animation
}

For this project, I wanted to try making something inspired by Japanese print. Such as the image shows below.

Image result for japanese print patterns

I played with the idea of two directional patterns. Where there is a dynamic flow in one direction and a sharp streak in another. This can be seen in the cool green curvy background with the bright orange streaks in the opposite direction. One thing I would work on if I were to continue this project, if is the fine detail accuracy of each stroke to one another (making sure that they are are flush with one another).

KadeStewart-Project05-Wallpaper

sketch

//Kade Stewart
//Section B
//kades
//Project-05


function setup() {
    createCanvas(480, 480);
    background(128);

    noStroke();
}


function draw() {

    var dim = 8;
    for (x = 0; x < dim; x++) {
        for (y = 0; y < dim; y++) {
            tile(x * width/dim, y * height/dim, width/dim, height/dim);
        }
    }


}

function tile(x, y, w, h) {
    fill(14,174,158); //light blue
    triangle(x, y, x, y + h, x + w/2, y + h/2);

    fill(255,209,80); //orange
    triangle(x + w, y, x + w, y + h, x + w/2, y + h/2);

    fill(12,18,111); //dark blue
    triangle(x, y, x + w, y, x + w/2, y + h/2);

    fill(240,240,240); //off-white
    triangle(x, y + h, x + w, y + h, x + w/2, y + h/2);

}

My wallpaper is meant to be viewed in a number of different ways. The tiles could be seen as squares of four triangles, as triangles made up of other triangles, or as a pyramid dark blue sky, yellow-orange side in the light, lighter blue in the shade, white ground). I was inspired by my favorite elementary school playtime activity – mosaic tiles.

Victoria Reiter – Project 05 – Wallpaper

sketch

/*
Victoria Reiter
Section B
vreiter@andrew.cmu.edu
Project - 05
*/

function setup() {
    // sets up canvas dimensions
    createCanvas(600, 480);
    // establishes background color
    background(250, 250, 180);
}

function draw() {
    // establishes initial coordinates for x and y
    var x = - 50;
    var y = 0;
    // creates a horizontal and vertical grid using a for() loop to draw
    // the flowers
    for (var i = 0; i < 20; i++) {
        for (var j = 0; j < 20; j++) {
            flower(x + j * 60, y + i * 60); 
    }
}
    // creates a horizontal and vertical grid using a for() loop
    // to draw the butterflies
    for (var k = 0; k < 200; k++) {
        for (var l = 0; l < 200; l++) {
            butterfly(x - 850 + l * 200, y - 50 + k * 120);
        }
    }
    noLoop();
}

// function which draws the entirety of the flower
function flower(x, y) {
    flowerStem(x, y);
    flowerPetals(x, y);
    stem(x, y);
    leaves(x + 15, y - 15);
} 

// function to draw the stem
function stem(x, y) {
   strokeWeight(7);
    stroke(0, 155, 0);
    line(x, y, x + 85, y - 35);
}

// function to draw the leaves
function leaves(x, y) {
    noStroke();
    // leaf color
    fill(0, 190, 0);
    // actual leaves
    ellipse(x, y - 1, 24, 10);
    ellipse(x + 25, y + 9, 24, 10);
    ellipse(x + 21, y - 10, 24, 10);
    strokeWeight(2);
    // leaf vein color
    stroke(100, 230, 100);
    // each leaf also has a little line to represent its veins
    line(x - 12, y - 1, x + 12, y - 1);
    line(x + 13, y + 9, x + 37, y + 9);
    line(x + 9, y - 10, x + 33, y - 10);
}

// function to draw the stems branching to the petals
function flowerStem(x, y) {
    strokeWeight(4);
    stroke(0, 190, 0);
    // actual stem
    line(x + 56, y - 27, x + 46, y - 43);
    // each stem also has a little bulb
    ellipse(x + 46, y - 43, 7, 7);
    line(x + 55, y - 18, x + 72, y + 2);
    ellipse(x + 72, y + 2, 8);
    line(x + 70, y - 33, x + 78, y - 60);
    ellipse(x + 78, y - 60, 8);
    line(x + 79, y - 28, x + 100, y - 3);
    ellipse(x + 100, y - 3, 10);
    line(x + 85, y - 35, x + 105, y - 57);
    ellipse(x + 105, y - 57, 11);
}

// function to draw flower petals
function flowerPetals(x, y) {
    noStroke();
    // main petal color
    fill(255, 125, 165);
    // petal 1
    ellipse(x + 43, y - 55, 23);
    //petal 2
    ellipse(x + 75, y + 12, 25);
    //petal 3
    ellipse(x + 74, y - 70, 20);
    // petal 4
    ellipse(x + 104, y + 10, 21);
    // petal 5
    ellipse(x + 108, y - 70, 27);
    fill(255, 65, 105);
    // sub-petal 1
    ellipse(x + 39, y - 45, 13);
    ellipse(x + 52, y - 55, 11);
    // sub-petal 2
    ellipse(x + 67, y + 6, 13);
    ellipse(x + 81, y + 4, 10);
    ellipse(x + 64, y + 15, 11);
    // sub-petal 3
    ellipse(x + 70, y - 61, 16);
    // sub-petal 4
    ellipse(x + 100, y + 5, 12);
    ellipse(x + 112, y + 8, 9);
    // sub-petal 5
    ellipse(x + 97, y - 63, 14);
    ellipse(x + 109, y - 58, 10);
    ellipse(x + 119, y - 64, 13);
    // detail color in petals
    fill(185, 0, 25);
    // sub-sub-petal 1
    ellipse(x + 32, y - 50, 9);
    ellipse(x + 48, y - 50, 8);
    // sub-sub-petal 2
    ellipse(x + 64, y + 2, 8);
    ellipse(x + 74, y + 4, 10);
    ellipse(x + 60, y + 9, 8);
    //sub-sub-petal 3
    ellipse(x + 78, y - 65, 13);
    ellipse(x + 62, y - 67, 8);
    // sub-sub-petal 4
    ellipse(x + 92, y + 9, 8);
    ellipse(x + 108, y + 5, 9);
    // sub-sub-petal 5
    ellipse(x + 102, y - 60, 9);
    ellipse(x + 90, y - 65, 10);
    // other detail color in petals
    fill(255, 205, 205);
    // many sub petals 1
    ellipse(x + 40, y - 67, 11);
    ellipse(x + 52, y - 60, 8);
    // many sub petals 2
    ellipse(x + 64, y + 16, 8);
    ellipse(x + 77, y + 9, 10);
    ellipse(x + 67, y + 23, 7);
    // many sub petals 3
    ellipse(x + 78, y - 79, 10);
    ellipse(x + 66, y - 71, 8);
    // many sub-petals 4
    ellipse(x + 94, y + 18, 12);
    ellipse(x + 114, y + 14, 9);
    // many sub-petals 5
    ellipse(x + 103, y - 69, 9);
    ellipse(x + 90, y - 64, 8);
    ellipse(x + 121, y - 74, 10);
}

// function to draw the entirety of the butterfly
function butterfly(x, y) {
    push();
    scale(.5);
    butterflyBody(x, y);
    butterflyWings(x, y);
    pop();
}

// function to draw butterfly's thorax
function butterflyBody(x, y) {
    // black but not entirely opaque body
    stroke('rgba(0, 0, 0, .7)');
    strokeWeight(10);
    line(x -5, y + 35, x + 20, y);
}

// function to draw butterfly's wings
function butterflyWings(x, y) {
    strokeWeight(2);
    stroke(90, 0, 90);
    // orange-ish color of wings
    fill('rgba(240, 130, 40, .6)');
    // top wing
    ellipse(x, y, 25, 40);
    // bottom wing
    ellipse(x - 15, y + 20, 40, 30);
    // brown color of spots in wings
    fill('rgba(110, 70, 30, .5)');
    // details in the wings
    ellipse(x - 20, y + 15, 16, 8);
    ellipse(x - 2, y + 20, 6, 8);
    ellipse(x - 13, y + 25, 5, 5);
    ellipse(x - 4, y - 7, 6, 9);
    ellipse(x + 4, y, 6, 5);

}

My project this week was inspired by my Chinese name. My dearest friend gave me my name in Chinese, and I really cherish having it as my name. It is 孟薇 (Mèng wēi), where the name 薇 is the name of a pretty pink flower. So for this week’s project I wanted to recreate the flower which represents my name!
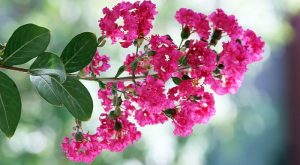
Image found by typing the flower “myrtle” into Google
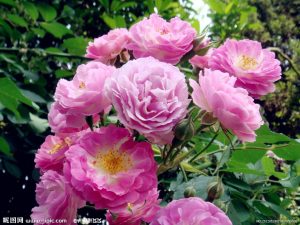
Image found by typing the flower “薇” into Baidu, the Chinese search engine

I first drew out a sketch of what I wanted to recreate, then listed the elements I would need to recreate it.
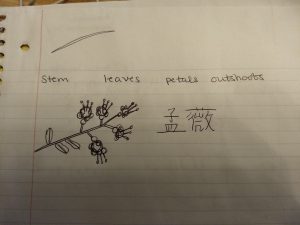
My preliminary sketch alongside my Chinese name 孟薇

I used the technique we saw in lecture where we create one large function composed of multiple smaller functions, each handling a particular aspect of the larger one. So for example I made “leaf” “petals” etc. their own function, then called them all under the broader “flower” function.

When I was finished, I really liked the product, but wanted to add the butterflies to make it more complex and practice layering for() loops.

I actually sew my own clothes, and the idea of having a skirt I sewed made out of fabric I designed/coded sounds really cool! I think I may take out the butterflies if I ever ordered it but I should look into that!
Jenna Kim (Jeeyoon Kim)- Project 5- Wallpaper

jennakim05

/* Jenna Kim (Jeeyoon Kim)
Section E
jeeyoonk@andrew.cmu.edu
Week 5 Project: Mr. Avocado and Ms. Eggy
*/
function setup() {
    createCanvas(600, 600);
    noStroke();
}

function draw() {
    background(245, 138, 125);

    for (var y = 0; y < height; y += 100) { //avocado peel
        for (var x = 0; x < width; x += 70) {
            fill(79, 50, 54);
            ellipse(x, y, 30, 30);
            ellipse(x, y + 30, 40, 40);
      }
    }
    for (var y=0;y < height;y += 100){ //inside of avocado
      for (var x = 10;x < width;x += 70){
        fill(204, 228, 182);
        ellipse(x - 10, y, 25, 25);
        ellipse(x - 10, y + 25, 35, 35);
        fill(79, 50, 54); 
        ellipse(x - 15, y, 3, 3); //left eye
        ellipse(x - 7, y, 3, 3); //right eye
      }
    }

    for (var y = 0;y < height;y += 100){ //avocado seed!
      for (var x = 10;x < width;x += 70){
        fill(79, 50, 54);
        ellipse(x - 10, y + 30, 15, 15);
      }
    } 
    for(var y = 70;y < height * 3 / 2;y += 100){ //egg! 🙂
    for(var x = 30;x < width;x += 70){
      fill(255); //white part
      ellipse(x, y, 40, 50);
      fill(252, 210, 94); //yolk
      ellipse(x, y, 20, 20);
      fill(252, 210, 94); //eyes
      ellipse(x - 10, y - 10, 4, 4); //left eye
      ellipse(x + 10, y - 10, 4, 4); //right eye
    }
  }
    noLoop();
}

For this project, I designed a pattern for a kind of pajamas I want for myself. 🙂
I made a pattern of avocados and eggs, my favorite food. Although this project was also challenging as the assignments a and b, I enjoyed using my creativity and apply what I learned from this week’s lecture and recitation. Through keep experimenting with the coding, I started to understand the loops fully than before. I know that next time, I can further improve by using % operator.

Sophia Kim – Project 05 Wallpaper – Sec C

sketch

// Sophia S Kim
// Section C 1:30
// sophiaki@andrew.cmu.edu 
// Project-05-Wallpaper


function setup() {
  createCanvas(450, 600); 
}

function draw() {
  background (255, 232, 187);
  //arc for RED part of rainbow
  for(var i = 20; i < height+40; i += 65) {
    for(var a = 20; a < width+30; a += 105) {
      strokeWeight(7);
      stroke(255, 67, 67);
      noFill(); 
      arc(a, i, 80, 85, PI, 0, OPEN);
    }
  }
  //arc for ORANGE part of rainbow
  for(var i = 20; i < height+40; i += 65) {
    for(var a = 20; a < width+30; a += 105) {
      strokeWeight(7);
      stroke(255, 177, 56);
      noFill(); 
      arc(a, i, 70, 75, PI, 0, OPEN);
    }
  }
  //arc for YELLOW part of rainbow
  for(var i = 20; i < height+40; i += 65) {
    for(var a = 20; a < width+30; a += 105) {
      strokeWeight(7);
      stroke(247, 238, 82);
      noFill(); 
      arc(a, i, 60, 65, PI, 0, OPEN);
    }
  }
  //arc for GREEN part of rainbow 
  for(var i = 20; i < height+40; i += 65) {
    for(var a = 20; a < width+30; a += 105) {
      strokeWeight(7);
      stroke(112, 232, 160);
      noFill(); 
      arc(a, i, 50, 55, PI, 0, OPEN);
    }
  }
  //arc for BLUE part of rainbow 
  for(var i = 20; i < height+40; i += 65) {
    for(var a = 20; a < width+30; a += 105) {
      strokeWeight(7);
      stroke(124, 209, 232);
      noFill(); 
      arc(a, i, 40, 45, PI, 0, OPEN);
    }
  }
  //arc for INDIGO part of rainbow 
  for(var i = 20; i < height+40; i += 65) {
    for(var a = 20; a < width+30; a += 105) {
      strokeWeight(7);
      stroke(124, 142, 229);
      noFill(); 
      arc(a, i, 30, 35, PI, 0, OPEN);
    }
  }
  //arc for VIOLET part of rainbow 
  for(var i = 20; i < height+40; i += 65) {
    for(var a = 20; a < width+30; a += 105) {
      strokeWeight(7);
      stroke(154, 125, 226);
      noFill(); 
      arc(a, i, 20, 25, PI, 0, OPEN);
    }
  }
  for(var i = 23; i < height+40; i += 65) {
    for(var a = 20; a < width+30; a += 105) {
      fill(0);
      noStroke();
      textStyle(BOLD);
      textSize(8);
      text("HAPPY", a-14, i + 10);
    }
  }
}

Utilizing the ‘wallpaper’/pattern into clothing, I was inspired by the iconic Paul Frank tees and the Happy Bunny t-shirts from my childhood. I wanted to fuse text and graphics together like the Happy Bunny t-shirts. I narrowed down the graphic to look simple so that the viewer can comprehend both the graphic and text together. The main objects I thought of were weather related: rain, clouds, sun, moon, rainbow. I chose to use the rainbow to give a positive mood to the viewer. At first, I had a really hard time spacing each block (graphic+text) from each other. However, after a while I got the hang of spacing and creating arcs for the rainbow. The assignments really assisted me to handle the for loops well for this project!

Image result for paul frank tee

Image result for happy bunny t shirt

Xindi Lyu-Project 05-Wall paper-Section A

sketch

 /*Xindi Lyu
 Section A
 xindil@andrew.cmu.edu
 project_05*/
 function setup() {
     createCanvas(600, 600);
     background(240);
}

 function draw() {
  background(255,243,69);
  for(var b=-600; b<600;b+=30){
    for(var c=-600;c<600;c+=15){
      var d=b+c;
      fill(0);
      ellipse(d,c,2,2);//polka dots background
    }
  }

  //ponrose triangles
  for(var a=-600; a<700; a+=200){
    for(var y=-600; y<height; y+=120){
      
 
  fill(251,51,139);
  noStroke();
  
  var x=a+y;
  quad(36+x,34+y,58+x,72+y,58+x,162+y,36+x,152+y);//pink 1
  quad(58+x,72+y,36+x,34+y,116+x,82+y,98+x,92+y);//pink 2
  

  fill(53,177,149);
  quad(58+x,72+y,78+x,82+y,78+x,130+y,58+x,162+y);//green 1
  quad(58+x,162+y,78+x,130+y,158+x,82+y,158+x,106+y);//green 2
   
   fill(173,221,255);
  quad(36+x,34+y,58+x,22+y,158+x,82+y,116+x,82+y);//purple 1
  quad(158+x,82+y,116+x,82+y,78+x,104+y,78+x,130+y);//purple 2


  //the profile lines for the triangles
  stroke(0);
  strokeWeight(1.2);
  line(58+x,22+y,36+x,34+y);
  line(36+x,34+y,36+x,152+y);
  line(36+x,152+y,56+x,162+y);
  line(158+x,106+y,56+x,162+y);
  line(158+x,82+y,158+x,106+y);
  line(58+x,22+y,158+x,82+y);
  line(58+x,162+y,58+x,72+y);
  line(58+x,72+y,98+x,92+y);
  line(98+x,92+y,78+x,104+y);
  line(78+x,104+y,78+x,82+y);
  line(78+x,130+y,158+x,82+y);
  line(78+x,104+y,78+x,130+y);
  line(116+x,82+y,78+x,104+y);
  line(116+x,82+y,36+x,34+y);

  
}
}


    }

For this project I was inspired by the extreme color contrast of pop art as well as the intriguing idea of “loops” within the penrose triangle.

Pop art inspiration

Mimi Jiao – Project 5 – Section E

sketch

/*
Mimi Jiao
wjiao@andrew.cmu.edu
Section E
Project-05
*/
var h = 5;
var w = 25;
var gap = 5;
function setup() {
    createCanvas(400, 400);
}

function draw() {
    background(0, 0, 255);

    //adds an extra interactive element so that the wallpaper
    //changes as the mouse is held and dragged 
    if (mouseIsPressed) {
        w = mouseX / 10;
        h = mouseY / 10;
    }

    //draws vertical rectangles in the for loop
    for (var y = 0; y < 40; y ++) {
        //draws horizontal rectangles in every quarter of the canvas
        for (var x = 0; x < 4; x ++) {

            //white longer rectangles
            push();
            noStroke();
            rect(x * (width / 4), y * (h + gap), w, h);
            pop();

            //empty fill green outline longer rectangles
            push();
            noFill();
            stroke(0, 255, 0);
            rect(w + (x * width / 4), gap + (y * (h +  gap)),
                 w, h);
            pop();

            //red fill longer rectangles
            push();
            fill(255, 0, 0);
            rect((3 * w / 2) + (x * width / 4),
                 y * (h + gap), w, h);
            pop();

            //black fill shorter rectangles
            push();
            fill(0);
            rect(w * 3 + (x * width / 4), gap + (y * (h +  gap)),
                 w / 2, h);
            pop();

        }            
    }
}

This project was an extension of one of my past projects for another class I’m taking, Color for Communciations, Products, and Environments. For that project, I created a repeating grid on Adobe Illustrator and made many different versions of it with different colors to study color interactions. I wanted to apply the same idea this time using code as my medium of expression, which allows me to play with more colors using the RGB colorspace that the CMYK colorspace doesn’t cover. In addition, it lets me play around with the interactive mouse, a function I really enjoy using.


Vicky Zhou – Project 5 – Wallpaper

sketch

/*Vicky Zhou
Section E
vzhou@andrew.cmu.edu
Project-05-Wallpaper*/

var x1 = 50; 
var y1 = 50; 

function setup() {
    createCanvas(480, 480);
    background(250, 240, 220);
    noLoop();
}

//creating own function to draw one houndstooth 
function houndstooth(x1, y1) {
	print(x1,y1);
	//draw one houndstooth
	var sqsize = 50; 
	// for (var i = 0; i <= 100; i += 10);
		fill(177, 92, 62); //brown
		noStroke();
		rect(x1, y1, sqsize, sqsize); //rectangle center
		triangle(x1, y1, //first triangle pointy part 
				x1 - (sqsize/2), y1,
				x1, y1 + (sqsize/2));
		triangle(x1, y1, //second triangle pointy part
				x1 + (sqsize/2), y1,
				x1, y1 - (sqsize/2));
		triangle(x1, y1 + (sqsize), //left top 
				x1 + (sqsize/2), y1 + (3 * sqsize/2), 
				x1 + (sqsize/2), y1 + (sqsize));
		triangle(x1 + (sqsize/2), y1 + (3 * sqsize/2), //left bottom
				x1 + (sqsize), y1 + (3 * sqsize/2),
				x1 + (sqsize), y1 + (2 * sqsize));
		triangle(x1 + (sqsize), y1, //right top 
				x1 + (sqsize), y1 + (sqsize/2),
				x1 + (3 * sqsize /2), y1 + (sqsize/2));
		triangle(x1 + (3 * sqsize/2), y1 + (sqsize/2), //right bottom
				x1 + (3 * sqsize/2), y1 + (sqsize),
				x1 + (2 * sqsize), y1 + (sqsize));
		triangle(x1 + (sqsize/2), y1 + (sqsize), //left connecting triangle
				x1 + (sqsize/2), y1 + (3 * sqsize/2),
				x1 + (sqsize), y1 + (3 * sqsize/2));
		triangle(x1 + (sqsize), y1 + (sqsize/2), //right connecting triangle
				x1 + (3 * sqsize /2), y1 + (sqsize/2),
				x1 + (3 * sqsize/2), y1 + (sqsize));
				
				
}

function draw() {
	for (var y = 0; y <= height; y+= 100){
		for (var x = 0; x <= width; x += 100){
			houndstooth(x + 30, y + 30); //draws houndstooth

			//first stitch mark
			fill(40, 32, 24, 150); //black
			ellipse(x, y + 50, 3, 60);
			ellipse(x, y + 50, 60, 3);

			//second stitch mark
			fill(250, 240, 220, 100); //cream 
			ellipse(x + 50, y + 50, 3, 60);
			ellipse(x + 50, y + 50, 60, 3);

		}
	}
}

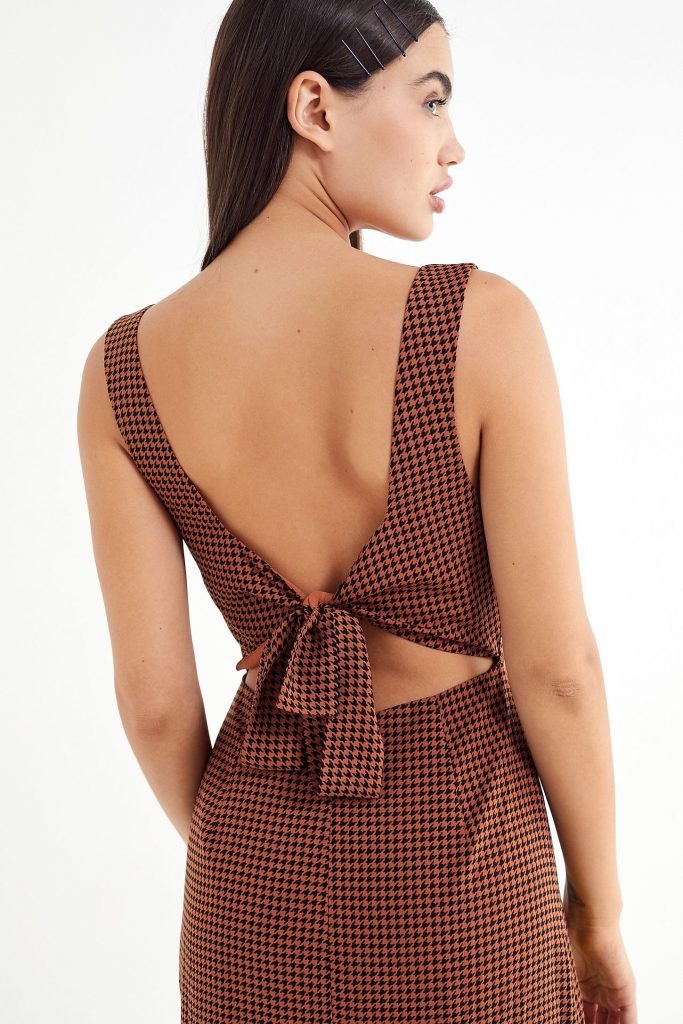
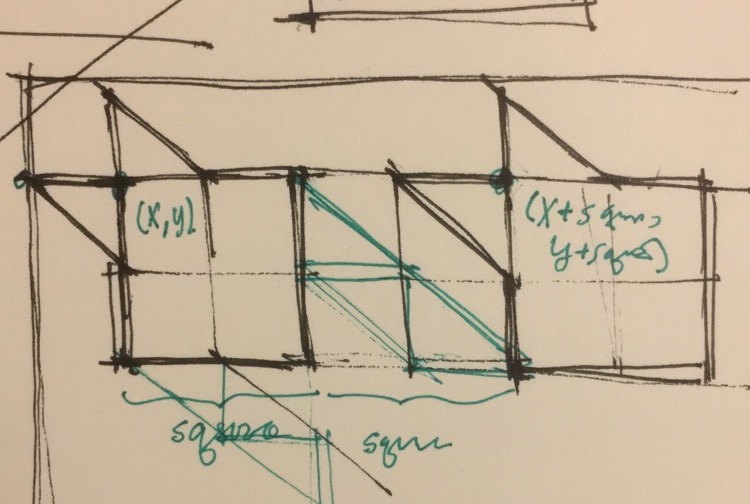
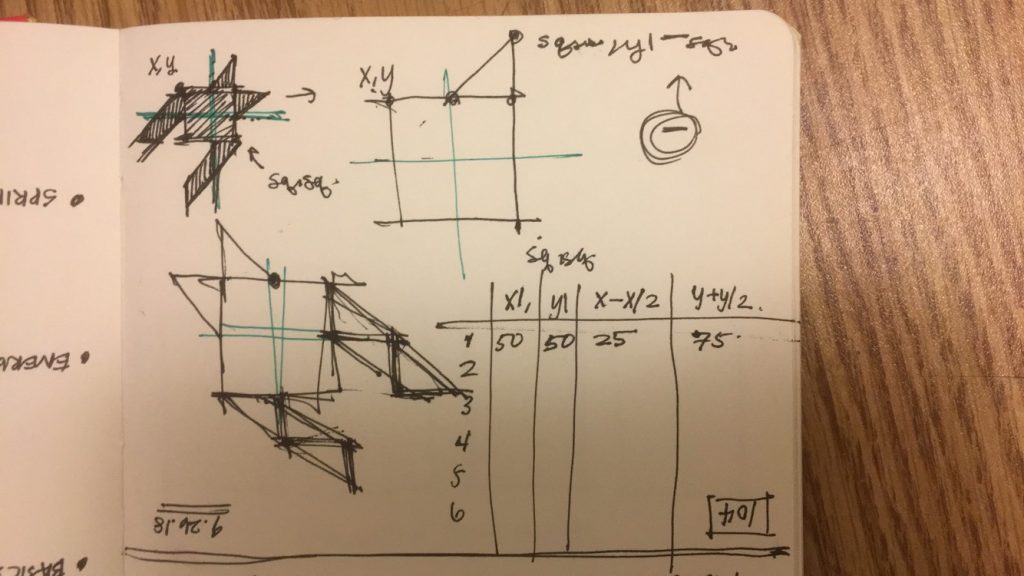
In this project prompt, the idea of a “wear-able” pattern immediately made me think of houndstooth, plaid, and Patagonia’s fleeces. In the end, I decided to draw my main inspiration from an urban outfitter’s houndstooth dress. I constructed it using squares and triangles, and also wanted to add an element of a “stitch” to create the texture of fabric. The concept that I struggled the most with during this pattern was constructing my own function (houndstooth), because it was difficult to reposition it in the draw function.

Alice Fang – Project 5 – Wallpaper

sketch

/*
Alice Fang
Section E
acfang@andrew.cmu.edu
Project-05-Wallpaper
*/

var citrusSize = 80;

function setup() {
    createCanvas(600, 600);
    background(176, 196, 222);
    noStroke();
}

function draw() {
	var offset = 5; // offset for fruit outlines

	// draw oranges
	for (x = 75; x < width; x += 150){ 
		for (y = 75; y < height; y += 150){
			noStroke();
			fill(244, 164, 96); 
			ellipse(x, y, citrusSize, citrusSize);

			// orange outline
			noFill();
			strokeWeight(5);
			stroke(220, 120, 30);
			ellipse(x + 5, y + 5, citrusSize, citrusSize);

			// orange dot details
			point(x + 20, y - 20);
			point(x + 15, y - 15);
			point(x + 10, y - 20);
		}
	} 
	var citrusX = 150; // width between lemon and lime
 	var citrusY = 150; // height between rows of lemon/lime
 	textStyle(ITALIC);

	// draw lemon and lime wedges
	for (x = 0; x < 6; x++) {
		for (y = 0; y < 5; y++) {
			var px = x * citrusX; // horizontal spacing between wedges
			var py = y * citrusY + 10; // vertical spacing between wedges
			
			if (x % 2 == 1) { // lemon wedges for even columns
				noStroke(); 
				fill(255, 250, 205);
				arc(px, py, citrusSize, citrusSize, 0, PI);
				
				fill(240, 230, 140); // lemon wedge shading
				triangle(px, py+5, px+5, py+30, px-10, py+30);
				triangle(px+2, py, px - 40, py + 10, px-35, py + 25);
				triangle(px+2, py, px+15, py + 30, px+30, py+10);

				text("lemon", px-10, py-50);
			}
			else { // lime wedges for odd columns
				noStroke();
				fill(154, 190, 20); 
				arc(px, py, citrusSize, citrusSize, 0, PI);
			
				fill(200, 255, 80); // lime wedge shading
				triangle(px, py+5, px+5, py+30, px-10, py+30);
				triangle(px+2, py, px - 40, py + 10, px-35, py + 25);
				triangle(px+2, py, px+15, py + 30, px+30, py+10);

				text("lime", px-10, py-50);
			}
			noFill();
			strokeWeight(5); // offset outline (citrus rind)
			stroke(255, 215, 10);
			arc(px - offset, py - offset, citrusSize, citrusSize, 0, PI);
		}
	}
	noLoop();	
}

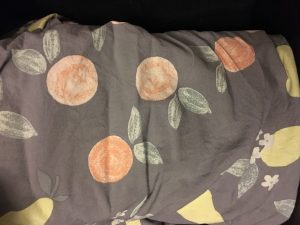
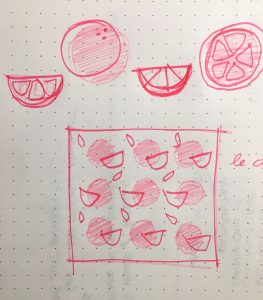
This was inspired by a pajama set that I own, and my own affinity for citrus prints (I also own a tshirt that has a different style of citrus illustration). For some reason, I’m drawn to these fruits, and I thought it would be an interesting way to combine the two different citrus clothing that I own. It was definitely good practice in nested loops, and getting more familiar with the % operator, since I wrote the lemons and limes separately before deciding to combine them into a nested for loop.

The pajama set with lemons and other fruit
Explorations of citrus illustration