Lan Wei – Project 10 – Generative Landscape

my-sketch.js

//Lan Wei
//Section D
//lanw@andrew.cmu.edu
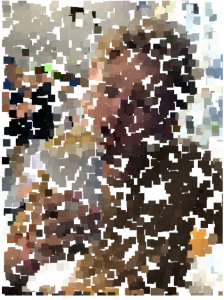
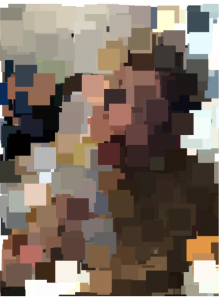
//Project 10 - Generative Landscape

//Cave people

var groundDetail = [0.004, 0.0001, 0.005, 0.002];
var groundSpeed = 0.0005;
var minY = [-10, 70, 110, 300]; //min values of terrain domains
var maxY = [150, 120, 300, 400]; //max values of terrain domains
var people = [];

function setup() {
    createCanvas(450, 450);
    frameRate(10);

    // initial people
    for (var i = 0; i < 7; i++){
        var rx = random(width);
        var ry = random(290, 313);
        people[i] = makePeople(rx, ry);
    }
}

var moonX = 450;

function draw() {
    //mountains & ground
    background(8, 46, 84);
    var colMountain = color(0);
    var colGround = color(176, 23, 31);
    var colHole = color(255, 222, 173);
    var col = [colMountain, colGround, colHole, colGround];
    noStroke();

    //moon
    moonX -= 1;
    fill(190);
    ellipse(moonX, 30, 70, 70);
    fill(255);
    ellipse(moonX, 30, 60, 60);

    for (var i = 0; i < 4; i ++){
        var yRange = [];
        fill(col[i]);
        beginShape();
        for (var x = 0; x < width; x++) {
            var t = (x * groundDetail[i]) + (millis() * groundSpeed);
            var y = map(noise(t), 0, 1, minY[i], maxY[i]);
            if (i === 0){ // reverse the direction of the mountains
                y = ((maxY[i] - minY[i]) - 1.5 * y);
            }
            vertex(x, y);
            yRange.push(y);
        }
        vertex(width, yRange[width - 1]);
        vertex(width, height);
        vertex(0, height);
        vertex(0, yRange[0]);
        endShape();

        if (i === 2){  ////the legs should be coverd by the bottom ground
            updateAndDisplayPeople();
            removePeopleThatHaveSlippedOutOfView();
            addNewPeopleWithSomeRandomProbability();
        }
    }
}

function updateAndDisplayPeople(){
    for (var i = 0; i < people.length; i++){
        people[i].move();
        people[i].display();
    }
}

function removePeopleThatHaveSlippedOutOfView(){
    var peopleToKeep = [];
    for (var i = 0; i < people.length; i++){
        if (people[i].x + people[i].bellyWidth/2 > 0) {
            peopleToKeep.push(people[i]);
        }
    }
    people = peopleToKeep; // remember the surviving buildings
}

function addNewPeopleWithSomeRandomProbability() {
    var newPeopleLikelihood = 0.2;
    if (random(0,1) < newPeopleLikelihood) {
        people.push(makePeople(width, random(290, 303)));
    }
}

function makePeople(bellyX, bellyY){
    var ppl = {x: bellyX,/////////////////////////belly
               y: bellyY,
               speed: -10,
               bellyWidth: random(23, 47),
               bellyHeight: random(50, 59),
               bellyCol: random(70, 255),
               headD: 10,/////////////////////////head
               headCol: random(20, 90),
               legY: bellyY,//////////////////////legs
               move: pplMove,
               display: pplDisplay}
    return ppl;
}

function pplMove(){
    this.x += this.speed;
}

function pplDisplay(){
    //head
    noStroke();
    fill(this.headCol);
    ellipse(this.x, this.y - this.bellyHeight/2 - 10, this.headD, this.headD);
    //legs
    noFill();
    stroke(0);
    strokeWeight(2);
    line(this.x - this.bellyWidth/4, this.legY, this.x - this.bellyWidth/4, height);
    line(this.x + this.bellyWidth/4, this.legY, this.x + this.bellyWidth/4, height);
    //belly
    noStroke();
    fill(this.bellyCol);
    ellipse(this.x, this.y, this.bellyWidth, this.bellyHeight);
}

This is my first time to practice using objects and it was tough but very fun.  I started with doing sketches and decided to make cave people at the end. Making mountains ground and the cave took me a while since I need to create several different noises with different qualities and I would like to do it with  loops. For the people part, I studied the building example and did modifications based on that, which is also challenging. To be honest, at the beginning I planned to achieve something more complicated but the process is more challenging than I’ve imagined so I simplified it a bit. But anyway, I feel that the  project helps me a lot to understand objects and the result makes me very happy.

Sketch

Jessica Timczyk – Looking Outwards 10

Some of the man hole coverings included in Ingrid Burrington’s website and book about New York’s networks and infrastructures.

Ingrid Burrington is an author, activist, and hacker and has worked on many  exhibitions, projects making maps, writing books and teaching at various schools including Cooper Union and the Rhode Island School of Design. She is from and still lives in New York City, and I unfortunately was unable to find where she went to school. One of her most interesting works, I have found, is her website and book Seeing Networks in New York City, that details New York’s network infrastructure. I found this project incredibly interesting because when in New York, normally a visitor is looking for and paying attention to all the sight-seeing and famous buildings and etc. that are there, but this project provides a map of city focusing on features that are commonly over looked. For example man hold covers, street markings and antennas. This project provides a different way to look at New York that I find incredibly interesting.


John Legelis – Looking Outwards, Week 10

Recently I visited the Carnegie Museum of Art down the road for the first time since before this summer. There have been several new installations since I last visited the museum but one stuck out specifically which was an exhibit by the Guerrilla Girls. The Guerrilla Girls are a self defined as a group of “feminist activist artists”. The aim to target discrepancies in the art world between representation of women’s works vs men’s. Among the groups tactics for bring attention to these sexist discrepancies are absurdism and borderline threatening. One of their favorite facts to demonstrate the underrepresentation of female artist is as follows:

An example of the Guerrilla Girls Activist Art

The group consists of an ever changing flux of people who remain anonymous in order to keep the attention on the issues instead of the members. I admire this group because of their frankness, aggression, and successful unorthodox methods.

Lan Wei-Looking Outwards 10

                                         People interacting with the structure
                                                              Part of the structure

The project’s name is Branching Morphogenesis, created by Jenny Sabin. I love the spatial effect of the project. People can walk through and see through the structure at the same time and get varies of experiences because of different densities of the elements in different places. When looking at the project closely, I’m surprised to know that the whole structure was made out of 75,000 zip ties, and it is just so amazing to see how the small forces inside of each zip tie can work together and support such a huge structure.

Jenny Sabin is an architect, designer, artist and professor (Cornell University) who draws upon biology and mathematics to design material structures. She emphasises computaional design and digital fabrication a lot in her projects. Her projects, whether large-scale or small-scale, generally have strong spatial effect and interactive possibilities. It is easy to notice that she creates a lot of holes in many of her projects, and I believe her intention is to encourage visual connections.

                                               Material: zip ties

Yoo Jin Shin-Project-09-Portrait

Project-09

// Yoo Jin Shin
// Section D
// yoojins@andrew.cmu.edu
// Project-09-Portrait

var underlyingImage;

function preload() {
    var myImageURL = "https://i.imgur.com/P9QQAmA.png";
    underlyingImage = loadImage(myImageURL);
}

function setup() {
    createCanvas(480, 416);
    background(255);
    underlyingImage.loadPixels();
    frameRate(500);
}

function draw() {
    var px = random(width);
    var py = random(height);
    var ix = constrain(floor(px), 0, width-1);
    var iy = constrain(floor(py), 0, height-1);
    var theColorAtLocationXY = underlyingImage.get(ix, iy);

    // drawing rectangles
    noStroke();
    fill(theColorAtLocationXY, random(0, 255));
    rect(px, py, random(5, 20), random(5, 20));

    // writing Bells
    noStroke();
    fill(theColorAtLocationXY);
    textFont('Helvetica');
    textSize(5);
    text("BELLS", px, py);
}

// resets with blank canvas once mouse pressed
function mousePressed() {
    clear();
}

For this project, I used a photo of my friend, Bella. I think this was especially fun and meaningful because it felt as if the final product had a specific recipient. I initially had larger end bounds for the dimensions of the rectangles, but realized that if the rectangles are too big, the end stage seems a bit too abstract to the point that you can hardly recognize the person.


Original photo
Early stage
Near the final stage

Han Yu Project 09 Portrait

sketch

// Han Yu
// Section D
// hyu1@andrew.cmu.edu
// Project 09 Portrait

var poolpic; //image variable
var pattern=["♛","♨","☆","♞","✌︎","🀧"]; //stores patterns to be drawn later

function preload() {
    var myImageURL = "https://i.imgur.com/f4kVoqD.jpg";
    poolpic = loadImage(myImageURL);
}

function setup() {
    createCanvas(600,400);
    background(95,171,188);
    poolpic.loadPixels();    
}

function draw() {
    scale(0.333,0.333); //makes the original image smaller

    //location and color variable of each pattern
    var x = random(width*3);
    var y = random(height*3);
    var c = poolpic.get(x, y);
    var randomly = floor(random(0,5.9)); //pattern to be drawn
    var p = pattern[randomly];  //randmly picks an item from pattern

    noStroke();
    fill(c);
    textSize(random(30,80));
    text(p, x, y);
}


In this project I used a picture of my bf. I was inspired by cool symbols and characters used in other people’s projects so I decided to use an array of symbols that describes my bf in my project.

After running three minutes…
The original photo.

Yoo Jin Shin-LookingOutwards-09

Prismverse

I came across Yingyang’s post and was introduced to Chris Cheung’s Prismverse (2017) exhibition. The thumbnail of the video was enough to capture my attention—it looks like a scene from some sci-fi, futuristic movie with the chrome geometric patterns on the black floor. I love how the colors transition and how the light and water effects actually make it seem like you’re inside a diamond. It was so unexpected that this project is part of Dr.Jart+, which I was already familiar with as a skincare brand. After looking up the product that this was designed for, I thought it would have been nice if at least some part of the packaging reflected this eye-catching exhibition.

Jessica Timczyk – Project 09 – Portrait

Portrait

// Jessica Timczyk
// Section D
// jtimczyk@andrew.cmu.edu
// Project-09-Portrait

// global variables
var underlyingImage;
var sx = [];
var sy = [];
var dx = [];
var dy = [];

function preload() { // preloads image
    var myImageURL = "https://i.imgur.com/CKGh2Ed.jpg?1";
    underlyingImage = loadImage(myImageURL);
}

function setup() {
    createCanvas(300, 400);
    background(255);
    underlyingImage.loadPixels();

    for (i = 0; i < 1000; i++){ // for loop to randomly pick the positions and speed of each square
        sx[i] = random(width);
        sy[i] = random(height);
        dx[i] = random(-5, 5);
        dy[i] = random(-5, 5);
    }
    frameRate(10);

}

function draw() {
    background(255);
    noStroke();
    for (i = 0; i < 1000; i++) {
        var colorAtSquare = underlyingImage.get(sx[i], sy[i]); // the color of each square changes as it moves across
        // the screen to match the photo under neath
        fill(colorAtSquare);
        rect(sx[i], sy[i], 20, 20); // drawing the rectangles and updating their locations with the speed
        sx[i] += dx[i];
        sy[i] += dy[i];

        // lets the rectangles wrap arround to the other side when they go off screen
        if (sx[i] > width){
         sx[i] = 0;
        } else if (sx[i] < 0) {
        sx[i] = width;
        }
        if (sy[i] > height) {
            sy[i] = 0;
        } else if (sy[i] < 0) {
            sy[i] = height;
        }
        
    }


}

It took me a while to decide on how I wanted to make this portrait. Although I knew which photo I wanted to do, I wasn’t sure how I wanted to manipulate it. I ended up really like this project because it allowed me manipulate photos in fun and interesting ways.

This screenshot shows the photo with 2000+ squares of the same size
This screenshot shows the photo with over 2000+ squares and the squares being double the size
This is the original photo

Jessica Timczyk – Looking Outwards 09

For this looking outwards I decided to do JJ Legelis’ post on 3D computer graphics in the movie Star Wars: Rogue One from this year, 2018. In this movie they used CGI through motion capture technology that allows you to use a real life actor’s movements and motions to map a CGI model on top that creates the illusion that the diseased actor, in this case Peter Cushing, is actually there. This is extremely useful for not only Star Wars but other franchises in which a actor or actress may die before being able to film another sequel, that way writers do not have to completely get rid of their characters. I agree with JJ’s assessment of the technology because not only is it extremely impressive how accurate but also realistically flawless the CGI is. I would only like to add that though this technology is extremely interesting and effective, with this much replication power it becomes important to recognize morals and the wishes of the family and the passed person themselves in manipulating

their image.

Lan Wei-Project 09-Portrait

my-sketch.js

//Lan wei
//lanw@andrew.cmu.edu
//Section D
//Project-09

var img;
var url;
function preload() {
    url = "https://i.imgur.com/LwxpUPT.jpg";
    img = loadImage(url);
    frameRate(10);
}

function setup() {
    createCanvas(300, 400);
    background(255);
    img.loadPixels();
}

function draw() {
   var x = floor(random(img.width));
   var y = floor(random(img.height));
   push();
   translate(x, y);
   var col = img.get(x, y);
   stroke(col);
   strokeWeight(map(brightness(col), 0, 100, 3, 1)); //line weight depending on brightness
   var length = map(brightness(col), 0, 100, 25, 5); //line length depending on brightness
   rotate(random(0, PI));
   line(- length/2, 0, length/2, 0);
   pop();
}

My idea is using lines to create the abstract portrait. To emphasize the human figure instead of the dark background, and also to make bright areas look brighter, I made the lines in areas with smaller brightness thicker and longer. I think it would look nicer if I choose a picture with more color changes.

Process effect