Project 3: Dynamic Drawing

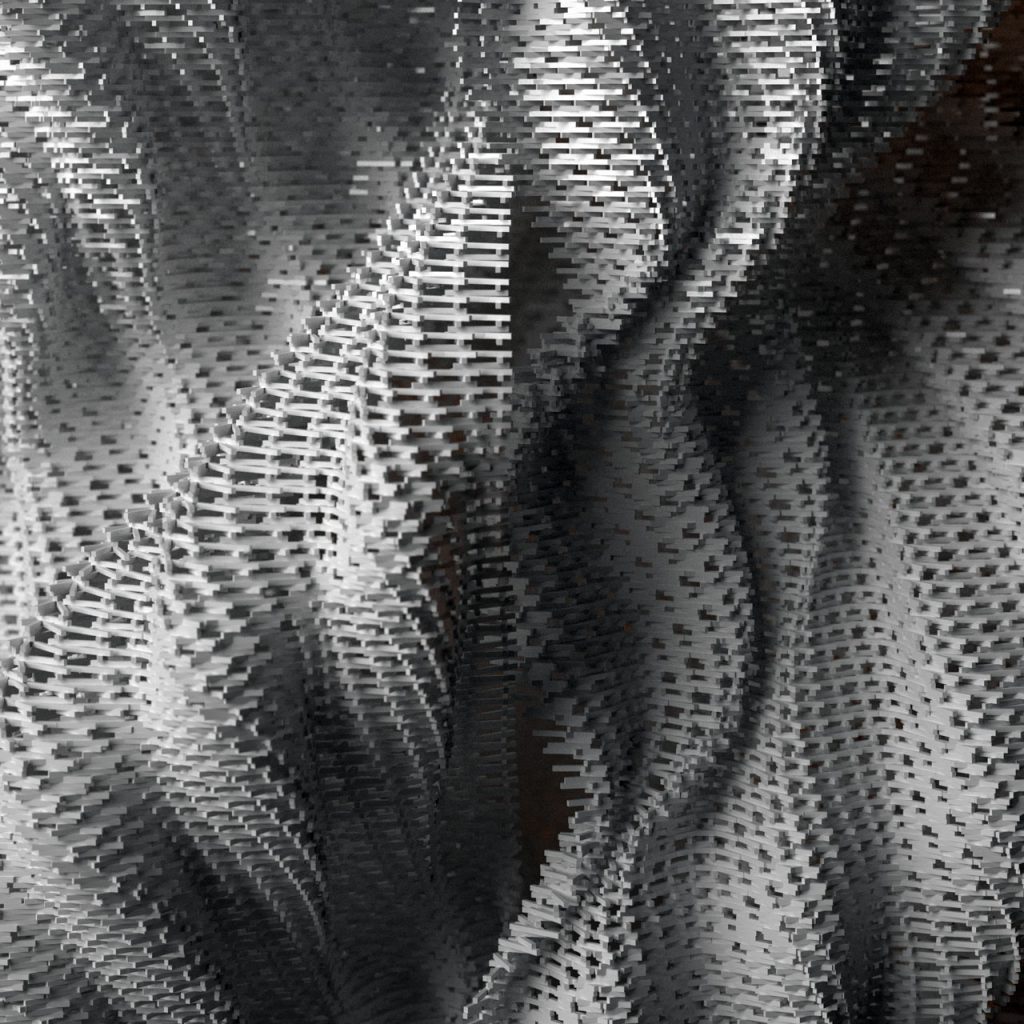
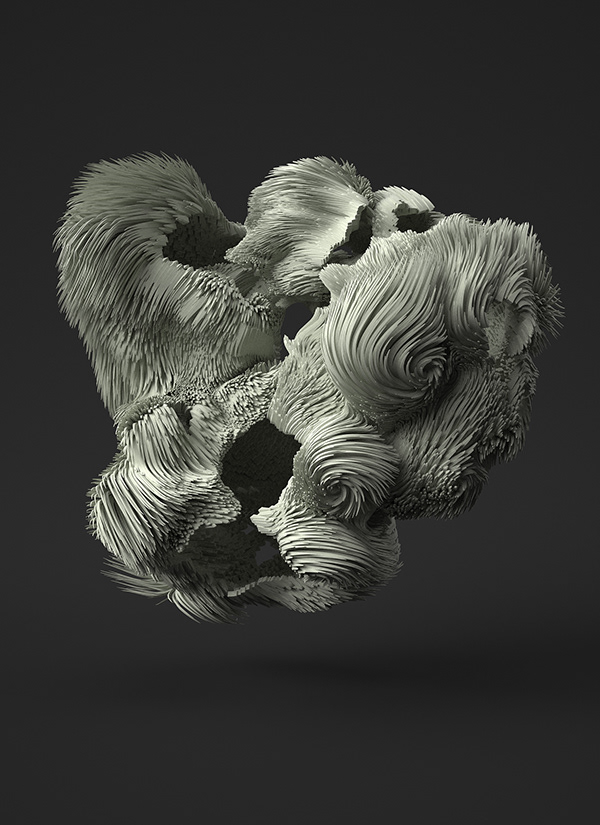
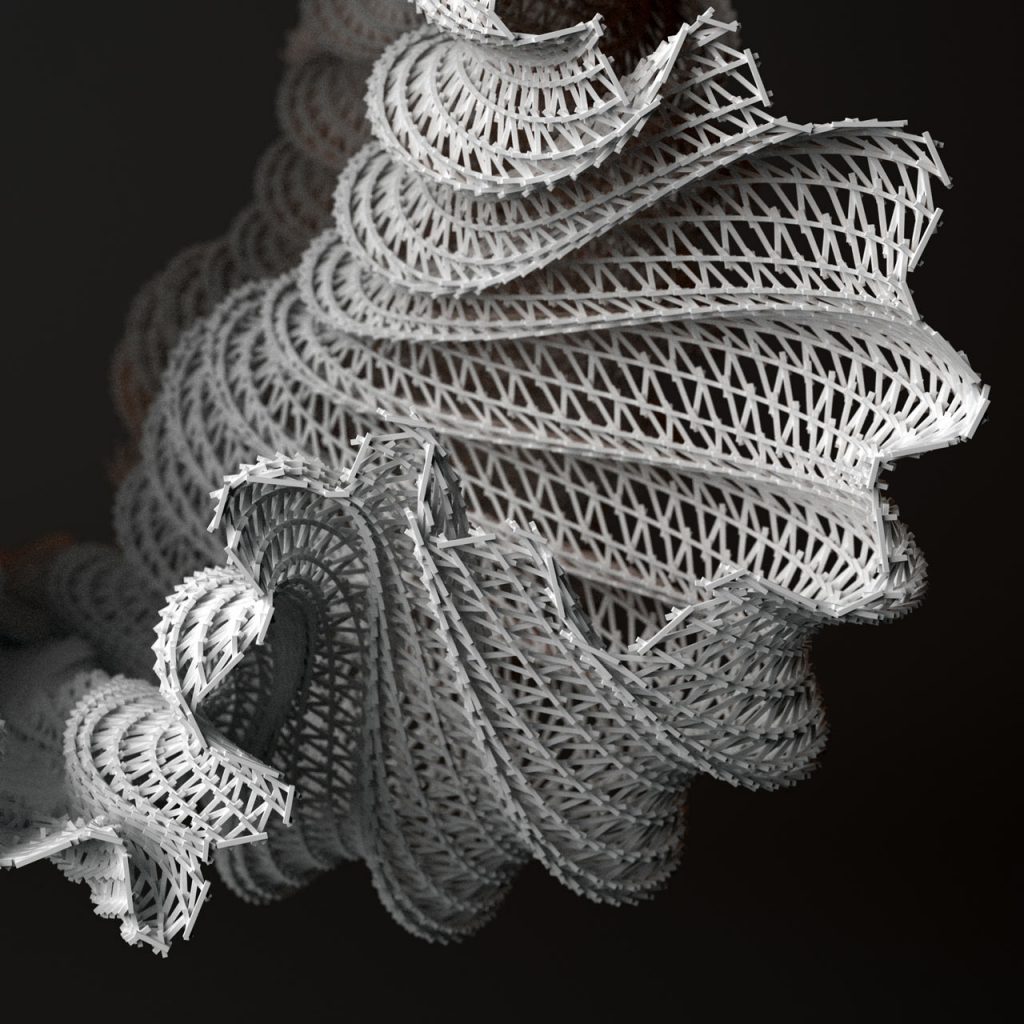
The project that I found inspirational is Benjamin Dillenburger’s Numerical Material. This project was created in 2021.

Numerical Material. This photo portrays the overall form of the artwork.

Numerical Material. This photo potrays the details of the algorithm of how the artwork was created when observed closely.

I admire this project because, the overall shape of the artwork has curves and has circular and soft lines and forms, yet when looked closely, these curves are created my geometric shapes of lines (sticks). While the sticks are white, the curvature of the surface creates positive and negative spaces as well as shadows, and lighter spaces which make the artwork very interesting to observe. The “set of rules” of parametric object are that the multiple sticks are overlapped onto each other to create a curve, and to connect the “curves” in a technical aspect to have the artwork itself hold, there are supporting sticks that overlap between these curves.

Link to Artwork

Project-03: Dynamic Drawing

sketch
function setup() {
    createCanvas(600, 450);
    background(100);
    fade = 0;
}

function draw() {
    var xmousePos = max(min(mouseX, 600), 0);
    var ymousePos = max(min(mouseY, 450), 0);
    var color = dist(300, 225, xmousePos, ymousePos);


    stroke(255, color, 0);
    //strokeweight increases as cursor moves further away from center
    strokeWeight(dist(300, 225, (xmousePos), (ymousePos))); 
    //drawing line that follows the cursor
    line(300, 225, xmousePos, ymousePos);
    //
    line(300, 225, xmousePos, -ymousePos);


}

I wanted to work with gradually changing colors particularly in projects to create a smooth gradient brush effect. Next time I want to try making curved lines as well.

Looking Outwards 03: Computational Fabrication

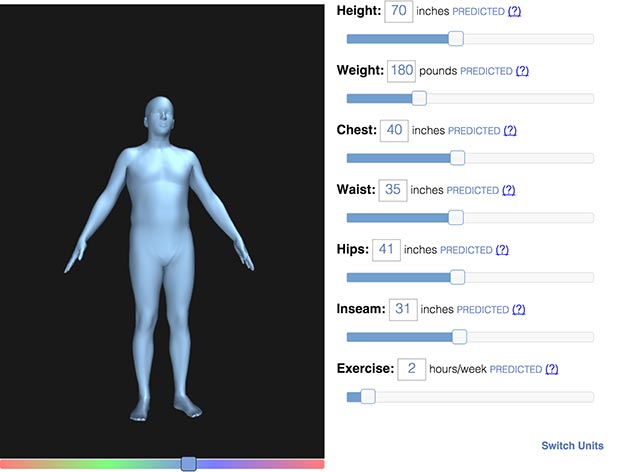
I think it is particularly interesting to link computational and parametric objects to living matter; such as nature or human. After reading professor Levin’s, I was really intrigued by how they digitally visualized a human body with different levers to control the width and length of each body part.

bodyvisualizer

Parametric 3D Form

I was interested in how each feature was correlated and dependent to one another and not completely independent, to make it a more accurate and realistic depiction of the actual human body. I have seen programs like this before, but each input for each body part could be changed completely on its own, allowing me to create a very unrealistic version of myself. I think that using programs like this would very much enhance the human life, in fields like fashion, medication, etc. I interpret this project as more of a scientific and technical approach than an artistically free one, but I think it is very interesting in ways how it can be of help in those various fields. If these kind of dependent parametric objects were created for other existences like animals or plants, I think that it will be a great way to determine and help sustain the natural environment as well.

Project-03: Dynamic Drawing

sketch
var angle = 0;
function setup() {
    createCanvas(600, 450);
    rectMode(CENTER);
}

function draw() {
    background(0);
    fill(255, 255, mouseY);
    // restrict mouseX to 0-400
    var m = max(min(mouseX, 400), 0);
    var size = m * 350.0 / 400.0;
    if (mouseX < width/2) {
        push(); 
        translate(150,200);
        rotate(radians(angle)); 
        rectMode(CENTER);
        rect(10 + m * 190.0 / 400.0, 200.0,
         size, size);
        pop();
        angle += 5;
} 

    else {
        rect(10 + m * 190.0 / 400.0, 200.0,
         size, size);
}

    fill(mouseX, 0, 255);
    size = 350 - size;
    rect(200 + m * 190.0 / 400.0, 200.0,
         size, size);


// } else if (mouseX > width/2) {background (0,0,200)}

}

Project 3: Dynamic Drawing

sketch
//Anthony Pan
//Section C
var size;
var colorRect; 
var wave;

function setup() {
    createCanvas(600, 450);
}

function draw() {
    scale(0.5); //zoom out
    translate(300, 200); //moves origin of canvas
    background(0);
    fill(255,0,0); //fills rectangles red
    rotate(radians(30)); //rotates canvas clockwise 30 degrees 
    mouseX = constrain(mouseX, 20, width); //constraining mouseX to canvas
    mouseY = constrain(mouseY, 0, height - 100); //constraining mouseY to canvas
    

    //rectangles created with for loop because of repeating pattern.
    for (let x = 0; x < 100; x++) {
        //initial rectangle 
        var position1 = (750 - 15 * x) + 200;
        var position2 = (-300 + x * 10) - 200;
        var rectWidth = 10;
        var rectHeight = 120;

        // size (further away from mouse, longer rectangle gets)(mouseX)
        size = dist(mouseX, 0, position1, position2); 
        position2 -= size/2; 
        rectHeight += size;

        //color (mouseY)
        //distance of mouseY from each rectangle gives color a value
        color = dist(0, mouseY, position1, position2); 
        //color creates a gradient from red to white
        color = (color/2.8 - 150) % 510
        //color = abs(255 - (color % 510)); // used so that there is a smooth transition from red to white to red again.
        fill(255, color, color);

        //wave (mouseX)
        wave = sin((PI/7) * x); //shifts the position of rectangles into a sin() wave
        position2 += wave * mouseX/3; //adjusting posiition based off of mouseX/3

        //twist (mouseY)
        rotate(radians(mouseY/100)); //reduces sensitivity of mouseY, also rotates canvas based on position of mouseY

        rect(position1, position2, rectWidth, rectHeight); //draws rectangle

    }
}

Using a for loop, I was able to create a rectangle and iterate it multiple times without having to repeatedly create every rectangle.

mouseX controls the size/length and the position of each rectangle through a sin() wave function as you move from left to right.

mouseY controls the color gradient from red to white as you move from top to bottom of the canvas. It also controls the rotation of the canvas.

Looking Outwards 03: Computational Fabrication

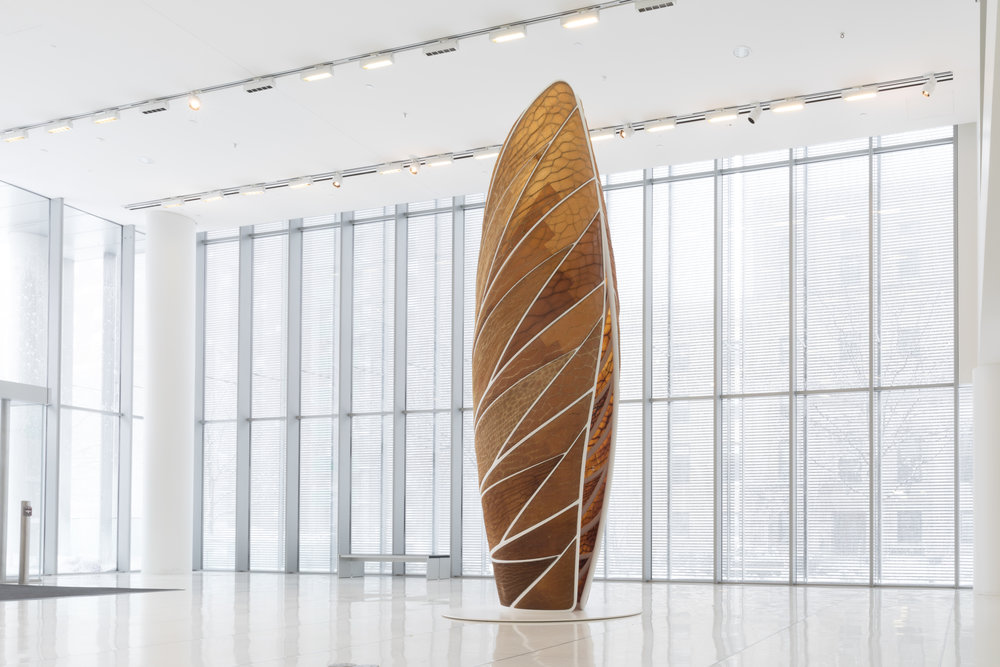
Today, I took a look at Project Aguahoja, a project done by the MIT media lab. The main focus of this project is waste reduction. Because so much of what we create ends up being waste, never to be used again, MIT media lab started a project where the grown and the made unite. They “aim to subvert the industrial, vicious cycle of material extraction and obsolescence through the creation of biopolymer composites that exhibit tunable mechanical and optical properties, and respond to their environments in ways that are impossible to achieve with their synthetic counterparts”. This is achieved through three parts, but I wanted to focus on the software and wetware designed by the Mediated Matter group. The Aguahoja Pavillion 1 can be programmed to degrade in water. This was especially inspiring to me because sustainability and technology can be mutually beneficial, and this project captures exactly that. The different structures that Aguahoja Pavillion 1 is made of are 3D printed from biomaterials and closely resemble natural structures. They didn’t disclose the programming used to create the structures, but I would have to guess that they used a series of equations to create a procedurally generated structure.

Project Aguahola

LO-Computational Fabrication

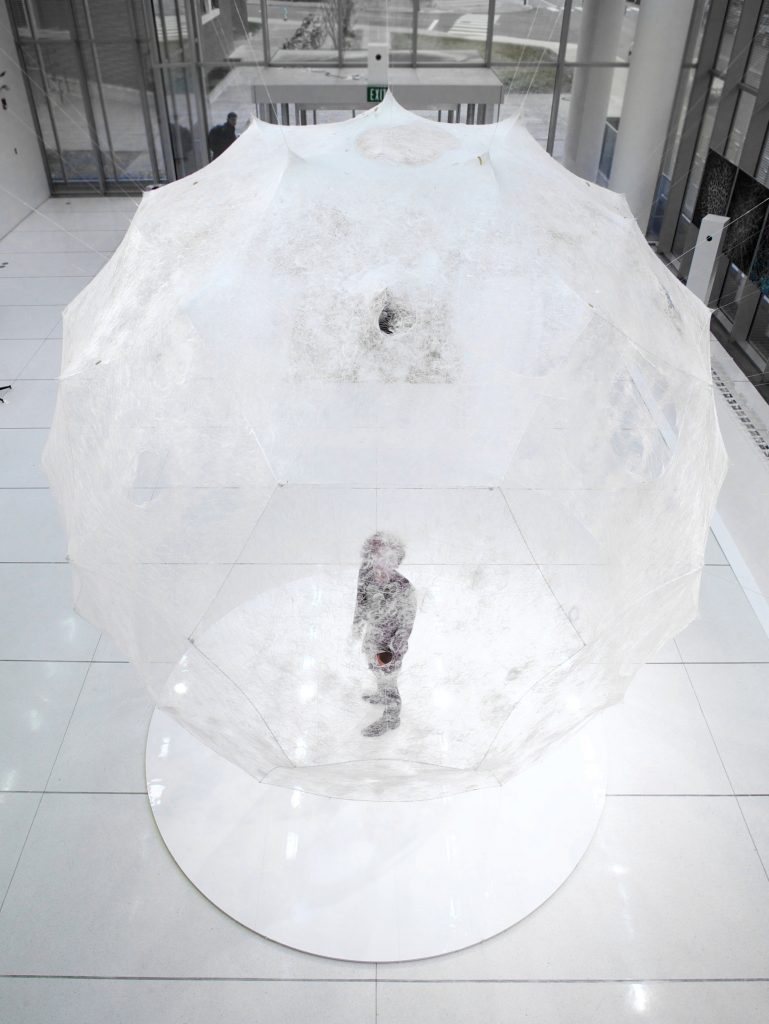
I looked at the silk pavilion project by The Mediated Matter Group at the MIT Media Lab in 2020. The thing I find inspiring about this project is how their team organically combine the algorithm calculations of digital media and biological features of silkworm. By mimicking the way natural worms form their silk, their team efficiently brings beauty of nature into something that’s created manually. I believe that nature is not only the source of our information and our living foundation, it also provides examples for us to learn from for further development. This pavilion project reminds me of biomimicry buildings that save energies by means learned from insects, plants, and other creatures from nature. By doing the series of work like this, it brings the connection between human and nature closer, and art and technology into another level.

The Final Pavilion

Project 03: Dynamic Drawing

This animation depicts a sun and a moon rotating in a circle, depending on the location of the user’s mouse. The background the sun passes through changes through sunrise, blue sky, and sunset colors as the sun moves from left to right.

Dynamic DrawingDownload

//Alana Wu
//ID: alanawu
//Section C
//Project-03

//sun and moon move in a circle centered in the canvas
// stars rotate around the moon
//clouds rotate around the sun
//when sun is above height/2, sunrise, then blue, then sunset colors
//when moon is above height/2, varying shades of blue 

function setup()
{
    createCanvas(600, 450);
    background(220);
    text("p5.js vers 0.9.0 test.", 10, 15);
}
var x = 30;

function draw()
{
    strokeWeight(0);
    background(0);

//moves (0,0) to center of canvas
    translate (300, 225);

//as mouse moves from left to right, background sky transitions
//from red (sunrise) to yellow, blue, yellow, and back to red(sunset)
    if (mouseX < 120)
    {
        fill (255, mouseX*2, 0);
    }
    if (mouseX>= 120 & mouseX < 220)
    {
        fill (255, 255, mouseX-40);
    }
//get from (255, 255, 180) to (50, 155, 255)
    if (mouseX>= 220 & mouseX < 300)
    {
        fill (50+(300-mouseX)*2.5, 155+(300-mouseX)*1.2, 255 - (300-mouseX));
    }
//get from (50, 155, 255) to (255, 255, 180)
    if (mouseX >= 300 & mouseX < 380)
    {
        fill (50+(mouseX-300)*2.5, 155+(mouseX-300)*1.2, 255-(mouseX-300));
    }
//from (255, 255, 180) to (255, 240, 0)
    if (mouseX >= 380 & mouseX < 480)
    {
        fill (255, 175+(480-mouseX), (480-mouseX)*1.4);
    }
    if (mouseX >= 480)
    {
        fill(255, 700-mouseX*1.1, 0)
    }
    rect (-300, -225, 600, 225);
    fill (mouseX/25, mouseX/25, 100);
    rect (-300, 0, 600, 225);

//draws background clouds that move horizontally
    push(0);
    fill(235);
 
 //if mouse is pressed, clouds change to dark gray and move left
    if (mouseIsPressed)
    {
        fill (90);
        x -= 5;
    }
    translate (-300, -225);
    ellipse (x, 45, 40, 40);
    ellipse (x+25, 30, 50, 50);
    ellipse(x+35, 60, 35, 35);
    ellipse (x+20, 50, 40, 40);

    ellipse (x+500, 150, 40, 40);
    ellipse (x+475, 160, 50, 50);
    ellipse(x+525, 170, 35, 35);
    ellipse (x+500, 180, 40, 40);

    ellipse (x + 300, 60, 40, 40);
    ellipse (x + 270, 70, 30, 30);
    ellipse (x + 285, 90, 50, 50);
    ellipse (x + 320, 90, 40, 40);

    ellipse (x+50, 100, 40, 40);
    ellipse (x+80, 130, 50, 50);
    ellipse(x+30, 132, 35, 35);
    ellipse (x+58, 135, 50, 50);
    pop();


//draws sun
    push();
    rotate (radians (135+mouseX/3.55));
    fill (255, 255, 0);
    ellipse (90, 90, 50, 50);
            translate (90, 90);
//draws 9 clouds around the sun
    for (var i = 0; i <= 8; i++)
    {
        rotate (radians (40));
        fill (255);
        strokeWeight(0);
        ellipse (mouseX/5 + 5, mouseY/5 + 5, 15, 15);
        ellipse (mouseX/5 - 8, mouseY/5-10, 15, 15);
        ellipse (mouseX/5, mouseY/5, 20, 20);
    }
    pop();

//draws moon
    push();
    
    rotate (radians(315+mouseX/3.55));
    fill (255, 255, 200);
    ellipse (90, 90, 50, 50);
    translate (90, 90);

//draws randomly moving stars around the moon 
    for (var j = 0; j < 5; j++)
        {
            rotate (radians(random (50, 80)));
            fill (255, 255, 204);
            rectMode (CENTER);
            rect (mouseX/9, mouseX/8, 5, 20);
            rect (mouseX/9, mouseX/8, 20, 5);
            push();
            translate (mouseX/9, mouseX/8);

//can you change the frameRate for only a section of the code?
            for (var h = 0; h <= 7; h++)
            {
                fill (255 - mouseX/7, 255 - mouseY/3, 255 - mouseX/5);
                rotate (radians (mouseY));
                ellipse (10+mouseX/20, mouseY/50, 8, 8);
            }
            pop();
        }

 //clouds move horizontally right by .5 every frame
    x += .5;

    pop();

}
Looking Outwards 03: Computational Fabrication

close up of wearable

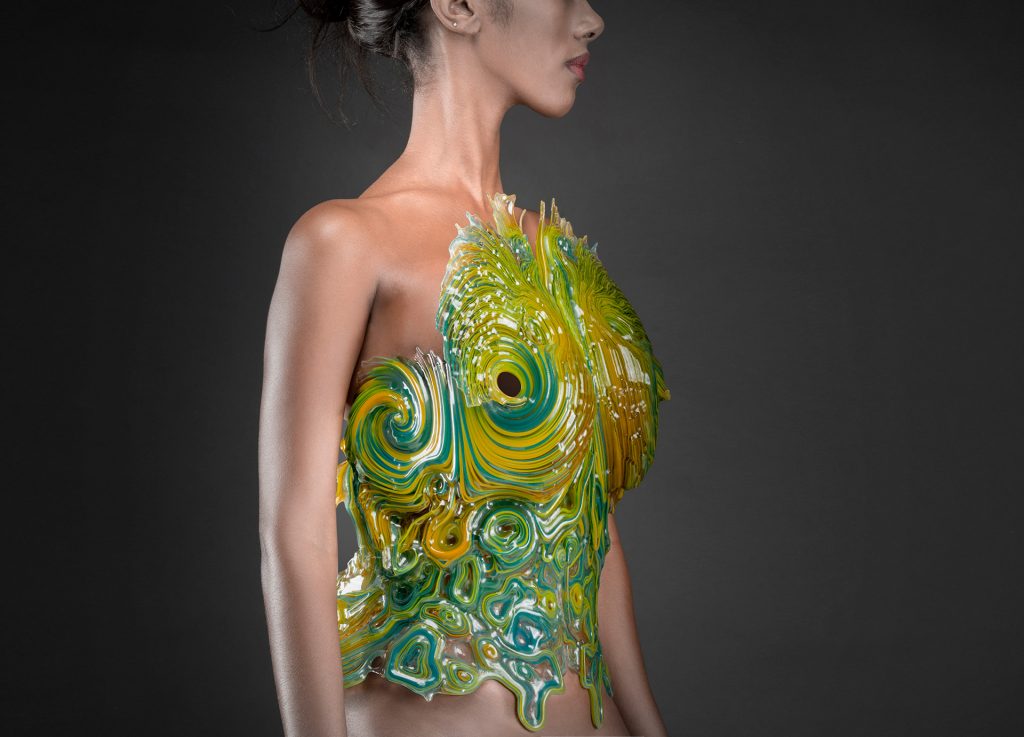
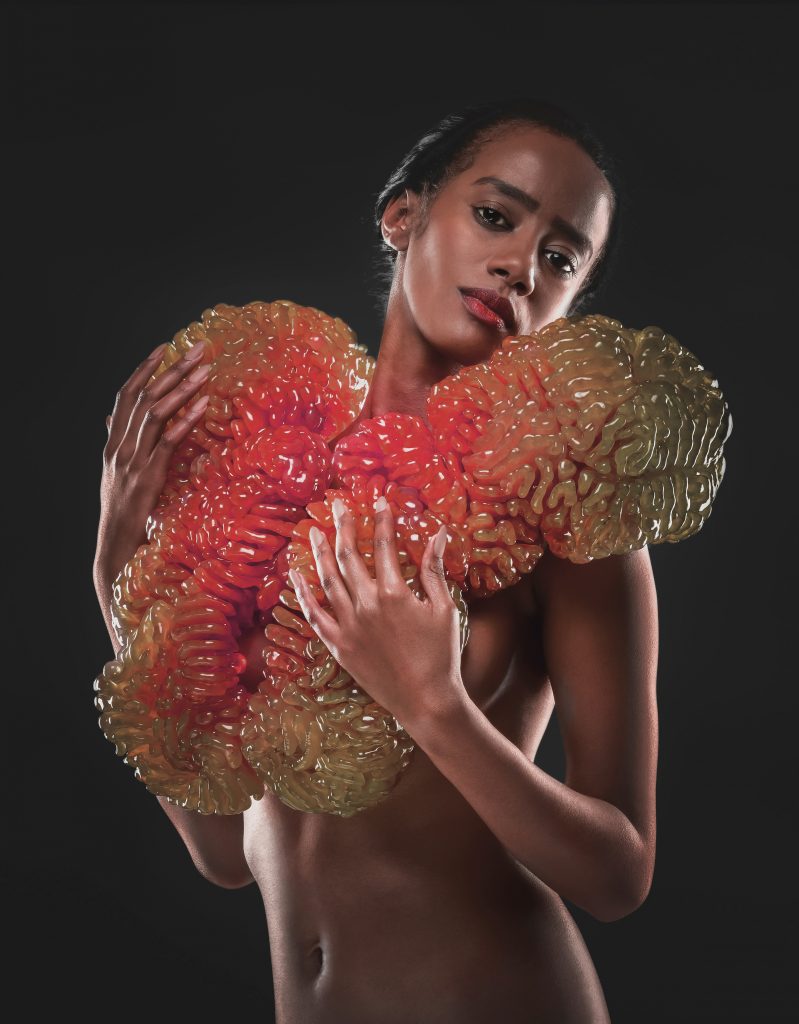
Wanderers computationally grows wearables through a process that emulates natural growth behavior. The shapes start out as a “seed” and adapt to their environment as they grow. 

The process imitated biological growth by transforming a geometric input into an intermediate representation, then deforming the initial geometric representation. The deformed initial representation reacts to the deformation of the object. This process is done iteratively, so as it repeats, the deformations aggregate into visible growth of the object.

Green and yellow wearable on model

I admire this project because it take biomimicry to the next level; rather than emulating specific end product qualities found in nature, this project literally grows and adapts the same ways living organisms do. Most man-made creations lack this quality. This opens up a whole host of new possibilities in design because as humans, many aspects of the future will always be uncertain, so fixed design will always have a flaw. But if you create algorithms that are capable of adapting to future changes, then design will be much for capable and efficient. Many of the things we design (buildings, energy systems, etc) are meant to exist for long periods of time and will need to be able to adapt to uncertain changes (eg effects of climate change). 

red and orange wearable on model

Looking Outwards 03: Computational Fabrication

Looking through the information about digital fabrication was very interesting to visually see and comprehend. A lot of the pieces reminded me of the third lab assignment we had this week. The random circles and colors compiled together looked similar to the modules in all the photos. Since there are multiple pieces and artists, I chose one project in specific: “Wood Skin Material”. The use of modules and scoring allows wood to become like a “skin-like” material which moves as a malleable blanket would. The “Wood Skin” adapts to each shape while also being able to generate new ones with its flexibility: giving designers freedom of expression with material. I am curious as to what physical designs this can be used for, for my freshman year in design there was a project where the class had to create environmental spaces with the use of simple shaped modules. The result of the project was alike to that of the “Wood Skin”. With just one repeated shape can create more interesting structures by bending, adding, etc.

https://www.behance.net/gallery/14217091/Wood-Skin-Material