Jinhee Lee; Looking Outwards 01

devilmaycry4playstation3us

Devil May Cry 4. The fourth installment in a video game franchise – developed and published by Capcom in 2008 – famous for revolutionizing the action genre in gaming, priding itself in its extensive combat mechanics, and bringing us some of the greatest moments in gaming history.

Devil May Cry 4 is one of those special gems that encourage me to possibly pursue a minor in Game Design, and what impresses me in particular is the engine on which the game runs, called MT Framework. Reverse-engineered from what was originally a PC engine, MT Framework has astounded me with just how much Devil May Cry 4 had going for it. Specifically its frame-rate of 60fps, complete in-game graphics, and solid performance, to name a few. For a game released 8 years ago, this was incredible production quality, and still is even by today’s standards. I commend the developers for prioritizing those aspects of the game, which are so important to get right in gaming that even current developers still struggle with or just flat-out neglect.

If anything, I see this as a shining example of polishing a computational project for maximum performance, as well as a standard to uphold, negating modern triple-A game developers excuses of sub-par performance in some of their games, despite multi million-dollar budgets and large development teams.

Link to a review of the game (link will take you to specific timestamp):

If you’re interested, here are links to combo videos that showcase the sheer potential of the combat:

Self Portrait Arula-01

index sketch

function setup() {
    createCanvas(300, 300);
    background(255);
}

function draw() {
	fill (30, 20, 15);
	ellipse (90, 180, 150, 200);
	fill (226, 185, 143);
	ellipse (100, 150, 90, 100);
	fill (30, 20, 15);
	ellipse (65, 120, 40, 53);
	fill (255);
	ellipse (117, 150, 20, 15);
	fill (255);
	ellipse (85, 150, 20, 15);
	fill (0);
	ellipse (119, 150, 10, 10);
	fill (0);
	ellipse (87, 150, 10, 10);
	noStroke ();
	fill (226, 185, 143);
	quad (90, 190, 110, 190, 110, 250, 90, 250);
	fill (181, 82, 57);
	quad (60, 215, 130, 230, 120, 283, 60, 283);
	ellipse (100, 180, 20, 10);
	fill (30, 20, 15);
	rect (73, 135, 20, 5);
	rect (107, 135, 20, 5);


}

Alison Hoffman Looking Outwards Week-01

As a Decision Science student you learn that there are three main types of decision making theories- Normative (what decisions we should make), Descriptive (what decisions we do make), and Prescriptive (how we can make better decisions). Personally I tend to be more interested in studying prescriptive theories because the by the nature there is more room for creativity. Nudging is one common type of prescriptive theory that allows people to make better decisions by making the optimal decision more effortless.

In a freshman year course, a professor showed a video showing a Volkswagon campaign using a nudge. In order to get more people to take the stairs rather than the escalator they turned the stairs into working a piano. The stairs worked as keys, playing notes as people walked up and down. By making the stairs interactive and fun, Volkswagon was able to get people to make a better, more beneficial decision.

I found this installation fascinating. While it took real time and effort to write the script and build the hardware to turn the stairs into a working piano, and Volkswagen made absolutely no profit from this, it was a great experiment to show how interactive design can influence behavior, and in the case, influence decision making. I admire how effective this project was. Moving forward in my academic career, I would like to explore how design and digital interaction can influence and improve consumer decision making. This project has shown me that can be effective.

Owen Fox LookingOutwards-01

V-Pyramid (1982) by Naim June Paik is a sculpture composed of 40 individual television screens, stacked on top of each other into a giant pyramid. Paik used his own video synthesis technology to create the images and video the screens display. Sound plays a big role in the piece as well: the pyramid blends together rock music, traditional Korean music, and raw noise into one sonic experience.

This project shows both the potential of new technology itself (in 1982 this video tech was cutting edge), but also the potential for combination between physical or structural art and digital or computational art. Without the “ziggurat”-like structure, the piece would lack permanence and gravitas, and without the hyper-modern audio and visuals, it would lack immediacy and interest.

Paik’s work owes a lot of inspiration to technology itself, but also to more traditional forms of art from all types of media (punk music for example.) This piece also draws from his earlier work: television sets and video manipulation are clearly things Paik is interested in)

Rebecca Enright Project-01-Face

Enright-Facesketch

function setup() {
    createCanvas(600, 600);
    background(176,0,100);
    
}

function draw() {
	noStroke();
	fill(255,238,196);
	ellipse(300,450,150,100);
	fill(155,0,178)
	ellipse(300,410,150,80);
	quad(250,430,350,430,370,600,230,600);
	fill(155,82,50);
	arc(280,270,100,70,HALF_PI,0);
	arc(325,285,100,100,PI,0);
	arc(300,235,70,60,PI,0);
	noStroke();
	fill(255,238,196);
	ellipse(300,300,140,145);
	noStroke();
	fill(255,191,198);
	ellipse(340,315,20,15);
	ellipse(260,315,20,15);
	fill(255,227,191);
	arc(300,320,20,20,PI,0);
	fill(255,205,191);
	arc(295,340,15,10,PI,0);
	arc(305,340,15,10,PI,0);
	arc(300,337,30,10,0,PI);
	fill(255)
	ellipse(275,290,30,20);
	ellipse(325,290,30,20);
	fill(155,82,50);
	ellipse(275,290,15,20);
	ellipse(325,290,15,20);
	fill(0);
	ellipse(275,290,10,17);
	ellipse(325,290,10,17);
	fill(255);
	ellipse(280,285,5,5);
	ellipse(330,285,5,5);
	noFill();
	stroke(0);
	strokeWeight(5);
	rect(255,280,35,25);
	rect(310,280,35,25);
	arc(300,295,15,10,PI,0);
	noFill();
	stroke(155,82,50)
	strokeWeight(5);
	arc(270,270,30,10,PI,0);
	arc(327,270,30,10,PI,0);
	bezier(250,250,215,300,200,350,235,400);
	bezier(250,250,365,160,415,380,370,400);
	arc(300,256,110,40,PI,0);
	arc(300,260,115,40,PI,0);
	arc(300,251,105,40,PI,0);
	arc(300,265,120,40,PI,0);
	noStroke();
	fill(255,238,196);
	ellipse(300,375,15,25);
	noLoop();


}

This project was really interesting and fun in how it allowed us to play around with the different shapes and techniques for creating the picture. I really enjoyed experimenting with this and seeing the different ways I could produce this image.

I also do not know why, but the image has been stretched out on here, so below is a rough picture of what it actually looks like:

Alison Hoffman Project-01

sketch

//Alison Hoffman
//Section D
//achoffma@andrew.cmu.edu
//Project-01


function setup() {
    createCanvas(600, 600);
    background(0,204,204);
}

function draw() {
	noStroke();
	//background hair
	fill(202,179,62);
	ellipse(width/2,height/2+100,400,630);
	//face base
	fill(255,218,185);//neck
	rect(width/2 - 80, height/2 +100,160,340);
	fill(75,75,75);
	ellipse(width/2,height/2+10,290,375); //shadow
	fill(255,218,185);//face
	ellipse(width/2,height/2,300,380);
	//shoulders 
	fill(255,218,185);
	ellipse(width/2,height/2+306,434,180);
	//shirt
	fill(153,0,0);
	rect(168,588,257,40);
	stroke(153,0,0);
	strokeWeight(18);
	strokeCap(SQUARE);
	line(168,532,168,600);	//left strap
	line(430,532,430,600);
	//face
	//eyes
	fill(0);
	noStroke();
	ellipse(width/2 - 55,height/2 - 25,44,26);
	ellipse(width/2 + 55,height/2 - 25,44,26);
	fill(255);
	noStroke();
	ellipse(width/2 - 55,height/2 -20,40,28);//left
	ellipse(width/2 + 55,height/2 -20,40,28);//right
	fill(0,140,180);//iris
	ellipse(width/2 - 55,height/2 -18,20);//left
	ellipse(width/2 + 55,height/2 -18,20);//right
	fill(0);//pupils
	ellipse(width/2 - 55,height/2 -18,12);//left
	ellipse(width/2 + 55,height/2 -18,12);//right
	//nose
	stroke(223,184,150);
	strokeWeight(4);
	line(width/2,height/2 - 2,width/2 + 9,height/2 +66);
	line(width/2 - 14,height/2 + 66,width/2 + 11,height/2 +66);
	//mouth
	fill(219,111,111);
	noStroke();
	triangle(width/2-42,height/2 + 120,width/2+20,height/2+120,width/2+24,height/2+106);
	triangle(width/2+8,height/2+120,width/2+20,height/2+120,width/2+40,height/2+90);
	fill(239,133,133);
	triangle(width/2-42,height/2 + 120,width/2+20,height/2+120,width/2+20,height/2+122);
    triangle(width/2+16,height/2+122,width/2+22,height/2+122,width/2+40,height/2+90);
    //bangs
    fill(202,179,62);
    ellipse(width/2,height/2 -156,200,70);
    triangle(width/2 -174,height/2-10,width/2+25,height/2-122,width/2-30,height/2-155);
    triangle(width/2 -174,height/2-10,width/2-110,height/2-150,width/2-20,height/2-155);
    triangle(width/2 +174,height/2-25,width/2+25,height/2-122,width/2+110,height/2-161);

    noLoop();
}

Michal Luria – Project – 01

michal-portrait

function setup() {
     createCanvas(455, 430);
     background(255, 87, 51);
}

function draw() {


	//face
	fill(255, 195, 1);
	noStroke();
	rect(120, 130, 80, 200);

	stroke(225, 195, 15);
	strokeWeight(1)
	rect(160, 128, 100, 180, 50);

	//nose
	triangle(257, 216, 257, 246, 275, 246);

	//sunglasses
	stroke(90, 24, 70);
	strokeWeight(5);
	line(170, 200, 260, 200);
	fill(145, 13, 63);
	ellipse(230, 210, 37);

	//lips
	stroke(145, 13, 63);
	strokeWeight(1);
	fill(199, 0, 57);
	triangle(245, 270, 260, 270, 260, 260);
	triangle(245, 270, 260, 270, 260, 280);

	//hair
	noStroke();
	fill(145, 13, 63);
	triangle(100, 130, 270, 85, 270, 160);
	fill(125, 13, 63);
	triangle(100, 130, 150, 137, 100, 300);
	fill(105, 23, 63);
	rect(80, 130, 60, 230);
	fill(145, 23, 63);
	triangle(40, 350, 140, 350, 120, 130);
	fill(135, 13, 63);
	triangle(150, 130, 180, 140, 130, 210);

	//headphones
	fill(90, 24, 70);
	ellipse(170, 215, 55);
	fill(199, 0, 57);
	ellipse(175, 210, 55);

	quad(195, 105, 235, 95, 190, 200, 160, 200);

}

In this project I started by hand sketching the portrait I wanted to create, and then broke it up into primitive shapes. Creating this image using JS required a number of iterations much greater than I expected, moving shapes around until I formed the full image I had in mind.

mic-sketch

Jinhee Lee; Project-01

jinheel1_Project-01

//Jinhee Lee
//Section C
//jinheel1@andrew.cmu.edu
//Project-01

function setup() {
    createCanvas(600, 600);
}

function draw() {
	background('blue');	//blue colored background
	strokeWeight(3);	//thicker outlines
	fill(255);	//white color for shirt
	triangle(0,600,600,600,300,537);
	fill(237,221,116);	//yellowish color for neck and face
	rectMode(CENTER);
	rect(300,525,160,60);	//neck
	ellipse(300,300,400,450);	//face
	fill(255);	//white color for eyeballs
	ellipse(210,230,65,45);
	ellipse(390,230,65,45);
	fill(89,65,12);		//brown color for outline of eyes
	ellipse(210,230,40,40);
	ellipse(390,230,40,40);
	fill(0);	//black color for eyes, hair features, and simplistic lips
	ellipse(210,230,25,25);	//eyes
	ellipse(390,230,25,25);
	quad(150,160,150,200,250,220,250,200);	//eyebrows
	quad(450,160,450,200,350,220,350,200);
	triangle(400,140,30,170,380,10);	//hair
	triangle(380,130,400,30,550,170);
	line(250,390,380,420);	//lips
	fill(247,181,195);	//pinkish color for nose
	triangle(260,340,340,340,300,240);
	fill('red');	//red color for that anger mark you see in Japanese anime
	rectMode(CORNER);
	strokeWeight(0);	//eliminate outlines for this shape
	rect(170,30,20,50);	//drawing the anger mark
	rect(140,60,50,20);
	rect(210,30,20,50);
	rect(210,60,50,20);
	rect(140,100,50,20);
	rect(170,100,20,50);
	rect(210,100,50,20);
	rect(210,100,20,50);
}

Not quite as frustrating as other coding projects (only took me 1.5 hours to type up the code) I’ve done, but I certainly had to think it through. Word of advice kiddies, draw your picture on paper and note the coordinates. Makes your life so much easier.

Naomi Shimada-Looking Outwards-1

For years, I’ve been a fan of the ballroom scene and the Be Our Guest number in Disney’s Beauty and the Beast. As a potential Animation and Special Effects minor and a 2D artist, I’ve marveled at Pixar’s ability to combine both traditional animation and computer animation. Though the projects are somewhat dated and technology has improved since then, the four years of intense work that 600 animators poured into a single film astounds me.

Beauty and the Beast was made using the software, Computer Animation Production System (CAPS), that was created by Pixar specifically for Disney. Beauty and the Beast was actually the first Disney film that utilized computer animation. Though the filmmakers had originally been against computer animation, the backgrounds that they were able to achieve through CGI eventually won them over.

Clearly Disney and companies like Pixar use computer animation today. Films like Tangled and Frozen would not have been made without Beauty and the Beast paving the way. As a 2D artist who tends to cling to the past, Beauty and the Beast has always been a reminder of a way to bridge tradition with innovation.

Disney Films Beauty and the Beast

Link to the Video:

https://www.youtube.com/watch?v=9qtTPTxvoPA

Research Information:

http://www.digitalmediafx.com/Beauty/Features/originalbeauty.html

Image:

Beauty and the Beast

Brandon Darreff – Project-01-Face

bdarreff_Project01

// Brandon Darreff

// Section A (Tuesdays 9:00)

// bdarreff@andrew.cmu.edu

// Project-01

function setup() {
    createCanvas(400, 550);
    background(186, 212, 126);
}

function draw() {
	// background triangles
	fill(211, 156, 93);
	stroke(255);
	triangle(0, 550, 0, 200, 175, 550);
	triangle(0, 0, 0, 100, 400, 0);
	triangle(400, 75, 400, 550, 300, 550);
	
	// left eyebrow
	fill(36, 107, 104);
	strokeWeight(0.5);
	stroke(255);
	beginShape();
	vertex(140, 200);
	quadraticVertex(220, 220, 200, 225);
	endShape(CLOSE);
	// right eyebrow
	beginShape();
	vertex(291, 268);
	quadraticVertex(220, 215, 236, 238);
	endShape(CLOSE)

	// left eye
	fill(255);
	stroke(100);
	strokeWeight(0.5);
	beginShape();
	vertex(150, 220);
	quadraticVertex(170, 210, 190, 250);
	quadraticVertex(170, 250, 150, 235);
	endShape(CLOSE);
	// right eye
	beginShape();
	vertex(235, 255);
	quadraticVertex(255, 245, 275, 285);
	quadraticVertex(255, 285, 235, 270);
	endShape(CLOSE);

	// left iris
	fill(36, 107, 104);
	stroke(0);
	strokeWeight(1);
	ellipse(167, 233, 17, 17);
	// right iris
	ellipse(252, 268, 17, 17);

	// left pupil
	fill(0);
	noStroke();
	ellipse(167, 233, 10, 10);
	// right pupil
	ellipse(252, 268, 10, 10);

	// left eye highlight
	fill(255);
	noStroke();
	ellipse(165, 230, 4, 2);
	//right eye highlight
	ellipse(249, 265, 4, 2);

	// nose
	fill(210, 232, 145);
	stroke(125);
	arc(190, 319.5, 20, 20, 30.5, HALF_PI, OPEN);
	noStroke();
	beginShape();
	vertex(220, 237);
	quadraticVertex(163, 322, 190, 330);
	endShape(CLOSE);
	p1 = {x: 220, y: 237}, p2 = {x: 190, y: 330}
	p3 = {x: 400, y: 320};
	noFill();
	stroke(125);
	curve(p1.x, p1.y, p1.x, p1.y, p2.x, p2.y, p3.x, p3.y);

	// hair
	fill(36,107,104);
	stroke(255);
	strokeWeight(1);
	beginShape();
	vertex(115, 250);
	quadraticVertex(110, 180, 150, 110);
	quadraticVertex(140, 130, 170, 150);
	quadraticVertex(160, 120, 180, 90);
	quadraticVertex(190, 140, 225, 150);
	quadraticVertex(210, 120, 220, 85);
	quadraticVertex(280, 160, 325, 180);
	quadraticVertex(340, 230, 290, 310); 
	quadraticVertex(300, 295, 300, 250);
	quadraticVertex(280, 260, 240, 180);
	quadraticVertex(220, 135, 130, 205);
	vertex(115, 250);
	endShape(CLOSE);

	// mouth
	fill(255);
	stroke(100);
	strokeWeight(1.5);
	beginShape();
	vertex(160, 345);
	quadraticVertex(190, 350, 200, 375);
	quadraticVertex(190, 385, 160, 360);
	endShape(CLOSE);
	strokeWeight(1);
	line(160, 354, 200, 375);

	// left ear
	fill(210, 232, 145);
	stroke(255);
	strokeWeight(1);
	beginShape();
	vertex(115, 250);
	quadraticVertex(95, 255, 114, 290);
	vertex(115, 250);
	endShape(CLOSE);
	// right ear
	beginShape();
	vertex(290, 310);
	quadraticVertex(310,325,265,350)
	vertex(290, 310);
	endShape(CLOSE);

 	// neck
	noFill();
	stroke(210, 232, 145);
	beginShape();
	vertex(150, 390);
	quadraticVertex(175, 410, 205, 400);
	quadraticVertex(190, 425, 195, 450);
	quadraticVertex(155, 475, 120, 425);
	quadraticVertex(145, 410, 139, 370);
	vertex(139, 370);
	endShape();

	// chin
	noFill();
	stroke(210, 232, 145);
	strokeWeight(1);
	beginShape();
	vertex(115, 250);
	quadraticVertex(105, 315, 150, 390);
	quadraticVertex(175, 410, 205, 400);
	quadraticVertex(250, 370, 265, 350);
	endShape();

	// shirt
	fill(255);
	stroke(255);
	beginShape();
	vertex(120, 425);
	quadraticVertex(155, 475, 195, 450);
	quadraticVertex(250, 450, 290, 480);
	quadraticVertex(298, 515, 290, 550);
	vertex(175, 550);
	vertex(110, 420);
	endShape(CLOSE);

	stroke(200);
	line(230, 550, 241, 505);
	line(237, 520, 234, 510);

	noLoop();
}

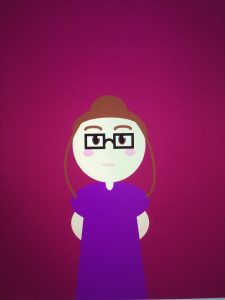
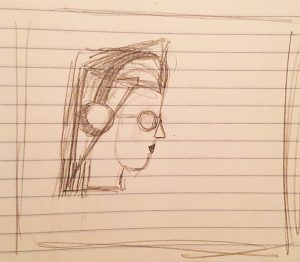
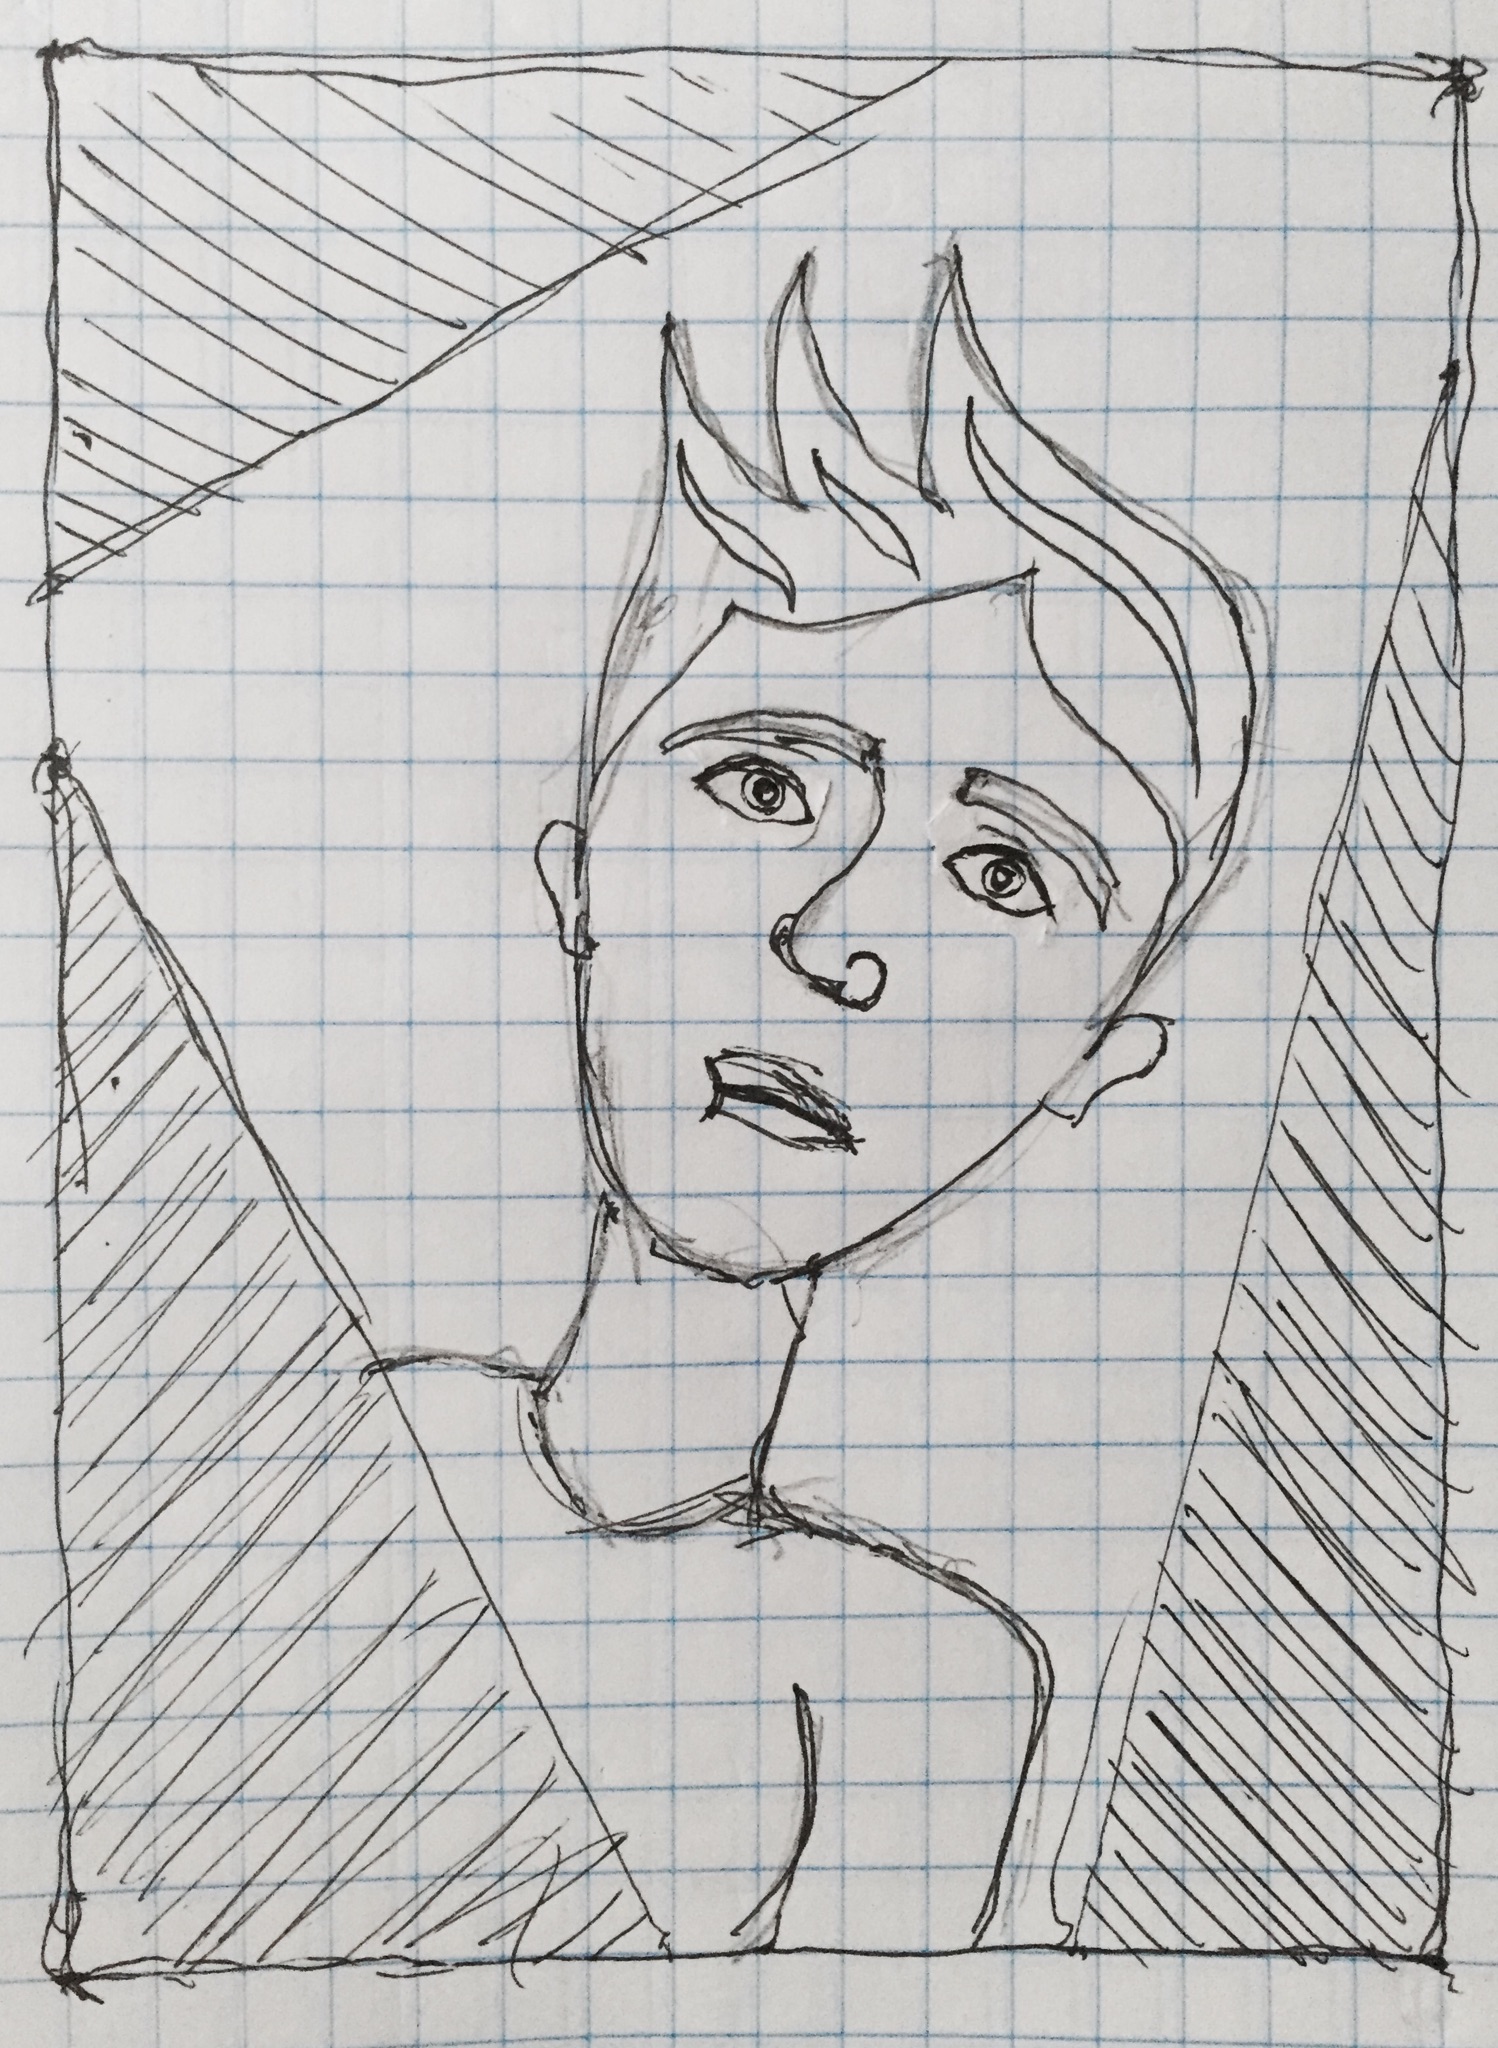
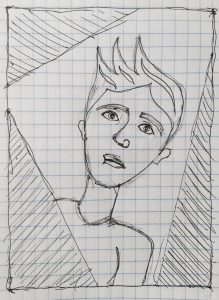
With this project I used a combination of primitive 2-d functions and irregular shapes to create the stylized portrait above. It was helpful to quickly sketch out the intended end-product on graph paper to be able to map certain features. I think the look of concern on the resultant figure’s face successfully captures my crippling anxiety and I am looking forward to learning how to develop the code I wrote in much cleaner, more efficient ways.

FullSizeRender