Ziningy1 – Section C – Looking Outwards – 02

Supercodex – Ryoji Ikeda

Japan’s leading electronic composer and visual artist Ryoji Ikeda has adopted a way to produce music using raw datas and mathematic models. Ikeda’s music is concerned primarily with sound in a variety of “raw” states, such as sine tones and noise, often using frequencies at the edges of the range of human hearing.  The Supercodex is live exhibition/performance by Ryoji Ikeda, which combines the auditory experience of his music with visual graphics that goes along with the music beats. I attend the Supercodex live performance last year in downtown Pittsburgh. The whole experience is 45 minutes, yet to me it does not seems to be intolerably long as I stand in the live room, listening to this “weird” highly electronic sound. However, it sounds less like music pieces that is fluent and harmonic, instead it was like some different frequency of noises composed meticulously together by the artist. The strong beat patterns and the fast changing black and white graphics brought me to a weird sensation state, where I become synchronize with the music and stop thinking about anything else. I am not sure whats the algorithm that Ikeda used to compose his music. I admired the aspect that Ikeda was able to integrate the mathematic precision and aesthetics into the world of music, and together with computed visuals he creates a incredible sensational experience for the viewers.

dchikows – Section C – Looking Outward – 02

Bio-Inspired Reaction Diffusion Print

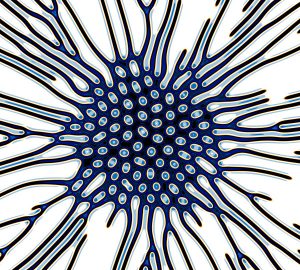
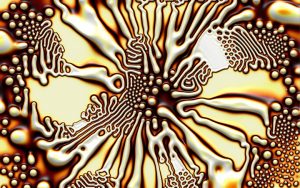
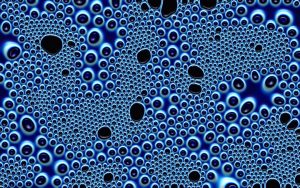
Karl Sims is a generative artist who has worked for industry and himself creating special effects software. Sims’ website is understated, but his two ARS Electronica Golden Nicas and a MacArthur Fellowship Award stand for themselves along with his work. When looking through his bio-inspired prints attention to detail is paramount. Sim’s created the pieces by the use of the Gray-Scott reaction-diffusion simulations. There is a kean distinction of his color pallets between light and dark tones, which seems to create a build up and almost zenith effect when looking at the images. In essence, to create the image a chemical reaction is simulated across a grid. From this grid once thousands cells is simulated patterns can emerge creating Sim’s images. Just as we are using variables in p5.js to create animations Sim’s aso uses variables in the software. One of which is the feed rate of the simulated chemicals being added to a reaction.

Find more of Sim’s work here

Lrospigl-Project02-VariableFaces

sketch

  var eyeSize = 20;
  var faceWidth = 170;
  var faceHeight = 170;
  var eyeColor = 150;
  var shirtColor = 150;
  
function setup() {
  createCanvas(400, 400);
}

function draw() {

  background(127, 155, 245);

  //hair
  strokeWeight(0);
  fill (138,109,90);
  rect (width/2 - (faceWidth/2) - 10, 
  height/2 - (faceHeight / 2) - 10, 
  faceWidth + 20, 
  faceHeight + 40, 30);
  
  //hairShadow
  strokeWeight(0);
  fill (121,96,79);
  rect (width/2 - (faceWidth/2), height/2 - (faceHeight / 2) - 10, 
  faceWidth, faceHeight + 40, 15);
  
  //neck
  strokeWeight(0);
  fill(239, 205, 182);
  rect (width/2 - 10, 200, 20, 200, 10);

  //neckshadow
  strokeWeight(0);
  fill(211, 179, 158);
  rect (width/2 - 10, 150 + (faceHeight / 3), 20, 100, 10);
  
  //head
  strokeWeight(0);
  fill(239, 205, 182);
  rect (width/2 - (faceWidth/2), height/2 - (faceHeight / 2), 
  faceWidth, faceHeight, 30);
  
  var eyeXpos = (width / 2 - faceWidth * 0.25);
  var eyeYpos = (width / 2 + faceWidth * 0.25);

  //eyes
  strokeWeight(1);
  arc(eyeXpos, height / 2, eyeSize, eyeSize, 0, 2*HALF_PI);
  arc(eyeYpos, height / 2, eyeSize, eyeSize, 0, 2*HALF_PI);

  //shirt
  strokeWeight(0);
  fill(76, shirtColor, 91);
  rect (width/2 - (faceWidth*1.2 / 2), 340,
  (faceWidth * 1.2), 80, 10);
  
  //smile
  
  fill (246,180,211); 
  arc(200, 200 + (faceHeight / 4), 
  (faceWidth/3), faceHeight/4, 0, 2*HALF_PI);
  
  //teeth
  fill (255,255,255);
  arc(200, 200 + (faceHeight / 4), 
  (faceWidth/3), faceHeight/10, 0, 2*HALF_PI);
  
  //eyebrows
  noFill ();
  strokeWeight(0.2);
  bezier(eyeXpos - 17, height / 2 - 10, 
  eyeXpos + 10, height / 2 - 20,
  eyeXpos + 10, height / 2 - 12,
  eyeXpos + 15, height / 2 - 10);
  
  bezier(eyeYpos - 17, height / 2 - 10, 
  eyeYpos + 10, height / 2 - 20,
  eyeYpos + 10, height / 2 - 12,
  eyeYpos + 15, height / 2 - 10);
  
  //bangs
  strokeWeight(0);
  fill (138,109,90)
  rect (width/2 - (faceWidth/2) + 2, 
  height/2 - (faceHeight / 2) - 10,
  faceWidth - 4, 
  faceHeight - (faceHeight/1.6), 10);
  
}

function mousePressed() {
  faceWidth = random(100, 200);
  faceHeight = random(100, 250);
  eyeSize = random(15, 30);
  shirtColor = random(0,150);
}

Sarah Kim- Looking Outwards 2

One of the projects that I found very intriguing was Beautiful Chaos which was an artwork created by an app made for leap motion control. The app, which existed previously before the artist’s decision to create this artwork, became a medium for the artist to explore in and create a beautiful work of nebulous lights. I chose this specific artwork because my main source of interest in artistic mediums were lights and color combination. Because I believe that enticement in art mainly comes from its visual presentation, I liked to study aesthetics through the use of many different color combos and understand the use of mood through the usage of lightings especially with neon and natural light. Because the majority of my interest in art comes from its aesthetic beauty more than the content, I tend to choose works that visually entice me which I find mysterious and interesting.

Beautiful Chaos


katieche – project 02 variable face

katieche-02

// Katie Chen
// 9:30 AM Class
// katieche@andrew.cmu.edu
// Assignment-02

var eyeSize = 20;
var earWidth = 50;
var earHeight = 55;
var headHeight = 200;
var headWidth = 220;
var ewSize = 30;
var cSize = 25;
var ccSize = 25;
var x = 6;
var y = 4;
var v = 6;
var z = 5;

 
function setup() {
    createCanvas(480, 640);
}
 
function draw() {
    background(207, 228, 247);

    // head
    strokeWeight(0);
    stroke(250);
    strokeCap(ROUND);
    fill (250);
    beginShape();
    	// top right
		curveVertex(headWidth/2, headHeight);
		// top left
		curveVertex(headWidth*2, headHeight);
		// bottom right
		curveVertex(headWidth*2, headHeight*2);
		// bottom left 
		curveVertex(headWidth/2, headHeight*2);
	endShape(CLOSE);

	// ears
    fill (250);
    var earL = width / 2 - headWidth * 0.25;
    var earR = width / 2 + headWidth * 0.25;
    ellipse(earL, headHeight, earWidth, earHeight);
    ellipse(earR, headHeight, earWidth, earHeight);

    // cheeks
    fill (255, 221, 211);
    noStroke();
    var cL = width / 2 - headWidth * 0.25 - 10;
    var cR = width / 2 + headWidth * 0.25 + 10;
    var dist = 25
    ellipse(cL, height / 2 + dist, cSize, cSize);
    ellipse(cR, height / 2 + dist, ccSize, ccSize);
    
    // eyes
    fill (250);
    strokeWeight(1);
    stroke (0);
    var ewL = width / 2 - headWidth * 0.25;
    var ewR = width / 2 + headWidth * 0.25;
    ellipse(ewL, height / 2, ewSize, ewSize);
    ellipse(ewR, height / 2, ewSize, ewSize);
    fill (0);
    var eL = width / 2 - headWidth * 0.25;
    var eR = width / 2 + headWidth * 0.25;
    ellipse(eL, height / 2, eyeSize, eyeSize);
    ellipse(eR, height / 2, eyeSize, eyeSize);

    // left eyebrow
    stroke (0);
    strokeWeight(y);
	strokeCap(ROUND);
    line(eL - 7, 290+x, eL +7, 290+y);

	// right eyebrow
    strokeWeight(y);
	strokeCap(ROUND);
    line (eR - 7, 290+v, eR +7, 290+z);


}
 
function mousePressed() {
    headWidth = random(150, 250);
    headHeight = random(200, 300);
    eyeSize = random(10, 30);
    cSize = random(20, 40);
    ewSize = random(20, 40);
    earWidth = random(15, 75);
    earHeight = random(55, 120);
    dist = random(20, 30);
    ccSize = random(20, 40);
    x = random(0, 10);
    y = random(0, 10);
    v = random(0, 10);
    z = random(0, 10);
}

I started the project with the template and shapes that I felt more comfortable playing around with (ellipses, lines, rectangles, etc.), before trying new shapes. For me, the body was the hardest to construct since I tried curveVertex(); for the first time, and even now, it doesn’t necessarily look the way I intended it to (it kind of just looks like a marshmallow now which I guess I’m also okay with). A lot of my project did come from happy accidents (i.e I was trying to make cheeks but ended up making ears, etc.) which I thought was fun, but it’d also be neat to eventually be confident enough in coding that I can actually make what I intend to make.

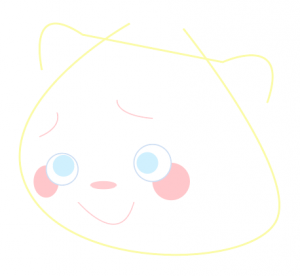
In terms of planning, I didn’t do anything much last project so I decided I’d try to make something in illustrator first (as seen below) this time and then recreate it with code. Unfortunately after a string of accidental shapes and still not being able to understand how to make curves, I ended up just kind of making everything on a whim for my final!

Project-1-Face-sjahania

sketch

function setup() {
    createCanvas(200, 200);
    background(0,83,124);
}
function setGradient(x, y, w, h, c1, c2) {

  noFill();

  // Top to bottom gradient
for (var i = y; i <= y+h; i++) {
  var inter = map(i, y, y+h, 0, 1);
  var c = lerpColor(c1, c2, inter);
  stroke(c);
  line(x, i, x+w, i);
 }
}

function draw() {
	//bow
	fill(255,95,60);
	stroke(0);
	strokeWeight(0.5);
	triangle(80,85,85,55,110,75);
	triangle(120,85,115,55,90,75);
	ellipse(100,65,8,10);

	//hair
	noStroke();
	fill(55,22,0);
	rect(75,90,50,80);

	//highlights
	c2 = color(255,206,69);
	c1 = color(55,22,0);
	setGradient(75,120,50,30,c1,c2)

	//neck
	fill(255,213,161);
	rect(88,120,24,20);
	arc(100,140,24,29,0,PI);

	//jawline
	noFill();
	strokeWeight(.5);
	stroke(0);
	arc(100,103,40,60,0,PI);

	//face
	noStroke();
	fill(255,213,161);
	ellipse(100,100,50,60);

	//bangs
	fill(55,22,0);
	arc(90,90,45,50,PI-QUARTER_PI,TWO_PI-QUARTER_PI);
	arc(110,90,45,50,PI+QUARTER_PI,QUARTER_PI);
	fill(255,213,161);
	arc(100,100,45,50,QUARTER_PI,TWO_PI-QUARTER_PI);
	arc(100,100,45,50,PI+QUARTER_PI,PI-QUARTER_PI)


	//whites of eyes
	fill(255);
	ellipse(90,100,10,7);
	ellipse(110,100,10,7);

	//eye color
	fill(55,22,0);
	ellipse(90,100,7,7);
	ellipse(110,100,7,7);

	//eyebrows
	noFill();
	stroke(55,22,0);
	strokeWeight(1.75);
	arc(89,94,15,4,PI,TWO_PI-QUARTER_PI);
	arc(111,94,15,4,PI+QUARTER_PI,TWO_PI);

	//nose
	noFill();
	stroke(55,22,0);
	strokeWeight(1);
	arc(100,110,8,8,PI,TWO_PI);

	//mouth
	noStroke();
	fill(0);
	arc(100,118,12,9,0,PI);

	//tongue
	fill(255,133,159);
	arc(100,120,8,5,0,PI);

	//shirt
	fill(255,95,60);
	noStroke();
	rect(60,145,80,60,25,25,0,0);

	//shirt collar
	stroke(0);
	strokeWeight(.5);
	arc(93,152,20,20,QUARTER_PI,PI+QUARTER_PI);
	arc(107,152,20,20,TWO_PI-QUARTER_PI,PI-QUARTER_PI);

	//arm holes
	fill(0,83,124);
	triangle(75,200,75,170,78,200);
	triangle(122,200,125,170,125,200);
	noStroke();
	fill(255,213,161);
	triangle(88,145,100,159,112,145);


}

I had a lot of trouble at first, especially since I have no eye for aesthetic, but eventually I got the hang of figuring out where things should go. I also added something from the p5.js website that allowed me to put a gradient in my hair.

dahyec-Project 01

sketch

function setup() {
    createCanvas(500,600);
    background(226,82,98);
}

function draw() {

//background
strokeWeight(0);
fill (182,68,81);
rect (0,0,700,80);
rect (0,150,700,80);
rect (0,300,700,80);
rect (0,450,700,80);

//hair
strokeWeight(0);
fill(137,54,73);
ellipse(250,230,300,270);
rect(100,240,300,500);


//ears
fill(226,110,112);
ellipse(135,300,40,70);
fill(226,110,112);
ellipse(365,300,40,70);
fill(85,33,64,80);
ellipse(135,300,20,40);
fill(85,33,64,80);
ellipse(365,300,20,40);

//face
strokeWeight(0);
fill(82,36,67,90);
ellipse(242,310,220,260);
strokeWeight(0);
fill(226,110,112);
ellipse(250,300,220,260);


//body
strokeWeight(0);
fill(233,202,163);
ellipse(250,580,355,240);
fill(233,202,163);
rect(73,565,354,240);


//eyes 
strokeWeight(0);
fill(85,33,64);
ellipse(205,290,26,40);
ellipse(310,290,26,40);


//nose
strokeWeight(0);
ellipse(258,325,10,10);

//mouth
fill(85,33,64,80);
arc(255, 380,33,30,0,PI);
fill(85,33,64);
arc(255, 365, 60,13,PI,0,PI);

//bang
fill(82,36,67,60);
rect(178,163,180,100);
fill(137,54,73);
rect(185,155,180,100);

//eyelash
strokeWeight(3);
line(225,289,215,285);
line(330,289,320,285);

//hairpin
strokeWeight(5);
line(390,210,350,240);
strokeWeight(5);
line(390,230,360,253);

}

In processing my self-portrait, I created simplified and 2D styled design.
Before starting with this project, I sketched my idea and then illustrated with illustrator so I can see what it would look like. In order to make it more 2D looking, I added some shadow under my front hair and face. Also, I only used 2 toned colors to look more simplified. I had a lot of fun learning and utilizing p5.js geometric elements.

rgroves – project01 – face

becky – face

function setup() {
    createCanvas(600, 750);
    background(235);
}

function draw() {
	angleMode(DEGREES);
	strokeWeight(0);


	//light hair
	fill(250, 230, 150);
	beginShape();
	vertex(125, 225);
	vertex(120,380);
	vertex(55, 475);
	vertex(55, 590);
	vertex(40, 620);
	vertex(150, 600);
	vertex(175, 625);
	vertex(220, 600);
	vertex(290, 290);
	vertex(125, 225);
	endShape();
	triangle(360, 630, 410, 350, 510, 550);
	triangle(510, 550, 490, 615, 380, 600);

	//darkhair
    fill(168, 128, 120);
    ellipse(350, 254, 450);

    //light hair
	fill(250, 230, 150);

    triangle(150, 500, 175, 300, 280, 500);

	//face shape
	fill(250 ,235 ,195);
	ellipse(378, 242, 345);
	//chin
	beginShape();
	curveVertex(235, 160);
	curveVertex(235, 160);
	curveVertex(193, 355);
	curveVertex(215, 510);
	curveVertex(270, 568);
	curveVertex(347, 550);
	curveVertex(475, 420);
	curveVertex(538, 306);
	curveVertex(538, 306);
	endShape();	

	//ear
	ellipse(450, 425, 150, 70);

	//eye1
	push();
	translate(300,303);
	rotate(25);
	fill(240,240,230);
	ellipse(0, 0, 70, 30);
	fill(105, 130, 170);
	ellipse(0,-5,40);
	fill(250, 220, 195);
	arc(0, 0, 70, 70, 180, 360, CHORD);
	pop();

    //hair 
    push();
    fill(168, 128, 120);
    translate(340, 175);
    rotate(75);
    ellipse(0, 0, 200, 420);
    pop();
    

    //shadow
	fill(260, 212, 170)

	beginShape();
	curveVertex(550, 257);
	curveVertex(550, 257);
	curveVertex(422, 287);
	curveVertex(350, 465);
	curveVertex(363, 530);
	curveVertex(363, 530);
	endShape();

	curveTightness(1.5);
	beginShape();
	curveVertex(367, 464);
	curveVertex(367, 464);
	curveVertex(338, 467);
	curveVertex(330, 465);
	curveVertex(320, 460);
	curveVertex(316, 478);
	curveVertex(315, 480);
	curveVertex(308, 478);
	curveVertex(304, 473);
	curveVertex(274, 478);
	curveVertex(306, 487);
	curveVertex(334, 505);
	curveVertex(350, 520);
	curveVertex(350, 520);
	endShape();

    curveTightness(0);
	beginShape();
	curveVertex(350, 520);
	curveVertex(350, 520);
	curveVertex(335, 505);
	curveVertex(318, 515);
	curveVertex(297, 506);
	curveVertex(290, 510);
	curveVertex(288, 519);
	curveVertex(290, 534);
	curveVertex(287, 553);
	curveVertex(274, 569);
	curveVertex(274, 569);
	endShape();
   
    beginShape();
	curveVertex(215, 510);
	curveVertex(274, 569);
	curveVertex(347, 550);
	curveVertex(475, 420);
	curveVertex(538, 306);
	curveVertex(550, 257);
	curveVertex(550, 257);
	endShape();

	//eye1

	push();
	translate(440, 360);
	rotate(25);
	fill(240,240,230);
	ellipse(0, 0, 70, 30);
	fill(95, 120, 150);
	ellipse(0,-5,40);
	fill(230, 200, 185);
	arc(0, 0, 70, 70, 180, 360, CHORD);
	pop();
}

Rebecca Groves
Section B

Reflection:
For my portrait, I wanted to maintain elements of my drawing style, which is generally not very geometric. As a compromise, I represented the nose and mouth in as organic a style as I could in this medium, and the rest of the face – the hair, eyes, and ear – are geometric.

Project-1-Face-Sontag

sketch

function setup() {
    createCanvas(400, 400);
    
   
}

function draw() {
    background(210);

    strokeWeight(0);
    fill(213, 180, 118);
    rect(160, 200, 120, 170);

    strokeWeight(0);
    fill(222, 184, 135);
    rect(110, 35, 60, 300);

    strokeWeight(0);
    fill(139, 69, 19);
    rect(50, 50, 250, 90);
    
    strokeWeight(0);
    fill(210, 180, 140);
    rect(width / 6, height / 6, 200, 200);

    strokeWeight(0);
    fill(205, 133, 63);
    rect(200, 60, 40, 90);

    strokeWeight(0);
    fill(139, 69, 19);
    rect(160, 200, 100, 10);

    strokeWeight(0);
    fill(255, 222, 173);
    rect(57, 150, 30, 60);

    strokeWeight(0);
    fill(255, 222, 173);
    rect(290, 57, 30, 60);

    strokeWeight(0);
    fill(0);
    ellipse(160, 55, 50, 80);

    strokeWeight(0);
    fill(0);
    ellipse(260, 90, 30, 24);

    strokeWeight(0);
    fill(218, 165, 32);
    rect(40, 100, 60, 10);

    strokeWeight(0);
    fill(222, 184, 135);
    rect(190, 130, 15, 15);

}

When tasked with drawing a self portrait of myself i decided to use a cubistic aproach. Although i could use other geometries to make a representation of my face, i don’t believe my skills would be able to create a realistic representation of me. Therefore i chose an abstract way of representation.

ziningy1 – Project 01 – Face

ziningy1_protrait


//Ethan Ye 
//ziningy1@andrew.cmu.edu 
//Project Self-Protrait 

function setup() {
    createCanvas(500,530);
    background(185,195,200);


} 

function draw() {  
     

    //shouder 
    noStroke();
    fill(110,130,150);
    ellipse(400,600,360,380);

    //neck 
    fill(230,210,177);
    rect(350,340,111,100);

    fill(110,130,150);
    triangle(460,430,330,470,460,480);
    
    fill(230)
    
    fill(90,112,130);
    ellipse(405.5,443,112,62);

    fill(230,210,177);
    ellipse(405.5,433,112,62);
    
    fill(220,200,167);
    ellipse(405.5,375,112,62);

    ellipse(390,380,112,62);


    //face 
    noStroke();
    fill(234,218,194);
    arc(353,267,330,270,PI+2*QUARTER_PI,HALF_PI+0.1,CHORD);
    fill(234,220,196);
    ellipse(340,280,140,245);


    //ellipse(500,270,270,300);


    //Hair
    noStroke();
    fill(50);
    triangle(220,230,300,130,360,170);
    fill(60);
    triangle(250,130,490,90,360,170);
    fill(30);
    triangle(340,80,500,110,400,135);
    fill(70);
    triangle(360,140,500,110,500,200);

    //eyebrow 
    fill(50);
    quad(313,227,360,210,370,220,313,237);
    triangle(360,210,390,215,370,220);

    //eye 
    fill(200,170,150);
    ellipse(345,258,49,28);
    
    fill(240);
    ellipse(342,255,50,27);
    fill(0);
    ellipse(329,257,13,20);
    fill(230);
    ellipse(326,252,4,3);

    //nose
    smooth();
    fill(234,220,196);
    triangle(272,256,240,310,280,310);

    //mouth 
    //fill(200,70,90);
    //arc(283,350,70,20,0,HALF_PI-0.2,PIE)

    fill(243,143,101);
    ellipse(300,355,40,25)

    fill(170,60,80);
    ellipse(291,350,50,25);

    fill(185,195,200);
    ellipse(275,350,50,25);

    //ear 

    fill(230,205,175);
    arc(440,270,100,70,5.4,1.4,CHORD);

    fill(234,218,194);
    arc(410,270,100,70,5.4,1.4,CHORD);

    //intials 
    scale(0.72);
    
    stroke(90,112,130);
    strokeWeight(3);
    line(90+60,220+110,90+60,260+110);
    line(90+60,220+110,115+60,220+110);
    line(90+60,240+110,110+60,240+110); 
    line(90+60,260+110,115+60,260+110);

    rect(130+60,260+110,2,2);
    line(145+60,220+110,160+60,240+110);
    line(160+60,240+110,175+60,220+110);
    line(160+60,240+110,160+60,260+110);


}

For this project, I intended to create a interesting facial expression with a simplistic style, which i decided to work with profile. I first worked on actual paper to sketch out some basic compositions, then moved to code, starting with the major geometric parts to detail adjustments. For colors, I also started with the gray scale, which is faster to begin with and provide a clear sense of hierarchy. And it works well for me to adjust all the colors together once the basic composition is laid out.