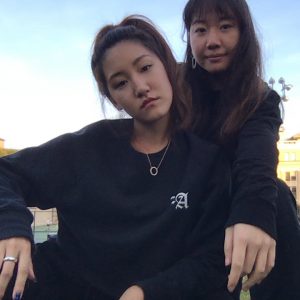
I had a lot of fun doing this project because I had the chance to use my personal photo as a visual element of the project. I chose a photo of me and my friend that we took during the sunset of an afternoon.
sketch
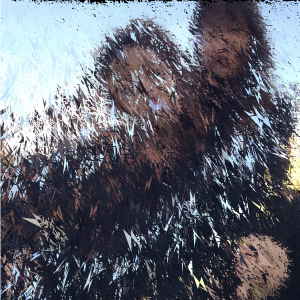
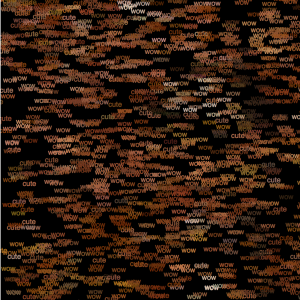
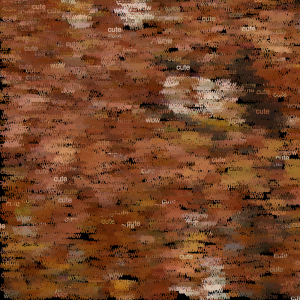
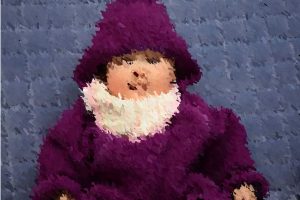
This project was fun because we were able to add aspects of our daily life and apply it to the code. I decided to use a photo of my friend and I together. I used the words “wow” and “cute” to describe us & the photo. If you scroll over the image, you will see little ellipses forming on the photo, reflecting the colors of the underlying image.
/*Sharon Yang
Section C
junginny
Project-09
*/var underlyingImage;functionpreload(){var myImageURL ="https://i.imgur.com/ZnYAlHy.jpg"; //image of my boyfriend smiling
underlyingImage =loadImage(myImageURL);}functionsetup(){createCanvas(480,480);background(0);
underlyingImage.loadPixels();frameRate(300);}functiondraw(){var px =random(width); //the coordinates of where shapes created are randomized
var py =random(height);var ix =constrain(floor(px),0, width-1);var iy =constrain(floor(py),0, height-1);var theColorAtLocationXY = underlyingImage.get(ix, iy); //get the colors of the pixel
noStroke();fill(theColorAtLocationXY);drawShape(px, py,5,10);}functiondrawShape(x, y, radius1, radius2){ //draw star shape
var angle = TWO_PI/5;beginShape();for(var i =0; i < TWO_PI; i += angle){var starX = x +cos(i)* radius2;var starY = y +sin(i)* radius2;vertex(starX, starY);
starX = x +cos(i+angle/2)* radius1;
starY = y +sin(i+angle/2)* radius1;vertex(starX, starY);}endShape(CLOSE);}
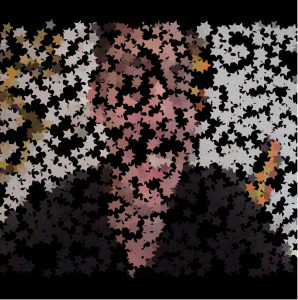
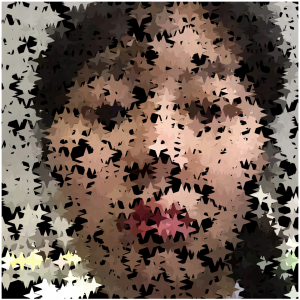
I have used an image of my boyfriend. The project incorporated a very interesting concept. However, because I used the star shape, and also the image was quite blurry, it became really hard to make out of what the image is.
/*
Yingying Yan
Section E
yingyiny@andrew.cmu.edu
Project - 09
*/var zoey; //a picture
functionpreload(){var zoeyPic ="https://i.imgur.com/QcSx6L4.jpg"
zoey =loadImage(zoeyPic);}functionsetup(){createCanvas(480,320);background(0);
zoey.loadPixels(); //get pixels from the picture
frameRate(30);}functiondraw(){var x =random(width); //x position of the storke
var y =random(height); //y postotion of the stroke
var px =constrain(floor(x),0, width-1); //x position of each pixel
var py =constrain(floor(y),0, height-1); //y position of each pixel
var theColorAtLocationXY = zoey.get(px, py); //get the color of each pixel
stroke(theColorAtLocationXY); //draw out zoey with small stokes
strokeWeight(random(1,5));line(x, y, x -random(0,9), y -random(0,9));}
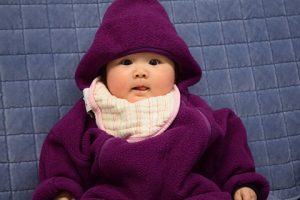
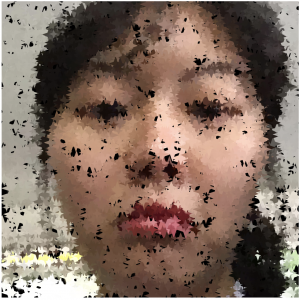
I regret using my little sister’s picture. She is so cute but I am not good enough to render her picture to something better. But that is ok because she will never see this. Overall I think this project is interesting. It is like making a filter for photoshop. I started the project by trying to do something fancy, but I failed. I will try to fix that after I turn this in.
// Jessica Timczyk
// Section D
// jtimczyk@andrew.cmu.edu
// Project-09-Portrait
// global variables
var underlyingImage;var sx =[];var sy =[];var dx =[];var dy =[];functionpreload(){ // preloads image
var myImageURL ="https://i.imgur.com/CKGh2Ed.jpg?1";
underlyingImage =loadImage(myImageURL);}functionsetup(){createCanvas(300,400);background(255);
underlyingImage.loadPixels();for(i =0; i <1000; i++){ // for loop to randomly pick the positions and speed of each square
sx[i]=random(width);
sy[i]=random(height);
dx[i]=random(-5,5);
dy[i]=random(-5,5);}frameRate(10);}functiondraw(){background(255);noStroke();for(i =0; i <1000; i++){var colorAtSquare = underlyingImage.get(sx[i], sy[i]); // the color of each square changes as it moves across
// the screen to match the photo under neath
fill(colorAtSquare);rect(sx[i], sy[i],20,20); // drawing the rectangles and updating their locations with the speed
sx[i]+= dx[i];
sy[i]+= dy[i]; // lets the rectangles wrap arround to the other side when they go off screen
if(sx[i]> width){
sx[i]=0;}elseif(sx[i]<0){
sx[i]= width;}if(sy[i]> height){
sy[i]=0;}elseif(sy[i]<0){
sy[i]= height;}}}
It took me a while to decide on how I wanted to make this portrait. Although I knew which photo I wanted to do, I wasn’t sure how I wanted to manipulate it. I ended up really like this project because it allowed me manipulate photos in fun and interesting ways.
This screenshot shows the photo with 2000+ squares of the same sizeThis screenshot shows the photo with over 2000+ squares and the squares being double the sizeThis is the original photo
//Jonathan Liang
//jliang2
//section A
var springy =0.7; // how much velocity is retained after bounce
var np =50; // how many particles
var underlyingImage;functionpreload(){var myImageURL ="https://i.imgur.com/obcoL1tl.jpg";
underlyingImage =loadImage(myImageURL);}functionparticleStep(){var ix =constrain(floor(this.x),0, width-1);var iy =constrain(floor(this.y),0, height-1);var theColorAtLocationXY = underlyingImage.get(ix, iy);noStroke();fill(theColorAtLocationXY)ellipse(this.x,this.y,5);this.x +=this.dx;this.y +=this.dy;if(this.x > width){ // bounce off right wall
this.x = width -(this.x - width);this.dx =-this.dx * springy;}elseif(this.x <0){ // bounce off left wall
this.x =-this.x;this.dx =-this.dx * springy;}if(this.y > height){ // bounce off bottom
this.y = height -(this.y - height);this.dy =-this.dy * springy;}elseif(this.y <0){ // bounce off top
this.y =-this.y;this.dy =-this.dy * springy;}}
// create a "Particle" object with position and velocity
functionmakeParticle(px, py, pdx, pdy){
p ={x: px, y: py,
dx: pdx, dy: pdy,
step: particleStep,}return p;}var particles =[];var randx =[];var randy =[];functionsetup(){createCanvas(380,480);background(0);
underlyingImage.loadPixels();for(i =0; i < np; i++){
randx[i]=random(-50,50);
randy[i]=random(-50,50);}frameRate(5);}
// draw all particles in the particles array
//
functiondraw(){background(230);for(var i =0; i < np; i++){ // make a particle
var p =makeParticle(200,350,
randx[i], randy[i]); // push the particle onto particles array
particles.push(p);}for(var i =0; i < particles.length; i++){ // for each particle
var p = particles[i];
p.step();}}
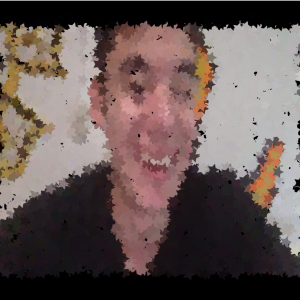
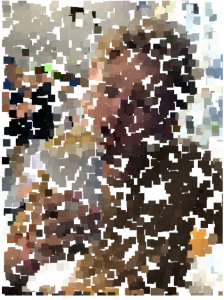
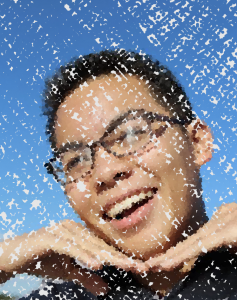
I chose a picture of my friend from high school. I wanted the ellipses that generated the image to first start from his mouth and then bounce everywhere to generate the image. Kind of like vomiting, but with a more artistic result. The ellipses slow down after they hit the walls so that it is clearer that they are bouncing and not just randomly generating wherever they want. Below is a few screenshots of the image being generated over time.
//Sophie Chen
//Section C
//sophiec@andrew.cmu.edu
//project-09
var underlyingImage;var p =70; // text starting size
functionpreload(){var myImageURL ="https://i.imgur.com/jr1cT80.jpg";
underlyingImage =loadImage(myImageURL);}functionsetup(){createCanvas(400,600);background(0);
underlyingImage.loadPixels();frameRate(10);}functiondraw(){var coordX =random(width);var coordY =random(height);var x =constrain(floor(coordX),0, width-1);var y =constrain(floor(coordY),0, height-1);var color = underlyingImage.get(x, y);noStroke();
p -=0.2; // each text's size decreases by 0.2
textSize(p);fill(color);text('lil', coordX, coordY); // stop decreasing text size once it reaches 20
if(p <20){
p =20;}}
I enjoyed this project a lot, I used this picture of my friend Sabrina. The word “lil” is what forms the image- I made it start pretty big to block out the general color scheme, and as the image continues to draw it gets smaller and smaller so the image is more detailed, which I personally found more interesting/enjoyable to watch than when I had the text stay the same size the entire time.
/*Kevin Riordan
Section C
kzr@andrew.cmu.edu
project_09*/var underlyingImage;
//making count variable, for end point and for switching point
var count =0;functionpreload(){var myImageLink ="https://i.imgur.com/UPry60m.jpg";
myImage =loadImage(myImageLink);}functionsetup(){noStroke();createCanvas(480,480);background(0);
myImage.loadPixels();}functiondraw(){var posX =random(width);var posY =random(height);rectMode(CENTER); //front half uses createRect function
if(count <=5000){var countMap1 =map(count,0,5000,100,20);createRect(int(posX),int(posY),countMap1 /10);
count++;} //back half uses detailedRect function
elseif(count <=10000){createDetailRect(posX,posY,2);
count++;}}
//making larger crosses at the beginning
functioncreateRect(initialX, initialY, size){var iX =constrain(floor(initialX),0, width -1);var iY =constrain(floor(initialY),0, height -1);var pixelColor = myImage.get(iX, iY);fill(pixelColor);for(var i = size; i >0; i --){var cCoord =map(i,0,size,size *2,0);rect(initialX + cCoord,initialY,i,i);rect(initialX - cCoord,initialY,i,i);rect(initialX,initialY - cCoord,i,i);rect(initialX,initialY + cCoord,i,i);}}
//making detailed shapes for the end
functioncreateDetailRect(initialX, initialY, size){var iX =constrain(floor(initialX),0, width-1);var iY =constrain(floor(initialY),0, height-1);var pixelColor = myImage.get(iX, iY);fill(pixelColor);for(var change =0; change <=12; change ++){var side =map(change,0,12,1,0);rect(initialX +(change /2),initialY,size * side,size * side);rect(initialX,initialY +(change /2),size * side,size * side);rect(initialX +(change /2),initialY +(change /2),size * side,size * side);rect(initialX -(change /2),initialY,size * side,size * side);rect(initialX,initialY -(change /2),size * side,size * side);rect(initialX -(change /2),initialY -(change /2),size * side,size * side);rect(initialX +(change /2),initialY -(change /2),size * side,size * side);rect(initialX -(change /2),initialY +(change /2),size * side,size * side);}}
I started this project by making a function based on the example code in the project description. It was pretty cool modifying the code and seeing what shapes appeared, and I played around with making an overall count variable that caused the size to decrease, increasing the detail. If I had more time, I would have played around with constraining the detailing after the count was above 5000, to constrain it to areas that had not been filled in. Overall, though, I am pretty satisfied with this project.
picture at beginning (count <2500)picture during middle (count = 5000)picture at end (count = 10000)reference picture i used for underlying image
// Xiaoying Meng
//B
//xiaoyinm@andrew.cmu.edu
//Project 9
var IMG;//store image
var x; //Grid X
var y; // Grid Y
//load image
functionpreload(){var ImageURL ="https://i.imgur.com/MMbPIxn.png"
IMG =loadImage(ImageURL);}functionsetup(){createCanvas(480,480); //Get pixels from image
IMG.loadPixels();}functiondraw(){background(0);drawGrid();}functiondrawGrid(){ //Creating Grid
for( x=0; x<480; x=x+10){for( y=0; y<480; y=y+10){ //Colors from image at x,y location
var theColorAtLocationXY = IMG.get(x,y); //Distance between mouse location and circle location
var d =dist(mouseX, mouseY,x,y); //Change circle size according to distance
var col =map(d,0,480,10,2);noStroke();fill(theColorAtLocationXY);ellipse(x,y,col,col);}}}
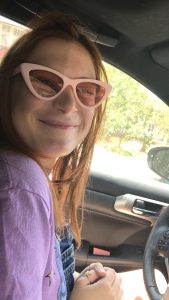
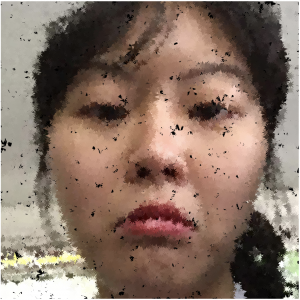
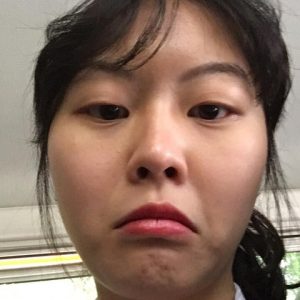
I used my selfie as the source image. I wanted to create something grid base and also interactive. So I change the sizes of the circles based on the distance between circles and mouse.
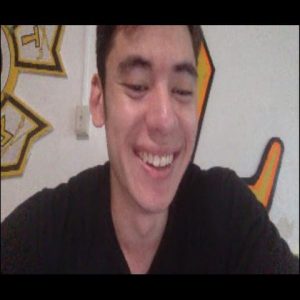
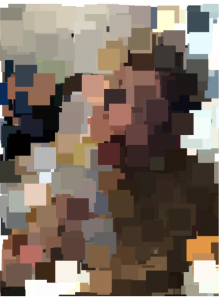
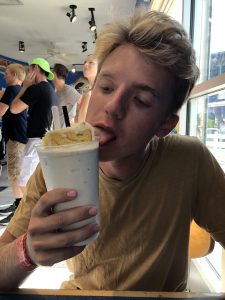
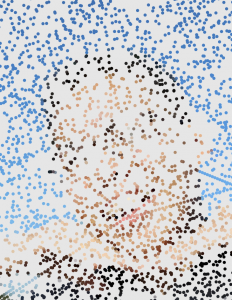
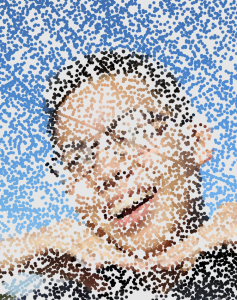
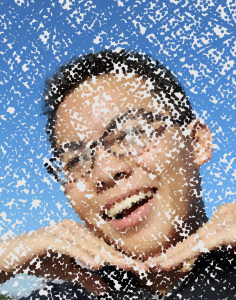
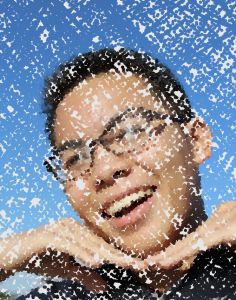
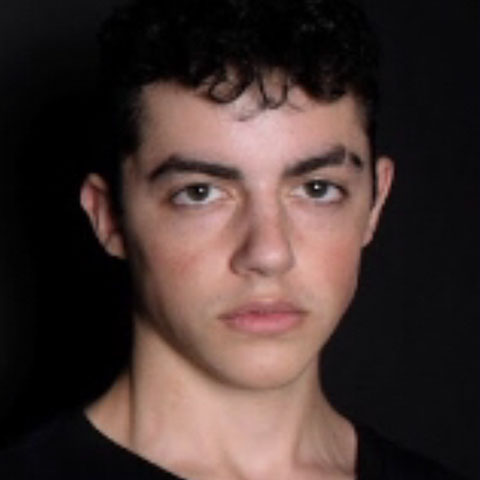
In the project brief, I was most excited by the work of Chuck Close. I was interested in the construction of his portraits and how he can create new colors simply by nesting circles within polygons. I wanted to find the overlap between systematic painting techniques and digital media. Knowing that Close uses complimentary colors to create his specific optical hues, I selected green and blue to compliment the pinks and rust oranges in the photo of my friend, Nick.
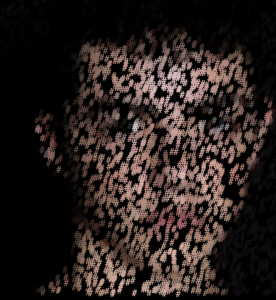
Once I created the gridded out and dotted portrait, I wanted to make it feel less static. To do this, I randomized each circle so that the colors are statistically more likely to be a shade of green, but when the viewer clicks on the portrait, these dots shift towards favoring shades of blue.
I genuinely enjoyed this project once I got the hang of it. Sending progress pictures of the portrait to my friend drove me to keep pushing myself forward.
the original photoearly experimentation where the “#” symbol was generating his face over timethe result of scaling up the ellipses encouraged me to explore the more abstract
![[OLD FALL 2018] 15-104 • Introduction to Computing for Creative Practice](../../../../wp-content/uploads/2020/08/stop-banner.png)