I decided to look at Claire Yoon’s Looking Outwards 03. As someone who knows very little about fashion, I was interested in looking into this article on how 3d printing and computer generated forms could become clothing. Personally, high fashion has seemed like a far off community that I had very few intersecting interests with. This project though, and this idea that a piece of clothing could be created by someone in CAD software or even by an algorithm and printed by a computer presents incredibly interesting possibilities for the future of clothing and fashion.
In regards to this particular piece, I find the forms to be neat. They have a geometric yet also organic sense to them, and a complexity that I imagine would be facilitated by the computer design process.
/*		Austin Garcia
		Section C
		aegarcia@andrew.cmu.edu
		Assignment or Project
*/

var originalImage;

function preload() {
    var myImageURL = "https://i.imgur.com/UdorMH0.jpg";
    originalImage = loadImage(myImageURL); //load image
}

function setup() {
    createCanvas(500, 500);
    background(0);
    originalImage.loadPixels();
    frameRate(1000);
}

function draw() {
    var px = random(width); //x coordinate
    var py = random(height); //y coordinate
    var ix = constrain(floor(px), 0, width-1);
    var iy = constrain(floor(py), 0, height-1);
    var locationColor = originalImage.get(ix, iy); //get pixel color


    var rectSizeX = random(10, 50)
    var rectSizeY = 2

    noStroke();
    fill(locationColor);
    rect(px, py, rectSizeX, rectSizeY);

    var theColorAtTheMouse = originalImage.get(mouseX, mouseY);
    stroke(theColorAtTheMouse);
    ellipse(pmouseX, pmouseY, 1, 2*height + mouseY);
}
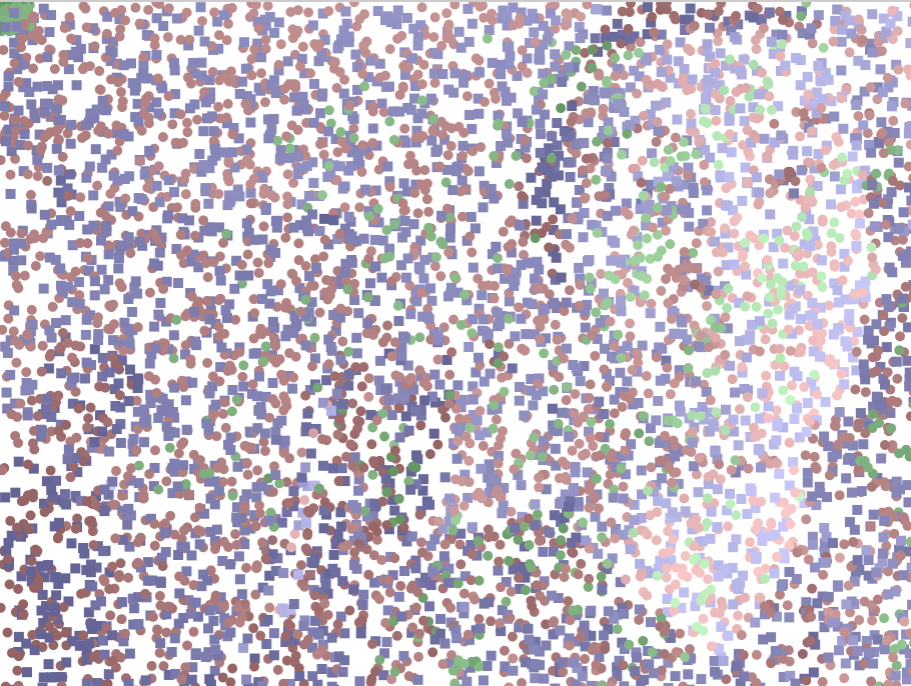
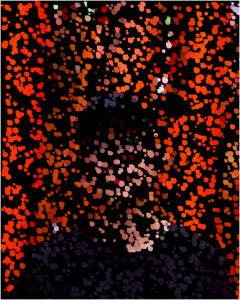
I wanted to explore vertical and horizontal lines converging to create this image my girlfriend took of me over the summer. I had the code generate short horizontal bars while having the mouse draw long vertical bars.
var img;
var gScale = 0.14; // Scale the image size down
var size = 5; // Size of all the circles and squares

function preload() {
    var portrait = "https://i.imgur.com/xb4QYap.jpg";
    img = loadImage(portrait);
}

function setup() {
    createCanvas(img.width * gScale, img.height * gScale);
    background(255);
    frameRate(60);
    img.loadPixels();

}

function draw() {
    //Draws small circles and squares. The circles are tinted red and the squares are blue

    var cx = random(img.width);
    var cy = random(img.height);
    var dotColor = img.get(cx, cy);
    var db = brightness(dotColor); // Gets the grayscale value of the pixel

    noStroke();
    fill(db + 150, db + 100, db + 100); // Turns all of the circles a red/brown
    circle(cx * gScale, cy * gScale, size);


    var sx = random(img.width);
    var sy = random(img.height);
    var squareColor = img.get(sx, sy);
    var sb = brightness(squareColor);

    fill(sb + 100, sb + 100, sb + 150); // Turns the squares blue
    square(sx * gScale, sy * gScale, size);


    var gx = random((mouseX - 15) / gScale, (mouseX + 15) / gScale); // creates a circle within 30 pixels of the mouse
    var gy = random((mouseY - 15) / gScale, (mouseY + 15) / gScale);
    greenDotColor = img.get(gx, gy);
    var gb = brightness(greenDotColor);

    fill(gb + 100, gb + 150, gb + 100); // Turns these circles green
    circle(gx * gScale, gy * gScale, size);

}
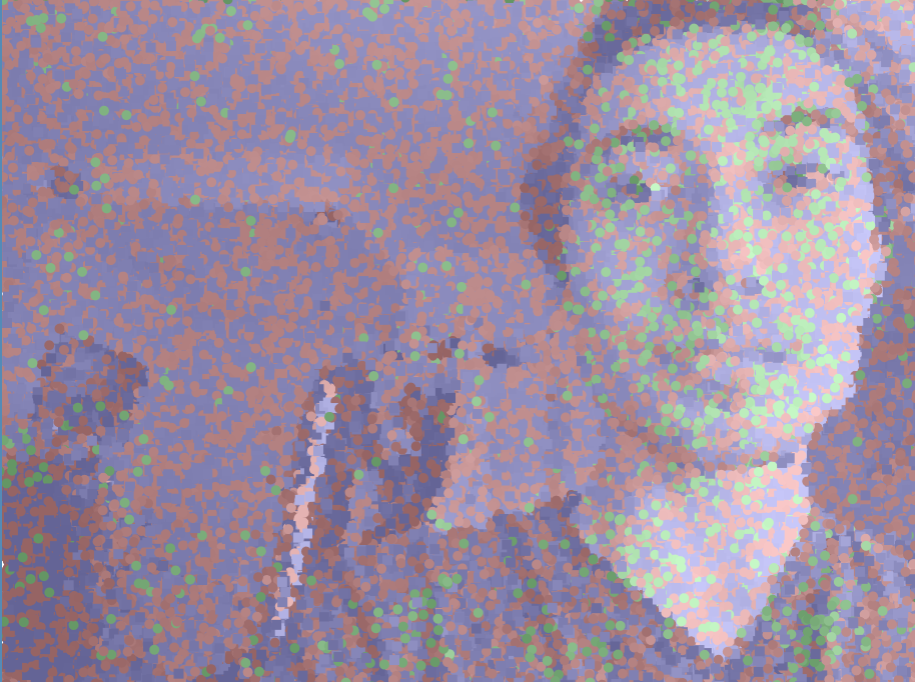
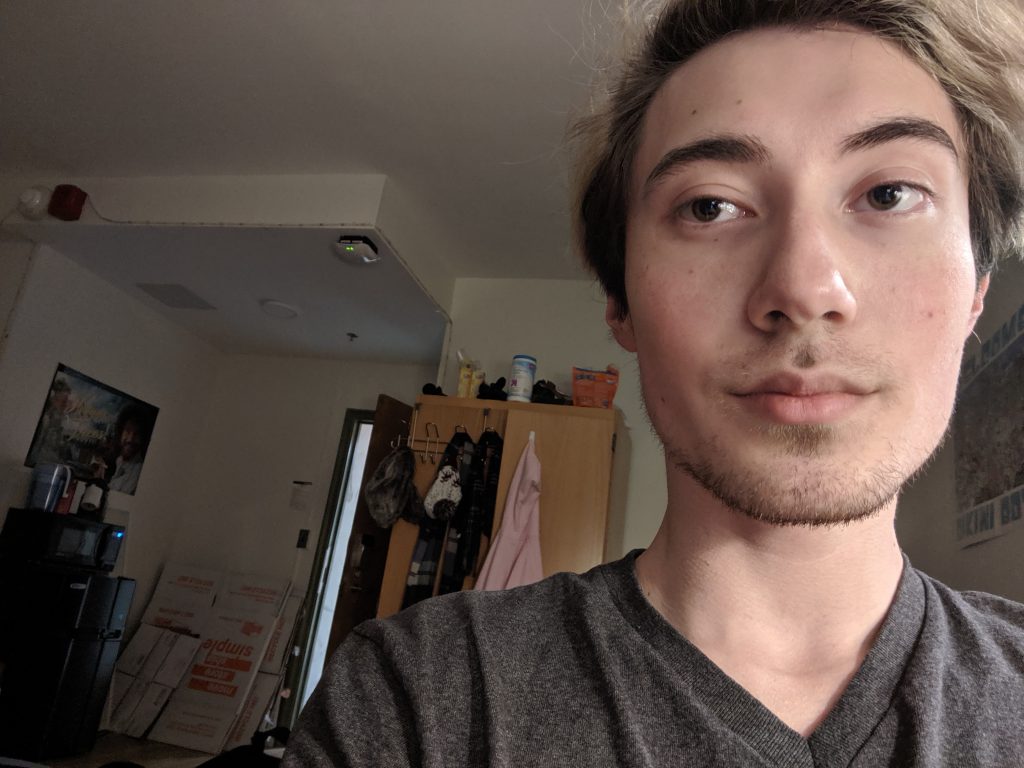
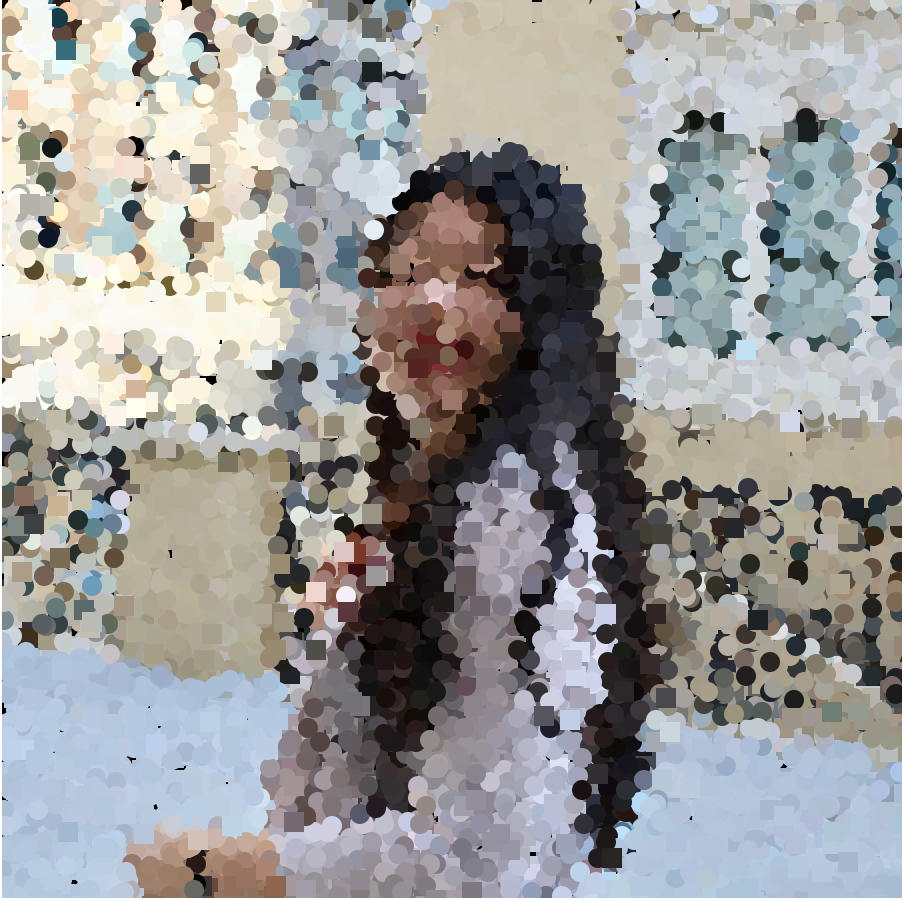
For this project I used a quick picture I took of myself as the base. I played around a bit with what I could do with the colors. Using the brightness feature I basically turned the picture black and white, then added in contrasting colors. Red circles and blue squares will randomly appear to start filling in the picture. Green circles will begin to fill in the picture in an area close to your mouse.
Portrait after about 10 – 20 secondsPortrait after a few minutesOriginal picture of myself
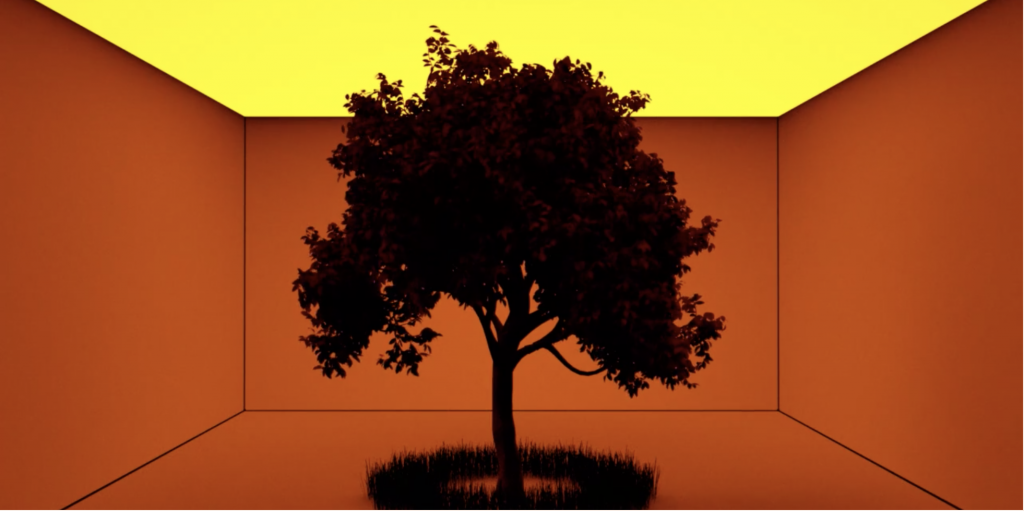
For this blog post, I decided to look at Angela Lee’s Looking Outwards 05. Angela discussed about Hayden Zezula’s work, which consist of 3D animations. I agree with Angela’s description of Hayden’s works. She talks about how he limits the number of colors he uses and his lack of details in the warped humanoid forms yet they are recognizable.
Hayden’s work, “Ghost in Shell” that is based on famous manga, also caught my eyes first. The way Hayden used contrast in this particular project is really interesting and strong on the visuals. Another visual element he often uses is lighting. In his animation for Leon’s Walls tour, his use of lighting for the tree is beautiful. Overall, I am glad that I got to find out about this artist, thank you to Angela.
//Yoshi Torralva
//yrt@andrew.cmu.edu
//Section E
//Project—09—Portrait
var underlyingImage;

function preload() {
    var myImageURL = "https://i.imgur.com/htGpgok.jpg";
    underlyingImage = loadImage(myImageURL);
}

function setup() {
    createCanvas(480, 480);
    background(0);
    underlyingImage.loadPixels();
}

function draw() {
    //variables to randomize location
    var px = random(width);
    var py = random(height);
    var ix = constrain(floor(px), 0, width-1);
    var iy = constrain(floor(py), 0, height-1);
    var theColorAtLocationXY = underlyingImage.get(ix, iy);
    frameRate(360);

    //large border that indicates which pixel is drawn
    // rectangles redrawn at different angles that creates circular border
    push();
    rectMode(CENTER);
    translate(240, 240);
    noFill();
    stroke(theColorAtLocationXY);
    strokeWeight(1);
    rotate(random(0, 10));
    rect(10, 10, 460, 460);
    pop();

    //light beams formed by random length
    noStroke();
    fill(theColorAtLocationXY);
    //shorter beams for greater quality
    rect(px, py, random(1), random(4, 50));
    //longer beams for greater expression
    rect(px, py, random(1), random(50, 100));

    //placed on top layer to create a more visible image
    //end points of the beams
    push();
    rectMode(CENTER);
    rect(px, py, 3, 3);
    pop();
}
start of the portrait in the middle of the generation of the portrait nearing the end of the generative portrait Self-portrait
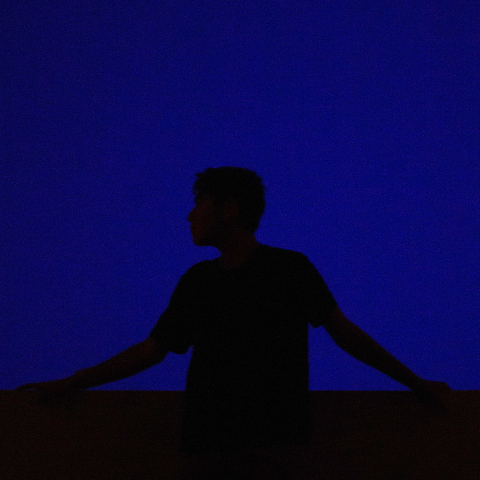
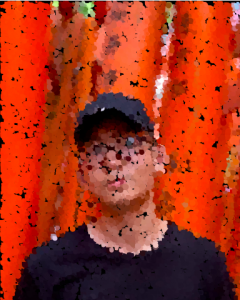
With this project, I wanted to use an image that was simple which would allow me to have an increased focus on the formulation of forms. I decided to use this self-portrait photo from the mattress factory as it only relies on black and blue. I was inspired by light beams and achieved this through randomly sized length rectangles with squares placed on the top of each randomized length rectangle. To add an additional element, I placed a rotating square that formed a circular border informed by called pixel colors.
//Caroline Song
//chsong@andrew.cmu.edu
//Section E
//Project 09

var imageUnderneath;
var imageColor;
var constrainX;
var constrainY;

function preload(){
    //preload image
    var myImageURL = "https://i.imgur.com/SHu7RYA.jpg";
    imageUnderneath = loadImage(myImageURL);
}

function setup(){
    createCanvas(450, 450);
    background(0);
    imageUnderneath.loadPixels();
    frameRate(1000);
}

function draw(){
    var rectX = random(width); //rectangles are placed randomly along width of canvas
    var rectY = random(height); //rectangles are placed randomly along height of canvas
    var rectSize = 10; //size of rectangle
    var ellipseSize = 10; //size of ellipse

    //constrain rectangles to canvas size
    constrainX = constrain(floor(rectX), 0, width);
    constrainY = constrain(floor(rectY), 0, height);

    //get and fill colors according to picture underneath
    imageColor = imageUnderneath.get(constrainX, constrainY);
    noStroke();
    fill(imageColor);

    //ellipses are drawn instead of rectangles when key 'e' is pressed
    if(key == 'e' || key == 'E'){
        ellipse(constrainX, constrainY, ellipseSize);
    } else{
        rect(constrainX, constrainY, rectSize, rectSize);
    }
}
This project was very interesting, however, I didn’t know how to approach it at first. I wanted to have some sort of interactive element to my self-portrait project. In my final piece, I chose to switch the shapes that the code draws in, from rectangles to ellipses.
Final project after 30 secondsFinal project after 3 minOriginal picture
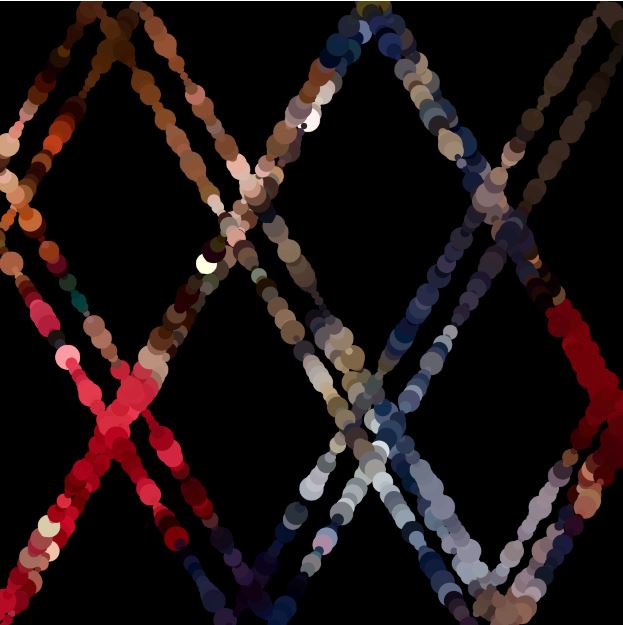
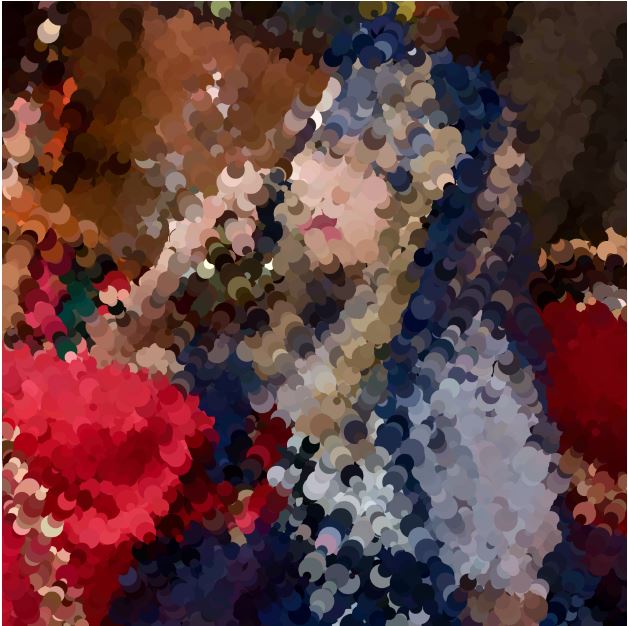
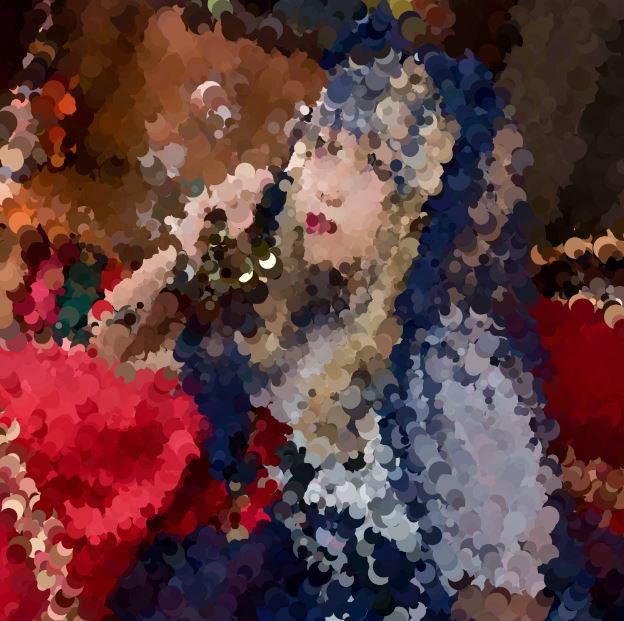
/*Kimberlyn Cho
ycho2@andrew.cmu.edu
Section C
Project 09 */

var underlyingImage;
//array of emoticons to choose from
var words = [";)", ":P", ">_<", "^.^", "<3"];
var expression = ["damnnn", "wow", "omg", "beautiful"]

function preload() {
    var myImageURL = "https://i.imgur.com/mZFEEAK.jpg";
    underlyingImage = loadImage(myImageURL);
};

function setup() {
    createCanvas(360, 480);
    background(0);
    underlyingImage.loadPixels();
    frameRate(10);
};

function draw() {
    var px = random(width);
    var py = random(height);
    var ix = constrain(floor(px), 0, width-1);
    var iy = constrain(floor(py), 0, height-1);
    var theColorAtLocationXY = underlyingImage.get(ix, iy);

    noStroke();
    fill(theColorAtLocationXY);
    //randomize emoticon choice
	var textchoice = floor(random(0, 5));
	//randomize emoticon size
	var sizechoice = floor(random(10, 20));
	textSize(sizechoice);
	//choosing from array of emoticons
	text(words[textchoice], px, py);
};

function mousePressed() {
	//generating "damnnn" with mousePressed
	var theColorAtTheMouse = underlyingImage.get(mouseX, mouseY);
    fill(theColorAtTheMouse);
    var textchoice = floor(random(0, 4));
	var sizechoice = floor(random(10, 20));
	textSize(sizechoice);
    text(expression[textchoice], mouseX, mouseY);
};
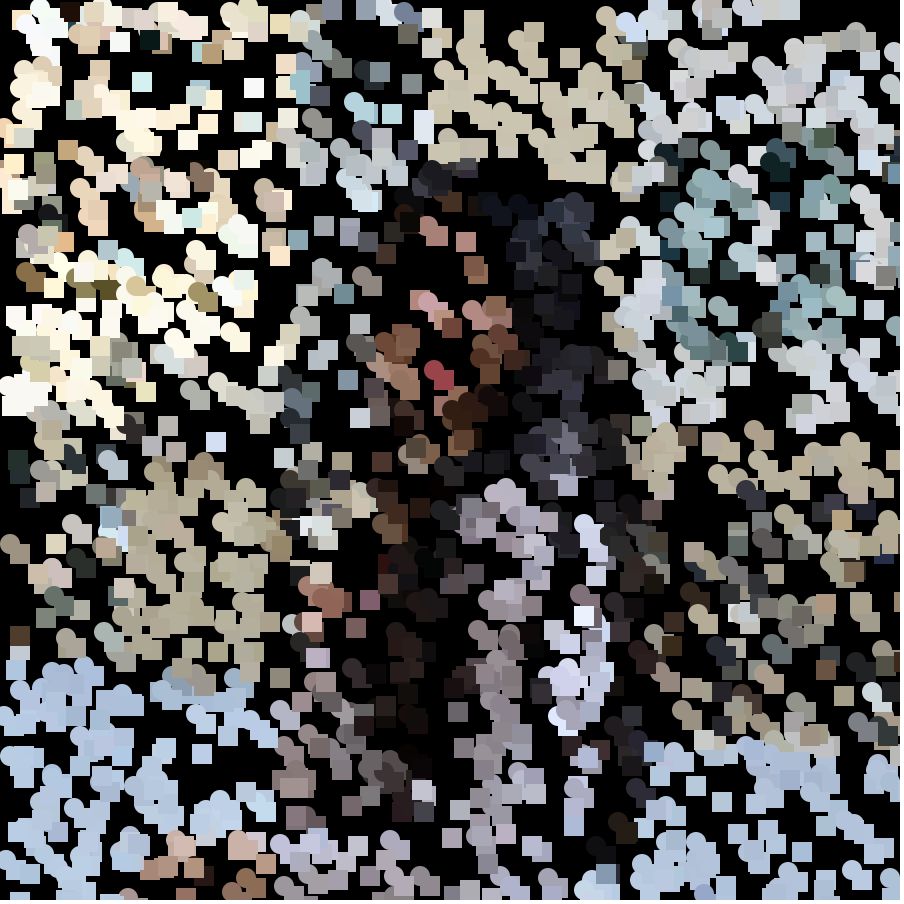
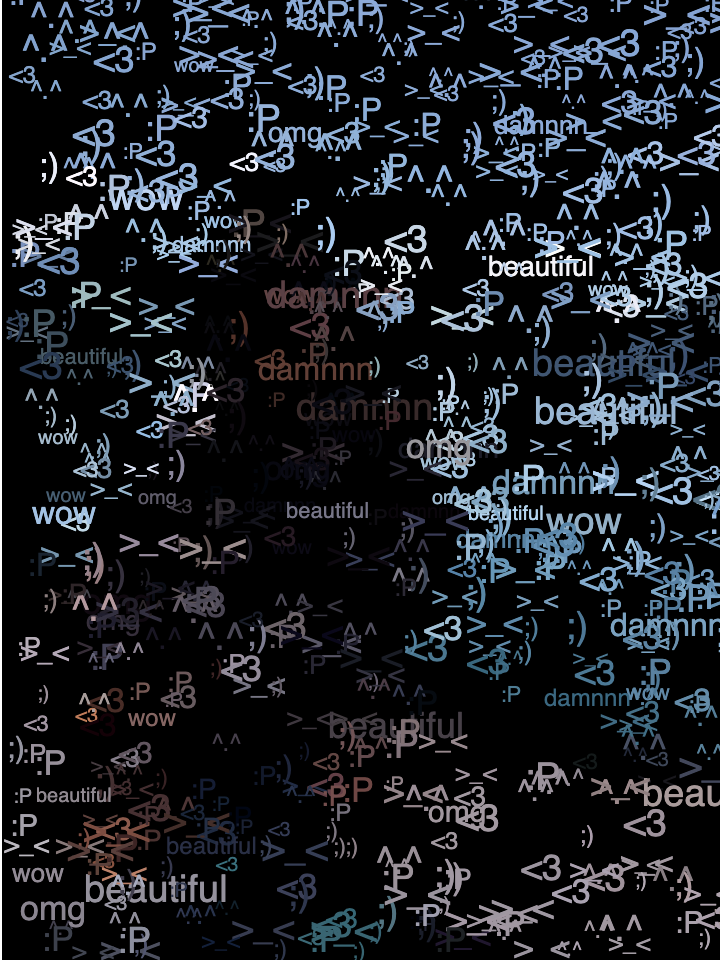
I chose my best friend from home for this assignment because I miss her very much. I used cute emoticons to represent her lovable and adorable character. I randomized the size and emoticon choice to vary the process. Lastly, I generated my first reactions to seeing this photo with the mouse pressed function.
early developmentprogressed developmentoriginal photo
//Claire Xu
//xux1@andrew.cmu.edu
//Section B
//Project-09
var cX = 250;
var cY = 250;
var vX = 3;
var vY = 5;

var currentImage;

function preload(){
	var myImage = "https://i.imgur.com/Bo3UtYO.jpg";
	currentImage = loadImage(myImage);

}

function setup(){
	createCanvas(500,500);
	background(0);
	currentImage.loadPixels();
	frameRate(50);
}

function draw(){
	var ix = constrain(floor(cX), 0, width);
	var iy = constrain(floor(cY), 0, height);
	var xyColor = currentImage.get(ix, iy);


	if(cX >= width || cX <= 0){
		vX = -vX;
	}

	if(cY >= height || cY <= 0){
		vY = -vY;
	}

	cX += vX;
	cY += vY;

	noStroke();
	fill(xyColor);
	circle(cX, cY, random(5,20));

	var xyColorMouse = currentImage.get(mouseX, mouseY);
	if(mouseIsPressed){
		noStroke();
		fill(xyColorMouse);
		circle(mouseX, mouseY, random(5,10));
	}
}
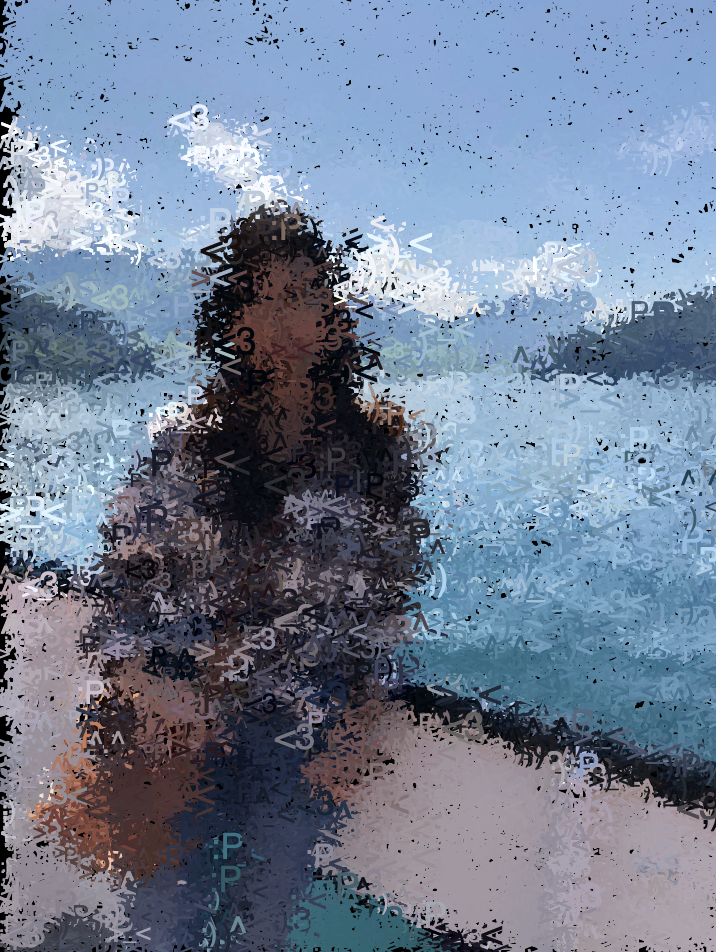
For this project I used the cosplay image of my friend, and I wanted the circles to appear in lines rather than random dots, so it looks like something is actually “printing” the image. The circles being printed tend to be larger, and the circles drawn by the mouse are smaller so more details of the photo can be observed manually.
Few seconds after program has run
Few minutes after program has run (without manual modifications)
Few minutes after program has run (details added through mouse press)
I decided to use a picture of my brother who I miss so much. I played around with a lot of shapes and sizes and I decided to use a water drop shape because my brother loves rain.
halfway done rendering
final stage in rendering
original image of my brother
/*
Min Ji Kim Kim
Section A
mkimkim@andrew.cmu.edu
Project-09
*/

var originalImage;

function preload() {
    var myImageURL = "https://i.imgur.com/hKHw7ls.jpg";
    originalImage = loadImage(myImageURL); //load image
}

function setup() {
    createCanvas(384, 480);
    background(0);
    originalImage.loadPixels();
    frameRate(1000); //make waterdrops appear faster
}

function draw() {
    var px = random(width); //x coordinate
    var py = random(height); //y coordinate
    var ix = constrain(floor(px), 0, width-1);
    var iy = constrain(floor(py), 0, height-1);
    var locationColor = originalImage.get(ix, iy); //get pixel color

    //make waterdrop shape
    var rectSize = random(3,10); //change waterdrop size
    noStroke();
    fill(locationColor);
    rect(px, py, rectSize, rectSize, 0, 5, 5, 5);
}
//Mihika Bansal
//mbansal@andrew.cmu.edu
//Section E
//Project 9

var portrait;

function preload(){
    var url = "https://i.imgur.com/rh2ehQc.jpg";
    portrait = loadImage(url);
}

function setup() {
    createCanvas(480, 480);
    background(0);
    portrait.loadPixels();
    frameRate(2000);
}

function draw() {
    //random pixel
    var px = floor(random(width));
    var py = floor(random(height));

    //color variables for that pixel
    var cx = constrain(px, 0, width - 1);
    var cy = constrain(py, 0, height - 1);

    var colorLoc = portrait.get(cx, cy);

    noStroke();
    fill(colorLoc);

    //person (rectangles)
    if(px > 120 & px < 430 && py > 30 && py < height){
        rect(px, py, 5, 5);
    }
    //background (ellipses)
    else{
        ellipse(px, py, 10, 10);
    }

}
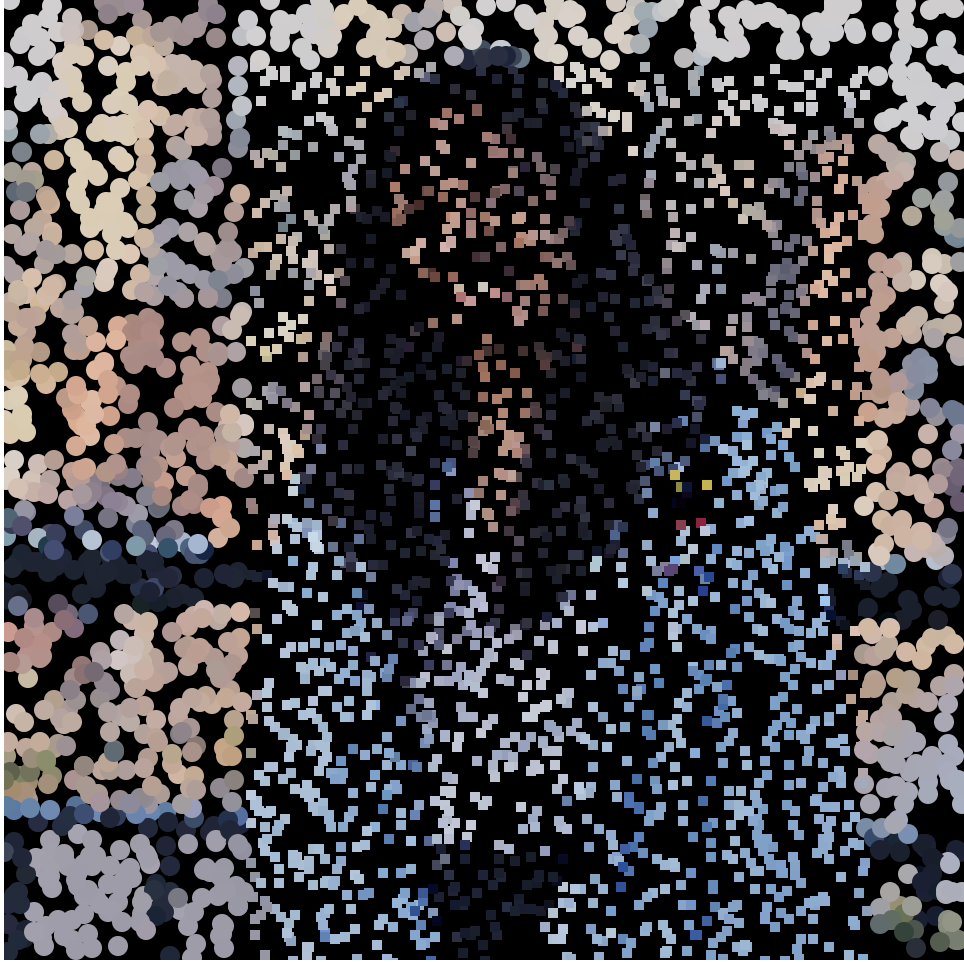
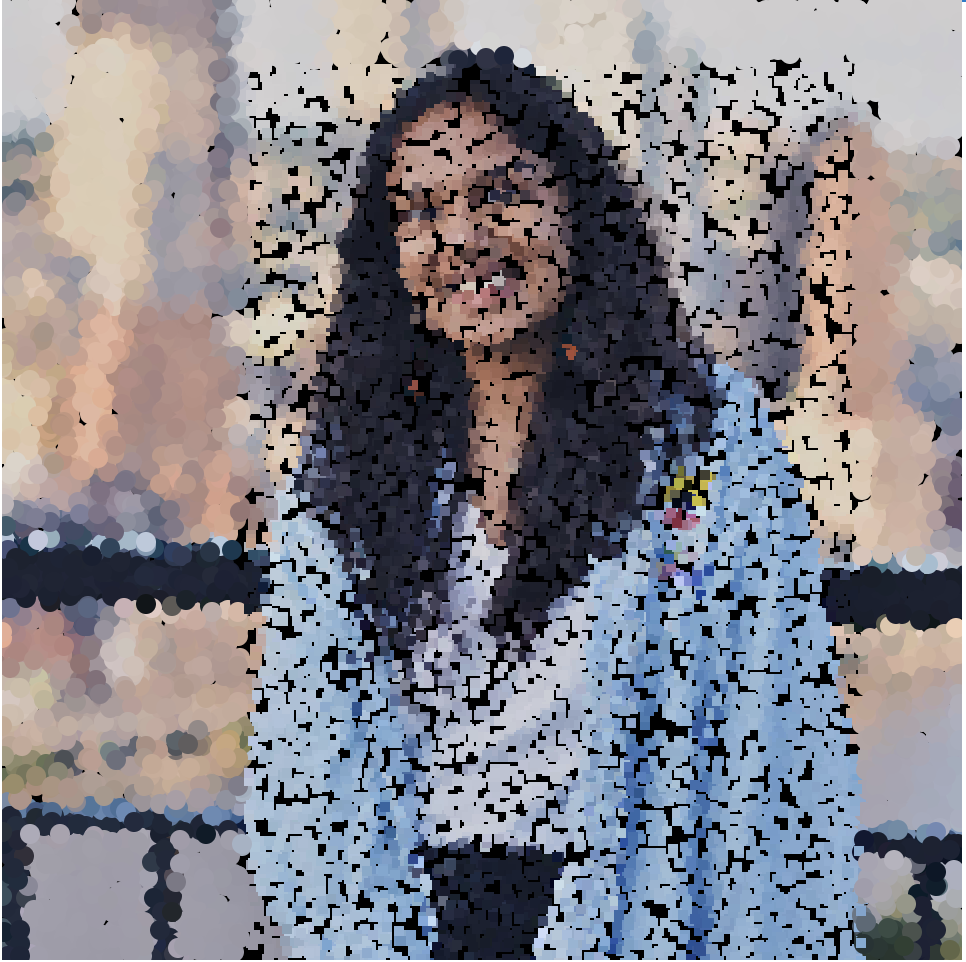
This project was very interesting to complete. I enjoyed the process of playing with different shapes to complete the different colored sections that worked together to form the portrait. I wanted to use larger ellipses in the background to create a more hazy background.
![[OLD FALL 2019] 15-104 • Introduction to Computing for Creative Practice](../../../../wp-content/uploads/2020/08/stop-banner.png)