aerubin-Project-09-Computational Portrait

Combination of Both Large and Small Squares

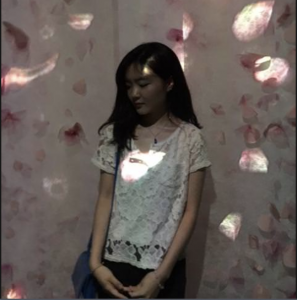
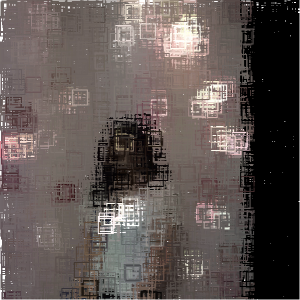
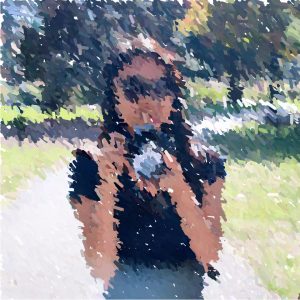
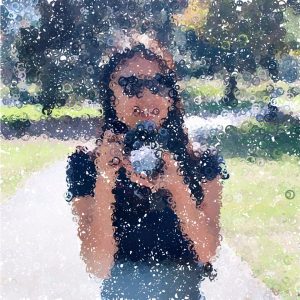
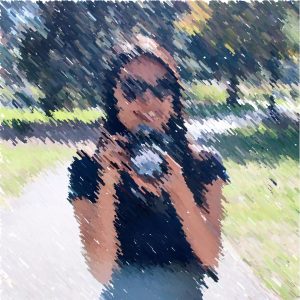
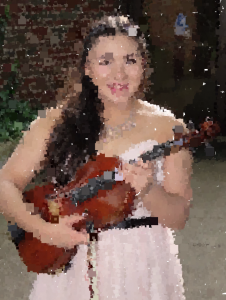
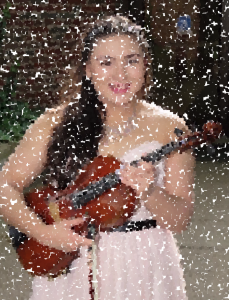
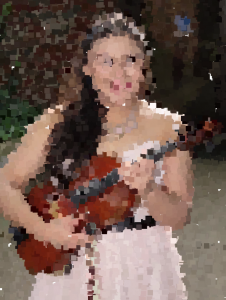
For this project, I selected an image that describes my passion for music and playing the viola. The portrait created from the code can be altered depending on where the mouse is located as the picture is being drawn one square at a time. The placement of the mouse determines the size of the squares. Pictured above, this is what occurs when both large and small squares are utilized.
Small Squares

Pictured directly above is when only small squares are utilized. This can be drawn by putting the mouse in the upper left hand corner.
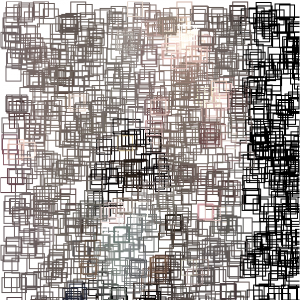
Pictured below is when only large squares are used. This can be drawn by putting the mouse in the lower right hand corner.
Large Squares

sketch

//Angela Rubin
//Section C
//aerubin@andrew.cmu.edu
//Project-09-Computational Portrait

var hiddenImage;

function preload() {
    var myImageURL = "https://i.imgur.com/7jZWZyX.jpg";
    hiddenImage = loadImage(myImageURL);
}

function setup() {
    createCanvas(338, 450);
    background(255);
    hiddenImage.loadPixels();
    frameRate(100);
}

function draw() {
    var px = random(width);
    var py = random(height);
    var ix = constrain(floor(px), 0, width-1);
    var iy = constrain(floor(py), 0, height-1);
    var ColXY = hiddenImage.get(ix, iy);

    noStroke();
    fill(ColXY);
    //if the mouse is in the upper half of the canvas, make 2x2 squares
    if(mouseY<height/2) {
        rectMode(CENTER);
        rect(px, py, 2, 2); 
    }
    //if the mouse is on the left side of the canvas, make 4X4 squares
    if(mouseX<width/2) {
        rectMode(CENTER);
        rect(px, py, 4, 4)
    }
    //if the mouse is on the right side of the canvas, make 8x8 squares
    if (mouseX>width/2) {
        rectMode(CENTER);
        rect(px, py, 8, 8);
    }
    //if the mouse is in the lower half of the canvas, make 12x12 squares
    if (mouseY>height/2) {
        rectMode(CENTER);
        rect(px, py, 12, 12);
    }
}

nahyunk1 – Project 09 Pixel Art

sketch

//Nahyun Kim
//Section B
//nahyunk1@andrew.cmu.edu
//Project 09

var img;

function preload(){
  img = loadImage("https://i.imgur.com/cKWLZzM.jpg");

}
function setup() {
  createCanvas(600, 600);
  img.loadPixels();
  frameRate(2000);
  image(img, 0,-20);
  background(255);

}

function draw() {
  var x = floor(random(600));
  var y = floor(random(600));
  var Col = img.get(x, y);
  stroke(Col);
  strokeWeight(random(0.5, 2));
  noFill();
  rect(x, y, 30, 30);
  strokeWeight(0.5);
  text("be forever hazy..", 5, 10);
}

My intentions of presenting an obscured image came out successful by filling strokes with pixel colors and and doing noFill(); instead of the other way, which would stylize blocks of filled rectangles draw my image. I wanted to have the image appear in a way that is more neat in its build up. It also stylizes my picture as glassy and translucent, which helped my initial thought get executed clearly. Here are some screenshots of my picture being built up to its finished look.

hyt-Project-09: Pixel Portrait

hyt-09-project

// helen tsui
// 15-104 section d
// hyt@andrew.cmu.edu
// project-09-Pixel-Portraits

var portrait;

function preload() {
    var portraitURL = "https://i.imgur.com/kQn5qoD.jpg";
    portrait = loadImage(portraitURL);
}


function setup() {
    // retrieve and load pixels + other properties
    createCanvas(450, 450);
    background(193, 226, 177);
    portrait.loadPixels();
    frameRate(100);
}


function draw() {
    // initialize dots' location
    var px = random(0, width); 
    var py = random(0, height);

    // retrieve color at specific pixels
    var ix = constrain(floor(px), 0, width-1);
    var iy = constrain(floor(py), 0, height-1);
    var theColorAtLocationXY = portrait.get(ix, iy);

    var brightnessVal = brightness(theColorAtLocationXY);
    fill(theColorAtLocationXY);
    var circleSize;

    // set brightness value if statement for drawing lines or circles
    if (brightnessVal > 40) {    
        strokeWeight(3);
        stroke(theColorAtLocationXY);
        //var circleSize = random(5, 10);
        line(px - random(0, 10), py - random(-10, 10), px, py);
    } if (brightnessVal <= 40) {
        fill(theColorAtLocationXY);
        noStroke();
        circleSize = random(5, 15);
        ellipse(px, py, circleSize, circleSize);
    }
}

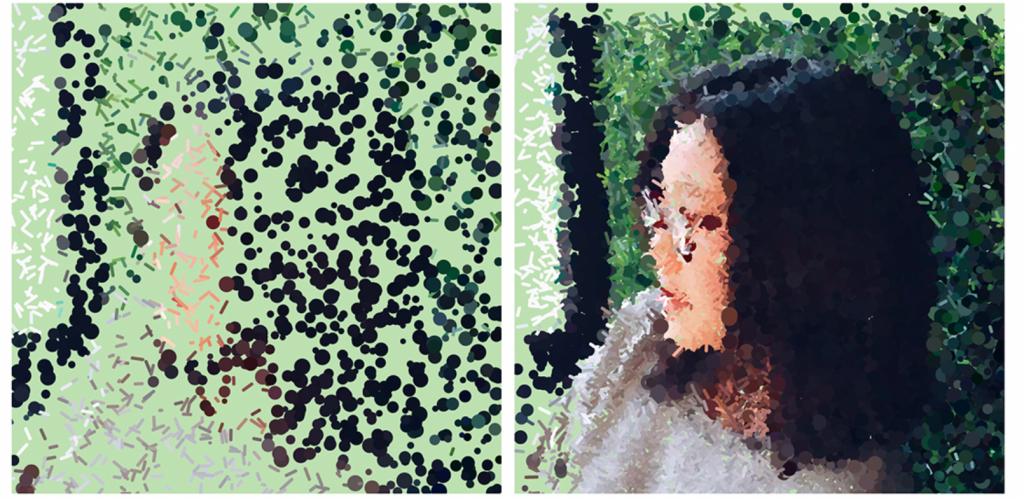
For this project, I primarily focused on the relationship between color values and the shape used. When I was looking at the photo, I wanted to pixelate and highlight my face in a more detailed manner, so I decided to illustrate that part with lines; the hair and background part, according to my color meter, were mostly under 40 (brightness) and therefore I set it so that it creates more blurry circles. I think this project was helpful in terms of understanding retrieving the pixels, brightness, as well as pixel location properties better.

The Original Portrait
Progress and finished screenshot
Other Strange Variations (not this project)

eeryan-Project09-Portrait

sketch

var photo;

function preload(){
  photo = loadImage("https://i.imgur.com/3TDt7Za.jpg");
}

function setup() {
  createCanvas(480, 480);
  background(255);
  photo.loadPixels();//load the pixels of the underlying photo
}

function draw() {
  for(var x = 0; x < width;x+=10){
    for(var y = 0; y < height; y+=10){
        var c = photo.get(x,y);//stores RGB value of pixel at (x,y) in array c
        noStroke();
        fill(c);
        rect(x,y,10,10);//draw rectangle at (x,y)
        var r = c[0];//assign items from the array c to variables
        var g = c[1];
        var b = c[2];
        noStroke();
        fill(r-40, g-40, b-40);
        rect(x,y,8,8);//draw circle inside the rectangle
        noStroke();
        fill(r+20, g+20, b+20);
        ellipse(x +5,y+5,4,4);
    }
  }
}

For this assignment I was inspired by Chuck Close’s portraits made up of squares with detail inside them, and wanted to recreate this effect within my portrait. I like how the end result looks a bit like a lego portrait.

elizabew – Looking Outwards – 09 – sectionE

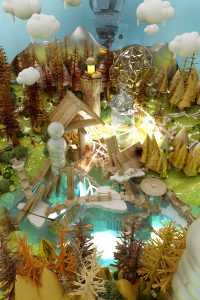
I decided to look through my friend Rachel Farn’s work, and I found her discovery of the media visual artist Alex Mcleod to be interesting. I found that her focus on his piece Mystic Pond (2010) really drew me into wanting to read more about the artist — this image of the piece looked unreal.

Mystical Pond (2010)

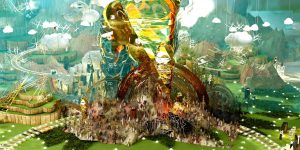
I absolutely agree with Rachel that his art connects traditional artists and graphic animation. Alex creates “paintings” that push the limits of traditional artists while integrating modern technology into his work. The works show so much detail that it’s fun to look at one piece and try to dissect it. (His work Forest City (2011) reminded me of The Hobbit)

Forest City (2011)

To add to what she’s already written, I would also like to say that Alex’s work really grasps landscapes in an otherworldly way — some of his work reminds me of futuristic films. And while incredibly bright and colorful, there’s a hint of uncomfortableness from these unsettling works. It is almost like each photo describes a different world and it’s up to the viewer to figure out what kind of place it is. To me, personally, I find that most of them look like dystopian, sometimes even alien places.


CLICK HERE for Rachel Farn’s Looking Outward

Click here for more on Alex Mcleod

hqq – secE – project 09 – portrait

hamza

//hamza qureshi
//hqq@andrew.cmu.edu
//section e
//project 08 : portrait

var pic; //new variable for base image

function preload(){
    var URL = "https://i.imgur.com/uWj0FJC.jpg"; //url for image
    pic = loadImage(URL); //loads image from url
}

function setup(){
    createCanvas(480,480);
    pic.loadPixels(); //loads pixels of image to be individually interpreted
    frameRate(10); //pls dont be slow
}

//create circles
function draw(){
    var posX = random(width); //position of x and y coordinates of shape
    var posY = random(height);
    var colX = constrain(floor(posX), 0, width-1); //determines pixel color
    var colY = constrain(floor(posY), 0, height-1);
    var picFill = pic.get(colX,colY); //grabs info for each pixel in image
    noStroke();
    fill(picFill); //apply fill
    ellipse(posX, posY, 7, 7); //draw circle at random location
                              //colored based on the pixel of its origin location
}

//create target shapes when mouse is pressed
function mousePressed(){
    var posX = mouseX; //new local variable for x and y
    var posY = mouseY;
    var colX = constrain(floor(posX), 0, width-1);
    var colY = constrain(floor(posY), 0, height-1);
    var picFill = pic.get(colX,colY);
    var sz = random(10, 20); //new variable to randomize shape
    noStroke();
    fill(picFill);
    //scale(sz);
    ellipse(posX, posY, 10, 10); //new, larger central ellipse
    stroke(picFill);
    strokeWeight(0.5);
    noFill();
    ellipse(posX, posY, sz + 2, sz + 2); //outer rings of ellipse
    ellipse(posX, posY, sz + 7, sz + 7); //are random in size to change
    ellipse(posX, posY, sz + 9, sz + 9); //size
}

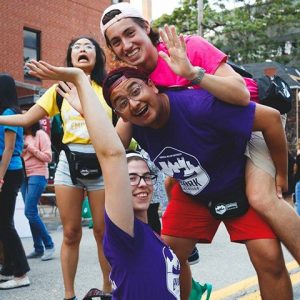
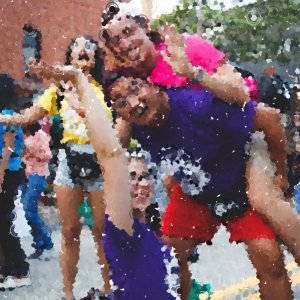
For my sketch, I used an image from Orientation this past summer:

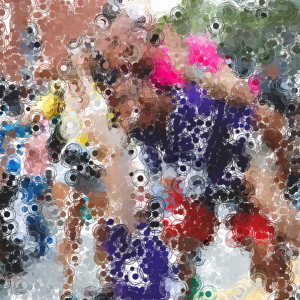
I appreciated the variety of colors in this picture of myself and some great friends. I chose to create a dynamically drawn portrait that allows for a slightly modified outcome when the mouse is clicked. The sketch operates as it generates each frame, but each click produces a randomly sized target shape. This creates an oil-painting-like stroke when the image nears completion. See below:


LookingOutward-09

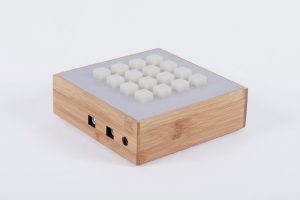
For this weeks post, I decided to write about my friend Elizabeth’s looking outwards post on the Sugarcube MIDI controller. Similar to her post, I agree with the satisfaction of the interaction with the Sugarcube.  What I found so fascinating about the device is how accurately it can imitate the movement of a marble or a surface. In one setting, it uses simple lights to imitate physical movement of solid objects.

Sugarcube

The project was created by Amanda Ghassaei, a grad student at the Center for Bits and Atoms at MIT Media Lab.

In addition to imitating simple movements, the Sugarcube also has many settings that create patterns of light and allows the user to interact with the lights as buttons. Besides lighting up and creating a visual performance, the device also emits sound and noises, allowing the user to use both senses and play around with sound and visuals. I find it interesting how this simple tool can be used as an educational tool and stimulate the user both visually as well as audibly.

http://www.instructables.com/id/Sugarcube-MIDI-Controller/


hyt-Looking-Outward-09: Peer Evaluation


ikrsek-Looking Outwards-05

Zolloc GIFs - Find & Share on GIPHY

When I saw Hayden Zezula’s project, I was completely mesmerized and at the mean time touched by its visceral use of repetitive elements — human body parts, graphic 3D waves, etc. Similar to what the original post said, I think it’s particularly relevant to some of the physics features we are currently learning in class — law of attraction, gravity, etc., and I think it would be interesting to do some research on the technical motions. Also, its choice of colors and dimensionality is also something to learn more about.

Another topic that I related to this artist is the boundary between commercial and conceptual artworks. After seeing his collaboration with lots of big-name commercial brands, as well as exposing himself on Instagram and GIF pop-culture websites, it may be hard for many to categorize him as a traditional artist, but I think his creativity is unparalleled to others, and that he is a concrete evidence of further interdisciplinary blend between technology and art.

You can view more of his works here: https://www.instagram.com/zolloc/


sijings-project09 – Computational Portrait

 
Note: this only works in Google Chrome for some unknown reason. So when viewing this project, please load it in Google Chrome.

sijings-portrait-week9

//Clair(sijing) Sun
//session C
//sijings@andrew.cmu.edu
//project-09

var underlyingImage;
var count=0;
var gAngle = [45,90,135,180];//for four circle's angles
var radius = [80,80/1.2,80/1.5,80/2];//for four circle's radius


function preload() {
    var myImageURL = "https://i.imgur.com/VEFcvLY.jpg";
    underlyingImage = loadImage(myImageURL);//loading pics

}

function setup() {
    createCanvas(480, 380);//within the size range
    background(0);
    underlyingImage.loadPixels();
    frameRate(30);//set to 30 so that it actually stay 

}

function draw() {
    var x = [cos(radians(gAngle[0])) * radius[0]];//build an array for x changing value
    var y = [sin(radians(gAngle[0])) * radius[0]];
    var px = [mouseX+x[0]];//array for x
    var py = [mouseY+y[0]];//array for y
    count+=1;//for determing when the second, third, fourth circles appear
    if (count>=150){
        x.push(cos(radians(gAngle[1]))*radius[1]);
        y.push(sin(radians(gAngle[1]))*radius[1]);
        px.push(mouseX+x[1]);
        py.push(mouseY+y[1]);
    }
    if (count>=170){
        x.push(cos(radians(gAngle[2]))*radius[2]);
        y.push(sin(radians(gAngle[2]))*radius[2]);
        px.push(mouseX+x[2]);
        py.push(mouseY+y[2]);

    }
    if (count>=190){
        x.push(cos(radians(gAngle[3]))*radius[3]);
        y.push(sin(radians(gAngle[3]))*radius[3]);
        px.push(mouseX+x[3]);
        py.push(mouseY+y[3]);
    }
    var ix = constrain(floor(px[0]), 0, width-1);//set the constrain for each x, y pos
    var iy = constrain(floor(py[0]), 0, height-1);
    var ix1 = constrain(floor(px[1]), 0, width-1);
    var iy1 = constrain(floor(py[1]), 0, height-1);
    var ix2 = constrain(floor(px[2]), 0, width-1);
    var iy2 = constrain(floor(py[2]), 0, height-1);
    var ix3 = constrain(floor(px[3]), 0, width-1);
    var iy3 = constrain(floor(py[3]), 0, height-1);
    var theColorAtLocationXY = [underlyingImage.get(ix, iy)];//get the color
    theColorAtLocationXY.push(underlyingImage.get(ix1,iy1));//add into the color array
    theColorAtLocationXY.push(underlyingImage.get(ix2,iy2));
    theColorAtLocationXY.push(underlyingImage.get(ix3,iy3));

    noStroke();
    fill(theColorAtLocationXY[0]);//call corresponding color
    ellipse(px[0], py[0], 10, 10);

    fill(theColorAtLocationXY[1]);
    ellipse(px[1],py[1],15,15);

    fill(theColorAtLocationXY[2]);
    ellipse(px[2],py[2],5,5);

    fill(theColorAtLocationXY[3]);
    ellipse(px[3],py[3],12,12);

    gAngle[0] = gAngle[0] + 2;//change of angles everytime
    gAngle[1] = gAngle[1] - 2;
    gAngle[2] = gAngle[2] + 2;
    gAngle[3] = gAngle[3] - 2;
}

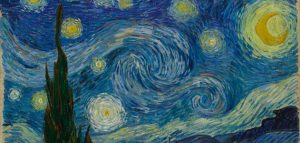
For this project, I thought about Van Gogh’s painting with how each stroke is distorted and convey a unique feeling of the whole image. “The Starry Night” especially, is where my inspiration came from.  

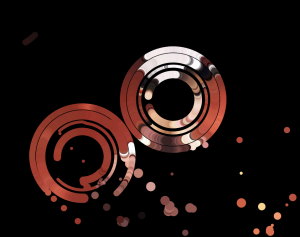
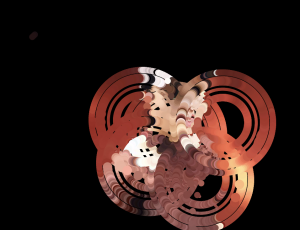
With each part of the drawing circulating, I thought I will be interesting to apply a similar technique on a portrait. For this project, I chose to do a more interactive piece where the audience can manipulate the strokes with their mouses. According to the position of the mouse, four circles with different width and radius will draw accordingly. In the end, the how the picture looks like a portrait composed with hundreds of circles.

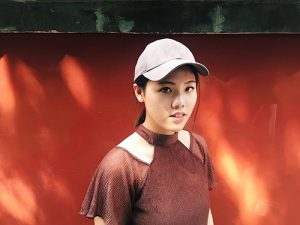
Original Portrait
stage1 with two mouse movement
stage2 with four mouse movements
with more mouse movements
one possibility of the final presentation

I was influenced by the “Cubism” idea.

thlai-Project-09-Portrait

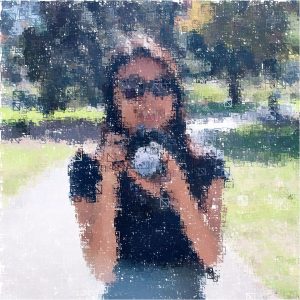
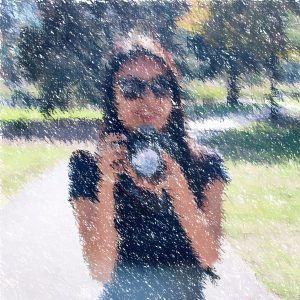
I went through many iterations of shapes, trying to see which one looked the best with my photo. I tried rectangles, lines, and ellipses, but ended up going with straight diagonal lines. This gives the photo the feeling of looking through rainy glass:


sketch

// Tiffany Lai
// 15-104, Section A
// thlai@andrew.cmu.edu
// Project 09

var portrait; // variable to store image

function preload() {
    var imageURL = "https://i.imgur.com/2w1VggQ.jpg";
    portrait = loadImage(imageURL);
}

function setup() {
    createCanvas(480, 480);
    background(255);
    portrait.loadPixels();
}

function draw() {
    var px = random(width); // x location of line
    var py = random(height); // y location of line
    var ix = constrain(floor(px), 0, width-1);
    var iy = constrain(floor(py), 0, height-1);
    var colorAtLocation = portrait.get(ix, iy); // get color at location x y
    var randomSize = random(0, 15); // random size of line

    stroke(colorAtLocation);
    strokeWeight(3);
    line(px, py, px + randomSize, py + randomSize); // draw lines

    var colorAtMouse = portrait.get(mouseX, mouseY);
    fill(colorAtMouse);
    line(mouseX, mouseY, mouseX + randomSize, mouseY + randomSize); // draw line where mouse is
}