jamieh-final-project

*Move mouse around canvas to move particles

*Click and/or drag to add more particles

sketch

/*
Jamie Ho
jamieh@andrew.cmu.edu
10:30
Project 12
*/

var particles = [];		//array to store circle particles
var d;					//distance between two particles
var md;					//distance between particle and 
var r = 255;
var g = 255;
var b = 255;

function setup(){
	createCanvas(480, 480);
}

function draw(){
	background(0);
	//create particles and push into array
	p = new Particle();
	particles.push(p);
	//if mouse is pressed, then add more particles & invert background colour
	if(mouseIsPressed){
		particles.push(p);
		background(255);
	}
	//first for loop counting backwards of the array
	for(var i = particles.length-1; i > 0; i--){		
		particles[i].show();
		particles[i].update();
		//second for loop counting forwards of the array. two for loops needed to draw lines between all particles
		for(var j = 0; j < particles.length; j++){		
			//distance between two particles
			d = dist(particles[i].x, particles[i].y, particles[j].x, particles[j].y);
			//distance between particle and mouse
			md = dist(particles[i].x, particles[i].y, mouseX, mouseY);
			//if distance between two particles is less than 45 then lines will be blue and thicker
			if(d < 45){
				if(d < 25){
					stroke(102, 204, 255);
					strokeWeight(0.35);
				} else if(d < 45 & d > 25){
					//if mouse is pressed, inverse colours
					if(mouseIsPressed){
						stroke(0);
						strokeWeight(0.1);
					} else{
						stroke(255);
						strokeWeight(0.1);
					}
				}
				line(particles[i].x, particles[i].y, particles[j].x, particles[j].y);
			}
			//if the distance between particle and mouse is between range to determine whether or not to push particles away
			if(md < 50 & mouseIsPressed == false){
				if(particles[i].x > mouseX){
					particles[i].x += random(md/4, md/2);
				} else if(particles[i].x < mouseX){
					particles[i].x -= random(md/4, md/2);
				} else if(particles[i].y > mouseY){
					particles[i].y += random(md/4, md/2);
				} else if(particles[i].y < mouseY){
					particles[i].y -= random(md/4, md/2);
				}
			}
			//if the alpha is less than 0 and returns true
			//then that particle is "killed off" or removed from array
			if(particles[i].finished()){
				particles.splice(i, 1);
			}
		}
	}
}

class Particle{
	//defines locations of particles and velocities and alphas
	constructor(){
		//if mouse is pressed then particle shows up where mouse is clicked
		if(mouseIsPressed){
			this.x = mouseX;
			this.y = mouseY;
		} else {
		//otherwise anywhere on canvas
			this.x = random(width);
			this.y = random(height);
		}
		//size of particles
		this.cSize = random(2, 8);
		//velocities
		this.vx = random(-0.5, 0.5);
		this.vy = random(-0.5, 0.5);
		//brightness of circles
		this.alpha = 255;
	}
	//creates the particles
	show(){
		noStroke();
		if(mouseIsPressed){
			fill(r, g, b, this.alpha);
		} else {
			fill(255, this.alpha);
		}
		ellipse(this.x, this.y, this.cSize);
	}
	//to move the particles
	update(){
		//make particles move
		this.x += this.vx;
		this.y += this.vy;
		//conditions where if particles hit the four edges, bounce
		if(this.x > width-this.cSize/2){
			this.vx -= random(0.5, 1.5);
		} else if(this.x < 0+this.cSize/2){
			this.vx += random(0.5, 1.5);
		} else if(this.y > height-this.cSize/2){
			this.vy -= random(0.5, 1.5);
		} else if(this.y < 0+this.cSize/2){
			this.vy += random(0.5, 1.5);
		}
		//to decrease the brightness of particles
		this.alpha -= 1.25;
	}
	//to "kill off" particles
	finished(){
		return this.alpha < 0; 	//either true or false
	}
}

function mouseDragged(){
	if(particles.push(p) & mouseIsPressed){
		r = map(mouseY, 0, height, 100, 255);
		g -= random(2, 3);	
		b = map(mouseX, 0, width, 150, 255);
	}
}

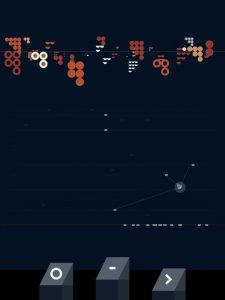
For my final project, I wanted to work with objects again to become more familiar with it. I chose to use particles and linking those particles based on different conditions. The particles are also interactive so that they’re not just floating circles that move by itself randomly. And while the mouse is clicked, the colours invert to show something more geometrical based on the lines drawn between particles.

jamieh-Looking-Outwards-12

Scott Snibbe’s Gravilux (1997) and Memo Akten’s My Secret Heart (2008) and ofxMSAFluid (2009) are two interactive works that I find interesting for my final project. Snibbe’s project is a lot older so it doesn’t have as much fancy coded graphic work, but I like the way the particles/objects move once triggered by the pen/mouse. It doesn’t just directly follow the pen through the shortest path possible, but also scatters and moves around. It’s not a simplistic, super straightforward movement based on the distance formula.

I also like Akten’s work because of the different ways he shows movement of particles: different sized circles, different thicknesses of lines, different colours of lines as well as something that looks almost like iron filings within a magnetic field. His work focuses not only on the movements of the particles/objects but also of the aesthetics and what art is formed after the particles/objects are triggered to move.


Below is Scott Snibbe’s Gravilux (1997)

Below is Memo Akten’s My Secret Heart (2008)

Below is Memo Akten’s ofxMSAFluid (2009)

jamieh-final-project-proposal

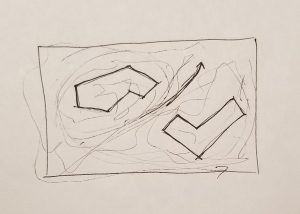
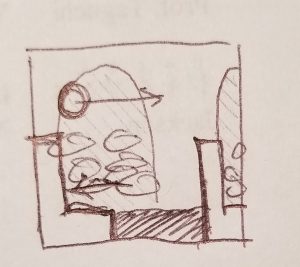
I want to incorporate my architecture studio final presentation work with this class’s final project. My plan is to develop an interactive artwork that shows the kinetic energy within a site based on circulation around buildings. I am thinking of using the mouse like an attractor point that would cause a shift in movement to the static objects (maybe lines or circles), so the mouse would be the energy that trigger movements. Instead of just simply drawing lines to depict circulation, I wanted to show movement real time. Then when the mouse is not pressed to guide movement around the site, then the objects will slowly move back to original position. (My looking outwards 12 post has examples of the effect that I would like to explore and create for this final project)  Below is a very simple drawing of the mouse going around the buildings.

jamieh-Project-11-Composition

sketch

/*
Jamie Ho
jamieh@andrew.cmu.edu
10:30
Project 11
*/


var hexagons;       //creating variablefor turtle
var len = 50;       //length of each triangle side
var factor = 0.15;  //factor to increase len size by
var angle = 0;      //initial angle
var colour = 255;   //white
var cFactor = 0.45; //amount to decrease the whiteness by

function setup() {
    createCanvas(400, 400);
    hexagons = new makeTurtle(width*0.8, height*0.4); //position of hexagons
    noLoop();
}

function draw() {
    background(0);

    hexagons.penDown();
    for(var i = 0; i < 500; i++){
        drawHexagon(len);           //call function with parameter of length for size of hexagons
        hexagons.face(angle);       //rotate hexagons
        
        //updates
        colour -= cFactor;          //turning white into black
        len += factor*i;            //increasing length of each side of hexagon
        angle += 3;                 //increasing rotation
    }
    hexagons.penUp();

}


function drawHexagon(length){
    hexagons.penDown();
    hexagons.setWeight(1);
    //triangle
    for(var i = 0; i < 6; i++){     // i < 6 to create hexagon
        hexagons.setColor(colour);  //setting colour for hexagon which changes for each time it runs through for loop
        hexagons.forward(length);   //move forward by 'length' dimension
        hexagons.right(60);         //move pen right by 60 degrees
    }
    hexagons.penUp();
}


//________________________TURTLE

function turtleLeft(d) {
    this.angle -= d;
}


function turtleRight(d) {
    this.angle += d;
}


function turtleForward(p) {
    var rad = radians(this.angle);
    var newx = this.x + cos(rad) * p;
    var newy = this.y + sin(rad) * p;
    this.goto(newx, newy);
}


function turtleBack(p) {
    this.forward(-p);
}


function turtlePenDown() {
    this.penIsDown = true;
}


function turtlePenUp() {
    this.penIsDown = false;
}


function turtleGoTo(x, y) {
    if (this.penIsDown) {
      stroke(this.color);
      strokeWeight(this.weight);
      line(this.x, this.y, x, y);
    }
    this.x = x;
    this.y = y;
}


function turtleDistTo(x, y) {
    return sqrt(sq(this.x - x) + sq(this.y - y));
}


function turtleAngleTo(x, y) {
    var absAngle = degrees(atan2(y - this.y, x - this.x));
    var angle = ((absAngle - this.angle) + 360) % 360.0;
    return angle;
}


function turtleTurnToward(x, y, d) {
    var angle = this.angleTo(x, y);
    if (angle < 180) {
        this.angle += d;
    } else {
        this.angle -= d;
    }
}


function turtleSetColor(c) {
    this.color = c;
}


function turtleSetWeight(w) {
    this.weight = w;
}


function turtleFace(angle) {
    this.angle = angle;
}


function makeTurtle(tx, ty) {
    var turtle = {x: tx, y: ty,
                  angle: 0.0, 
                  penIsDown: true,
                  color: color(128),
                  weight: 1,
                  left: turtleLeft, right: turtleRight,
                  forward: turtleForward, back: turtleBack,
                  penDown: turtlePenDown, penUp: turtlePenUp,
                  goto: turtleGoTo, angleto: turtleAngleTo,
                  turnToward: turtleTurnToward,
                  distanceTo: turtleDistTo, angleTo: turtleAngleTo,
                  setColor: turtleSetColor, setWeight: turtleSetWeight,
                  face: turtleFace};
    return turtle;
}

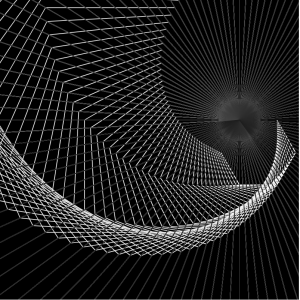
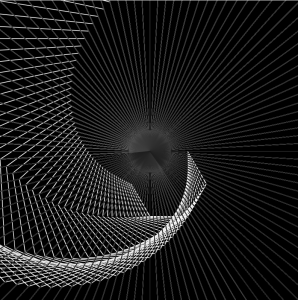
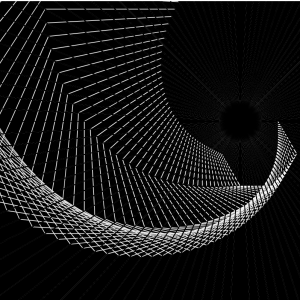
With the turtle graphics, I wanted to use hexagons, which is a very simple shape, and turn it into an abstracted drawing that makes the shape of the hexagon almost unrecognisable. I also wanted to make the code efficient with use of loops unlike the previous assignment 10A which required a lot of repeated lines of motion.

Below are images of the final product and other results I got from experimenting with composition.

final product
change in position
change in for loop condition

jamieh-Looking-Outwards-11

Example of the visualizations of the computer generated music

Atlås, created by Agoston Nagy, “generates music in a conversational cognitive space”. The app basically creates music through programming language in Pure Data and creates graphics with javascript’s p5js library. What I like about this project is that music is not just something that can be heard, but also visualized. The graphics locate the sounds within space, which brings an aspect of cognitive process into the experience of listening. The sounds generated by the machine through coding may seem random and distinct from each other, but through the visuals, such sounds then seem to show a narration and a relationship with each other.


Below is a video example of his work.


jamieh-looking-outwards-10

Neri Oxman is an American-Israeli architect, designer and professor at the MIT Media Lab. She is in charge of the Mediated Matter research group, where they focus on combining design, biology, computing, materials engineering with architecture and art. Her work is primarily determined by its context, whether it be a helmet based on a CT scan of the brain (design fits the body not only by the shape but also by the physiological makeup of the body) or an acoustic chair that absorbs sound (design corresponds to the pressure points on the human body). Everything she does relates to something specific that gives it a sense of context. Most of her organically-shaped, beyond the norm designs are 3D printed.

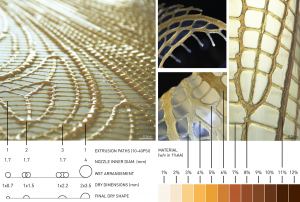
One of my favourite works of hers would be the Mechanic Biomaterials Deposition using chitosan (2014). She took chitosan paste, developed solutions of different chemical concentrations and used that solution to 3D print, with a robotic arm, a structure in large scale. The microorganisms (a byproduct of the air bubbles from the printing process) and embedded bacteria take carbon from the atmosphere and convert it into sugar/energy. Not only can the product as as a structural beam, but also as a facade mesh (eg windows). The product also biodegrades to nourish marine life or nourish soil. What I like about this project is that the product is thought of as a cycle that is part of the natural environment. She takes what is natural to create one environmentally-harmless man-made object, which can then be returned back to the environment.

Below is a TEDtalk given by Neri Oxman.


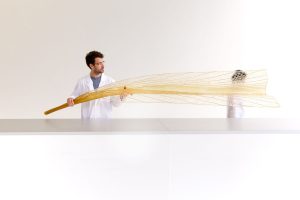
Researcher from Mediated Matter researcher group holding the chitosan and water-based structural member
Close up of the chitosan-based structure

jamieh-project-10-landscape

sketch

/*
Jamie Ho
jamieh@andrew.cmu.edu
10:30
Project 10
*/

var clouds = [];
var skies = [];
var sunPos = 0;
var colour = 0;

function setup() {
    createCanvas(480, 480);

    //to make and store clouds in array
    for (var i = 0; i < 10; i++){
        var rx = random(width);
        clouds[i] = makeClouds(rx);
    }
    frameRate(10);
}

function draw() {
	noStroke();

	//environment outside of plane
	sky();
	theSun(sunPos);
	if(sunPos < width){		//condition statement for position of sun
		sunPos += 3;		//to move sun
		colour += 2;		//to change colour
	} else {				//go back to 0
		sunPos = 0;
		colour = 0;
	}

	updateAndDisplayClouds();
	addNewCloudsChances();

	//plane interiors
	windows(0);
	windows(width*0.7);
	planeInterior();
	seat(0);
	seat(width*0.7);
}

function windows(pos){
	fill(200, 200, 200, 50);
	rect(pos+width/6, height/4, pos+width/2, height);
	ellipseMode(CORNER);
	arc(pos+width/6, 0, width/2, width/2, PI, 0);
}

function seat(pos){
	noStroke();
	fill(150);
	rect(pos, height/3, width/8, height, 50);			//back rest
	fill(200);
	rect(pos, height*0.85, width/2, height, 25);		//seat
	fill(125);
	rect(pos+25, height*0.75, width/2.5, 25, 50);		//arm rest
	ellipseMode(CORNER);
	fill(100);										
	ellipse(pos+25, height*0.75, 25, 25)				//arm rest joint
	ellipseMode(CENTER);
	fill(200);
	ellipse(pos+width/8, height/2.5, 18, height/5);		//head rest
}

function planeInterior(){
	fill(80);
	rect(0, height*0.7, width, height);
}

function updateAndDisplayClouds(){
    for (var i = 0; i < clouds.length; i++){
        clouds[i].move();
        clouds[i].show();
    }
}

function addNewCloudsChances() {
    // With a very tiny probability, add a new building to the end.
    var newCloudChances = 0.01; 
    if (random(0,1) < newCloudChances) {
        clouds.push(makeClouds(width));
    }
}

function removeBuildingsThatHaveSlippedOutOfView(){
    var cloudsToKeep = [];
    for (var i = 0; i < clouds.length; i++){
        if (clouds[i].x + clouds[i].breadth > 0) {
            cloudsToKeep.push(clouds[i]);
        }
    }
    clouds = cloudsToKeep; // remember the surviving buildings
}

function cloudsMove() {
    this.x += this.speed;
}

function cloudsDisplay(){
	var gs = random(240, 255);		//greyscale
	fill(gs, gs, gs, 50);
	ellipse(this.x, this.y, this.sizeX, this.sizeY);		//big clouds
	ellipse(this.x+5, this.y-100, this.sizeX*0.45, this.sizeY*0.25);	//small clouds
}

function makeClouds(birthLocationX){
	var clouds = {x: birthLocationX,					//where it starts
				  y: random(height*0.35, height*0.7),	//vertical position
				  speed: random(-0.5, -1),				//speed of each cloud
				  breadth: 35,							//distance between clouds
				  sizeX: random(120, 200),				//size of ellipse
				  sizeY: random(60, 100),
				  move: cloudsMove,						//to animate clouds
				  show: cloudsDisplay};					//to create clouds
	return clouds;
} 

function sky(){
	var factor = 0.5;								//factor to decrease rbg values by
	for(var i = 0; i<width; i++){
		var f = i*factor;							//rbg decreases incrementally based on i
		fill(230-f, 247-f, 255-f);					
		skies.push(rect(i, 0, i+1, height*0.7));	//creating sky rectangles
	}
}


function theSun(x){
	var sSize = 100;
	ellipseMode(CORNER);
	fill(255+colour, 204+colour, 0+colour, 255-colour/2);
	ellipse(x, height/16, sSize, sSize);
}

The hardest part of this project is still understanding objects and keeping track of where those parameters go within all the different functions that are then called in draw. I started the project with drawing what was still, then putting in what moved. However, I think I should have done what moved first as it was in the background and it requires more time to figure out. I wanted to show more to the moving landscape based on the changing time of day during a long flight, but I couldn’t figure out how to do a moving gradient sky and just kept it as a gradient.

Sketch of what’s still and what’s moving

jamieh-LookingOutwards-09

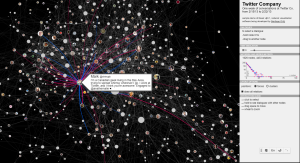
I found Hamza’s week 7 post about Santiago Ortiz’s (from Moebio Labs) visualization of Twitter connections. I agree with Hamza and Ortiz’s opinions that “data visualization is most effective not in the form of static charts and graphs, but as fluid, moving pieces of art”. There are certain types of information that should be visualized in a bar chart or pie chart, but when it comes to trying to visualize connections between subjects, it cannot be done in a numerical way. What’s interesting about the web about conversations between people at twitter is the fact that you can kind of imagine the personalities of people and the type of people they converse with. This may be because of common interests. Hovering over the circles with the person’s photo will show a blurb about the person.

relationships between people at Twitter based on data collected on twitter conversations

jamieh-project-09-portrait

sketch

/*
Jamie Ho
jamieh@andrew.cmu.edu
10:30
Project 09
*/

var underlyingImage;
var press = 1;			//to store value based on amt of times 
						//left and right arrow keys are pressed

function preload() {
    var myImageURL = "https://i.imgur.com/bJEDJSJ.jpg";
    underlyingImage = loadImage(myImageURL);
}

function setup() {
    createCanvas(480, 320);
    background(255);
    underlyingImage.loadPixels();
    frameRate(5000);
}

function draw() {
    var px = random(width);
    var py = random(height);
    var ix = constrain(floor(px), 0, width-1);
    var iy = constrain(floor(py), 0, height-1);
    var theColorAtLocationXY = underlyingImage.get(ix, iy);

    var lengthX = map(mouseX, 0, width, 5, 20);		//2nd X coordinate based on mouseX
    var lengthY = map(mouseY, 0, height, 5, 20);	//2nd y coordiante based on mouseY
    
    stroke(theColorAtLocationXY);
    strokeWeight(press);							//based on key presses
    line(px, py, px+lengthX, py+lengthY);			//draw line based on mousex mousey
}

function keyPressed(){
	if(keyCode == LEFT_ARROW & press > 1.0){		//if left arrow pressed
		press -= 0.5;								//strokeWeight decreases by 0.5
	} else if(keyCode == RIGHT_ARROW & press < 5.0) {		//if right arrow pressed
		press += 0.5;										//strokeWeight increases by 0.5
	}
	
}

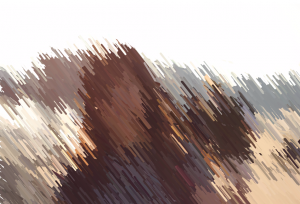
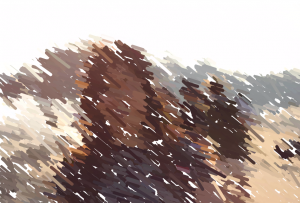
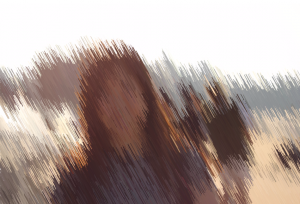
The code allows for interactive changes to the product by using mouse positions to change the direction and length of the lines, whereas using left and right arrow keys on the keyboard adjusts the thickness of the lines. Thicker lines give less details but the product will be finished faster. I experimented with directions of the lines as well, which I think produces a much more dynamic and sketchy type of image (last image).

Thick strokeWeight with one angle


Thick strokeWeight with different angles
Thin strokeWeight with one angle
Thin strokeWeight with different angles

jamieh-LookingOutwards-08

(Above is Kate Hollenbach’s lecture at INST-INT 2014)

Kate Hollenbach is an artist and programmer who develops interactive systems and technologies that incorporate the human body, human gestures as well as the environment’s physical space. Her experiences came from being an interface designer and product developer from a computer science undergraduate background. She was previously the Director of Design and Computation at Oblong Industries, where she oversaw the Mezzanine project. One of the projects she took part of while at Oblong that I thought was the most interesting was “Tamper”. It uses multiple screens that play videos and the Tamper system allows the user to edit videos (cinematic design) through gestures alone, which is sensed through wearing a glove. What I love about this project is that this type of technology always seemed so surreal and only seen in movies. However, it is possible through sensors and data collection. It is making the imagined possible. And then from the Tamper project, it led to other projects that are more developed, such as the G-Speak (eg. allows more than one human interaction with the system) or the Rummage (eg. photo sorting). All of her projects think about the 3D space, transforming two-dimensional things like videos and photos into an object within a XYZ plane. As her works are very complex and may not be easily understood or visualized through words alone, they are explained through demonstration videos of someone interacting with the system.


(Below is a demonstration of what Tamper does)