thlai-Project-09-Portrait

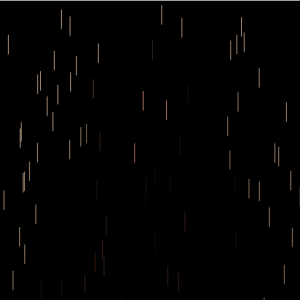
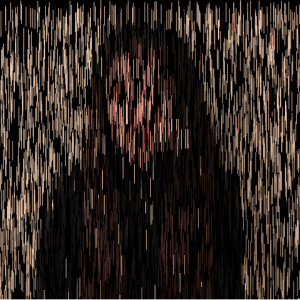
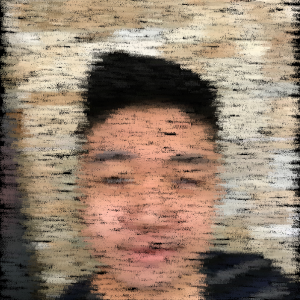
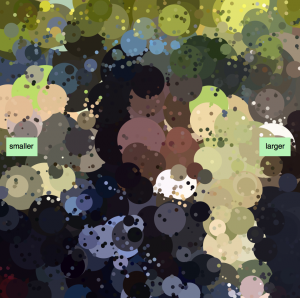
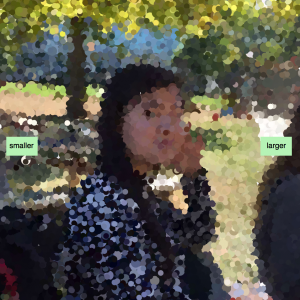
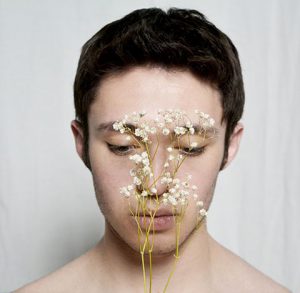
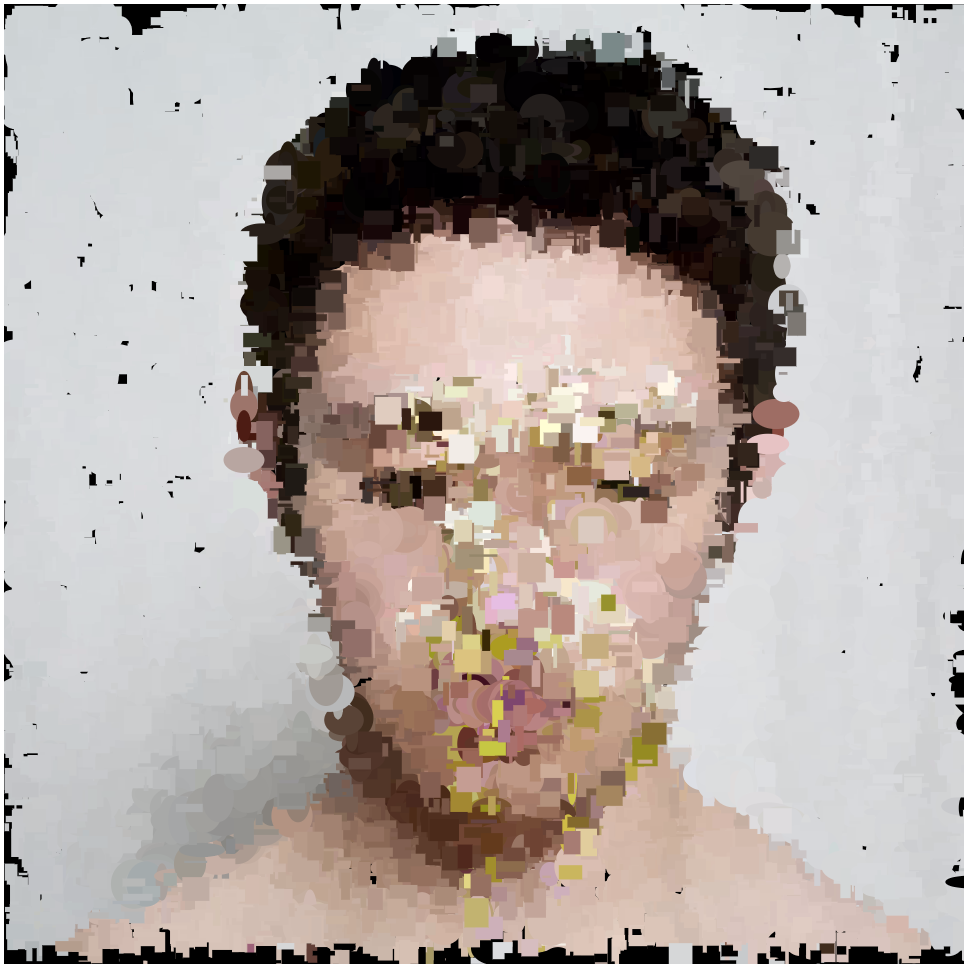
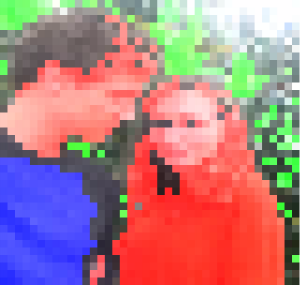
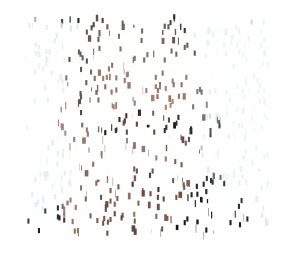
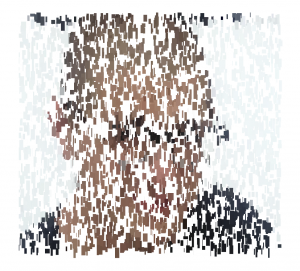
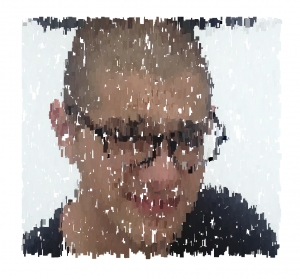
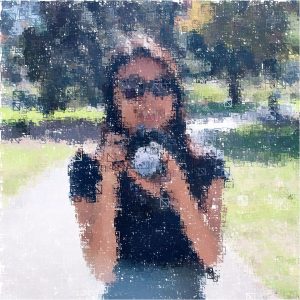
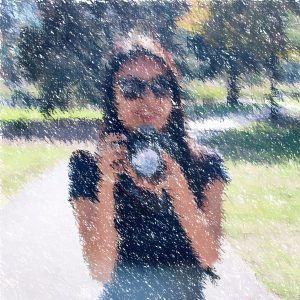
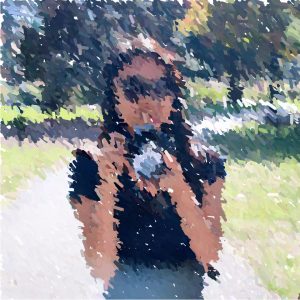
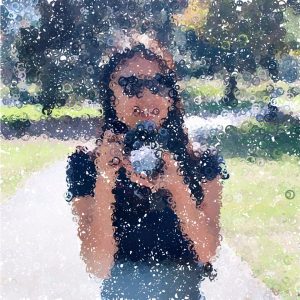
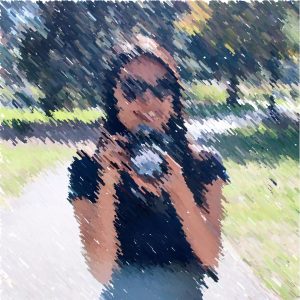
I went through many iterations of shapes, trying to see which one looked the best with my photo. I tried rectangles, lines, and ellipses, but ended up going with straight diagonal lines. This gives the photo the feeling of looking through rainy glass:


sketch

// Tiffany Lai
// 15-104, Section A
// thlai@andrew.cmu.edu
// Project 09

var portrait; // variable to store image

function preload() {
    var imageURL = "https://i.imgur.com/2w1VggQ.jpg";
    portrait = loadImage(imageURL);
}

function setup() {
    createCanvas(480, 480);
    background(255);
    portrait.loadPixels();
}

function draw() {
    var px = random(width); // x location of line
    var py = random(height); // y location of line
    var ix = constrain(floor(px), 0, width-1);
    var iy = constrain(floor(py), 0, height-1);
    var colorAtLocation = portrait.get(ix, iy); // get color at location x y
    var randomSize = random(0, 15); // random size of line

    stroke(colorAtLocation);
    strokeWeight(3);
    line(px, py, px + randomSize, py + randomSize); // draw lines

    var colorAtMouse = portrait.get(mouseX, mouseY);
    fill(colorAtMouse);
    line(mouseX, mouseY, mouseX + randomSize, mouseY + randomSize); // draw line where mouse is
}

jennyzha – Project 09

sketch

// Jenny Zhang
// jennyzha
// Section D
// Project 09

var jennyzha;

function preload() {
    var Image = "https://i.imgur.com/c3AjAad.jpg";
    jennyzha = loadImage(Image);
}

image(jennyzha);

function setup() {
    createCanvas(480, 480);
    background(0);
    jennyzha.loadPixels();
    frameRate(10);
}

function draw() {
    var px = random(width);
    var py = random(height);
    var ix = constrain(floor(px), 0, width-1);
    var iy = constrain(floor(py), 0, height-1);
    var ColorXY = jennyzha.get(ix, iy);

    push();
    stroke(ColorXY);
    strokeWeight(1);
    line(px, py, px, py + 30); 
    pop();

    stroke(ColorXY);
    strokeWeight(1);
    line(mouseX, mouseY, mouseX, mouseY + 30); 
}

This project took me a lot of trial and error, interestingly enough, not because of the code but because of imgur and the image itself. First, after seeing that my code would not load, and feeling fairly confident in my code itself, I realized that I had used the wrong url for the image on imgur. Second, after the code started to run the way I wanted it to, I saw that it was loading just the background. This is when I realized that it was because the image was over 1000X1000 pixels and my canvas was only the max requirement, 480X480. I quickly went back to the original image, shrunk it down and the code worked perfectly.

mstropka-Project09-E

sketch

//Max Stropkay
//Section E
//mstropka@andrew.cmu.edu
//Project-09

var underlyingImage;

function preload() {
    var myImageURL = "https://i.imgur.com/j59r16x.jpg";
    underlyingImage = loadImage(myImageURL);
}

function setup() {
    print("made");
    createCanvas(480, 480);
    background(0);
    underlyingImage.loadPixels();
    frameRate(20);
}

function draw() {
var size = 20;
    for(var i = 0; i < 480; i+=10){
      for(var j = 0; j< 480; j+=10){
        fill(underlyingImage.get(i, j));
        ellipse(i+random(-10,10), j+random(-10, 10), size ,size);
      }
    }


}

For my project I took a picture of my friend and replaced every pixel with an ellipse that is filled with the color of the underlying picture. This gives the image a sort of painterly feel. Then I made the ellipses move randomly to give the image a sense of movement.

Sheenu-Project 09-Portrait

sketch

// Portrait
// Name: Sheenu You
// Andrew ID: sheenuy
// Section E

//Variables
var sheenu;
var a =0;
var b =0;
//Loads Image
function preload() {
    var myImageURL = "https://i.imgur.com/JCe4MPY.jpg";
    sheenu = loadImage(myImageURL);
}

function setup() {
    createCanvas(480, 480);
    background(0);
    //Load Pixels of image
    sheenu.loadPixels();
    frameRate(120);
}

function draw() {
    //Variables that generate Image
    var x = random(width);
    var y = random(height);
    //Gets all those pixels and arranges into variable
    //Generates "Sheenu" pixel
    var image = sheenu.get(x, y);
    fill(image);
    textSize(7);
    text("Sheenu",x, y);
    //Generates random "You" pixel
    text("You",a,b)
    //"You" pixel genereator
  a += 20;
  if (a > width) {
    a = 0;
    b += 20;
  }


}

I wanted to do something with text, so I decided to use my name as a custom pixel. I guess you can say this portrait has my name (and face) all over it. I like how the text starts to appear like brush strokes or pastel as more text generates and creates the full image. I found it as an interesting effect I wasn’t aware of nor expecting. I also wanted to do something with my last name, so I made them generate in an orderly fashion but with randomly generated colors. The “You” is definitely a huge contrast compared to the “Sheenu”, which generates randomly and has a specifically generated fill. In the end, all I can say is that a picture is truly worth a thousand words (or names).

jwchou-project-09-portrait

sketch 66

var image;
var circleDiam = 15; //diameter of dots


function preload() {
    var URL = "https://i.imgur.com/tOU8IHH.jpg"; //locating image on web
    image = loadImage(URL);
}

function setup() {
    createCanvas(480, 480);
    background(255);
    image.loadPixels();
    frameRate(60); // 60 circles a second
}

function draw() {
	var x = random(width);
	var y = random(height);
	var pixelColor = image.get(x, y); //retrieve color value of pixel;
	noStroke();
	fill(pixelColor); //fill circle with color of pixel at x,y
	ellipse(x, y, circleDiam, circleDiam); //draw circles at random locations
	
	//buttons to make the circles smaller or larger
	fill(180, 244, 180); //green fill
	rect(10, 220, 50, 30); //"smaller" button
	rect(415, 220, 50, 30); //"larger" button
	fill(0); //text fill
	text("smaller", 15, 238);	
	text("larger", 425, 238);

}

function mousePressed() {
	if (mouseX < 60 & mouseX > 10 && mouseY > 220 && mouseY < 250 && circleDiam > 4) {
		circleDiam += -3; //if the mouse is over the smaller button, and the current diameter is greater than 4, make the circles smaller by 3 px
	}

	if (mouseX < 465 & mouseX > 415 && mouseY > 220 && mouseY < 250 && circleDiam < 100) {
		circleDiam += 3; //if the mouse is over the "larger" button, and the current diameter is less than 100, make the circles alrger by 3 px
	}
}

I had trouble at first, because my diameter values were going negative and doing weird things so I tried using constrain() to no avail. Then, I just added a few more conditions to my if() statements, and that worked.

Some possible outcomes:

A portrait rendered with a combination of large and fine dots.

A portrait rendered with finer dots.

This is a portrait of my friend, Amber. Mine uses a very basic element, just circles so I wanted to make it more interactive. Using my highly-advanced HCI skills, I devised a very intuitive interface, consisting of two buttons that say “smaller” and “larger.”
When you click on each corresponding button, the dots get larger or smaller.

I had trouble at first, because my diameter values were going negative and doing weird things so I tried using constrain() to no avail. Then, I just added a few more conditions to my if() statements, and that worked.

Some possible outcomes:

A portrait rendered with a combination of large and fine dots.
A portrait rendered with finer dots.

yoonyouk-LookingOutwards-09

I decided to focus on my friend Sharon’s LookingOutward-03, which focused on the work of David Wicks, who works with data visualization. He quotes, “Making Information Beautiful.” The work she decided to focus on was a map of the US with representation of rainfall and water flow.

“A representation of rainfall vs. water consumption in Winter 2001.”

I thought it was interesting that this beautiful visual representation could translate into data information. Although it does not present any numbers, it still provides a general idea of how the water flows. I also thought it was unique that the artist was able to figure out an algorithm that would draw and create such as piece.

elizabew-Project-09-Portrait

sketch

//Elizabeth Wang
//elizabew@andrew.cmu.edu
//Section E
//Project-09

var underlyingImage;

function preload() {
    var myImageURL = "https://i.imgur.com/wlqq6AA.jpg"; //loads image
    underlyingImage = loadImage(myImageURL);
}

function setup() {
    createCanvas(480, 480);
    background(0);
    underlyingImage.loadPixels();
    frameRate(1000);
}

function draw() {

    var x = random(width); //finds random x value on canvas
    var y = random(height); //finds random y value on canvas
    var ix = constrain(floor(x), 0, width - 1);
    var iy = constrain(floor(y), 0, height - 1);
    var color = underlyingImage.get(ix, iy); //gets color

    push();
    fill(color); //calls for color from image
    noStroke();
    var rw = random(1, 15); //random width of rectangles
    var rh = random(1, 15); //random height of rectangles
    rect(x, y, rw, rh); //rectangles
    pop();


}
function mouseDragged() { //when user presses and drags mouse over image, makes a bunch of random cirlces
    var colorAtMouse = underlyingImage.get(mouseX, mouseY);
    fill(colorAtMouse);
    var ew = random(5, 25); //random width of ellipses
    var eh = random(5, 25); //random height of ellipses
    noStroke();
    ellipse(mouseX, mouseY, ew, eh);
}

“NYC #33″ 36″x36” Oil – Jeremy Mann

For this project, I was initially inspired by the style that one of my favorite painters, Jeremy Mann, uses. To me his paintings visually express an almost pixelated and futuristic-esque view of cities, and I wanted to add that sharpness and softness into this project as well.

Portrait Photo used for this project

I ended up choosing a more artsy portrait of one of my good friends. I felt that the green and white of the flower would make the final piece more visually interesting since most likely they won’t be 100% discernible.

Final product when using mousePressed and waiting for random rectangles to cover the entire canvas.

Overall I am pretty satisfied with the results. I achieved the sharpness I wanted from the small rectangles, and the softness that the user is able to put in themselves using mousePressed.

mmirho – Project 9 – Portrait – Saturated Pixelation

sketch

var underlyingImage; // The image used

var index; //The variable used to loop through the built in pixels array

var pixelation = 10; //The width of each pixel

var colorDiff = 15; //The variable used to compare the colors, and find if
// one color in the RGB spectrum is significantly larger

var r = 0; //the variable that measures the number of clicks you've done

var clickIndex; // The variable that decides if the number of clicks is
// divisible by 1, 2 or 3

function preload() {
    var myImageURL = "https://i.imgur.com/SMNCOc6.jpg";
    //Image of a portrait of me and my girlfriend at a botanical garden 🙂
    underlyingImage = loadImage(myImageURL);
    //Load the image into the variable underlying image
}

function setup() {
    createCanvas(400, 380);
    background(0);
    underlyingImage.loadPixels();
}

function draw() {
    noStroke();

    for (var y = pixelation/2; y <= 1000; y += pixelation) {
        for (var x = pixelation/2; x <= 1000; x += pixelation) {
            //These nested loops move through each and every pixel in the given image
            //They also move with relation to the pixelation intensity

            index = (x*2 + y*3200)*4 - pixelation*width/2;
            //A balancing act on looping through the colors of the image
            //using the built in pixels

            var redish = underlyingImage.pixels[index+0];
            //The red intensity of the current pixel 
            var greenish = underlyingImage.pixels[index+1];
            //The green intensity of the current pixel 
            var blueish = underlyingImage.pixels[index+2];
            //The blue intensity of the current pixel 

            if ((redish > greenish+colorDiff) & (redish > blueish+colorDiff)) {

                fill(255, greenish , blueish);

                //If the red intensity of the observed cell is significantly
                // greater than the blue and green both, then the cell is
                // made much more red

            } else if ((blueish > greenish+colorDiff) & (blueish > redish+colorDiff)) {

                fill(redish, greenish , 255);

                //Same as above, but for the blue intensity

            } else if ((greenish > redish+colorDiff) & (greenish > blueish+colorDiff)) {

                fill(redish, 255 , blueish);

                //Same as above, but for the green intensity

            } else {

                fill(redish, greenish , blueish);
                //if there isn't a significant difference, then the cell
                //color remains normal

            }

            rectMode(CENTER);
            rect(x, y, pixelation, pixelation);
            //Makes the rectangle at each x and y with relation to the pixel intensity

        }
    }
}

function mousePressed () {

    r += 1;
    //Increment r each time you click

    clickIndex = r%3
    // clickIndex will only ever be 0, 1, or 2 
    //and so we can set conditionals on it

    if (clickIndex == 0) { 
        //if the number of clicks you've done is
        //divisible by three, the difference threshold
        //is much smaller, so more cells are colored
        colorDiff = 15;
    }
    if (clickIndex == 1) {
        //if you've done 3(n) +1 clicks, increase the threshold for less color
        colorDiff = 23;
    }
    if (clickIndex == 2) {
        //if 3(n) +2 clicks, decrease the threshold further for even less color
        colorDiff = 45;
    } //Here, only the most intense colored cells are effected

}

Click it! The “Saturation” decreases and then resets in increments.

This was very interesting, I had trouble balancing the pixels array and looping through it appropriately. But, once I had the pixelation formed correctly, it was easy to affect individual cells, so the setup was important to increase ease of use.

These are the three stages of intensity the image saturates the image of me and my girlfriend.

Project-09-Chickoff-Self Portrait

sketch

//Cora Hickoff
//Section D
//chickoff@andrew.cmu.edu
//Project-09  

var underlyingImage;
var nPoints = 100;
var CYCLOID = 0; 

var titles = ["-●●●-"];
var curveMode = CYCLOID;

function preload() {

    var myImageURL = "https://i.imgur.com/cNsCKtz.png";
    underlyingImage = loadImage(myImageURL);
}

function setup() {

    createCanvas(480, 480);
    background(100, 170, 25, 100);

    underlyingImage.loadPixels();
    frameRate(100);

    var myImageURL2 = "https://i.imgur.com/Sna9w4t.png";
    img = loadImage(myImageURL2)
    
}

function draw() {

    textSize(23);
    fill(0, 200, 0);
    text("Eat healthy, ya picky eater!", 10, 30);

    textSize(23);
    fill(0, 200, 0);
    text("These edamame beans will make you strong", 10, 400);

    //photo of edamame beans 
    image(img, 0, height/4, width/2);

    //draws the picture
    var px = random(width);
    var py = random(height);
    var ix = constrain(floor(px), 0, width-1);
    var iy = constrain(floor(py), 0, height-1);
    var theColorAtLocationXY = underlyingImage.get(ix, iy);

        noStroke();
        fill(theColorAtLocationXY);
        //little pie slices
        arc(px, py, 17, 17, 0, HALF_PI);
    
        //little edamame beans
        //controlled by mouse
        fill(78, 215, 0, 25); 
        text(titles[curveMode], mouseX, mouseY);
        //having this below means the 
        //beans will have no no stroke
        stroke(0);
}

function drawEdamameBeans (thisX, thisY) {

    fill(theColorAtLocationXY);
    titles(titles[curveMode], py, thisX, thisY);
}

My goal with this project was to focus on having fun and being playful with code versus feeling defeated by it. I started with a photo of me from freshman year eating my typical meal, broccoli (which I never ate because it was undercooked) and mac and cheese. That year was not very healthy for me food wise, and so I wanted to make fun of myself being a picky eater in this project, though I have improved a lot.

I decided to have arcs make up the photo because they looked like slices of pie, and then wrote code so that whenever the mouse was dragged a shape would be drawn. I chose “-●●●-“ to be the shape because it looks like edamame beans, which I found I enjoy eating. Plus they’re healthy. Now, by moving these around on the screen, I essentially am “feeding myself” if an edamame bean is moved towards my mouth!

Me and food