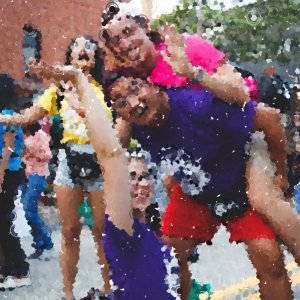
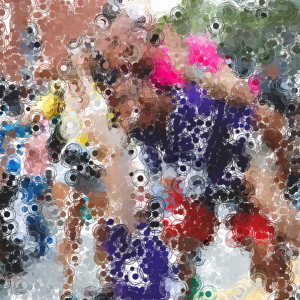
for this Project I experimented alot with the way that stroke were rendered by the program and how the user could interfere with that and in the end I decided on creating something slightly pixelated. I chose to have the program automatically render the photo in the form of rectangles because of it’s interesting pixelated quality. I then decided to that the user’s stroke be rendered as empty ellipses so as to give the user the ability to make the image a little more interesting and the overlapping and intermixing of colors (without changing opacity) was something that struck me as rather pretty- the ellipses add a quality that I feel is reminiscent of rain drops on a body of water, or even just ripples across a small puddle.
I didn’t have a particular goal in mind at the beginning aside from encouraging the program to add a more painterly quality to images as it redrew them pixel by pixel
I feel the the top right and left corners as well as the bottom left corner look particularly watery in a good way.
Image with intervention from the user:
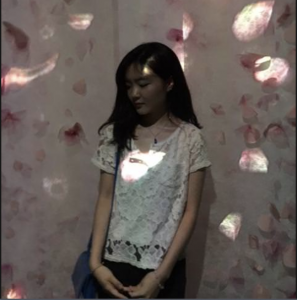
Here is what the image looks like without any interference:
var underlyingImage;

function preload() {
    var myImageURL = "https://i.imgur.com/bDkozta.jpg ";
    underlyingImage = loadImage(myImageURL);
}

function setup() {
    createCanvas(480, 480);
    background(0);
    underlyingImage.loadPixels();
    //frameRate(10);
}

function draw() {
    var px = random(width);
    var py = random(height);

    var w = random(0,20);
    var h = random(0,20);

    var ix = constrain(floor(px), 0, width);
    var iy = constrain(floor(py), 0, height);
    var theColorAtLocationXY = underlyingImage.get(ix, iy);

    noStroke();
    fill(theColorAtLocationXY);
    arc(px, py, w, h, PI+QUARTER_PI, TWO_PI);
    arc(px, py, w, h, PI+QUARTER_PI, TWO_PI);
    arc(px, py, w, h, PI+QUARTER_PI, TWO_PI);
    arc(px, py, w, h, PI+QUARTER_PI, TWO_PI);
    arc(px, py, w, h, PI+QUARTER_PI, TWO_PI);
    arc(px, py, w, h, PI+QUARTER_PI, TWO_PI);

    var theColorAtTheMouse = underlyingImage.get(mouseX, mouseY);
    fill(theColorAtTheMouse);
    noStroke();
    var z = random(0,80);
    var d = random(0, 10);
    ellipse(mouseX, mouseY, d,d);
    arc(pmouseX, pmouseY, w, h, PI+QUARTER_PI, TWO_PI);
}
My code creates lots of small arcs in random areas like scales. I was inspired by when you run your finger through scales and the sheen on them changes. The mouse also creates small ellipses like a brush, if you’d like to speed up the image creation process.
//Brandon Hyun
//Section B
//bhyun1@andrew.cmu.edu
//project09-PixelArt

var underlyingImage;

function preload() {
  //brings image from Imgur
    var ImageURL = "https://i.imgur.com/oSC8MC5.jpg";
    underlyingImage = loadImage(ImageURL);
}

function setup() {
    //creates canvas that fits the size of the picture
    createCanvas(778, 1219);
    background(0);
    underlyingImage.loadPixels();
    //draws the rectangles in certain speed
    frameRate(150);
}

function draw() {
    var px = random(width);
    var py = random(height);
    var ix = constrain(floor(px), 0, width-1);
    var iy = constrain(floor(py), 0, height-1);
    var theColorAtLocationXY = underlyingImage.get(ix, iy);

    noStroke();
    fill(theColorAtLocationXY);
    rect(px, py, 30, 70);


}
The portrait gets drawn onto the canvas is a rectangle that creates a mosaic of an image and the following image has the fast FrameRate that reveals the image quickly. I did not want the image to reveal so slowly since its hard for the viewers to view it. I also created the rectangles quite largely so the image can get revealed more quickly.
//Aisha Ghei Dev
//adev@andrew.cmu.edu
//Project-09
//Section E


var myPortrait;

function preload() {//loading baby photo
    var myPortraitURL = "https://i.imgur.com/GszICUU.jpg";
    myPortrait = loadImage(myPortraitURL);
}

function setup() {
    createCanvas(500, 500);
    background(0);
    myPortrait.loadPixels();
    frameRate(10);//low frame rate for faster processing.
    noStroke();
}

function draw() {
	//random position values
	var px = random(width);
    var py = random(height);
    var ix = constrain(floor(px), 0, width-1);
    var iy = constrain(floor(py), 0, height-1);
    //colour at specific pixel
    var theColorAtLocationXY = myPortrait.get(ix, iy);

    fill(theColorAtLocationXY);
    var sqDimensions = (random(10, 50));

    rect(px, py, sqDimensions/2, sqDimensions/2);
}


//Writing nickname
function mousePressed(){
	fill(255,0,0);
	textFont ("Georgia");
	textSize(28);
	text("$$$PAISHA", mouseX, mouseY);
}
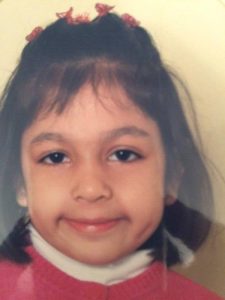
For this project, I wanted to do something light and fun and kind of poke fun at myself. I chose this baby picture of me that I think is hilarious.
I played around with a few iterations of my code and I liked the one with the text the most because it makes is even more personal with a funny childhood nickname.
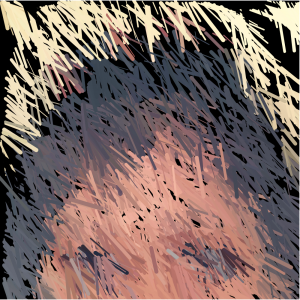
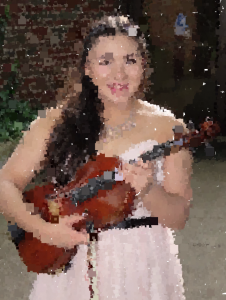
For this project, I selected an image that describes my passion for music and playing the viola. The portrait created from the code can be altered depending on where the mouse is located as the picture is being drawn one square at a time. The placement of the mouse determines the size of the squares. Pictured above, this is what occurs when both large and small squares are utilized.
Small Squares
Pictured directly above is when only small squares are utilized. This can be drawn by putting the mouse in the upper left hand corner.
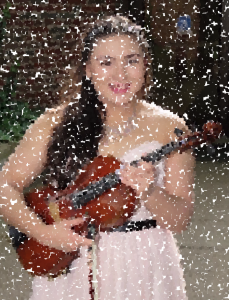
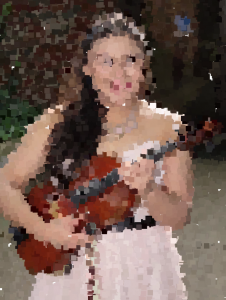
Pictured below is when only large squares are used. This can be drawn by putting the mouse in the lower right hand corner.
//Angela Rubin
//Section C
//aerubin@andrew.cmu.edu
//Project-09-Computational Portrait

var hiddenImage;

function preload() {
    var myImageURL = "https://i.imgur.com/7jZWZyX.jpg";
    hiddenImage = loadImage(myImageURL);
}

function setup() {
    createCanvas(338, 450);
    background(255);
    hiddenImage.loadPixels();
    frameRate(100);
}

function draw() {
    var px = random(width);
    var py = random(height);
    var ix = constrain(floor(px), 0, width-1);
    var iy = constrain(floor(py), 0, height-1);
    var ColXY = hiddenImage.get(ix, iy);

    noStroke();
    fill(ColXY);
    //if the mouse is in the upper half of the canvas, make 2x2 squares
    if(mouseY<height/2) {
        rectMode(CENTER);
        rect(px, py, 2, 2);
    }
    //if the mouse is on the left side of the canvas, make 4X4 squares
    if(mouseX<width/2) {
        rectMode(CENTER);
        rect(px, py, 4, 4)
    }
    //if the mouse is on the right side of the canvas, make 8x8 squares
    if (mouseX>width/2) {
        rectMode(CENTER);
        rect(px, py, 8, 8);
    }
    //if the mouse is in the lower half of the canvas, make 12x12 squares
    if (mouseY>height/2) {
        rectMode(CENTER);
        rect(px, py, 12, 12);
    }
}
//Nahyun Kim
//Section B
//nahyunk1@andrew.cmu.edu
//Project 09

var img;

function preload(){
  img = loadImage("https://i.imgur.com/cKWLZzM.jpg");

}
function setup() {
  createCanvas(600, 600);
  img.loadPixels();
  frameRate(2000);
  image(img, 0,-20);
  background(255);

}

function draw() {
  var x = floor(random(600));
  var y = floor(random(600));
  var Col = img.get(x, y);
  stroke(Col);
  strokeWeight(random(0.5, 2));
  noFill();
  rect(x, y, 30, 30);
  strokeWeight(0.5);
  text("be forever hazy..", 5, 10);
}
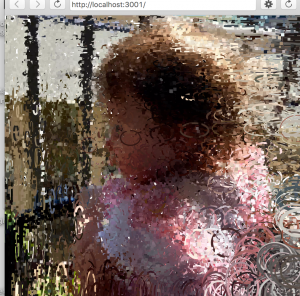
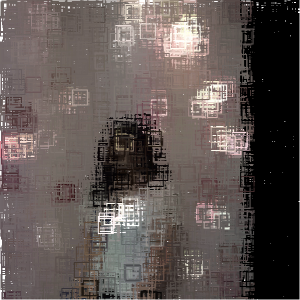
My intentions of presenting an obscured image came out successful by filling strokes with pixel colors and and doing noFill(); instead of the other way, which would stylize blocks of filled rectangles draw my image. I wanted to have the image appear in a way that is more neat in its build up. It also stylizes my picture as glassy and translucent, which helped my initial thought get executed clearly. Here are some screenshots of my picture being built up to its finished look.
// helen tsui
// 15-104 section d
// hyt@andrew.cmu.edu
// project-09-Pixel-Portraits

var portrait;

function preload() {
    var portraitURL = "https://i.imgur.com/kQn5qoD.jpg";
    portrait = loadImage(portraitURL);
}


function setup() {
    // retrieve and load pixels + other properties
    createCanvas(450, 450);
    background(193, 226, 177);
    portrait.loadPixels();
    frameRate(100);
}


function draw() {
    // initialize dots' location
    var px = random(0, width);
    var py = random(0, height);

    // retrieve color at specific pixels
    var ix = constrain(floor(px), 0, width-1);
    var iy = constrain(floor(py), 0, height-1);
    var theColorAtLocationXY = portrait.get(ix, iy);

    var brightnessVal = brightness(theColorAtLocationXY);
    fill(theColorAtLocationXY);
    var circleSize;

    // set brightness value if statement for drawing lines or circles
    if (brightnessVal > 40) {
        strokeWeight(3);
        stroke(theColorAtLocationXY);
        //var circleSize = random(5, 10);
        line(px - random(0, 10), py - random(-10, 10), px, py);
    } if (brightnessVal <= 40) {
        fill(theColorAtLocationXY);
        noStroke();
        circleSize = random(5, 15);
        ellipse(px, py, circleSize, circleSize);
    }
}
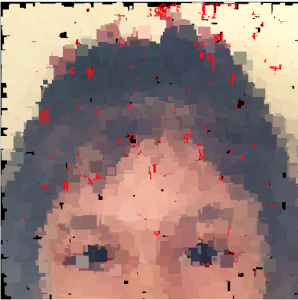
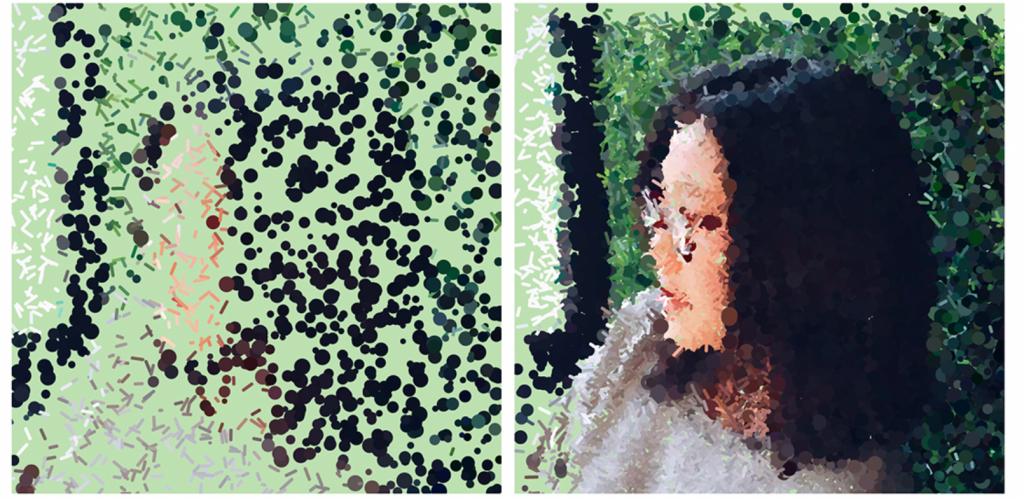
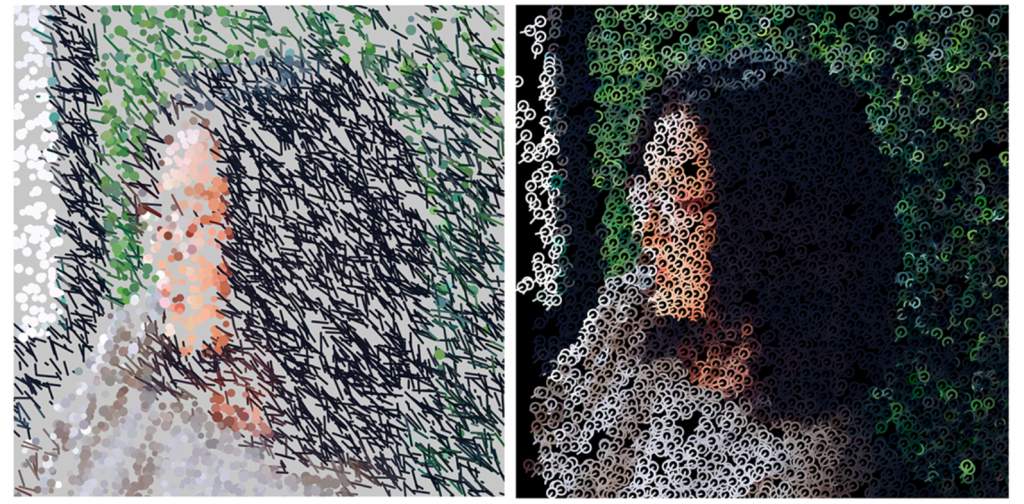
For this project, I primarily focused on the relationship between color values and the shape used. When I was looking at the photo, I wanted to pixelate and highlight my face in a more detailed manner, so I decided to illustrate that part with lines; the hair and background part, according to my color meter, were mostly under 40 (brightness) and therefore I set it so that it creates more blurry circles. I think this project was helpful in terms of understanding retrieving the pixels, brightness, as well as pixel location properties better.
The Original PortraitProgress and finished screenshotOther Strange Variations (not this project)
var photo;

function preload(){
  photo = loadImage("https://i.imgur.com/3TDt7Za.jpg");
}

function setup() {
  createCanvas(480, 480);
  background(255);
  photo.loadPixels();//load the pixels of the underlying photo
}

function draw() {
  for(var x = 0; x < width;x+=10){
    for(var y = 0; y < height; y+=10){
        var c = photo.get(x,y);//stores RGB value of pixel at (x,y) in array c
        noStroke();
        fill(c);
        rect(x,y,10,10);//draw rectangle at (x,y)
        var r = c[0];//assign items from the array c to variables
        var g = c[1];
        var b = c[2];
        noStroke();
        fill(r-40, g-40, b-40);
        rect(x,y,8,8);//draw circle inside the rectangle
        noStroke();
        fill(r+20, g+20, b+20);
        ellipse(x +5,y+5,4,4);
    }
  }
}
For this assignment I was inspired by Chuck Close’s portraits made up of squares with detail inside them, and wanted to recreate this effect within my portrait. I like how the end result looks a bit like a lego portrait.
//hamza qureshi
//hqq@andrew.cmu.edu
//section e
//project 08 : portrait

var pic; //new variable for base image

function preload(){
    var URL = "https://i.imgur.com/uWj0FJC.jpg"; //url for image
    pic = loadImage(URL); //loads image from url
}

function setup(){
    createCanvas(480,480);
    pic.loadPixels(); //loads pixels of image to be individually interpreted
    frameRate(10); //pls dont be slow
}

//create circles
function draw(){
    var posX = random(width); //position of x and y coordinates of shape
    var posY = random(height);
    var colX = constrain(floor(posX), 0, width-1); //determines pixel color
    var colY = constrain(floor(posY), 0, height-1);
    var picFill = pic.get(colX,colY); //grabs info for each pixel in image
    noStroke();
    fill(picFill); //apply fill
    ellipse(posX, posY, 7, 7); //draw circle at random location
                              //colored based on the pixel of its origin location
}

//create target shapes when mouse is pressed
function mousePressed(){
    var posX = mouseX; //new local variable for x and y
    var posY = mouseY;
    var colX = constrain(floor(posX), 0, width-1);
    var colY = constrain(floor(posY), 0, height-1);
    var picFill = pic.get(colX,colY);
    var sz = random(10, 20); //new variable to randomize shape
    noStroke();
    fill(picFill);
    //scale(sz);
    ellipse(posX, posY, 10, 10); //new, larger central ellipse
    stroke(picFill);
    strokeWeight(0.5);
    noFill();
    ellipse(posX, posY, sz + 2, sz + 2); //outer rings of ellipse
    ellipse(posX, posY, sz + 7, sz + 7); //are random in size to change
    ellipse(posX, posY, sz + 9, sz + 9); //size
}
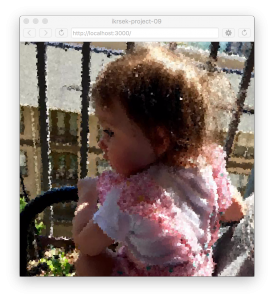
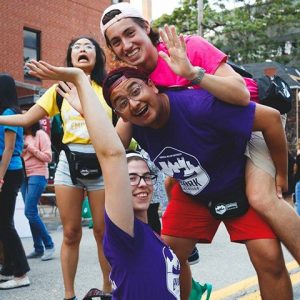
For my sketch, I used an image from Orientation this past summer:
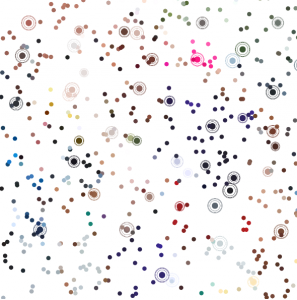
I appreciated the variety of colors in this picture of myself and some great friends. I chose to create a dynamically drawn portrait that allows for a slightly modified outcome when the mouse is clicked. The sketch operates as it generates each frame, but each click produces a randomly sized target shape. This creates an oil-painting-like stroke when the image nears completion. See below:
//Clair(sijing) Sun
//session C
//sijings@andrew.cmu.edu
//project-09

var underlyingImage;
var count=0;
var gAngle = [45,90,135,180];//for four circle's angles
var radius = [80,80/1.2,80/1.5,80/2];//for four circle's radius


function preload() {
    var myImageURL = "https://i.imgur.com/VEFcvLY.jpg";
    underlyingImage = loadImage(myImageURL);//loading pics

}

function setup() {
    createCanvas(480, 380);//within the size range
    background(0);
    underlyingImage.loadPixels();
    frameRate(30);//set to 30 so that it actually stay

}

function draw() {
    var x = [cos(radians(gAngle[0])) * radius[0]];//build an array for x changing value
    var y = [sin(radians(gAngle[0])) * radius[0]];
    var px = [mouseX+x[0]];//array for x
    var py = [mouseY+y[0]];//array for y
    count+=1;//for determing when the second, third, fourth circles appear
    if (count>=150){
        x.push(cos(radians(gAngle[1]))*radius[1]);
        y.push(sin(radians(gAngle[1]))*radius[1]);
        px.push(mouseX+x[1]);
        py.push(mouseY+y[1]);
    }
    if (count>=170){
        x.push(cos(radians(gAngle[2]))*radius[2]);
        y.push(sin(radians(gAngle[2]))*radius[2]);
        px.push(mouseX+x[2]);
        py.push(mouseY+y[2]);

    }
    if (count>=190){
        x.push(cos(radians(gAngle[3]))*radius[3]);
        y.push(sin(radians(gAngle[3]))*radius[3]);
        px.push(mouseX+x[3]);
        py.push(mouseY+y[3]);
    }
    var ix = constrain(floor(px[0]), 0, width-1);//set the constrain for each x, y pos
    var iy = constrain(floor(py[0]), 0, height-1);
    var ix1 = constrain(floor(px[1]), 0, width-1);
    var iy1 = constrain(floor(py[1]), 0, height-1);
    var ix2 = constrain(floor(px[2]), 0, width-1);
    var iy2 = constrain(floor(py[2]), 0, height-1);
    var ix3 = constrain(floor(px[3]), 0, width-1);
    var iy3 = constrain(floor(py[3]), 0, height-1);
    var theColorAtLocationXY = [underlyingImage.get(ix, iy)];//get the color
    theColorAtLocationXY.push(underlyingImage.get(ix1,iy1));//add into the color array
    theColorAtLocationXY.push(underlyingImage.get(ix2,iy2));
    theColorAtLocationXY.push(underlyingImage.get(ix3,iy3));

    noStroke();
    fill(theColorAtLocationXY[0]);//call corresponding color
    ellipse(px[0], py[0], 10, 10);

    fill(theColorAtLocationXY[1]);
    ellipse(px[1],py[1],15,15);

    fill(theColorAtLocationXY[2]);
    ellipse(px[2],py[2],5,5);

    fill(theColorAtLocationXY[3]);
    ellipse(px[3],py[3],12,12);

    gAngle[0] = gAngle[0] + 2;//change of angles everytime
    gAngle[1] = gAngle[1] - 2;
    gAngle[2] = gAngle[2] + 2;
    gAngle[3] = gAngle[3] - 2;
}
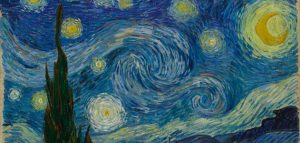
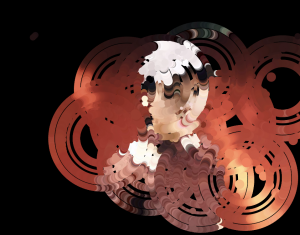
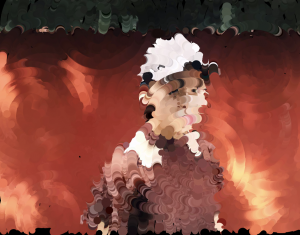
For this project, I thought about Van Gogh’s painting with how each stroke is distorted and convey a unique feeling of the whole image. “The Starry Night” especially, is where my inspiration came from.
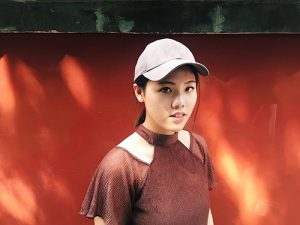
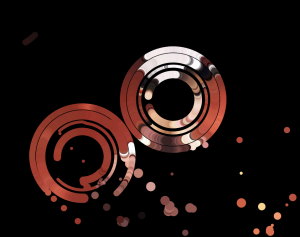
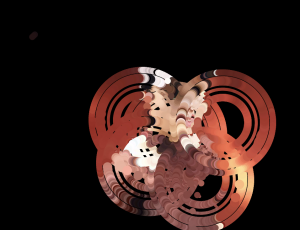
With each part of the drawing circulating, I thought I will be interesting to apply a similar technique on a portrait. For this project, I chose to do a more interactive piece where the audience can manipulate the strokes with their mouses. According to the position of the mouse, four circles with different width and radius will draw accordingly. In the end, the how the picture looks like a portrait composed with hundreds of circles.
Original Portraitstage1 with two mouse movementstage2 with four mouse movementswith more mouse movementsone possibility of the final presentation
![[OLD FALL 2017] 15-104 • Introduction to Computing for Creative Practice](../../../../wp-content/uploads/2020/08/stop-banner.png)