NatalieKS-LookingOutwards-09

I was browsing through the Looking Outwards posts for Week 7, because I was interested in learning about other examples of computational information visualization. One really interesting post I found was from my friend Christopher Reyes, which featured a short movie made by Red Bull in collaboration with design firm CLEVER°FRANKE and fashion brand Byborre.

I agree that this kind of constant visual feedback is engaging and effective. I can also see how it can positively influence clubgoers’ experiences, especially with the real-time animations being projected around them in the club. One of the aspects about this that I find notable is the fact that it’s sponsored by Red Bull. More and more big companies are branching out into these new forms of data visualization, and it’s exciting to see how each company is using these forms. Especially in this case, where the data, the clubgoers’ excitement, was being directly influenced by Red Bull’s products. It’ll be interesting to see how companies further manipulate and visualize data to reach broader audiences and achieve better marketing.

Here are videos of the original work:

Red Bull at Night x ByBORRE – The Sixth Sense – Case movie from CLEVER FRANKE on Vimeo.

Red Bull visualizations summary of screencast from CLEVER FRANKE on Vimeo.

hyt-Project-09: Pixel Portrait

hyt-09-project

// helen tsui
// 15-104 section d
// hyt@andrew.cmu.edu
// project-09-Pixel-Portraits

var portrait;

function preload() {
    var portraitURL = "https://i.imgur.com/kQn5qoD.jpg";
    portrait = loadImage(portraitURL);
}


function setup() {
    // retrieve and load pixels + other properties
    createCanvas(450, 450);
    background(193, 226, 177);
    portrait.loadPixels();
    frameRate(100);
}


function draw() {
    // initialize dots' location
    var px = random(0, width); 
    var py = random(0, height);

    // retrieve color at specific pixels
    var ix = constrain(floor(px), 0, width-1);
    var iy = constrain(floor(py), 0, height-1);
    var theColorAtLocationXY = portrait.get(ix, iy);

    var brightnessVal = brightness(theColorAtLocationXY);
    fill(theColorAtLocationXY);
    var circleSize;

    // set brightness value if statement for drawing lines or circles
    if (brightnessVal > 40) {    
        strokeWeight(3);
        stroke(theColorAtLocationXY);
        //var circleSize = random(5, 10);
        line(px - random(0, 10), py - random(-10, 10), px, py);
    } if (brightnessVal <= 40) {
        fill(theColorAtLocationXY);
        noStroke();
        circleSize = random(5, 15);
        ellipse(px, py, circleSize, circleSize);
    }
}

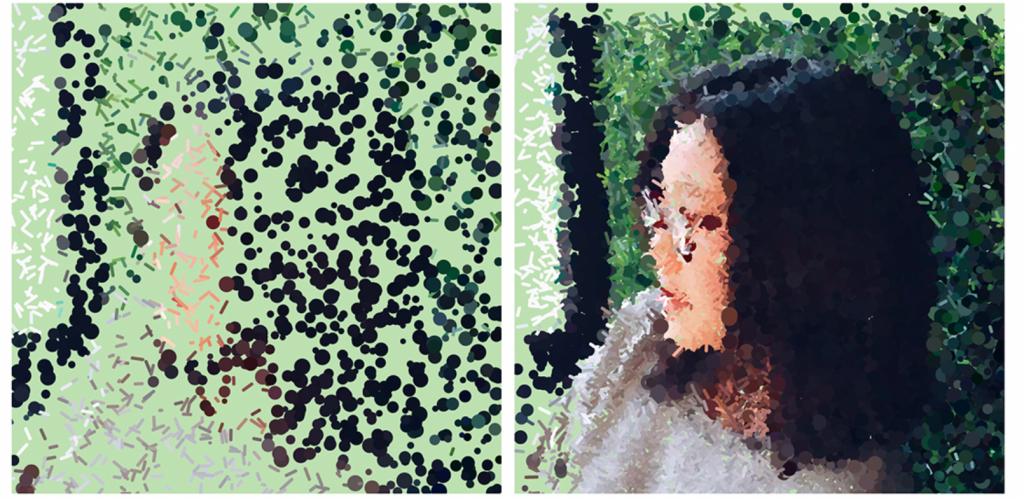
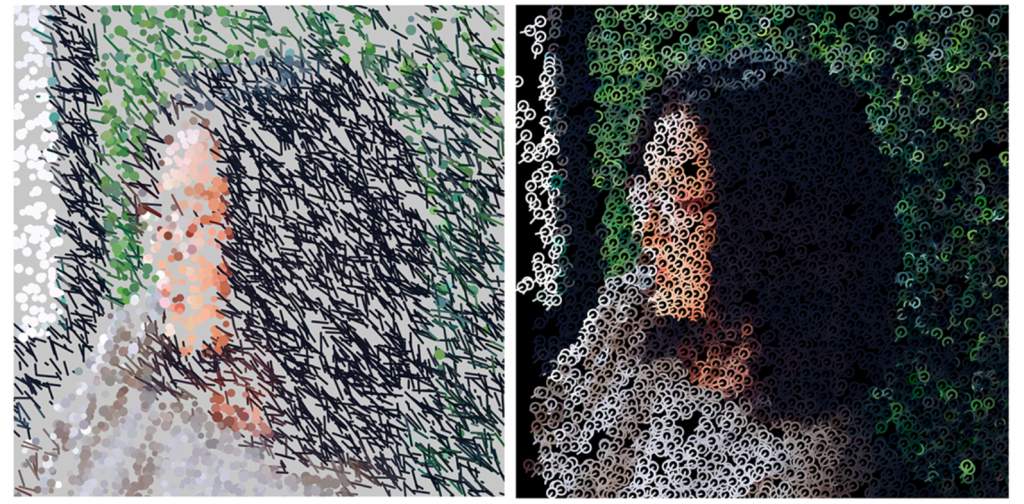
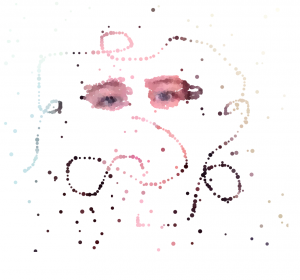
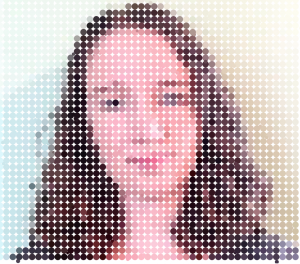
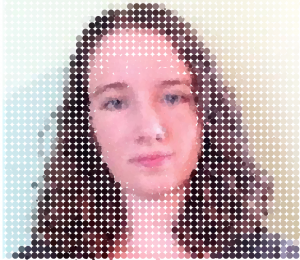
For this project, I primarily focused on the relationship between color values and the shape used. When I was looking at the photo, I wanted to pixelate and highlight my face in a more detailed manner, so I decided to illustrate that part with lines; the hair and background part, according to my color meter, were mostly under 40 (brightness) and therefore I set it so that it creates more blurry circles. I think this project was helpful in terms of understanding retrieving the pixels, brightness, as well as pixel location properties better.

The Original Portrait
Progress and finished screenshot
Other Strange Variations (not this project)

hyt-Looking-Outward-09: Peer Evaluation


ikrsek-Looking Outwards-05

Zolloc GIFs - Find & Share on GIPHY

When I saw Hayden Zezula’s project, I was completely mesmerized and at the mean time touched by its visceral use of repetitive elements — human body parts, graphic 3D waves, etc. Similar to what the original post said, I think it’s particularly relevant to some of the physics features we are currently learning in class — law of attraction, gravity, etc., and I think it would be interesting to do some research on the technical motions. Also, its choice of colors and dimensionality is also something to learn more about.

Another topic that I related to this artist is the boundary between commercial and conceptual artworks. After seeing his collaboration with lots of big-name commercial brands, as well as exposing himself on Instagram and GIF pop-culture websites, it may be hard for many to categorize him as a traditional artist, but I think his creativity is unparalleled to others, and that he is a concrete evidence of further interdisciplinary blend between technology and art.

You can view more of his works here: https://www.instagram.com/zolloc/


jennyzha – Project 09

sketch

// Jenny Zhang
// jennyzha
// Section D
// Project 09

var jennyzha;

function preload() {
    var Image = "https://i.imgur.com/c3AjAad.jpg";
    jennyzha = loadImage(Image);
}

image(jennyzha);

function setup() {
    createCanvas(480, 480);
    background(0);
    jennyzha.loadPixels();
    frameRate(10);
}

function draw() {
    var px = random(width);
    var py = random(height);
    var ix = constrain(floor(px), 0, width-1);
    var iy = constrain(floor(py), 0, height-1);
    var ColorXY = jennyzha.get(ix, iy);

    push();
    stroke(ColorXY);
    strokeWeight(1);
    line(px, py, px, py + 30); 
    pop();

    stroke(ColorXY);
    strokeWeight(1);
    line(mouseX, mouseY, mouseX, mouseY + 30); 
}

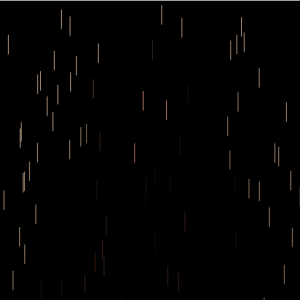
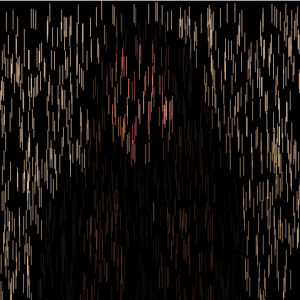
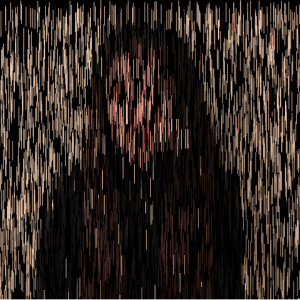
This project took me a lot of trial and error, interestingly enough, not because of the code but because of imgur and the image itself. First, after seeing that my code would not load, and feeling fairly confident in my code itself, I realized that I had used the wrong url for the image on imgur. Second, after the code started to run the way I wanted it to, I saw that it was loading just the background. This is when I realized that it was because the image was over 1000X1000 pixels and my canvas was only the max requirement, 480X480. I quickly went back to the original image, shrunk it down and the code worked perfectly.

Project-09-Chickoff-Self Portrait

sketch

//Cora Hickoff
//Section D
//chickoff@andrew.cmu.edu
//Project-09  

var underlyingImage;
var nPoints = 100;
var CYCLOID = 0; 

var titles = ["-●●●-"];
var curveMode = CYCLOID;

function preload() {

    var myImageURL = "https://i.imgur.com/cNsCKtz.png";
    underlyingImage = loadImage(myImageURL);
}

function setup() {

    createCanvas(480, 480);
    background(100, 170, 25, 100);

    underlyingImage.loadPixels();
    frameRate(100);

    var myImageURL2 = "https://i.imgur.com/Sna9w4t.png";
    img = loadImage(myImageURL2)
    
}

function draw() {

    textSize(23);
    fill(0, 200, 0);
    text("Eat healthy, ya picky eater!", 10, 30);

    textSize(23);
    fill(0, 200, 0);
    text("These edamame beans will make you strong", 10, 400);

    //photo of edamame beans 
    image(img, 0, height/4, width/2);

    //draws the picture
    var px = random(width);
    var py = random(height);
    var ix = constrain(floor(px), 0, width-1);
    var iy = constrain(floor(py), 0, height-1);
    var theColorAtLocationXY = underlyingImage.get(ix, iy);

        noStroke();
        fill(theColorAtLocationXY);
        //little pie slices
        arc(px, py, 17, 17, 0, HALF_PI);
    
        //little edamame beans
        //controlled by mouse
        fill(78, 215, 0, 25); 
        text(titles[curveMode], mouseX, mouseY);
        //having this below means the 
        //beans will have no no stroke
        stroke(0);
}

function drawEdamameBeans (thisX, thisY) {

    fill(theColorAtLocationXY);
    titles(titles[curveMode], py, thisX, thisY);
}

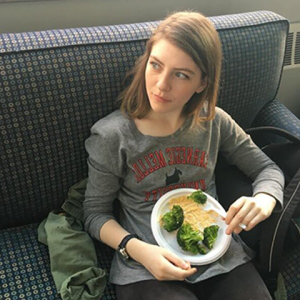
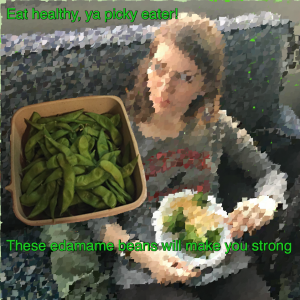
My goal with this project was to focus on having fun and being playful with code versus feeling defeated by it. I started with a photo of me from freshman year eating my typical meal, broccoli (which I never ate because it was undercooked) and mac and cheese. That year was not very healthy for me food wise, and so I wanted to make fun of myself being a picky eater in this project, though I have improved a lot.

I decided to have arcs make up the photo because they looked like slices of pie, and then wrote code so that whenever the mouse was dragged a shape would be drawn. I chose “-●●●-“ to be the shape because it looks like edamame beans, which I found I enjoy eating. Plus they’re healthy. Now, by moving these around on the screen, I essentially am “feeding myself” if an edamame bean is moved towards my mouth!

Me and food

aboyle-Project 09-Portrait

aboyle portrait

var underlyingImage;

function preload() {
    var myImageURL = "https://i.imgur.com/znMO3pp.jpg";
    underlyingImage = loadImage(myImageURL);
}

function setup() {
    createCanvas(470, 410);
    background(255);
    underlyingImage.loadPixels();
//framerate is low, so random dots appear slowly
    frameRate(3);
}

function draw() {
//creates random dots
    var px = random(width);
    var py = random(height);
    var ix = constrain(floor(px), 0, width-1);
    var iy = constrain(floor(py), 0, height-1);
//makes dots match the color of the photo
    var theColorAtLocationXY = underlyingImage.get(ix, iy);
//varies size of random dots
    var ellipseSize=random(3,7)
    noStroke();
    fill(theColorAtLocationXY);
    ellipse(px, py, ellipseSize);

}


function mouseDragged() {
//if you drag mouse, you get line of randomly sized dots
    var ellipseSize=random(3,7)
    var theColorAtMouse=underlyingImage.get(mouseX,mouseY)
    fill(theColorAtMouse)
    ellipse(mouseX, mouseY, ellipseSize);
}


function mousePressed(){
//if you press mouse, you get randomly sized dot
    var ellipseSize=random(3,7)
    var theColorAtMouse=underlyingImage.get(mouseX,mouseY)
    fill(theColorAtMouse)
    ellipse(pmouseX, pmouseY, ellipseSize);
}

//My name is Anna N Boyle, so I made my picture appear faster
//if you type in the letters A N B O Y L E
//each section is the width of the canvas and 60 pixels down
//and each ellipse is 10 pixels and spaced evenly
//the color variables make the ellipses match the photo color

function keyTyped(){
    if (key==='a'){
      for(i=0; i<width; i+=10){
        for(w=0; w<60; w+=10){
        var theColorAtTheA=underlyingImage.get(i,w)
        fill(theColorAtTheA)
        ellipse(i,w,10)
    }
  }
}
    if (key==='n'){
        for(i=0; i<width; i+=10){
          for(w=60; w<120; w+=10){
            var theColorAtTheN=underlyingImage.get(i,w)
            fill(theColorAtTheN)
            ellipse(i,w,10)}
          }
          firstNCheck=1
        }
    if (key==='b'){
      for (i=0; i<width; i+=10){
        for(w=120; w<180; w+=10){
          var theColorAtTheB=underlyingImage.get(i,w)
          fill(theColorAtTheB)
          ellipse(i,w,10)}
    }
  }
    if (key==='o'){
      for (i=0; i<width; i+=10){
        for(w=180; w<240; w+=10){
          var theColorAtTheO=underlyingImage.get(i,w)
          fill(theColorAtTheO)
          ellipse(i,w,10)}
      }
}
    if (key==='y'){
      for (i=0; i<width; i+=10){
        for(w=240; w<300; w+=10){
          var theColorAtTheY=underlyingImage.get(i,w)
          fill(theColorAtTheY)
          ellipse(i,w,10)}
        }
      }
      if (key==='l'){
        for (i=0; i<width; i+=10){
          for(w=300; w<360; w+=10){
            var theColorAtTheL=underlyingImage.get(i,w)
            fill(theColorAtTheL)
            ellipse(i,w,10)}
          }
        }
        if (key==='e'){
          for (i=0; i<width; i+=10){
            for(w=360; w<height; w+=10){
              var theColorAtTheE=underlyingImage.get(i,w)
              fill(theColorAtTheE)
              ellipse(i,w,10)}
            }
          }
}

//If you press the enter key, the portrait resets to white screen
function keyPressed(){
    if (keyCode===ENTER){
      background(255);
    }
}

This was a fun project! I went ahead with the “randomly appearing dots” idea, but I made the frame rate very low so they would appear slowly–I wanted to the majority of my portrait to appear as a result of the viewer interacting with it. I made it so if you clicked the mouse a randomly sized dot appears at that point, and if you drag the mouse a line of dots appears. Since this was a portrait of me, I made it so typing my first two initials and my last name would make sections of the portrait appear. Finally, if you press Enter, the portrait resets to a white canvas and lets you start over!


The portrait when you drag and click the mouse 

The portrait when you type in ANBOYLE

The portrait when you use a mix of typing and dragging 

aboyle-Looking Outwards-09

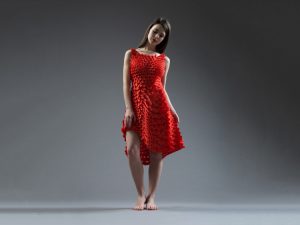
For this looking outwards, I chose to look at Angela Rubin’s post on the Kinematic Petals Dress, which can be found at https://courses.ideate.cmu.edu/15-104/f2017/2017/09/13/aerubin-lookingoutwards-03/. The dress was created by Nervous System and commissioned by The Museum of Fine Arts, Boston. It was presented at the exhibition #techstyle, which ran from March 6 to July 10, 2016. I think that the project is incredibly cool—planning a dress on a model and then 3D printing it sounds like something out of a sci-fi movie.

Angela brings up some very good points in her discussion of the project. I hadn’t thought about the disadvantages of the project until she mentioned them. For example, shell structures can only move in one direction, which prevents the 360 movement other fabric is capable of. Additionally, I wholeheartedly agree with her assessment that the Kinematic Petals dress has an amazing amount of customizability.

One thing I would add to the discussion is how the aesthetic of the dress was tailored to the medium it was created in. Just by looking at the dress, I get the sense that it is not a typical store-bought dress. The interlocking petals look almost futuristic. I could tell the goal wasn’t to simply make a dress with a computer; it was to test the boundaries of fashion and technology.

daphnel-Project 09-Portrait

dance

var dancers;

function preload() {
    //loading the image;
    var image = "https://i.imgur.com/vEGDVWM.jpg?1";
    dancers = loadImage(image);
}

function setup() {
    createCanvas(480, 480);
    background(0);
    dancers.loadPixels();
    frameRate(70);
}

function draw() {
    //setting random vars to use as location of dots drawn;
    var x = random(width);
    var y = random(height);
    var col = dancers.get(x, y);

    noStroke();
    fill(col);
    var size=random(5,20);
    var diam=random(30,100);
    ellipse(x, y, size,size);//random sized balls;
    stroke(col);

}

BEFORE
Final Result

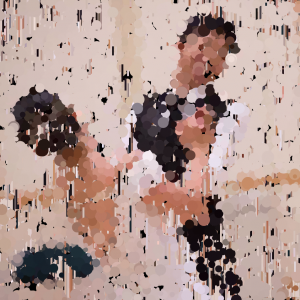
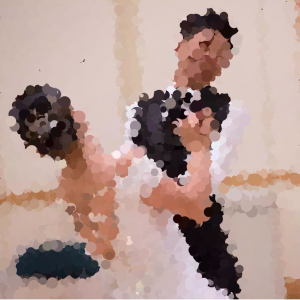
I decided to choose one of my favorite photos taken of my friend and I this past weekend at a dance competition. The theme was T-Rex arms so we both looked really awkward but had big smiles! I started off trying to make a myriad of things. I tried to use the dots as the main base and tried adding ripples to the photo to make it more interesting but while experimenting, I also ended up just making a lot of lines of different thicknesses. I wasn’t a big fan of how the lines and ripples(not seen in photo below) sometimes weren’t as accurate in getting the colors like the points did though. I ended up sticking to my points even though it was quite simple because I just loved the way it ended up depicting the image.

creyes1-Project-09-Portrait

creyes1 Project-09 (Portrait)

//Christopher Reyes
//Section D
//creyes1@andrew.cmu.edu
//Project-09 (Custom Pixel)

var underlyingImage;

function preload() {
    underlyingImage = loadImage('https://courses.ideate.cmu.edu/15-104/f2017/wp-content/uploads/2017/10/creyes1_15104pic.jpg');
}

function setup() {

    createCanvas(480, 480);
    background(255);

    underlyingImage.loadPixels(); //Loads pixel data
    frameRate(60);

}

function draw() {
    //Creates randomly spawning rectangles with color according to underlyingImage
    var px = random(width);
    var py = random(height);
    var ix = constrain(floor(px), 0, width-1);
    var iy = constrain(floor(py), 0, height-1);

    var theColorAtLocationXY = [red(underlyingImage.get(ix, iy)) + 20,
                                green(underlyingImage.get(ix, iy)),
                                blue(underlyingImage.get(ix, iy)),
                                70];

    var rectSize = random(10, 20);

    rectMode(CENTER);
    noStroke();
    fill(theColorAtLocationXY);
    rect(px, py, rectSize, rectSize*3);

    //Draws smaller squares for more detail...
    //At eyes
    drawDetailPixel(width/2, 50, 145, 200, 10);
    //At mouth
    drawDetailPixel(width/2 - 10, 50, 240, 300, 10);

}

//Samples underlying image data for pixel color, then draws a rectangle
//in a random position with a Gaussian distribution
function drawDetailPixel(xmin, xmax, ymin, ymax, pixelSize) {
    var dpx = randomGaussian(xmin, xmax);
    var dpy = random(ymin, ymax);
    var dix = constrain(floor(dpx), 0, width-1);
    var diy = constrain(floor(dpy), 0, height-1);
    var detailColXY = [red(underlyingImage.get(dix, diy)) + 20,
                                      green(underlyingImage.get(dix, diy)),
                                      blue(underlyingImage.get(dix, diy)),
                                      35];
    fill(detailColXY);
    rect(dpx, dpy, pixelSize, pixelSize);
}

//Draws a large transparent ellipse according to underlying image color
function mousePressed() {
    fill(red(underlyingImage.get(mouseX, mouseY)) + 20,
         green(underlyingImage.get(mouseX, mouseY)),
         blue(underlyingImage.get(mouseX, mouseY)),
         35);
    stroke(255, 255, 255, 35);
    strokeWeight(1);
    ellipse(mouseX, mouseY, random(150, 250));
}

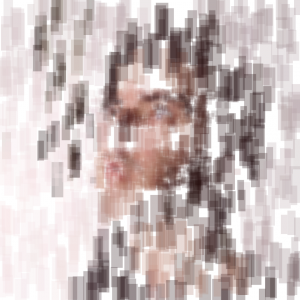
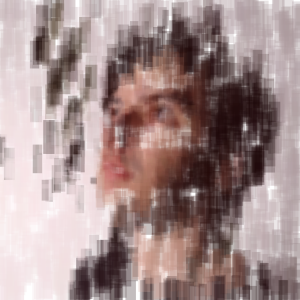
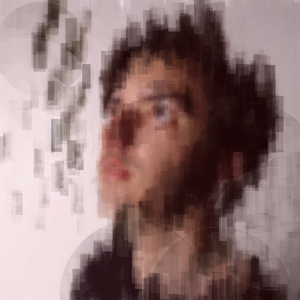
While I didn’t run into too many issues with this project in terms of implementation, I did have some issues with finding a balance between keeping it visually interesting while avoiding having too much visual noise that it becomes confusing to look at. I really liked the idea that this was a program that would continue to loop and build upon itself, and so opted for various degrees of transparency so that the image would become more clear as the program ran. I also made it a point to highlight certain areas of the image, such as the eyes and mouth, with smaller transparent squares to build up some more defined shapes so that it would be easier to pick out a face from the constantly layering rectangles. I really like the interaction between the analog brush marks in the portrait with the computational pixels in the program, where it creates something almost painterly, yet not quite glitch art, but a really interesting in-between.
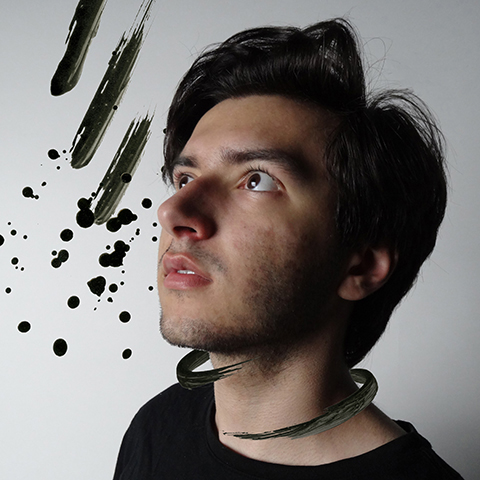

Original Self Portrait
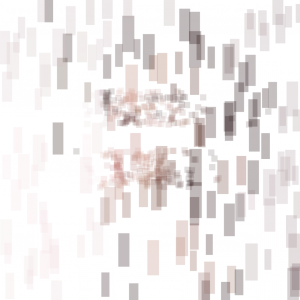


Development of the portrait as the program runs and manual mouse clicks are introduced

creyes1-LookingOutwards-09


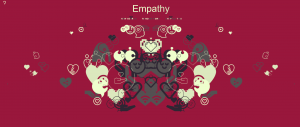
Screen capture from the Pictooptic website, showing icons for “Empathy”

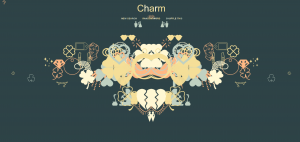
I had recently stumbled upon my friend Yoonyoung Kim’s feature of Pictooptic, an extension of The Noun Project, an initiative to collect and celebrate the universal language of visual icons, with new icons being submitted to the site every day. With Pictooptic, icons that relate to the entered word are randomly assembled to create these visually fascinating Rorschach-like mirror images. Yoonyoung really enjoyed the “spontaneity and whimsical nature of the generator” and I feel that sums it up perfectly. The generator creates a wonderful blend of playful icons from creators the world over that allows the user to see the striking similarities and fascinating differences that come from condensing a word into a single icon.


Screen capture from the Pictooptic website, showing icons for “Charm”


An introductory video about The Noun Project

Yoonyoung’s Looking Outwards post can be found here, and more information about The Noun Project can be found on their website.