/*
Name: Colleen Duong
Lab Section: D
Email: cduong@andrew.cmu.edu
Project-03 Dynamic Drawing
*/
var sunsize = 50;
var BR = 6; //Sky R color
var BG = 6; //Sky G color
var BB = 50; //Sky B color
var BRG = 25; //Ground R color
var BGG = 62; //Ground G color
var BBG = 16; //Ground B color
var SR = 255 //Sun R color
var SG = 255 //Sun G color
var SB = 255 //Sun B color
var sproutstemh = 610; //sprout stem height
function setup() {
createCanvas(640, 480);
}
function draw() {
background(BR, BG, BB);
noStroke();
//Sky Start
//Setting the boundaries for the morning colors to appear
if ((mouseX >= 640) & (mouseX <= 640)){
mouseX = 640;
}
//Setting the boundaries for the night colors to appear
//background nighttime colors (6, 6, 50)
//background daytime colors (187, 235, 235)
if ((mouseX > 0) & (mouseX < 400)){
BR = mouseX*((187-6)/400) + 6;
BG = mouseX*((235-6)/400) + 6;
BB = mouseX*((235-50)/400) + 50;
}
//Sky End
//The Sun Start
fill(SR, SG, SB);
//Setting a constraint so the sun cannot leave the canvas
var constrainy = constrain(mouseY, 0, 300);
var constrainx = constrain(mouseX, 0, 600);
//Creating the sun shape
ellipse(constrainx, constrainy, sunsize, sunsize); //The circle
//Setting the boundaries for sun to change to morning color
if ((mouseX > 640) & (mouseX < 640)){
mouseX = 640;
}
//Setting the boundaries for sun to change to night color
//Daytime Grass (255, 199, 5)
//Nighttime Grass (255, 255, 255)
if ((mouseX > 0) & (mouseX < 640)){
SR = mouseX*((255-255)/640) + 255;
SG = mouseX*((199-255)/640) + 255;
SB = mouseX*((5-255)/640) + 255;
}
//Changing the Sun Size depending on Location
sunsize = (0.5*(mouseX+mouseY));
//The Sun End
//Grass Start
//Ground
fill(BRG, BGG, BBG);
rect(0, 400, 680, 100);
//Setting the boundaries for the morning grass colors to appear
if ((mouseX > 640) & (mouseX < 640)){
mouseX = 640;
}
//Setting the boundaries for the night grass colors to appear
//Daytime Grass (78, 174, 55)
//Nighttime Grass (25, 62, 16)
if ((mouseX > 0) & (mouseX < 640)){
BRG = mouseX*((78-25)/640) + 25;
BGG = mouseX*((174-62)/640) + 62;
BBG = mouseX*((55-16)/640) + 16;
}
//Grass End
//Stems Start
//Make stems grow as the arrow moves across the x-axis
push();
translate(35, -mouseX+200); //Make the stems grow upward
sproutS = rect(35, sproutstemh, 10, 300, 10);
sprout2S = rect(105, sproutstemh, 10, 300, 10);
sprout3S = rect(175, sproutstemh, 10, 300, 10);
sprout4S = rect(245, sproutstemh, 10, 300, 10);
sprout5S = rect(315, sproutstemh, 10, 300, 10);
sprout6S = rect(385, sproutstemh, 10, 300, 10);
sprout7S = rect(455, sproutstemh, 10, 300, 10);
sprout8S = rect(525, sproutstemh, 10, 300, 10);
pop();
//Leaves that pop out of the stem depending on where your mouse is on the x axis
//Key: SproutL is the first stem's sprouts, Sprout 2L is the second stem's sprouts, etc
//Key2: SproutL2 is the second leaf from the ground, etc.
if ((mouseX > 450)){ //First to pop up
sproutL = ellipse(60, 380, 25, 20);
sprout3L = ellipse(200, 370, 25, 20);
sprout7L = ellipse(480, 360, 25, 20);
}
if ((mouseX > 480)){ //Second to pop up
sprout2L = ellipse(130, 385, 25, 20);
sprout4L = ellipse(300, 360, 25, 20);
sprout6L = ellipse(410, 370, 25, 20);
sproutL2 = ellipse(90, 320, 25, 20);
sprout3L2 = ellipse(230, 320, 25, 20);
sprout7L2 = ellipse(510, 330, 25, 20);
}
if ((mouseX > 520)){ //Third to pop up
sprout5L = ellipse(340, 355, 25, 20);
sprout8L = ellipse(580, 350, 25, 20);
sprout2L2 = ellipse(160, 325, 25, 20);
sprout3L3 = ellipse(200, 300, 25, 20);
sprout4L2 = ellipse(270, 310, 25, 20);
sprout6L2 = ellipse(440, 320, 25, 20);
sprout7L3 = ellipse(480, 290, 25, 20);
}
if ((mouseX > 540)){ //Fourth to pop up
sproutL3 = ellipse(60, 260, 25, 20);
sprout2L3 = ellipse(130, 280, 25, 20);
sprout3L4 = ellipse(230, 275, 25, 20);
sprout4L3 = ellipse(300, 255, 25, 20);
sprout5L2 = ellipse(370, 260, 25, 20);
sprout6L3 = ellipse(410, 260, 25, 20);
sprout7L4 = ellipse(510, 250, 25, 20);
sprout8L2 = ellipse(550, 260, 25, 20);
}
//Last to pop up: Flowers Start
if ((mouseX > 575)){ //Petal 1
fill(247, 154, 185); //Pink Color
ellipse(50, 200, 40, 40); //Pink
fill(255, 180, 0); //Orange Color
ellipse(190, 200, 40, 40); //Orange
fill(191, 63, 63); //Red Color
ellipse(120, 200, 40, 40); //Red
fill(31, 144, 0); //Green Color
ellipse(330, 200, 40, 40); //Green
fill(255, 234, 0); //Yellow Color
ellipse(260, 200, 40, 40); //Yellow
fill(136, 73, 189); //Purple Color
ellipse(470, 200, 40, 40); //Purple
fill(17, 46, 173); //Blue Color
ellipse(400, 200, 40, 40); //Blue
fill(70, 63, 69); //Black Color
ellipse(540, 200, 40, 40); //Black
}
if ((mouseX > 565)){ //Petal 2
fill(247, 154, 185); //Pink Color
ellipse(100, 200, 40, 40); //Pink
fill(255, 180, 0); //Orange Color
ellipse(240, 200, 40, 40); //Orange
fill(191, 63, 63); //Red Color
ellipse(170, 200, 40, 40); //Red
fill(31, 144, 0); //Green Color
ellipse(380, 200, 40, 40); //Green
fill(255, 234, 0); //Yellow Color
ellipse(310, 200, 40, 40); //Yellow
fill(136, 73, 189); //Purple Color
ellipse(520, 200, 40, 40); //Purple
fill(17, 46, 173); //Blue Color
ellipse(450, 200, 40, 40); //Blue
fill(70, 63, 69); //Black Color
ellipse(590, 200, 40, 40); //Black
}
if ((mouseX > 570)){ //Petal 3
fill(247, 154, 185); //Pink Color
ellipse(75, 180, 40, 40); //Pink
fill(255, 180, 0); //Orange Color
ellipse(215, 180, 40, 40); //Orange
fill(191, 63, 63); //Red Color
ellipse(145, 180, 40, 40); //Red
fill(31, 144, 0); //Green Color
ellipse(355, 180, 40, 40); //Green
fill(255, 234, 0); //Yellow Color
ellipse(285, 180, 40, 40); //Yellow
fill(136, 73, 189); //Purple Color
ellipse(495, 180, 40, 40); //Purple
fill(17, 46, 173); //Blue Color
ellipse(425, 180, 40, 40); //Blue
fill(70, 63, 69); //Black Color
ellipse(565, 180, 40, 40); //Black
}
if ((mouseX > 555)){ //Petal 4
fill(247, 154, 185); //Pink Color
ellipse(60, 225, 40, 40); //Pink
fill(255, 180, 0); //Orange Color
ellipse(200, 225, 40, 40); //Orange
fill(191, 63, 63); //Red Color
ellipse(130, 225, 40, 40); //Red
fill(31, 144, 0); //Green Color
ellipse(340, 225, 40, 40); //Green
fill(255, 234, 0); //Yellow Color
ellipse(270, 225, 40, 40); //Yellow
fill(136, 73, 189); //Purple Color
ellipse(480, 225, 40, 40); //Purple
fill(17, 46, 173); //Blue Color
ellipse(410, 225, 40, 40); //Blue
fill(70, 63, 69); //Black Color
ellipse(550, 225, 40, 40); //Black
}
if ((mouseX > 560)){ //Petal 5
fill(247, 154, 185); //Pink Color
ellipse(90, 225, 40, 40); //Pink
fill(255, 180, 0); //Orange Color
ellipse(230, 225, 40, 40); //Orange
fill(191, 63, 63); //Red Color
ellipse(160, 225, 40, 40); //Red
fill(31, 144, 0); //Green Color
ellipse(370, 225, 40, 40); //Green
fill(255, 234, 0); //Yellow Color
ellipse(300, 225, 40, 40); //Yellow
fill(136, 73, 189); //Purple Color
ellipse(510, 225, 40, 40); //Purple
fill(17, 46, 173); //Blue Color
ellipse(440, 225, 40, 40); //Blue
fill(70, 63, 69); //Black Color
ellipse(580, 225, 40, 40); //Black
}
if ((mouseX > 550)){ //Flower Centers
fill(211, 86, 115); //Dark Pink Center
ellipse(75, 205, 25, 25);
fill(194, 139, 7); //Dark Orange Center
ellipse(215, 205, 25, 25);
fill(160, 38, 38); //Dark Red Center
ellipse(145, 205, 25, 25);
fill(21, 99, 0); //Dark Green Center
ellipse(355, 205, 25, 25);
fill(220, 202, 0); //Dark Yellow Center
ellipse(285, 205, 25, 25);
fill(96, 39, 144); //Dark Purple Center
ellipse(495, 205, 25, 25);
fill(8, 32, 132); //Dark Blue Center
ellipse(425, 205, 25, 25);
fill(33, 30, 31); //Dark Black Center
ellipse(565, 205, 25, 25);
}
//Stems End
}
1) You can only see the flowers fully grow if you’re looking at the code on a full 640×480 canvas
This project was really difficult for me because there were so many options that I could have done and it was hard for me to really decide what I wanted to code for this project.
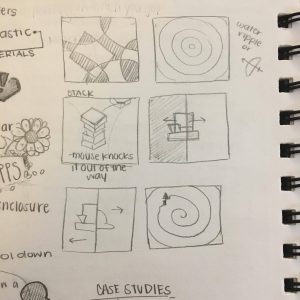
These were some initial sketches I did of possible things that I could have attempted to code (unsure if the drawings even make sense), but I decided to try and stick with my theme that I had in my last project, which is the idea of using sprouts. I wanted to try to make the sprouts look like they were growing depending on where the sun is (on the x-axis) and I wanted to change the color of the sky, grass, and the sun depending on where the mouse is (on the x-axis) and also allowing the sun to grow smaller and bigger depending on where it is on the canvas.
It was difficult for me to try and figure out how to code certain things, especially the growing stems for the plants because I tried to do that for my last project. I figured out a way to do it, but I’m sure there is a more efficient way to do it that I want to try and figure out next time.
Another aspect that I wanted to incorporate in this project was to try and draw different flowers like sunflowers, but I found it too difficult to do sadly. Maybe next time.
//Cora Hickoff
//Section D
//chickoff@andrew.cmu.edu
//Project-03
function setup() {
createCanvas(640, 480);
rectMode(CENTER);
frameRate(10);
}
function draw() {
//mouseX controls the degrees
var deg = mouseX;
var rad = radians(deg);
background(144,180,180);
//make background change color
//when mouse midway point of canvas width
if (mouseX > (width / 2)) {
background (232,180,180);
}
//small gold circle
fill(255, 214, 169);
noStroke();
//restrict mouseX to 0-135
var m = max(min(mouseX, 40), 135);
var size = m * 120.0 / 400.0;
ellipse(10 + m * 190.0 / 400.0, 200.0, size, size);
//white circle
fill(255);
noStroke();
//restrict mouseX to 0-400
var m = max(min(mouseX, 400), 35);
var size = m * 120.0 / 300.0;
ellipse(10 + m * 190.0 / 400.0, 200.0, size, size);
//big gold circle
fill(255, 214, 169);
noStroke();
//restrict mouseX to 0-335
//mouseX, 920 causes mouseX
//to control bid golden circle
//once white circle overlaps
var m = max(min(mouseX, 920), 335);
var size = m * 120.0 / 400.0;
ellipse(10 + m * 190.0 / 400.0, 200.0, size, size);
//peach square
fill(240,140,130);
//as mouseX moves across
//canvas, its degrees determine
//the square's rotation
rotate(rad);
rect(300 + m * 190.0 / 400.0, 200.0, size, size);
}
In this project, I wanted to make a shape rotate based on the mouse’s x coordinates. By adding the other ellipses, I realized that the end result made them all look like planets in a solar system and the rectangle looked as though it were orbiting them.
var circleW=150;
var circleH=150;
var circleX=320;
var circleY=240;
var earL=280;
var earR=200;
var earW=70;
var earH=320;
var innerearL=200;
var innerearR=280;
var innerearW=24;
var innerearH=280;
var smallerCircleW=50;
var smallerCircleH=50;
var smallerCircleX=160;
var armR=120;
var armL=360;
var eyes=15;
var eyesR=210;
var eyesL=265;
var pupil=8;
var pupilL=212;
var pupilR=267;
var rectY=165;
var rectW=150;
var rectH=150;
var antennaR=210;
var antennaL=265;
var angle=10;
var x1=50;
var y1=0;
var x2=250;
var y2=25;
var x3=50;
var y3=50;
function setup() {
createCanvas(480, 480);
}
function draw() {
background(230, mouseX, mouseY);
//made the background change based on the mouseX and mouseY positions
strokeWeight(0);
fill(255);
push();
translate(370,350);
//divided by 50 to make sure it rotates slower
rotate(mouseX/50);
//ears
ellipse(mouseX/7,earL,earH,earW);
ellipse(mouseX/7,earR,earH,earW);
//inside of ears
fill(255, 204, 204);
ellipse(mouseX/7,innerearL,innerearH,innerearW);
ellipse(mouseX/7,innerearR,innerearH,innerearW);
//the face
fill(255);
ellipse(mouseX / 7, circleY, circleW, circleH);
//the two circular arms
ellipse(mouseX / 7, armR, mouseX/7, mouseX/7);
ellipse(mouseX / 7, armL, mouseX/7, mouseX/7);
//body
rect(mouseX / 7, rectY, rectW, rectH);
fill(0);
//the two white eyes in the green blob
ellipse(mouseX / 8,eyesR,eyes,eyes);
ellipse(mouseX / 8,eyesL,eyes,eyes);
fill(255);
ellipse(mouseX/8,pupilR,pupil,pupil);
ellipse(mouseX/8,pupilL,pupil,pupil);
//carrot body
fill(mouseX, 153, 0);
triangle(x1,y1,x2,y2,x3,y3);
//the greens of the carrot
fill(102, 204, 0);
ellipse(40,5,mouseX/7,mouseX/7);
ellipse(25,15,mouseX/7,mouseX/7);
ellipse(20,30,mouseX/7,mouseX/7);
ellipse(50,25,mouseX/7,mouseX/7);
ellipse(40,40,mouseX/7,mouseX/7);
//blush will show up on the bunny's cheeks when mouse goes past 400 px of
//the canvas
if (mouseX>400){
fill(255, 153, 153);
ellipse(mouseX/7,innerearL-5,13,25);
ellipse(mouseX/7,innerearR,13,25);
}
pop();
}
This project was actually extremely hard for me. I had a lot of ideas and inspirations but it was hard for me to actually execute them. I started off with something like this where I wanted the rectangles to move in a clockwise direction. After I got the rectangles moving the direction I wanted, I couldn’t really figure out how to slow down the rate at which they were moving and to make sure they stayed within the canvas, so this idea ended up being scrapped. I then started fiddling with the mouseX and mouseY functions and was able to use that for background in my current project. I threw in a circle since I originally wanted to create something where there was a circle in the middle and as the mouse moved to the left, the circle would split into 4, then 16 and so forth, but then that too was a little too hard for me to comprehend. I ended up connecting to together random shapes that somehow ended up looking like an Android figure. I tried using the translate, push, pop and rotate functions we learned in lab to finish off my project.
The result was a figure that looked something like this.
I tried to refine the work and make it look a little more presentable and nicer to look at as well as changed the color scheme a bit. I hope I can learn to use new and different functions to use in my future projects but as of right now, I still don’t have a full grasp of many functions so this was the best I could do.
This is the 99 Failures Pavilion, a temporary pavilion which was named in support of the idea that failure is beneficial to knowledge and success. It was created by Architecture graduate students and design professionals at the Digital Fabrication Lab at the University of Tokyo in November of 2013.
Many structural models were tested in order to find the right geometry that would allow this flat, stainless steel to become sturdy in its 3D form. The stainless steel sheets were then welded together and formed to mimic pillows. I find it fascinating that even steel can appear as soft as it does in this project. It looks weightless and balloon-like.
Another element that I believe has helped this pavilion’s success is the golden tree behind it. Since it’s autumn, the structure seems more like a shelter for the cold days to come, and makes the steel more comforting. This ability to transform a material is what I appreciate most about this work. Architecture should not only be about functionality, but also about creating spaces with feeling.
Michael Hansmeyer’s L-Systems in Architecture explores the possibilities that L-Systems can open up in architecture. L-Systems is a string-rewriting algorithm that was created by biologist Aristid Lindenmayer. Lindenmayer created this algorithm to model simplified plants and their growth processes. Hansmeyer’s is an architect and programmer. His interests lie in the idea that architecture should be judged by the experiences that it produces. He takes advantage of computational methods to enhance these experiences intellectually and sensually.
There are two parts to the project. The first half explores which qualities of a design are essential to the logic of the algorithm. It considers methods for visualizing L-Systems. The second half incorporates aspects of parametric systems to expand the algorithm’s language. This part of the project explores the different ways that the L-System can react to its environment and how these adaptations can physically be applied to architectural design.
Nature has been the muse of many architects due to it’s forms and geometries. Many times the product of nature’s inspiration is executed too literally. Hansmeyer utilizes these characteristics as ways to improve the function of a building rather than to solely determine it’s form.
//Anna Anderson
//Section D
//aranders@andrew.cmu.edu
//project-03
var pbsize = 30
var pbcolor = 0
var pbposition = 275
var jellysize = 30
var jellycolor = 0
var jellyposition = 25
function setup() {
createCanvas(600, 400);
}
function draw() {
background(218, 145, 223)
noStroke();
//left bread
fill(255);
rect(50, 100, 200, 200);
ellipse(50, 125, 50, 50);
ellipse(250, 125, 50, 50);
//right bread
fill(255);
rect(350, 100, 200, 200);
ellipse(350, 125, 50, 50);
ellipse(550, 125, 50, 50);
//peanut butter color
pbcolor = min(max(0, mouseX), 100);
fill(216, 152, pbcolor);
//peanut butter position and size
pbsize = max(min(mouseX, 150));
pbposition = max(min(mouseY, 375));
rect(pbposition, 125, pbsize, pbsize);
//jelly color
jellycolor = min(max(0, mouseX), 100);
fill(225, jellycolor, 225);
//peanut butter position and size
jellysize = max(min(mouseX, 150));
jellyposition = max(min(mouseY, 75));
rect(jellyposition, 125, jellysize, jellysize);
}
I really like peanut butter and jelly and thought this was a good opportunity to digitally spread the goodness. This project went relatively smoothly and was fun to create!
For my project, I made a dynamic drawing that is controlled by the mouse, or the user. I varied several elements, including size, color, rotation and position.
The user can move the wrecking ball to wherever in the canvas and manipulate the size of the buildings. One can see that the size of the ball itself changes, according to position as well. The size of the wrecking ball is largest when the mouse is located on both extremes of the width. The height of the buildings decreases when approached by the ball.
As for colors, as you move the mouse from left to right, the background changes from dark to light.
Another element that the mouse controls is the particles floating in air. It could be considered stars or dust. When the mouse is in the bottom half of the canvas, the particles rotate at a faster pace than they do when the mouse is in the top half of the canvas.
I would say that some challenges came from how tedious my design was. I also wish that I could have made the windows on the buildings to change color in the same fashion that the background does to keep it more consistent.
A design based on algorithms that interested me is the auditorium in the Elbphilharmonie, which is a concert hall in Hamburg designed by an architecture firm called Herzog and de Meuron and opened in 2017. The Elbphilharmonie is a complex that resembles a city; it offers many different attractions, such as the main philharmonic hall, music hall and restaurants.
TThe building complex as a whole is extremely intricate, with its many geometries and attractive materiality but an area that is more impressive in regards to its use of technology would be the largest concert hall. The concert hall was created based on algorithms. Over 10 years, architects Jacques Herzog and Pierre de Mueron created about 10,000 gypsum fiber acoustic panels that cover the walls. Basically, the entire auditorium is covered in algorithmic, NURBS-based cells that look like shallow dugouts in the sand. The concave cells look like they were hand-carved, but were actually milled with CNC milling machines, based on precise calculations made computationally. The algorithm that lies underneath varies the characteristic of each cell so that individual cells play their unique role in handling the sounds and perfectly fill up the walls. Some of the variables here are depth, radius and splits, as seen in the image directly below.
With the help of an acoustician (Yasuhisa Toyota) the architects were able to create and fabricate a space that insures the highest acoustic qualities that a music hall can ask for. The variations that the algorithm randomly creates within its parameters significantly affect the sound in the auditorium. Depending on the shape of the surface that sound waves hit, the sound gets manipulated differently: some are absorbed by the surface, while others are disseminated, ultimately creating a balanced harmonic sound.
Algorithms in this case allowed the firm to manifest its style of conveying through materials and complex geometries and suggest at infinite possibilities of creating structures that require such finesse that might not be achievable through manual work.
A piece called Sunflowers made in 2013 by Rob and Nick Carter made an impression (sorry for the pun) on me. The work is a 3D replication of Vincent Van Gogh’s painting of the same name. The duo recreated the painting by translating the 2D brushstrokes into 360 degree perspective. They then used 3D printing to cast the sculpture in bronze. I admire the work because of the way it brings Van Gogh’s painting to life. It is a precise piece that displays the signature way in which Van Gogh painted. The movement and energy of his brushstrokes is seen in the sculpture. The algorithms for the base of the sculpture were not that refined. The great detail came in with the use of zbrush.
This project uses 3D printers and materials to lend a hand to more hands on projects that link computational projects to physical DIY projects. Overall, what I love is that this project solves is the common problem of the complexities involving dIY furniture construction; therefore only enhancing a non-computer activity, rather than entirely replacing it.
Not only does this project help the building part of furniture construction, but it also has goals in more efficient packaging, given that the larger wooden pieces can be flat-packaged with these connectors.Even more, buyers would be able to create their own furniture from scratch if desired with these easy to use parts.
Although I am not sure about what the artists inspirations were or what algorithms were used, I do know that the solution uses strong triangular shapes for structural support and requires only the most basic screwdrivers to finish the product.