Looking Outwards-09

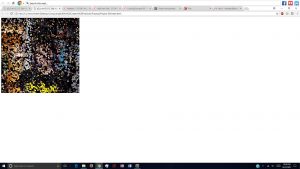
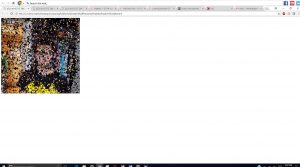
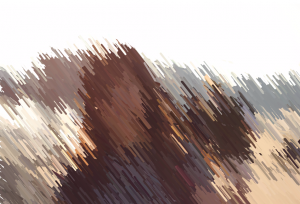
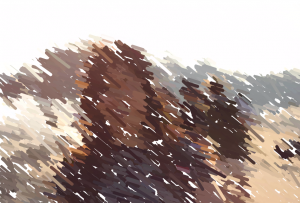
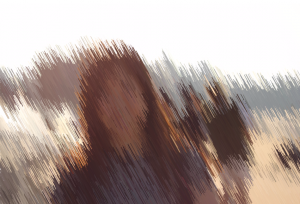
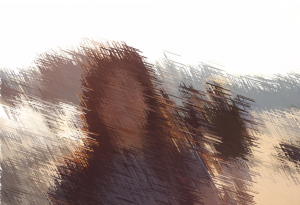
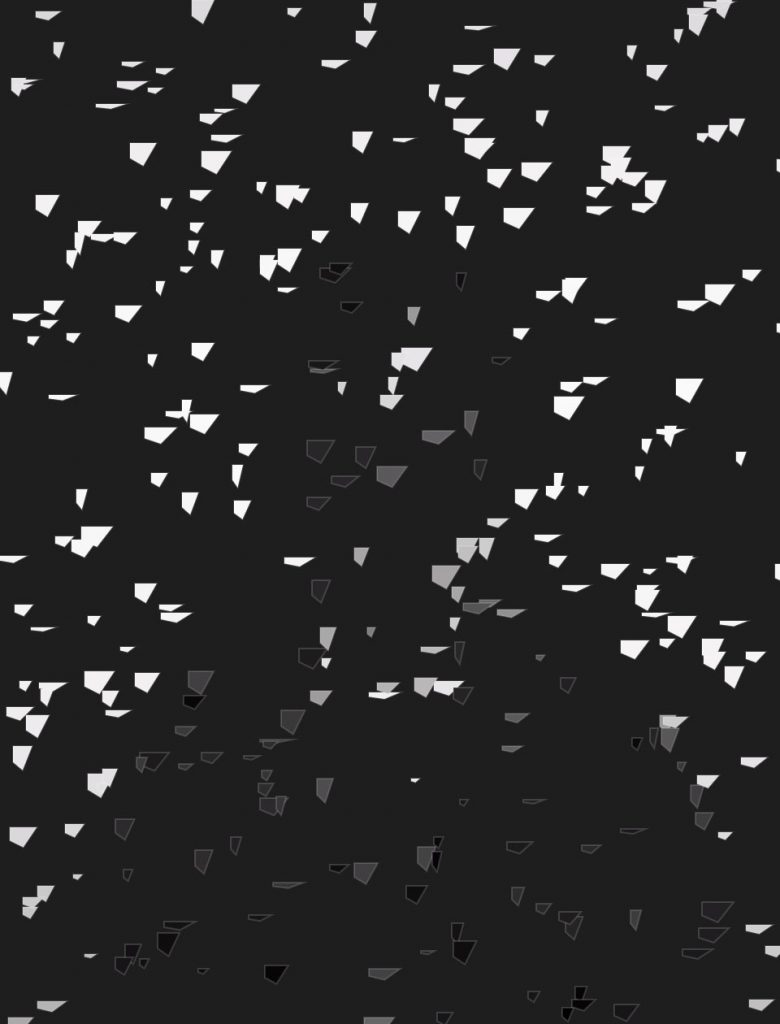
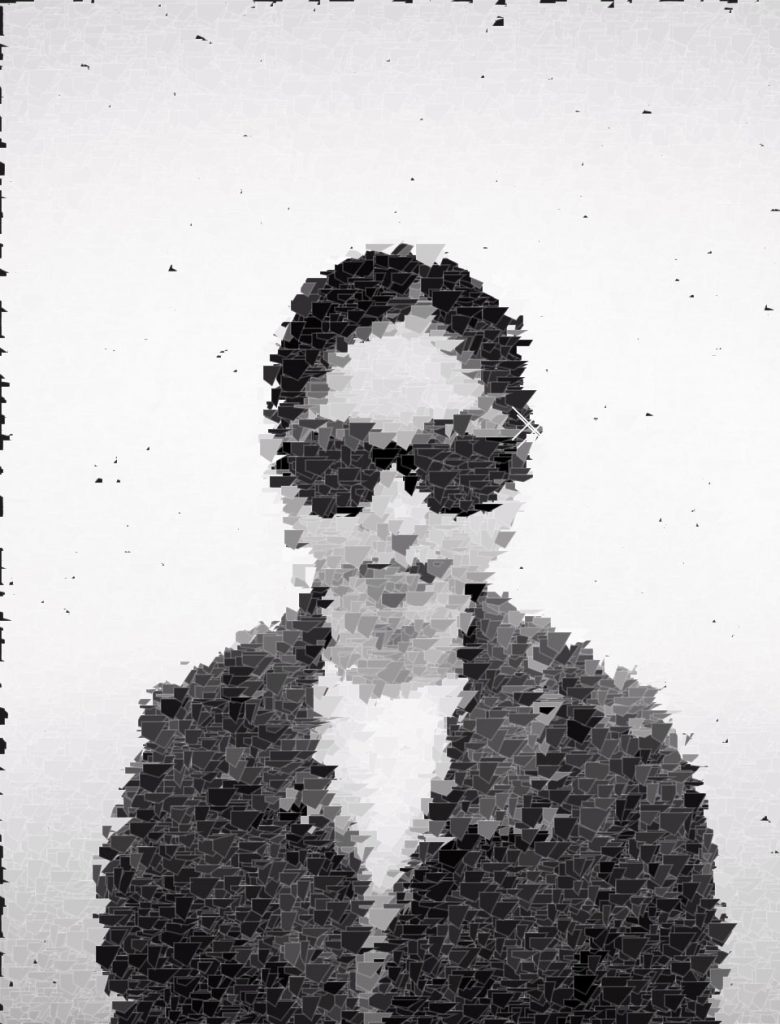
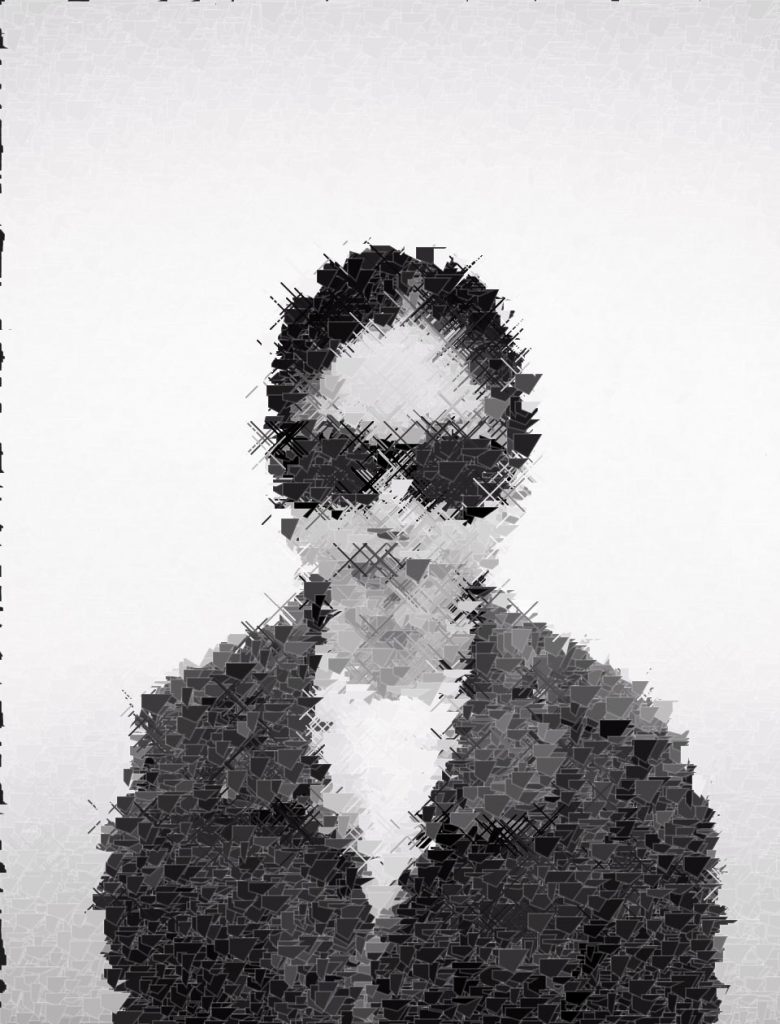
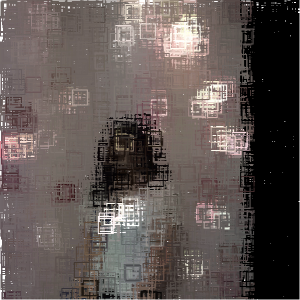
Random Number Multiples by Marius Watz and Jer Thorp
Original post by Hae Wan Park

https://creators.vice.com/en_uk/article/vvzxkb/random-numbers-screen-printed-generative-art-nyc-event

This project is awesome, like Hae Wan mentioned, because it is a combination of digital processes informing a handcrafted, physical output. One thing I would like to add to the commentary is that coding is also a craft. It’s neat to think about the processes that make up each piece. With coding, the interaction with the computer is minimal and restricted to slight hand/finger movements. The print process affords many rich interaction because the tools require fully body control. But this does not mean that one cannot inform the other.

The posters by Watz and Thorp are generative examples of pseudo-random algorithms that “simulate” nature. The simulation im taking about is that many of the patterns people see in nature have an element of randomness: rain drops, sand, etc. The contrast between the clear artificial form of the surfaces, made up by the random lines is fascinating!

atraylor – Project 09 – Section B

sketch

//atraylor@andrew.cmu.edu
//project 09
//Section B

var face = "https://i.imgur.com/q6OIZVm.jpg";
var imScale = 10;
var offset = [];
var step = [];
function preload(){
    currentImage = loadImage(face);
}
function setup() {
    createCanvas(480, 480);
    background(220);
    currentImage.loadPixels();
    for(var i = 0; i < 2400; i++){
        offset.push(random(-2, 2));
        step.push(random(-100, 100));
    }
}
function draw() {
    pixelDensity(1);
    // currentImage.loadPixels();
    currentImage.loadPixels();
    // Render the current image to the canvas.
    image(currentImage, 0, 0);
    background(230);

    for (var y = 0; y < currentImage.height; y++){ // y location of pixels
        for (var x = 0; x < currentImage.width; x++) { // x location of pixels
            var index = (x + y * currentImage.width) * 4; // to analyze the rgba values in the pixels

            var p = []; // the pixel array
            p[0] = currentImage.pixels[index]; // r
            p[1]= currentImage.pixels[index+1]; // g
            p[2] = currentImage.pixels[index+2]; // b
            p[3] = currentImage.pixels[index+3]; // a

            var brightP = brightness(p);
            //draw "pixels"
            fill(brightP);
            strokeWeight(.09);
            rect(x* imScale + noise(offset[x]), y* imScale + noise(offset[y]), imScale, imScale);
            offset[x] += step[x];
            offset[y] += step[y];
        }
    }
}


Here is a digital portrait of me and my sister, or my sister and me? We’re two years apart but people, to our confusion, always think we’re twins. We did a face-swap one day and it was hilarious: we didn’t seem to change at all.

merlebac Project-09-Portrait

Pixel Portrait

// Matthew Erlebacher
// Section B
// merlebac@andrew.cmu.edu
// Project-09

var underlyingImage;

function preload() {
    var myImageURL = "https://i.imgur.com/lcdPSVo.jpg";
    underlyingImage = loadImage(myImageURL);
    // Loads the image and turns it into a variable
}

function setup() {
    createCanvas(500, 480);
    background(0);
    underlyingImage.loadPixels();
    frameRate(60);
    // I increased the frame rate to 60 so it would appear faster
}

function draw() {
    var px1 = random(width);
    var py1 = random(height);
    // Creates random location for small square
    var px2 = random(width);
    var py2 = random(height);
    // Creates random location for large square
    var ix1 = constrain(floor(px1), 0, width-1);
    var iy1 = constrain(floor(py1), 0, height-1);
    // Constrains px1 and py1
    var ix2 = constrain(floor(px2), 0, width-1);
    var iy2 = constrain(floor(py2), 0, height-1);
    // Constrains px1 and py1
    var theColorAtLocationXY = underlyingImage.get(ix1, iy1);
    var theColorAtLocationXY = underlyingImage.get(ix2, iy2);

    noStroke();
    fill(theColorAtLocationXY);
    // Fills the squares with portions of the image
    rect(px1, py1, 6, 6);
    rect(px2, py2, 9, 9);
    // Generates random rectangles

    var theColorAtTheMouse = underlyingImage.get(mouseX, mouseY);
    stroke(theColorAtTheMouse);
    line(pmouseX, pmouseY, mouseX, mouseY);
}

Working on this project was extremely difficult for me. For some reason the image wouldn’t generate a large amount of the time. Some of the edits that I made were increasing the frame rate, and changing the ellipses to rectangles. I did this because I thought the rectangles looked more visually appealing and covered the screen more quickly.

jamieh-LookingOutwards-09

I found Hamza’s week 7 post about Santiago Ortiz’s (from Moebio Labs) visualization of Twitter connections. I agree with Hamza and Ortiz’s opinions that “data visualization is most effective not in the form of static charts and graphs, but as fluid, moving pieces of art”. There are certain types of information that should be visualized in a bar chart or pie chart, but when it comes to trying to visualize connections between subjects, it cannot be done in a numerical way. What’s interesting about the web about conversations between people at twitter is the fact that you can kind of imagine the personalities of people and the type of people they converse with. This may be because of common interests. Hovering over the circles with the person’s photo will show a blurb about the person.

relationships between people at Twitter based on data collected on twitter conversations

BrandonHyun-LookingOutwards-09

For this Weeks Looking Outwards, I am going to be looking at Scott Snibbe who is an Interactive Media Artist, researcher, and an entrepreneur. He is one of the First who works with projector based interactivity wall.

According to Scott Snibbes Website project ” Cause and Effect ” (2004) records viewers’ movements in silhouette as they simultaneously displace the recordings of previous viewers. When the movies re-play on sliding tiles, only the viewers’ movements are shown, giving a sense of autonomy to actions that were actually determined through interaction with the prior recordings. “Cause and effect” is a common translation for the Buddhist term Karma, which dictates that all human experiences, however minute, are the result of their own prior actions.

Since we have worked with projection and looked at artist that uses silhouette in Children’s museum, I think it was really interesting who originally used this type of method.


jamieh-project-09-portrait

sketch

/*
Jamie Ho
jamieh@andrew.cmu.edu
10:30
Project 09
*/

var underlyingImage;
var press = 1;			//to store value based on amt of times 
						//left and right arrow keys are pressed

function preload() {
    var myImageURL = "https://i.imgur.com/bJEDJSJ.jpg";
    underlyingImage = loadImage(myImageURL);
}

function setup() {
    createCanvas(480, 320);
    background(255);
    underlyingImage.loadPixels();
    frameRate(5000);
}

function draw() {
    var px = random(width);
    var py = random(height);
    var ix = constrain(floor(px), 0, width-1);
    var iy = constrain(floor(py), 0, height-1);
    var theColorAtLocationXY = underlyingImage.get(ix, iy);

    var lengthX = map(mouseX, 0, width, 5, 20);		//2nd X coordinate based on mouseX
    var lengthY = map(mouseY, 0, height, 5, 20);	//2nd y coordiante based on mouseY
    
    stroke(theColorAtLocationXY);
    strokeWeight(press);							//based on key presses
    line(px, py, px+lengthX, py+lengthY);			//draw line based on mousex mousey
}

function keyPressed(){
	if(keyCode == LEFT_ARROW & press > 1.0){		//if left arrow pressed
		press -= 0.5;								//strokeWeight decreases by 0.5
	} else if(keyCode == RIGHT_ARROW & press < 5.0) {		//if right arrow pressed
		press += 0.5;										//strokeWeight increases by 0.5
	}
	
}

The code allows for interactive changes to the product by using mouse positions to change the direction and length of the lines, whereas using left and right arrow keys on the keyboard adjusts the thickness of the lines. Thicker lines give less details but the product will be finished faster. I experimented with directions of the lines as well, which I think produces a much more dynamic and sketchy type of image (last image).

Thick strokeWeight with one angle


Thick strokeWeight with different angles
Thin strokeWeight with one angle
Thin strokeWeight with different angles

jiaxinw-Project 09-Computational Portrait

sketch

function preload() {
    img = loadImage("https://i.imgur.com/rHE8Y7e.jpg");
}

function setup() {
    createCanvas(480, 630);
    background(30);
    img.loadPixels();
}

function draw() {
    // pick x,y randomly from the image
    var x = floor(random(img.width))
    var y = floor(random(img.height))
    // set random values for creating irregular shapes
    var rw = random(5,20);
    var rh = random(2,15);
    //get color from x,y point of the image
    var pcolor = img.get(x,y)
    //fill irregular shapes with the x,y point color
    fill(pcolor)
    stroke(255,40)
    quad(x,y,x+rw,y,x+rw/2,y+rh,x,y+rh/1.5)
}

function mouseDragged(){
    //when mouse is dragged, keep drawing crosses 
    //and get color from the mouseX, mouseY point
    var dcolor = img.get(mouseX,mouseY);
    var l = 10;
    stroke(dcolor);
    line(mouseX,mouseY,mouseX+l,mouseY+l);
    line(mouseX,mouseY,mouseX-l,mouseY+l);
    line(mouseX,mouseY,mouseX+l,mouseY-l);
    line(mouseX,mouseY,mouseX-l,mouseY-l);

}


function mousePressed(){
    //when mouse is dragged, draw one cross 
    //and get color from the mouseX, mouseY point
    var dcolor = img.get(mouseX,mouseY);
    var l = 10;
    stroke(dcolor)
    line(mouseX,mouseY,mouseX+l,mouseY+l);
    line(mouseX,mouseY,mouseX-l,mouseY+l);
    line(mouseX,mouseY,mouseX+l,mouseY-l);
    line(mouseX,mouseY,mouseX-l,mouseY-l);
}

I wanted to use irregular shapes to “draw” the image, so I decided to use quad() and add random numbers to change the shapes randomly. Since I wanted to make the image become interactive, I used mousePressed() to make the image change when the mouse is clicked. The reason why I put crosses in the image since I thought about when I was a child, I liked to draw lines on pictures to “destroy” it. 🙂

rsp1-LookingOutwards-09

Hamza Qureshi Looking Outwards Week 8

I was very inspired by the Looking Outwards blog written by my peer Hamza Qureshi. Like Hamza, I am interested in the possibilities of design through user experiences and architecture, and found that this specific project exemplified just that. Artist Taeyoon Choi has skills in both the arts and computational coding, so he combines those skills to create something useful to all who come across his works. From Hamza’s blog post, Choi coins this term ‘poetic computation‘, in which it “allows an artist to intervene in a social space to use digital and computational tools to reorganize and reparametrize that space.”

Hacking IKEA

In his project, Choi makes a field recording while making noise with motors and microcontroller in the showroom, often interacting with the shoppers and the products on display. Since it is producing only harmlessly tiny noise, the symbolic importance is gained by paying attention to the noise created within the shop, and also the products, which will become a material noise in near future.


ikea_original_original
Choi at work

BrandonHyun-Project09

sketch

//Brandon Hyun
//Section B
//bhyun1@andrew.cmu.edu
//project09-PixelArt

var underlyingImage;

function preload() {
  //brings image from Imgur
    var ImageURL = "https://i.imgur.com/oSC8MC5.jpg";
    underlyingImage = loadImage(ImageURL);
}

function setup() {
    //creates canvas that fits the size of the picture
    createCanvas(778, 1219);
    background(0);
    underlyingImage.loadPixels();
    //draws the rectangles in certain speed
    frameRate(150);
}

function draw() {
    var px = random(width);
    var py = random(height);
    var ix = constrain(floor(px), 0, width-1);
    var iy = constrain(floor(py), 0, height-1);
    var theColorAtLocationXY = underlyingImage.get(ix, iy);

    noStroke();
    fill(theColorAtLocationXY);
    rect(px, py, 30, 70);


}

The portrait gets drawn onto the canvas is a rectangle that creates a mosaic of an image and the following image has the fast FrameRate that reveals the image quickly. I did not want the image to reveal so slowly since its hard for the viewers to view it. I also created the rectangles quite largely so the image can get revealed more quickly.

nahyunk1 – Project 09 Pixel Art

sketch

//Nahyun Kim
//Section B
//nahyunk1@andrew.cmu.edu
//Project 09

var img;

function preload(){
  img = loadImage("https://i.imgur.com/cKWLZzM.jpg");

}
function setup() {
  createCanvas(600, 600);
  img.loadPixels();
  frameRate(2000);
  image(img, 0,-20);
  background(255);

}

function draw() {
  var x = floor(random(600));
  var y = floor(random(600));
  var Col = img.get(x, y);
  stroke(Col);
  strokeWeight(random(0.5, 2));
  noFill();
  rect(x, y, 30, 30);
  strokeWeight(0.5);
  text("be forever hazy..", 5, 10);
}

My intentions of presenting an obscured image came out successful by filling strokes with pixel colors and and doing noFill(); instead of the other way, which would stylize blocks of filled rectangles draw my image. I wanted to have the image appear in a way that is more neat in its build up. It also stylizes my picture as glassy and translucent, which helped my initial thought get executed clearly. Here are some screenshots of my picture being built up to its finished look.