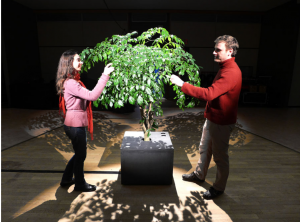
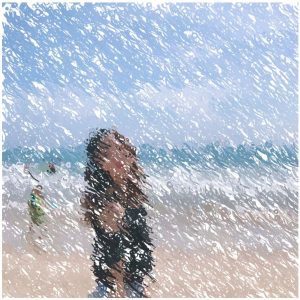
Pictured above are two people interacting with the Lumifolia artwork.Shadow of a woman exploring the art piece.
For my Looking Outwards Post this week, I looked at the very first Looking Outward Post by Rachel Park from the first week of classes. She wrote about an art piece made by the duo Scenocosme: Gregory Lasserre and Anais met den Ancxt called Lumifolia (press for link). This interactive garden “questions sensitivity, artistic, and musical relationships with the plants and the environment” according to its official website. The closer the human’s touch, the brighter the lights shine.
I agree with Rachel that the idea behind this art piece is both very refreshing and also innovative. It can be used for a greater purpose such as a future public installation in more uninteresting areas. However, I also thought of how this piece could be used for safety measures in dark allies such as in urban areas.
Rachel also mentioned the unique design of the art piece, which encouraged human interaction. I also thought of the tree model they used for this particular art piece. Maybe, there is a more subtle message that encourages more interaction between humans and nature in this specific art piece. The message can be seen with the bright light that shines specifically only when the human touch comes closer to the tree model itself.
It reminded me once again that my art can be used for more than just aesthetic purposes. It can beautify the setting that surrounds it, but can also help serve the usability of that area also.
For this weeks Looking Outwards, I found ikrsek’s looking outwards 5 to be particularly interesting, which discussed the work of Hayden Zezula.
Hayden Zezula is an animator who creates designs for companies such as HBO, Adidas, and Adult Swim. To sum his work up in a word… unsettling.
A lot of Zezula’s work, to me, explores the relationship between 2D and 3D. This perhaps differs or expands a bit from ikrsek’s description of his work as a “3D style on a 2D screen”.
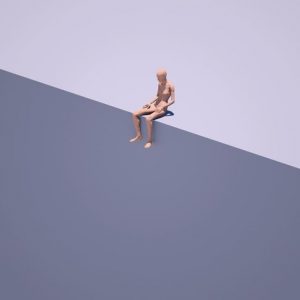
Hayden Zezula’s “end”, a gif depicting a 3D human leaning over and covering his/her face with his/her hands in a 2D landscape.
This image on “end” for instance, shows a 3 dimensional figure sitting on a pretty 2 dimensional surface. The relationship between the two is both visually and thematically interesting.
Also, as ikrsek mentions, much of Zezula’s work has to do with texture. This, to me, is the most interesting aspect of his work.
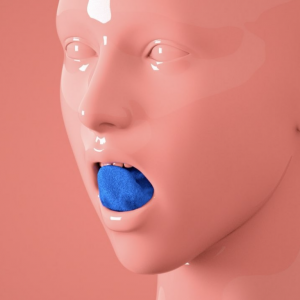
Hayden Zezula’s “Options” gif, displaying a plastic-like human face and a fuzzy, synthetic tongue
The image above shows the kind of unsettling contrast between textures that Zezula likes to use. In fact, it’s much more unsettling if you watch the gif, since part of texture/material is shown through movement (for example, the tongue sort of ripples when it hits the top of the mouth). Not only is this visually really interesting, but actually I think Zezula is working with deeper ideas of the relationship between synthetic and organic things, like how organic things like humans and plants can be defiled by synthetic things; How what should be organic can be “replaced” by something synthetic; and how unnatural organic things can be when twisted and manipulated.
For this post, I want to respond and add to my classmate’s post on the Disney short Paperman, directed by John Kahrs. I saw this video discussing the computer graphics and techniques a while back, and thought it would give more context to how the 3d and 2d images are combined.
I really love this short because hand drawn animation has a certain charm which is hard to replicate with cg (really, this goes for most practical effects when they are well executed). What the original post didn’t mention is that not all of the 2d lines or effects were drawn frame by frame. Disney used software to compute in-betweens on key frames which acted like 3d blend shapes, tangents to place lines, and motion vectors to determine texture placement.
//Hanna Jang
//hannajan@andrew.cmu.edu
//Section B
//Project -09

var underlyingHanna;
var randommax=13;

function preload() {
    var myImageURL = "https://i.imgur.com/v5rsvnH.jpg?1";
    underlyingHanna = loadImage(myImageURL);
}

function setup() {
    createCanvas(500, 500);
    background(255);
    underlyingHanna.loadPixels();
    frameRate(40);
}

function draw() {
    var px = random(width);	//random y from canvas width
    var py = random(height);	//random x from canvas height
    var thex = constrain(floor(px), 0, width-1);
    var they = constrain(floor(py), 0, height-1);
    var theColorAtLocationXY = underlyingHanna.get(thex, they); //var color from image background

    noStroke();
    fill(theColorAtLocationXY);

    //make smiley face

    //happy mouth is made
  arc(px, py, 10, 10, 0, PI);

  //happy eyes are made
  ellipse(px-3, py-5, 5, 5);
  ellipse(px+3, py-5, 5, 5);

	//when mouse moves, a trail of squares follow
    var theColorAtTheMouse = underlyingHanna.get(mouseX, mouseY);
	stroke(theColorAtTheMouse);
	rect(mouseX, mouseY, 3, 3);
}

function mousePressed(){
	//random sizes for sad face generation from mouse press
	var sizex=random(7,randommax);
	var sizey=random(7, randommax);
	 var Mousecolor = underlyingHanna.get(mouseX, mouseY);

	//sad mouth is made
	 fill(Mousecolor);
    arc(mouseX, mouseY, sizex, sizey, PI, TWO_PI);
    //sad eyes are made
    ellipse(mouseX-3, mouseY-10, 5, 5);
    ellipse(mouseX+3, mouseY-10, 5, 5);
}
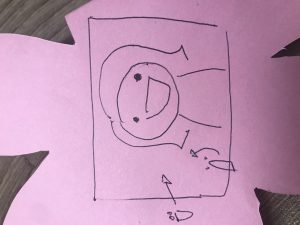
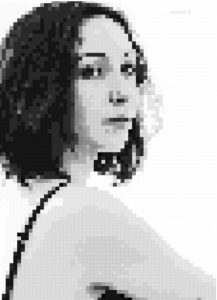
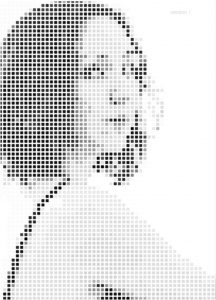
I decided to do a self-portrait image background of me smiling into the camera. I then thought of an idea to use faces for the custom pixels, to make up a bigger picture of a smiling face.
Original image draftoriginal picturescreenshot of partly finished portraitfully finished portrait
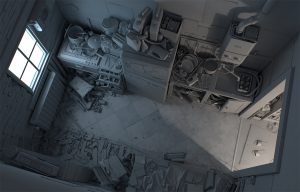
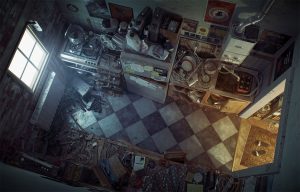
Jiaxin wrote a blog post about CG artist Cornelius Dämmrich. His works look like awesome illustrations, but he uses multiple graphic softwares to create lighting, texture and shading. Since I have interest on concept art, this blog post just caught my eyes. Jiaxin said there is no specific story behind his work, but as I see, I can read the story behind it. Story doesn’t necessarily mean to have narrative. If it has detailed concept for background and atmosphere, it can be a story too. In his work, amount of details tell a lot of things. I love how he uses lighting to tell a story. Strong contrast from the image gives a feeling on isolation, and also antipation for something.
Here are more images I found on his websites.
Until the light takes us 2013(in progress)Until the light takes us 2013(Final work)
var portrait;

//image loading from imgur
function preload() {
    var imageURL = "https://i.imgur.com/WgHeMvC.jpg";
    portrait = loadImage(imageURL);
}

//setup loadPixel function here & setup frame Rate(speed)
function setup() {
    createCanvas(480, 480);
    background(0);
    portrait.loadPixels();
    frameRate(20);
}

//draw stitches and ellipses changing there size and length depend on mouse position
function draw() {
    var px = random(width);
    var py = random(height);
    var px1 = random(width);
    var py1 = random(height);
    var ix = constrain(floor(px), 0, width);
    var iy = constrain(floor(py), 0, height);
    var col = portrait.get(ix, iy);
    var dia = round(constrain(mouseX / 5, 0, 15))
    var len = round(constrain(mouseY / 5, 0, 10))
//ellipse
    noStroke();
    fill(col);
    ellipse(px, py, dia, dia)
//stitches
    stroke(col);
    strokeWeight(random(0.5, 2))
    line(px1, py1, px1 + len, py1 + len);
    line(px1 + len, py1, px1, py1 + len);
    pop();

}
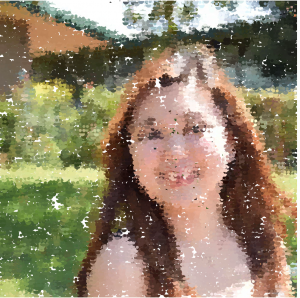
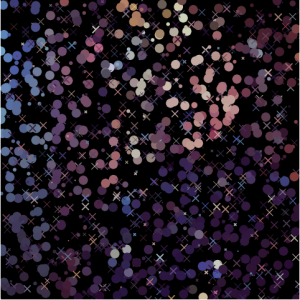
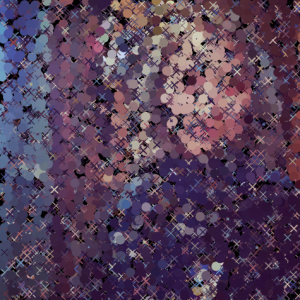
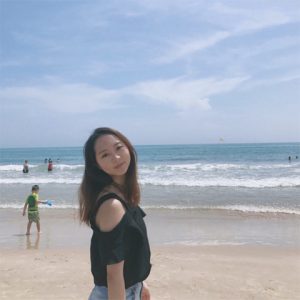
I choose one of the photos from a last year trip to japan. It was fun and interesting trip. So I wanted to make this pixel loading image to be shine as the memory.
Here are some images of portrait.
This project was SO MUCH FUN. I had way too many ideas for just this week, so after I finish this post I’ll probably go back to making portraits.
At first I had only abstract concepts to work towards. Like gravity was definitely something I wanted to play around with. Unfortunately, I ran into issues with how ridiculously long it took to load the program every time I ran it…. there was no way I was going to be able to make anything that complicated. I was worried that I might not even finish the project! (every time I loaded the image it took on average 7 minutes to load. That’s like 8 an hour).
So, a good portion of my work on this project was figuring out how to make it run faster. After reading around on the reference page, I figured out if I used loadPixels, I could directly access the pixels[] array, and thus get the pixels information way faster. And.. hurray the code runs almost instantly!
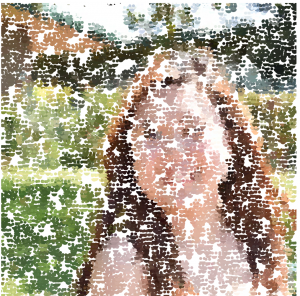
I had a couple hours left, so I didn’t have room to be QUITE as ambitious as I wanted to be for this project (I was honestly going to turn in like 5 different codes as variations on a theme). Nonetheless, I think it turned out pretty well. I wanted to get a sort of old video game aesthetic going, so first I coded that up.
First step in the process. transforming the image into these block-ey pixels and getting the contrast right.
I played around with the size of the squares used to create the image, and the contrast between the darker parts (like the hair and lips) and the lighter parts (skin), but ultimately settled on the image above. Next, I (accidentally) made the stroke() color on the square pixels 10 below the fill color. This gave the image a more tile-esque look to it — closer to that old video game vibe I was going for. I decided to play around with that (intentionally this time), and settled on a white stroke. The reason being, is I wanted to print out the image on a huge poster, and have the affect of a bunch of separated squares, instead of a filled canvas.
Second step in the process. I was playing around with adding a border around the block pixels, and decided I liked the white border.
At this point, I felt like the portrait was pretty good, but I wanted to do something a little bit more. Also, I just wanted to do something with code that is a bit out of my comfort zone… so I implemented objects into the portrait. I made each “tile” start at the bottom of the canvas, and slide upwards at varying speeds until it reached its correct location on the canvas.
I particularly like the effect that occurs around the bottom of the hair, as the dark pixels are sliding under the lighter pixels that have already reached their destination.
Click the in the image below if you want to see the program run again!
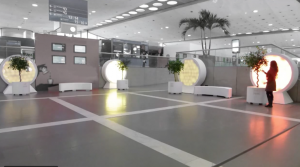
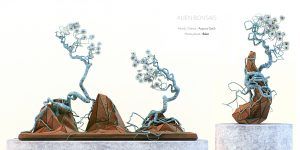
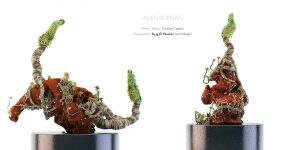
A 3D generated plant by Chaotic Atmospheres Family/Genus: Aspona Gatik Home Planet: IkamA 3D generated plant by Chaotic Atmospheres Family/Genus: Caradae Capesus Home Planet: Dyyg El Rhaaben (old Inilliatoa)
Alien Bonsais by Chaotic Atmospheres
http://chaoticatmospheres.com/alien-bonsais
The looking outward that I chose to respond to was Selina Lee’s week 5 post. The project that she cited was Alien Bonsais, and was made by Chaotic Atmospheres. I thought the 3D modeled plants looked beautiful. The artist did an amazing job of making them look as if they were from another world. In addition, I would have to complement Chaotic on his/her choice of color for the plants. Each model has a small amount of a bright color to make the images pop. One critique of Chaotic’s work that I would have is the background that they used. They used a plain white back drop, and I though it would have looked more interesting in a surrounding environment.
//Yugyeong Lee
//Section B
//yugyeonl@andrew.cmu.edu
//Project 09

var imgYugy;

function preload() {
    var yugyURL = "https://i.imgur.com/Ghau5tT.jpg";
    //load image using the URL
    imgYugy = loadImage(yugyURL);
}

function setup() {
    createCanvas(480, 480);
    background(255);

    imgYugy.loadPixels();
    //how fast curves get drawn on canvas
    frameRate(750);
}

function draw() {
    //calling created functions
    circleYugy();
    curveYugy();
}

//circular pixels following position of mouse
function circleYugy() {
    var startX = mouseX;
    var startY = mouseY;
    var limitX = constrain(floor(startX), 0, width - 1);
    var limitY = constrain(floor(startY), 0, height - 1);
    var color = imgYugy.get(limitX, limitY);
    var diam = random(3, 10);

    noFill();
    stroke(color);
    ellipse(startX, startY, diam, diam);
}

//diagonal lines at random
function curveYugy() {
    var startX = random(0, width);
    var startY = random(0, height);
    var limitX = constrain(floor(startX), 0, width-1);
    var limitY = constrain(floor(startY), 0, height-1);
    var color = imgYugy.get(limitX, limitY);
    var diagonalLength = random(5, 25);
    var thickness = random(.5, 3);
    var curveScale = random(.1, .6)

    stroke(color);
    strokeWeight(thickness);
    noFill();
    beginShape();
    curveVertex(startX, startY);
    curveVertex(startX, startY);
    curveVertex(startX+curveScale*diagonalLength, startY+.6*diagonalLength);
    curveVertex(startX+diagonalLength, startY+diagonalLength);
    curveVertex(startX+diagonalLength, startY+diagonalLength);
    endShape();
}
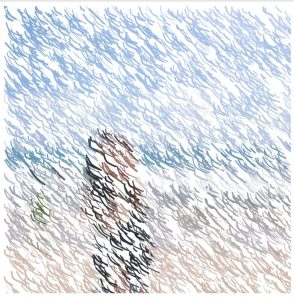
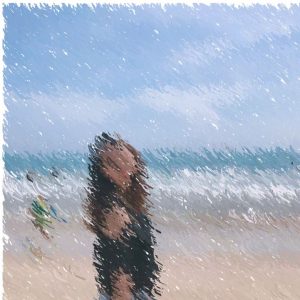
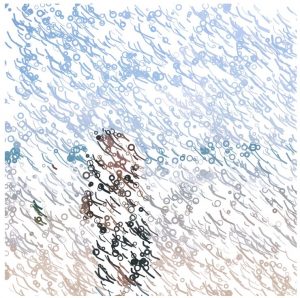
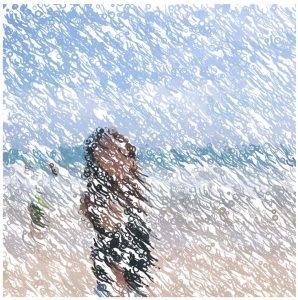
There are two ways the portrait gets drawn onto the canvas: through random curves following the FrameRate and circular lines that follow the position of the mouse while capturing pixel color of each location. I wanted to create a paint-brushed effect as the end product while incorporating another geometry to disturb what could be a smooth surface. Bellow are the screenshots of the stages with just the curves and with circular curves.
original picture first stage (just curves) second stage
first stage (with circles) second stage third stage
//Ty Van de Zande
//ctv@andrew.cmu.edu
//Section B
//Project-09

//sorry for not commenting

var underlyingImage;
var dir = 1;

function preload() {
    var myImageURL = "https://i.imgur.com/xIecQsR.jpg";
    underlyingImage = loadImage(myImageURL);
}

function setup() {
    createCanvas(420, 420);
    background(0);
    underlyingImage.loadPixels();
    frameRate(60);
}

function draw() {
    var r = random(90);
    var r2 = random(3, 20);

    if(r <= 1){
    underlyingImage.loadPixels();
    var stepSize = round(constrain(mouseX / 8, 6, 32));
    for (var y=0; y<height; y+=stepSize) {
    for (var x=0; x<width; x+=stepSize) {
      var i = y * width + x;
      var darkness = (255 - underlyingImage.pixels[i*4]) / 255;
      var radius = stepSize * darkness;
      ellipse(x, y, r2, r2);
    }
  }
    }

    var px = random(width);
    var py = random(height);
    var ix = constrain(floor(px), 0, width-1);
    var iy = constrain(floor(py), 0, height-1);
    var theColorAtLocationXY = underlyingImage.get(ix, iy);
    var sz = random(0, 30);


    noStroke();
    fill(theColorAtLocationXY);
    ellipse(px, py, sz, sz);
}

function mousePressed(){
    dir = dir *(-1);
}
![[OLD FALL 2017] 15-104 • Introduction to Computing for Creative Practice](../../../../wp-content/uploads/2020/08/stop-banner.png)