svitoora – 05 Looking Outwards

World Within: Colored Scanning Electron Microscopes (SEM)
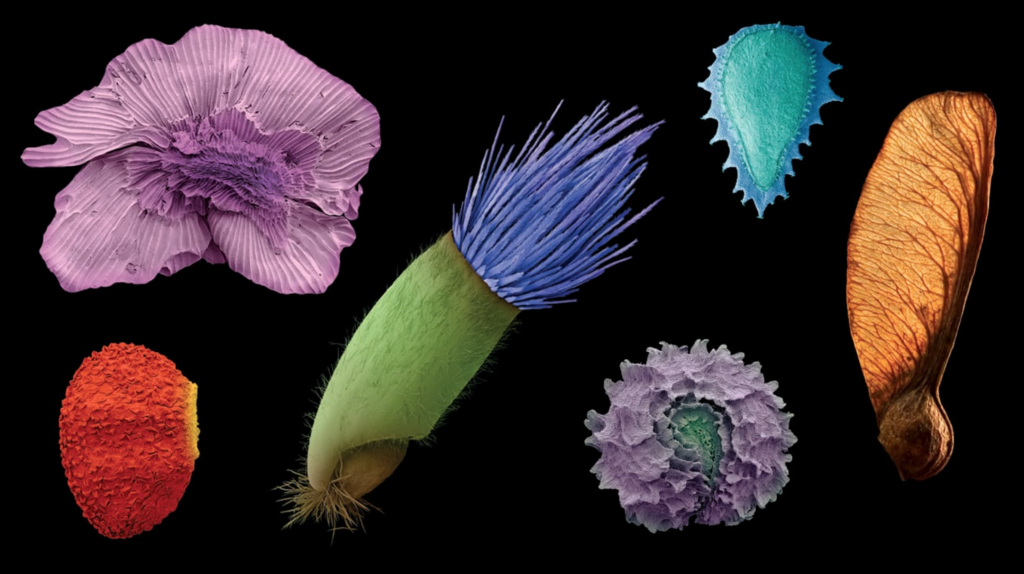
SEM scans of various plant seeds colorized

Colored Electron Microscope Scans are amazing! These were photos I would stare at in the science textbook as a kid. Recently, I came across one of these Scanning Electron Microscope (SEM) scans at the Miller Gallery in the exhibit World Within. Scientifically and algorithmically these scans are generated by using a beam of an electron to scan the surface of the object. In comparison to a beam of visible photons, the electrons’ wavelength is 10,000 times shorter thereby enabling higher precision in vision. The SEM has an electron optical lens which works similarly to a light camera lens to capture the reflected electrons, and afterward through some image processing algorithm, a SEM image emerges. While SEM, allows us to see the world at a whole different level, it only allows us to see that world in black and white because of the nature of electrons’ micro wavelength. Without the artist’s sensibility, these scans would just be mere black and white photos. Today, the common practice of coloring a SEM photo is still via Photoshop or other feature detection software.
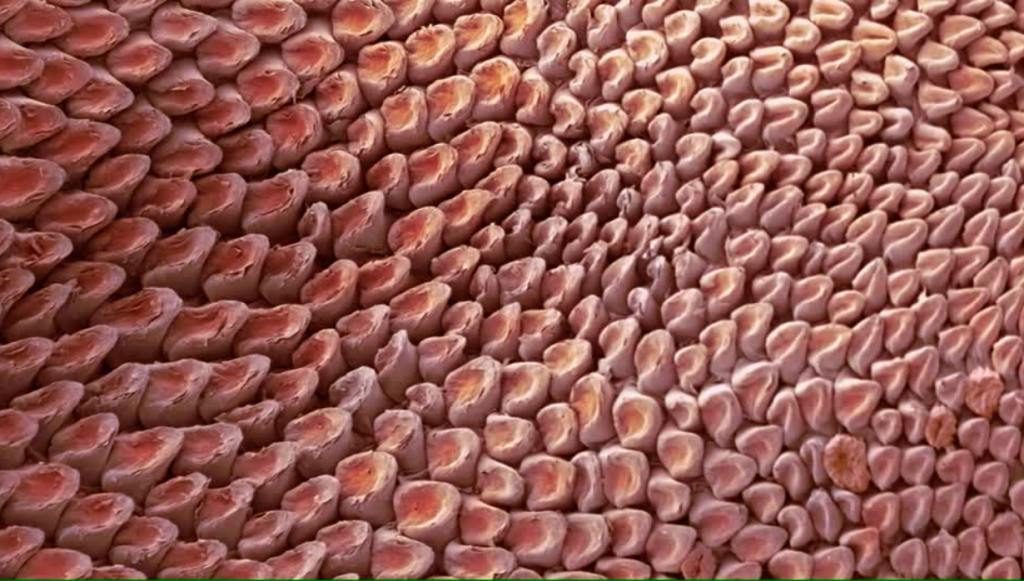
Tongue of a domestic cat
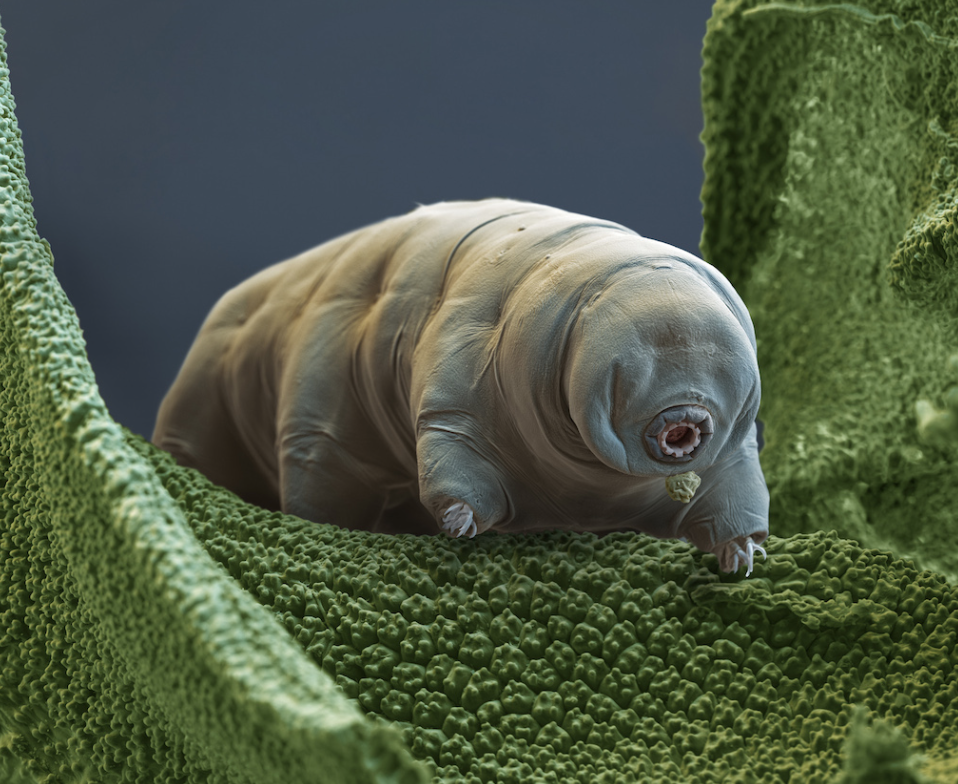
Tardigrade

PHOTOSHOP FOR THE SCIENTIST:
https://www.youtube.com/watch?v=pp0sisFQ53M

svitoora – 05 – Recursive Sakura Wallpaper

sketch

// 
// Supawat Vitoorapakorn
// Svitoora@andrew.cmu.edu
// Section E
// 
// Cherry Blossoms: Recusively generate a forest of Sakura.
// Using a Lindenmayer system, each plant grows towards the sun.

var w = 400;
var h = 400;

// Global Variable
var PLANT;
var segment_l = h * .1;
var r = h * .05 * .5;
var common_ratio = .618033 //Golden Ratio
var food;

// Recursively generates a plant model
var max_i = 7; // Max iteration depth
var cur_i = 0;
var DRAW_i = 0; // DRAW's iteration depth

///// MODEL /////
// Creates the sun for plants to grow towards
function food_create(x = w / 2, y = -h * 2) {
	this.x = x;
	this.y = y;
}

// Creates plants node. Nodes that have .child are branches,
// and nodes without .child are leaves.
function create_plant_node(x, y) {
	this.x = x;
	this.y = y;
	this.x0 = this.x;
	this.y0 = this.y;
	this.child = [];
	this.x1 = null;
	this.y1 = null;
}

// Grows plant by making plant seek sunlight
function grow(plant, cur_i) {
	// Using the golden ratio, plant's branch size is a geometric sequence
	l = segment_l * (common_ratio ** (cur_i))
		// Randomly generate the next node via reducing
		// distance from plant ro sun
	do {
		angleMode(DEGREES);
		if (cur_i == 0) {
			angle = 5;
			theta = random(-90 - angle, -90 + angle);
		} else {
			theta = random(0, 360);
		}
		plant.x1 = plant.x0 + (l * cos(theta));
		plant.y1 = plant.y0 + (l * sin(theta));
		d_new = dist(plant.x1, plant.y1, food.x, food.y)
		d_old = dist(plant.x0, plant.y0, food.x, food.y)
	}
	// Keep generating until the new distance is less than the current one
	while (d_new > d_old)
	plant.child = [];
	// Randomly decide how many children(branches) a node should have
	for (var x = 0; x < random(1, 4); x++) {
		plant.child.push(new create_plant_node(plant.x1, plant.y1));
	}
}

// Recursively generates plant
function generate_plant(PLANT, cur_i, max_i) {
	// Break Base
	if (cur_i == max_i) {
		return
		// Continue case
	} else {
		grow(PLANT, cur_i);
		cur_i++;
		for (i in PLANT.child) {
			generate_plant(PLANT.child[i], cur_i, max_i)
		}
	}
}

///// DRAW /////
// Recursively draws plant
function draw_PLANT(plant, DRAW_i) {
	DRAW_i++; // Increases DRAW's Depth counter
	stroke(255 * .3);
	strokeCap(SQUARE);
	strokeWeight((h * .0125) * (common_ratio ** DRAW_i))
		// Break case: Flowers
		// If node has no children; draw leaf.
	if (plant.child.length == 0) {
		fill(255, 255, 255);
		ellipse(plant.x, plant.y, (2 / 600) * w, (2 / 600) * w);
		return
	} // If node has chldren; draw branches
	else {
		r = r ** common_ratio;
		for (i in plant.child) {
			line(plant.x, plant.y,
				plant.child[i].x, plant.child[i].y)
			draw_PLANT(plant.child[i], DRAW_i);
		}
	}
}

///// SETUP /////
function setup() {
	createCanvas(w, h);
	background("#a5d3e5");
	food = new food_create();

	// Row Cols Controller
	num_tree = 3;
	num_row = 3;
	y_pos = 0;

	// Translates Row and Col of Trees
	push();
	translate((w / num_tree) * .5, (h / num_row)*.825);
	// Rows
	for (var x = 0; x < num_row; x++) {
		y_pos = x * (h / num_row);
		// Cols
		for (var i = 0; i < num_tree; i++) {
			PLANT = new create_plant_node(i * (w / num_tree), y_pos);
			generate_plant(PLANT, cur_i, max_i);
			draw_PLANT(PLANT, DRAW_i);
		}
	}
	pop();
    textAlign(RIGHT);
    textSize(10);
    fill(255 * .3);
    text("Please click to regnerate",w*.975,h*.985)
	print("Final:", PLANT);
}

function mouseClicked() {
	setup()
}

Using a Lindenmayer system, each plant grows towards the sun. Every plant starts with a seed, and randomly generates branches to reduce its distance towards the sun at (width/2, -height*2) for a maximum recursion depth of 7. A number of sub-branches (children) each branch (node) generates is random between 1-4.

rsp1-project05

sketch

/*Rachel Park
rsp1@andrew.cmu.edu
Section B @ 10:30AM
Project 05: Wallpaper Art*/

var SIZE = 25;

function setup() {
    createCanvas(480, 480);
      noStroke();
}

function draw() {

    drawGrid();
    drawPetal1();
    drawPetal2();
    drawPetal3();
    drawPetal4();
    drawMiddle();
    drawSquare();

    noLoop();
}


function drawGrid() {
  for (var y = 0; y < height + SIZE; y += SIZE) {
    for (var x = 0; x < width + SIZE; x += SIZE) {
      fill('lightblue');
      ellipse(x,y,SIZE, SIZE);
    }
  }
}

function drawPetal1() {
  for (var y = 0; y < height + SIZE; y += SIZE) {
    for (var x = 0; x < width + SIZE; x += SIZE) {
      fill(255,178,178);
      rectMode(CENTER);
      rect(x+5,y,7,7);
    }
  }
}

function drawPetal2() {
  for (var y = 0; y < height + SIZE; y += SIZE) {
    for (var x = 0; x < width + SIZE; x += SIZE) {
      fill(255,178,178);
      rectMode(CENTER);
      rect(x-5,y,7,7);
    }
  }
}

function drawPetal3() {
  for (var y = 0; y < height + SIZE; y += SIZE) {
    for (var x = 0; x < width + SIZE; x += SIZE) {
      fill(255,178,178);
      rectMode(CENTER);
      rect(x,y+5,7,7);
    }
  }
}

function drawPetal4() {
  for (var y = 0; y < height + SIZE; y += SIZE) {
    for (var x = 0; x < width + SIZE; x += SIZE) {
      fill(255,178,178);
      rectMode(CENTER);
      rect(x,y-5,7,7);
    }
  }
}

function drawMiddle() {
  for (var y = 0; y < height + SIZE; y += SIZE) {
    for (var x = 0; x < width + SIZE; x += SIZE) {
      fill(255);
      rectMode(CENTER);
      rect(x,y,4,4);
    }
  }
}

function drawSquare() {
  for (var y = 0; y < height + SIZE; y += 50) {
    for (var x = 0; x < width + SIZE; x += 50) {
      fill(178);
      rectMode(CENTER);
      rect(x,y,SIZE,height);
    }
  }
}

sketch of design

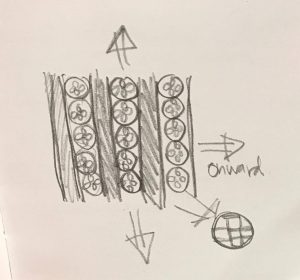
For my design, I wanted something simple and to the point. So as I was looking for inspiration, I noticed a lot of wall designs with stripes and such. To add a bit more, I added in flowers into the design as well.

hdw – Project 5 – Wallpaper

sketch

//Helen Wu
//Section A
//hdw@andrew.cmu.edu
//Project 5 

function setup() {
    createCanvas(400, 400);
    fill(255)
}

function draw() {
  var x = 10 //x-center for yellow circle
  var y = 10 //y-center for circle
  var r = 5 //radius for all circles
  var spacing = 20 //spacing between each tile
  var lx //pink lines


//draw the lines that divide each column of flowers
for (var lx = 20; lx <=400; lx+=spacing){
  stroke(255,200,241);
  line(lx,0,lx,400);
}

//leaves and leaf lines
for (var b = 1; b<=400; b+=spacing){
  for (var a = 1; a <=400; a+=spacing){
    fill(147,216,140);
    noStroke()
    quad(a,b, a,3+b, 6+a,6+b, 3+a,b);
    stroke(7,89,0)
    strokeWeight(1)
    line(a,b,6+a,6+b)
  }
}


//yellow circles
for (var y = 10; y <= 400; y+=spacing){
  for (var x = 10; x <= 400; x+=spacing){
    fill(255,249,100);
    noStroke();
    ellipse(x,y,r,r);
  }
}

//bottom flower petal
push()
translate(0,5);
for (var y = 10; y <= 400; y+=spacing){
  for (var x = 10; x <= 400; x+=spacing){
    fill(255,0,63);
    stroke(255,200,241);
    strokeWeight(1);
    ellipse(x,y,r,r);
  }
}
pop()

//top flower petal
push()
translate(0,-5);
for (var y = 10; y <= 400; y+=spacing){
  for (var x = 10; x <= 400; x+=spacing){
    fill(255,0,63);
    stroke(255,200,241);
    strokeWeight(1);
    ellipse(x,y,r,r);
  }
}
pop()

//right flower petal
push()
translate(5,0);
for (var y = 10; y <= 400; y+=spacing){
  for (var x = 10; x <= 400; x+=spacing){
    fill(255,0,63);
    stroke(255,200,241);
    strokeWeight(1);
    ellipse(x,y,r,r);
  }
}
pop()

//left flower petal
push()
translate(-5,0);
for (var y = 10; y <= 400; y+=spacing){
  for (var x = 10; x <= 400; x+=spacing){
    fill(255,0,63);
    stroke(255,200,241);
    strokeWeight(1);
    ellipse(x,y,r,r);
  }
}
pop()
}

This week’s project was inspired the small patterns on early settler’s clothes in the west. I guess I kind of miss home. :’)

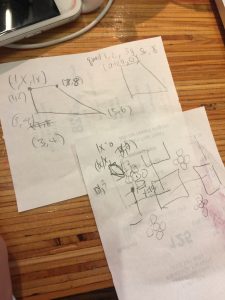
I drew on the back of a Fuku Tea receipt to plan out the shapes. I struggled with the leaf placement variables but figured it out.

abradbur – Project-05 – Wallpaper


rainyday

function setup() {
    createCanvas(480, 480);
    noLoop();
    
}

function draw() {
    background(22, 79, 119);
    noStroke();
    //rain
    for (var y = 0; y < 480; y += 5){
        for (var x = 0; x < 480; x += 5){
            fill(30, 190, 177);
            ellipse(x, y, 1, 1);
        }
    }

    for (var x = 0; x < 480; x += 96){
        for (var y = 0; y< 480; y+= 96){
            push();
            translate(x,y);
            drawTile();
            pop();

        }
    }
}

function drawTile(){


    //umbrella
    fill(60, 56, 68);
    quad(18, 66, 42, 34, 45, 35, 21, 67);
    rect(18, 66, 7, 3, 20);
    fill(151, 17, 55);
    triangle(24, 30, 60, 12, 36, 36);
    fill(151, 59, 86);
    triangle(36, 36, 60, 12, 48, 51);
    fill(151, 17, 55);
    triangle(48, 51, 60, 12, 54, 54);
    fill(243, 207, 118);
    triangle(60, 10, 64, 9, 63, 13);
    triangle(60, 10, 57, 12, 55, 8);
    triangle(58, 10, 55, 16, 63, 13);
    triangle(59, 14, 66, 16, 63, 12);
    fill(108, 13, 40);
    ellipse(60, 12, 3.5);

    
}

I wanted to make a cute wallpaper with umbrellas to signify my deep seated hope that maybe Pittsburgh will start cooling down for Fall and stop cooking us alive at 80 – 90 degrees. Let the rain fall.

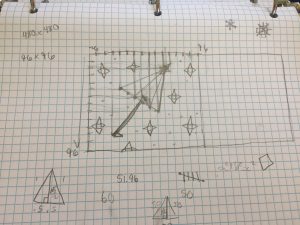
Coding the loop was pretty simple, coding the shapes is still the most finicky part. However, using graph paper to sketch out things first helps.

ikrsek-Looking Outwards-05

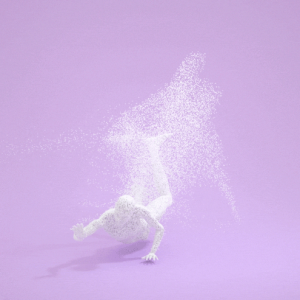
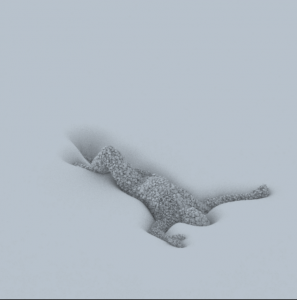
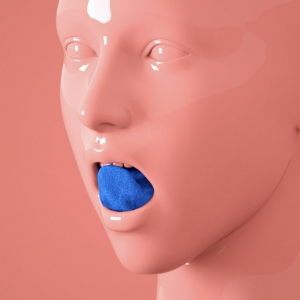
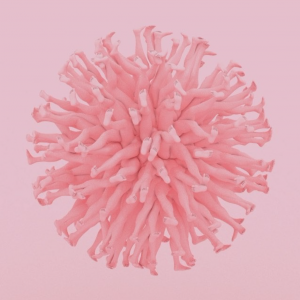
This week for the topic of Computer Graphics, one of the most compelling artists that utilizes CG for their work would be Hayden Zezula. He works primarily as an animator doing designs and such for brands like Adidas, HBO, or Adultswim – and mucho of his portfolio work comes in the form of gifs or video. Overall, the reason why I chose him is because of his experimentation with representing texture and form in a 3D style on a 2d screen. His work is extremely visually captivating, both because of the bizarre content that is displayed and the sheer technical ability he diplays. There is not a lot to be said for his work that isn’t said by the work itself, and unfortunately I can only post photos of it since gifs don’t seem to play when you post them here, so here are a few screenshots – though I highly recommend you visit his website or instagram and view the work as it is meant to be seen.


Websites:

http://zolloc.com/work/

https://www.instagram.com/zolloc/

selinal-Project-05

sketch

//Selina Lee
//Section C
//selinal@andrew.cmu.edu
//Project-05

function setup() {
    createCanvas(480, 360);
    background(255, 255, 120); //light yellow background

    for(var row = 0; row < 60; row++) { //creating grid of 60x80 for design
    	for(var col = 0; col < 80; col++) { 
    		stroke(230, 230, 150, 40); //light beige stripes
    		strokeWeight(3);
    		line(col*6 + 3, 0, col*6 + 3, width); //spacing the stripes 6 units apart and centering the space by three units from the origin

    		push(); //start of a rotation
    		noStroke(); 
    		fill(255, 200, 150, 150); //orange hue
    		rotate(radians(32)); //rotate the shape by 32 degrees
    		ellipse(row * 20 + 12, col * 40 - 260, 7, 3); //diagonal rows of ellipses more in the horizontal direction that are 20 units apart
    		rotate(radians(70)); //rotate shape by 70 degrees so that it is in a more upward direction
    		ellipse(row * 20 - 80, col * 40 - 800, 6, 2); //shifting the ellipse lines up and over to the right more
    		pop(); //confining the rotation
    	}
    }

    for(var petalx = 0; petalx < 4; petalx++) { //creating flowers with 4 columns
    	for(var petaly = 0; petaly < 3; petaly++) { //flowers in 3 rows
    		noFill();
    		stroke(180, 230, 100); //green flower stems
    		strokeWeight(3); //stroke weight of 3
    		beginShape(); 
    		curveVertex(petalx * 120 + 75, petaly * 120 + 50); //flower stem starting at center point of white ellipse (see below)
    		curveVertex(petalx * 120 + 75, petaly * 120 + 50);
    		curveVertex(petalx * 120 + 65, petaly * 120 + 70); //midpoints of stem where curve shape happens
    		curveVertex(petalx * 120 + 65, petaly * 120 + 90); //other mid point
    		curveVertex(petalx * 120 + 70, petaly * 120 + 110); //finishing point below main shape of flower
    		curveVertex(petalx * 120 + 70, petaly * 120 + 110);
    		endShape();

    		noStroke();

    		fill(255, 255, 250); //main off-white flower center
    		ellipse(petalx * 120 + 75, petaly * 120 + 50, 10, 10); //centerpoint

    		fill(200, 100, 255, 130); //indigo color of flower with 130 transparency to fit in better with opposing color of yellow
    		ellipse(petalx * 120 + 65, petaly * 120 + 45, 20, 5); //three horizontal ellipse petals 
    		ellipse(petalx * 120 + 60, petaly * 120 + 50, 20, 5);
    		ellipse(petalx * 120 + 65, petaly * 120 + 55, 20, 5);

    		ellipse(petalx * 120 + 80, petaly * 120 + 40, 5, 20); // three vertical ellipse petals to show series of abstraction in flower
    		ellipse(petalx * 120 + 85, petaly * 120 + 50, 5, 20);
    		ellipse(petalx * 120 + 80, petaly * 120 + 60, 5, 20);
    	
    	}
    }

    noLoop();

}

function draw() {
}

selinal-Looking-Outwards-05

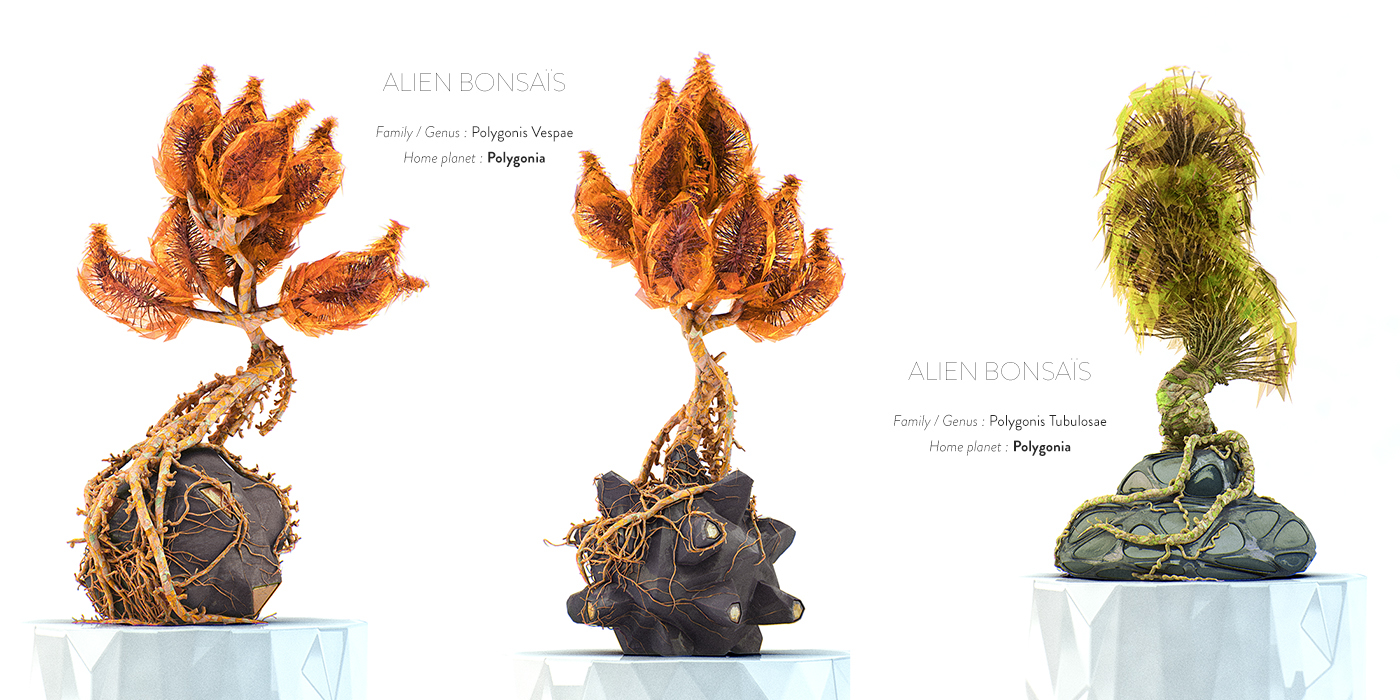
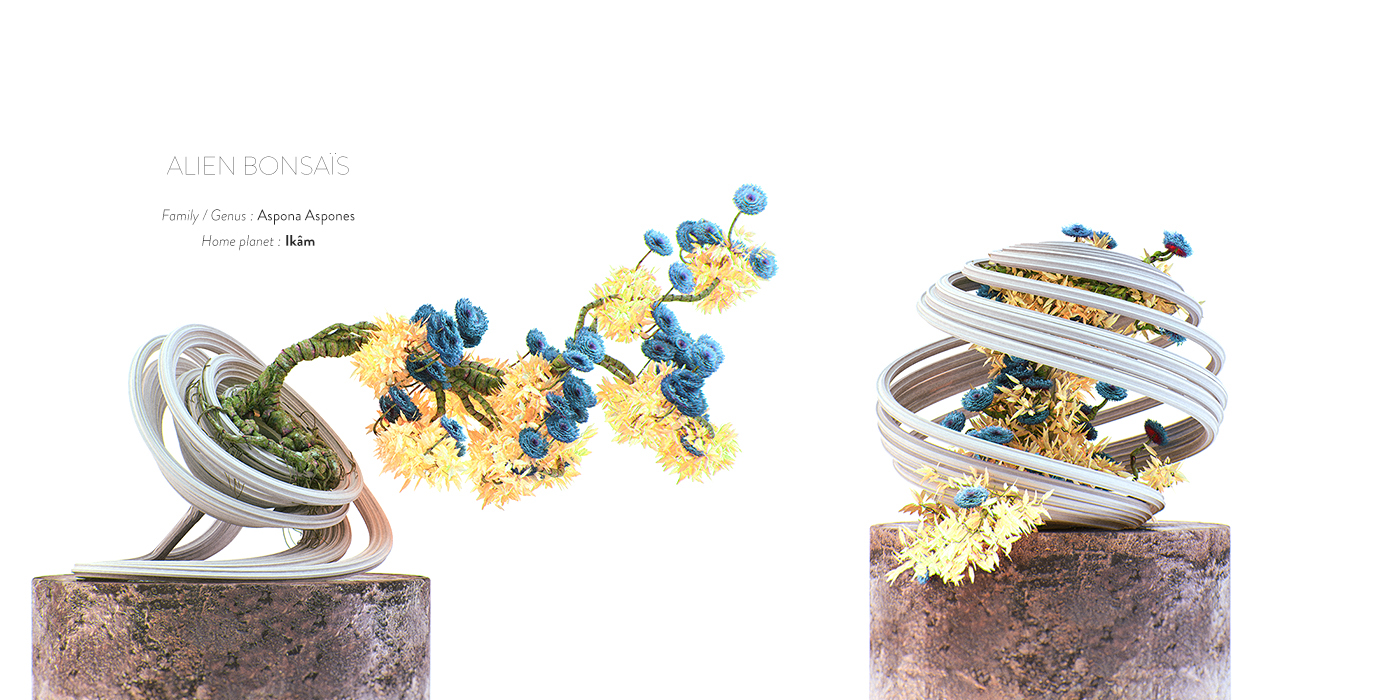
Alien Bonsais by Chaotic Atmospheres

http://chaoticatmospheres.com/alien-bonsais

What I admire about this project are the organic structures, shapes, etc. created to as an inorganic iteration of a bonsai tree. In a way, Chaotic Atmospheres is creating a sculpture on the bonsai tree digitally which would be too difficult to manifest physically on a real, living organism. Thus, that makes the shapes created in relation to the tree a true “alien” visual. What I know of the algorithms used for this project is that the artist used a 3D software called Substance Designers which he embedded onto his own digital trees to create the alien texturing of his bonsais. His artistic sensibilities were utilized in the organization of constructing the digital trees and altering the tones, color, shapes, sizing, movement, etc. of the product so that the image was cohesive and aesthetically intriguing.

Image result for alien bonsais

Image result for alien bonsais

mjeong1-05-Wallpaper-SectionA

sketch

//Min Young Jeong
//Section A 9:30am
//mjeong1@andrew.cmu.edu
//Project-05

function setup() {
    createCanvas(500, 500);
    noLoop();
    
}

function draw() {
    background(254,218,0);
    noStroke();

    for (var x = 0; x <= 500; x += 50){
    	for (var y=0;y<=500;y+=50){
    	fill(0);
    	ellipse(x,y,2,4);
    	}
    }
    //yellow background with black seed grid (spacing 50,50)

    for (var x = 0; x < 500; x += 200){
        for (var y = 0; y< 500; y+= 100){
            push();
            translate(x,y);
            drawTile();
            pop();

        }
    }

    //half watermellon concave spacing 200
    
    for (var x = 100; x < 500; x += 200){
        for (var y = 0; y< 500; y+= 100){
            push();
            translate(x,y);
            drawTile2();
            pop();

        }
    }
    //eaten half watermellon convex spacing 200
}

function drawTile(){
	fill(2,130,115)
	arc(50,50,70,70,0,PI,CHORD);
	fill(255);
	arc(50,50,60,60,0,PI,CHORD);
	fill(255,64,108);
	arc(50,50,50,50,0,PI,CHORD);
	fill(0);
	ellipse(60,60,3,6);
	ellipse(40,65,3,6);
	ellipse(45,55,3,6);    
}
//half watermellon tile

function drawTile2(){
	fill(2,130,115)
	arc(50,70,70,70,PI,0,CHORD);
	fill(255);
	arc(50,70,60,60,PI,0,CHORD);
	fill(255,64,108);
	arc(50,70,50,50,PI,0,CHORD);
	fill(0);
	ellipse(60,65,3,6);
	ellipse(40,55,3,6);
	ellipse(45,65,3,6);  
	fill(254,218,0);
	ellipse(65,70,20,20);
	ellipse(55,70,15,15);
}
//helf watermeelon with bite tile


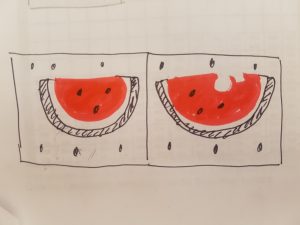
For this project, I started with two different types of tile, one with half watermelon and the other with eaten watermelon.  And I created pattern with two tiles with yellow background with seed pattern.

mjeong1-Looking Outwards-05-SectionA

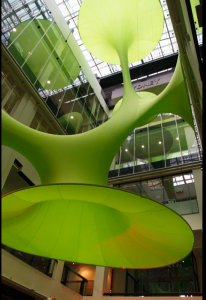
Green Void / LAVA

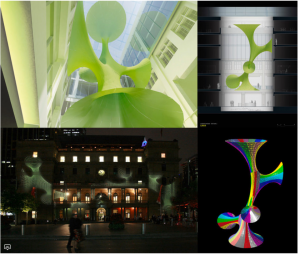
“Green Void” by Architect LAVA in Sydney,Austrailia
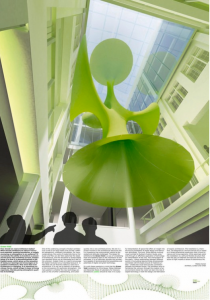
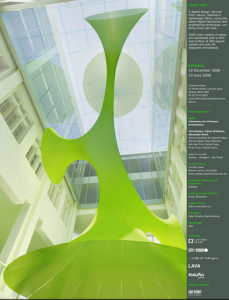
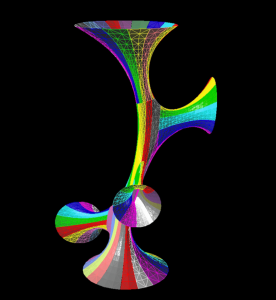
The installation Green Void is a digitally patterned product which is located in the main interior atrium of the Customs House. The design process started with 3D computer modelling, and fabricated under a process of computer controlled(CNC) material cutting. The computer model is exclusively based on the simulation of  complex evolving system using certain geometric algorithm, which feeds directly into a production through manufacturing. The design shows a new way of digital workflow by enabling shape of the product to be generated through computational workflow in a extremely shot time.

What I admire about this project is how rendered 3D graphic image looks similar to final installation and how the 3d image can inform people about the final work even before the fabrication. It might be impossible to have this indirect experience of the space without the computer generated image. Especially in the field of architecture, design through computer graphic can be a core of design process since it is much easier to explain your project through visual representation and also you can have feedback in a relatively short time.


link to original