![[OLD FALL 2017] 15-104 • Introduction to Computing for Creative Practice](../../../../wp-content/uploads/2020/08/stop-banner.png)
var img;
var x;
var y;
var blue_range;
var red_range;
var yellow_range;

function preload() {
    img = loadImage("https://i.imgur.com/boCvJXd.jpg");
}

function setup() {
    createCanvas(360, 480);
    img.loadPixels();
    noFill();
    yellow_range = 7; //initial value;
}

function draw() {
    background(255);
    blue_range = map(mouseX, 0, width, 0, 8);
    red_range = map(mouseY, 0, height, 0, 10);

    for (y = 0; y < height; y+=6) {
        for (x = 0; x < width; x+=6) {
            var i = y * width + x;
            //color
            var redness = (255 - img.pixels[i*4]) / 255;
            var yellowness = (255 - img.pixels[(i+1)*4]) / 255;// I just decide to represent green value among RGB as yellow color
            var blueness = (255 - img.pixels[(i+2)*4]) / 255;

            //blue diagonal line
            stroke(20, 20, 255);
            strokeWeight(blueness * blue_range);
            line(x - 3, y - 3, x + 3, y + 3);
            //red diagonal line
            stroke(255, 20, 20);
            strokeWeight(redness * red_range);
            line(x + 3, y - 3, x - 3, y + 3);
            //yellow ellipse
            noStroke();
            fill(245, 220, 0);
            ellipse(x, y, yellowness * yellow_range, yellowness * yellow_range);

        }
    }
}

function mousePressed() {
    yellow_range = random(1, 12); //yellow range changes when you press mouse
}
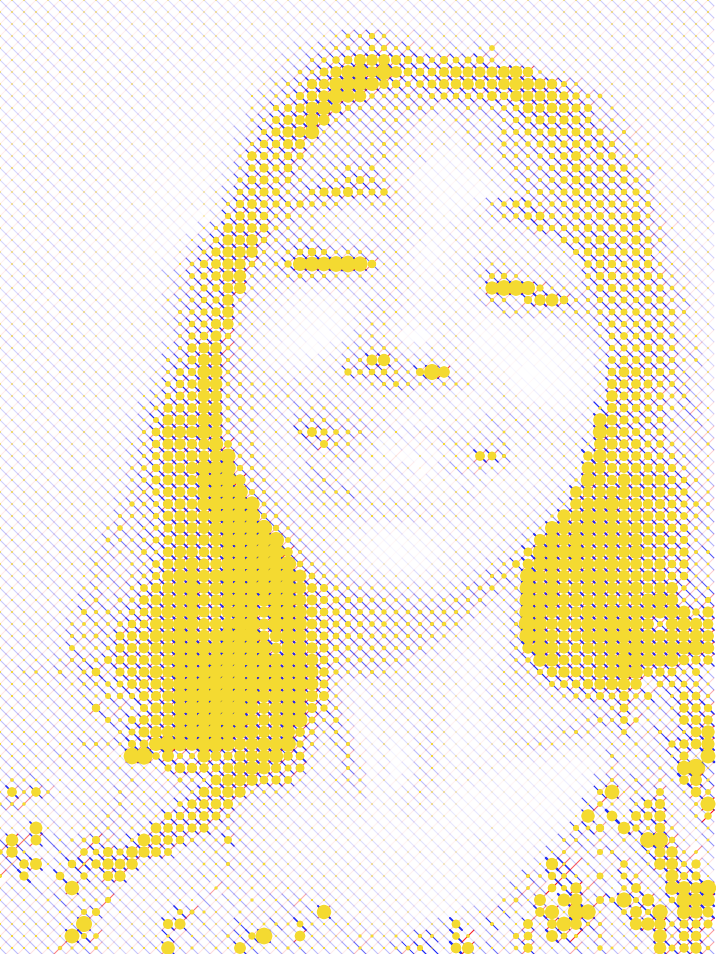
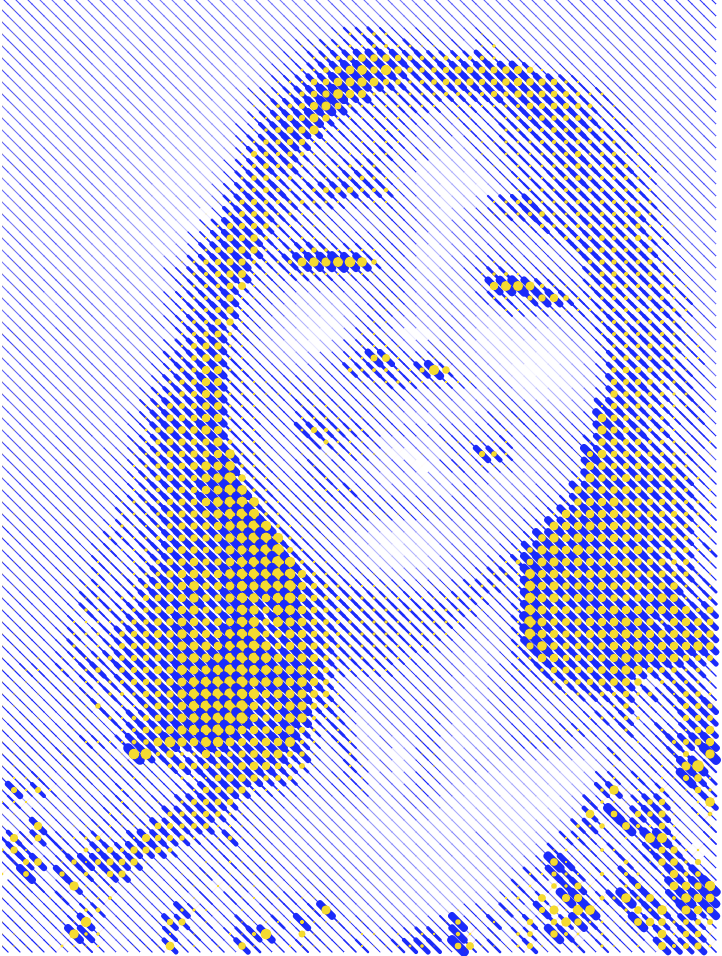
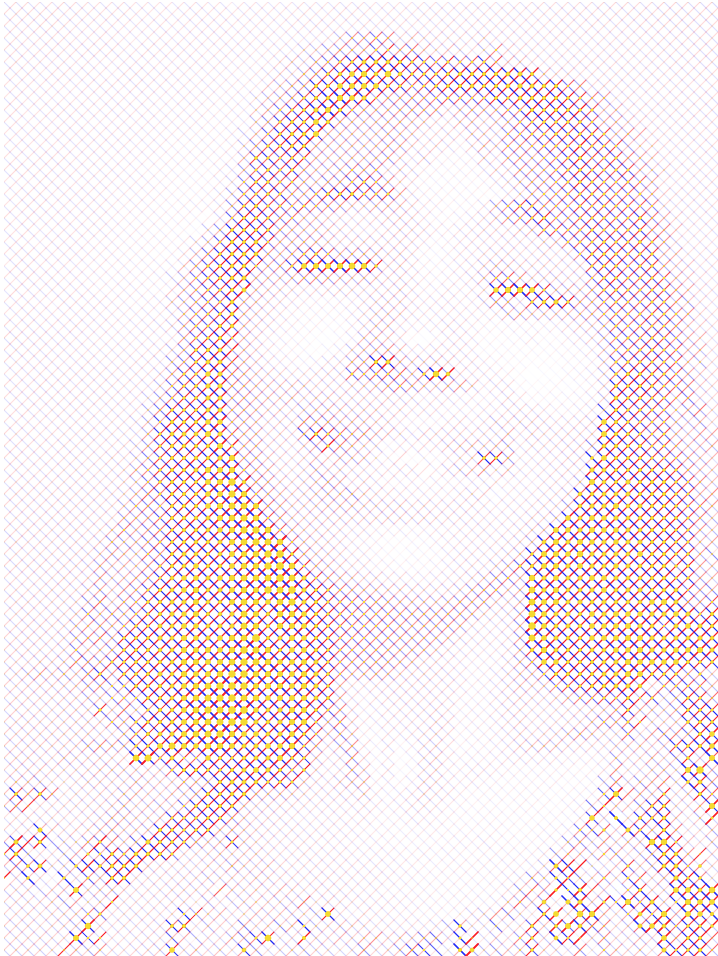
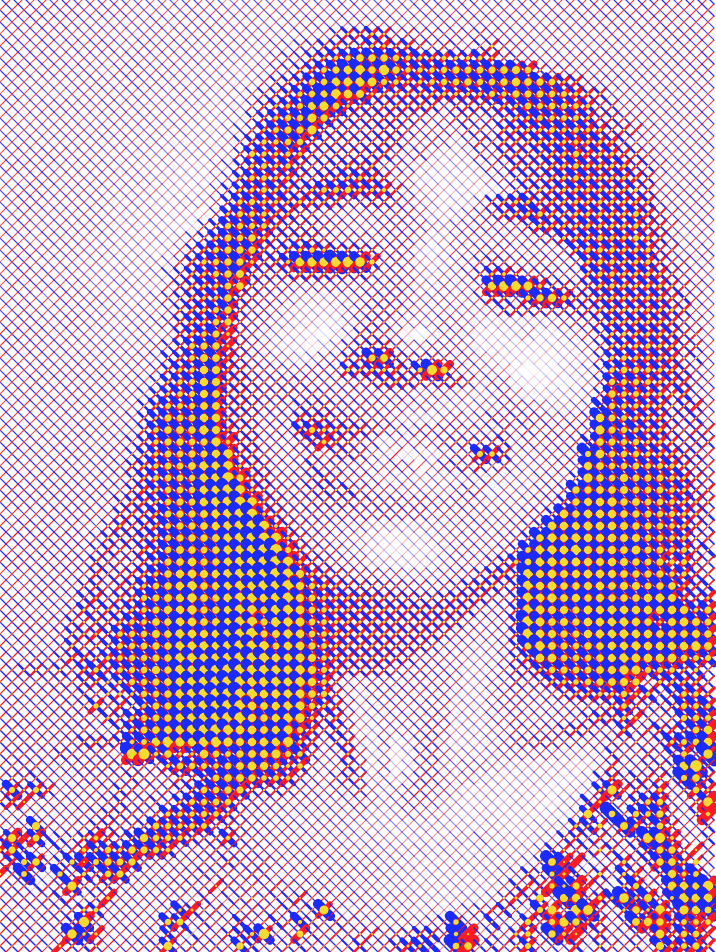
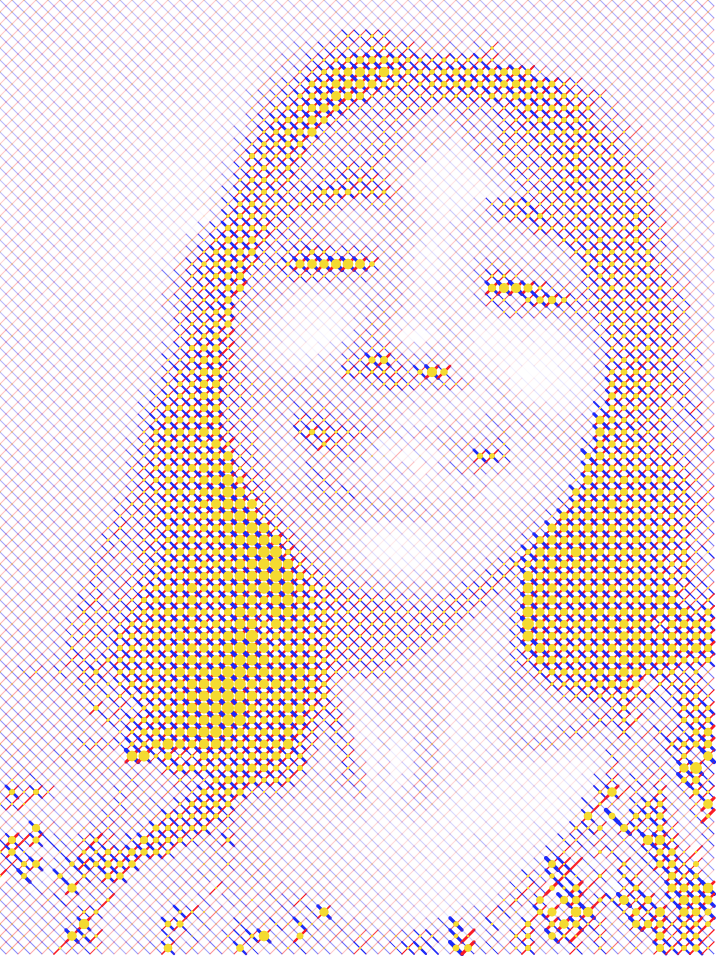
In this project, I learned that there are many ways to depict pixels. I represent this portrait with dividing each R, G, B value (Later, I represent green value with yellow color). Based on each R, G, B value, size and stroke weight are determined. Also, this can be played around with the mouse behaviors. There are several variations based on mouse behavior below.