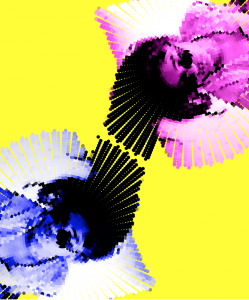
mmiller5-Looking Outwards-09

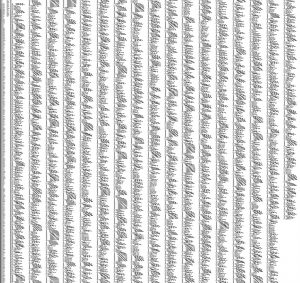
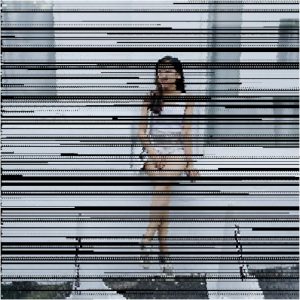
This week, I’ll be looking at the post Hamza Qureshi made on A Text of Random Meanings by architect Rami Hammour from 2015.  What I find to be more interesting about this work isn’t the process used to make the random lines, but rather the implications of using randomness to simulate something that usually is not random — writing.  I can think of two ways to view this seeming juxtaposition:  that by having a random assortment of lines look like text, it highlights that writing is not random and should follow some goal, or that something that seems random, such as the order of letters in a language one can’t read, may in fact possess a deeper meaning and purpose that we’re just not able to understand

BrandonHyun-LookingOutwards-09

For this Weeks Looking Outwards, I am going to be looking at Scott Snibbe who is an Interactive Media Artist, researcher, and an entrepreneur. He is one of the First who works with projector based interactivity wall.

According to Scott Snibbes Website project ” Cause and Effect ” (2004) records viewers’ movements in silhouette as they simultaneously displace the recordings of previous viewers. When the movies re-play on sliding tiles, only the viewers’ movements are shown, giving a sense of autonomy to actions that were actually determined through interaction with the prior recordings. “Cause and effect” is a common translation for the Buddhist term Karma, which dictates that all human experiences, however minute, are the result of their own prior actions.

Since we have worked with projection and looked at artist that uses silhouette in Children’s museum, I think it was really interesting who originally used this type of method.


hschung-Project-09

sketch

//Heidi Chung
//Section A
//hschung@andrew.cmu.edu
//Project-09

var baseImage;

function preload() {
    var myImageURL = "https://i.imgur.com/FLTyc1P.jpg?1"; // a picture of myself
    baseImage = loadImage(myImageURL); //loading the image
}

function setup() {
    createCanvas(480, 480);
    background(255);
    baseImage.loadPixels(); //loading the image's pixels
    frameRate(20);
    noStroke();
}

function draw() {
    image(baseImage, 0, height, baseImage.width/2, baseImage/height/2);
    var px = random(width); //random assembly of circles being drawn in regards to x
    var py = random(height);//random assembly of circles being drawn in regards to y
    var ix = constrain(floor(px), 0, width-1);
    var iy = constrain(floor(py), 0, height-1);
    var theColorAtLocationXY = baseImage.get(ix, iy); //extracting the colors of the image

    noStroke();
    fill(theColorAtLocationXY); //colors of circles match the image's colors at the appropriate positions
    var circleWidth = random(5, 30); //variable set so the circles have the same random width and height
    ellipse(px, py, circleWidth, circleWidth); //instead of making ellipses

    var theColorAtTheMouse = baseImage.get(mouseX, mouseY);
    fill(theColorAtTheMouse); //drawing with the mouse using the image's colors at the pixels

    var whatsUpTextX = pmouseX-25; //the position of the text relative to the mouse
    var whatsUpTextY = pmouseY-20;
    textSize(15); //the text says "what's up" in japanese
    text("どうしたの?", whatsUpTextX, whatsUpTextY); //what's up is dragged along by the mouse
}

function mousePressed() {
  var theColorAtTheMouse = baseImage.get(mouseX, mouseY); //extracting the colors of the image again
  strokeWeight(3); //white stroke around the text to see it better
  stroke(255); //the text says "are you okay?" in korean
  textSize(30); //when you click, a big "are you okay?" is drawn
  text("괜찮아?", pmouseX - 45, pmouseY);
}

I really enjoy post-impressionism, especially Van Gogh’s art. I love that he painted scenery and people with purposeful strokes and artistic, imprecise interpretation, especially in a time where people did not appreciate his art because it wasn’t “accurate” or exact to real life images. I love the smudges and smears he made in his works. So I thought it’d be fun to make a self-portrait that feels impressionistic. When you drag the mouse across the canvas, it “paints” words that say “what’s wrong” or “what’s up” in Japanese. When you click the mouse, it “paints” a word that says “are you okay” in Korean. I can read/speak both Japanese and Korean, and I thought it’d be interesting to have both languages in my project- to say that even if you can’t understand something, you can still visually appreciate it, like you can with Van Gogh’s works.

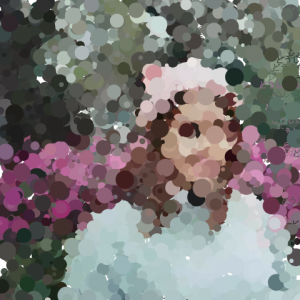
After many circles have been drawn
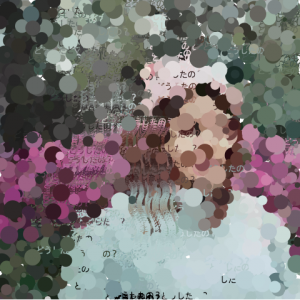
You can drag the mouse to “draw” on the canvas with the words that ask “what’s up?” in Japanese
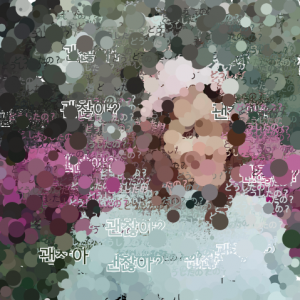
When you click, the word that appears says “are you okay?” in Korean

dnoh-sectionD-lookingoutwards-09

Student: Ryu Kondrup
Looking Outwards 2

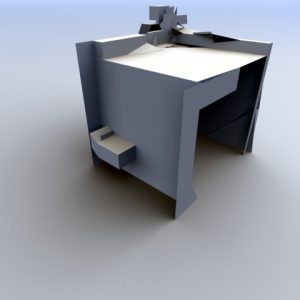
As a student in architecture, I do find this project (Alex Dragulescu) very intriguing. It fascinates me how spatial qualities can be so easily generated through computation. However, although the image on Ryu’s post is very picturesque and beautiful, it seems, in my opinion, that half of the mass is not spatial. Nonetheless, I find the project very interesting.

It is very interesting how so many different shapes could be created through, quoted from Ryu, “bothersome digital flotsam”, also known as spam mail.

ssharada-looking-outwards-09

^DIFFUSION from Kouhei Nakama

I took Kornrat Euchukanonchai’s looking outwards 05 post which was a week where we were tasked with looking at 3D computer graphics and their capabilities. Kouhei Nakama is a visual art director who also works for a company that does large scale commercial work.

Here he uses a variety of generative and particle based animation to bring 3D figures to life in this motion graphics short piece titled diffusion. Nakama work destroys the boundaries between the human form and geometric using 3D graphics.

In this particular piece, the body is blended with different textures that range from organic to more alien and computer like. The human’s flesh and body is stretched and elongated to its maximum capacity. It changes colours and patterns while questions about evolution are revoked.

I really liked looking at this video because it was a complete deviation from what I had looked at in my looking outwards 5 so it was nice to see the other extent of what is possible with 3D graphics.

dnoh-sectionD-project8-portrait

(edited to change sketch size)

click to change direction pixels come from.

sketch

//Daniel Noh
//Section D
//dnoh@andrew.cmu.edu
//Project-09

//global variables
var squares = [];
var direction;
var side;


function preload(){
    var picurl = "https://i.imgur.com/ABZ50uF.jpg";
    pic = loadImage(picurl);
}

function setup(){
    createCanvas(400,400);
    pic.loadPixels();
    background(0);
    direction = 30; //setting up initial values of the variables to start
    side = 0;
}


function drawsquares() {
    var ix = constrain(floor(this.x), 0, width-1);
    var iy = constrain(floor(this.y), 0, height-1);
    var colourXY = pic.get(this.x, this.y);//gets fill colour from image

    fill(colourXY);//fills with pixel colour
    noStroke();
    rect(this.x, this.y, this.size, this.size);
}


function movesquares() {//function to make the squares roll
    this.x += this.dx*0.1;
}

function portrait(px, py, pdx) {
    s = {x: px,
         y: py,
         dx: pdx,
         squares: drawsquares,
         speed: movesquares,
         size : random(1,3)//randomizes the size of each individual square
        }
    return s;
}
function draw(){
    noStroke();
    newlines = []; //empty array to hold lines
    for (var i=0; i<squares.length; i++){
        var s = squares[i];
        s.speed();//returns function speed
        s.squares();//returns function squares
        newlines.push(s);
    }
    squares = newlines;
}

function mousePressed(){//changes the side and the direction of the lines each time mouse is pressed
    direction = -1*direction;
    if (side == 0){
        side = 400;
    }
    else if (side == 400){
        side = 0;
    }

}
function mouseMoved() {
    var newsquare = portrait(side, mouseY, random(direction));
    squares.push(newsquare);
}

The initial idea for this sketch was to create a portrait that slowly appeared from the sides. However, to integrate the mouse, I made the pixels appear where mouseY is and made clicking change whether the pixels appeared from the right or left.

This is not the complete portrait, however this shows the code’s aesthetics better.

jamieh-project-09-portrait

sketch

/*
Jamie Ho
jamieh@andrew.cmu.edu
10:30
Project 09
*/

var underlyingImage;
var press = 1;			//to store value based on amt of times 
						//left and right arrow keys are pressed

function preload() {
    var myImageURL = "https://i.imgur.com/bJEDJSJ.jpg";
    underlyingImage = loadImage(myImageURL);
}

function setup() {
    createCanvas(480, 320);
    background(255);
    underlyingImage.loadPixels();
    frameRate(5000);
}

function draw() {
    var px = random(width);
    var py = random(height);
    var ix = constrain(floor(px), 0, width-1);
    var iy = constrain(floor(py), 0, height-1);
    var theColorAtLocationXY = underlyingImage.get(ix, iy);

    var lengthX = map(mouseX, 0, width, 5, 20);		//2nd X coordinate based on mouseX
    var lengthY = map(mouseY, 0, height, 5, 20);	//2nd y coordiante based on mouseY
    
    stroke(theColorAtLocationXY);
    strokeWeight(press);							//based on key presses
    line(px, py, px+lengthX, py+lengthY);			//draw line based on mousex mousey
}

function keyPressed(){
	if(keyCode == LEFT_ARROW & press > 1.0){		//if left arrow pressed
		press -= 0.5;								//strokeWeight decreases by 0.5
	} else if(keyCode == RIGHT_ARROW & press < 5.0) {		//if right arrow pressed
		press += 0.5;										//strokeWeight increases by 0.5
	}
	
}

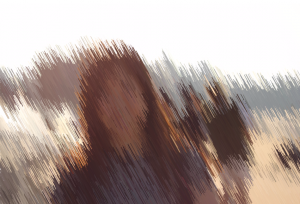
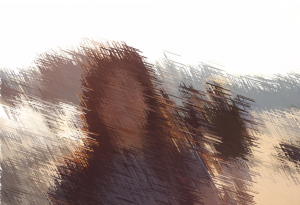
The code allows for interactive changes to the product by using mouse positions to change the direction and length of the lines, whereas using left and right arrow keys on the keyboard adjusts the thickness of the lines. Thicker lines give less details but the product will be finished faster. I experimented with directions of the lines as well, which I think produces a much more dynamic and sketchy type of image (last image).

Thick strokeWeight with one angle


Thick strokeWeight with different angles
Thin strokeWeight with one angle
Thin strokeWeight with different angles

keuchuka-project-09

project9

//Fon Euchukanonchai
//15-104 Section A
//keuchuka@andrew.cmu.edu
//Project-09

//preloading two hugh faces into varialbes
function preload() {
    var hughFronturl = "https://i.imgur.com/fKUjDi7.jpg";
    var hughSideurl = "https://i.imgur.com/vNGpU0e.jpg";    
    hughFrontImage = loadImage(hughFronturl);
    hughSideImage = loadImage(hughSideurl);
    }

//load pixels from the two pictures of hugh's faces
function setup() {
    createCanvas(200, 267);
    hughFrontImage.loadPixels();
    hughSideImage.loadPixels();
    
    }

function draw() {

    frameRate(300);

    //setting background color
    background(255,0,255);
    noStroke();

    //drawing the two green rectangles
    fill(0, 255,0)
    rect(0, 0, 130, 70)
    rect(188, width/2, 12, 167)


    //creating a grid for image sampling
    for (x = 0; x < width/6; x++) {
        for(y = 0; y < height/6; y++){

            //the sample grid interacts with mouse horizontal movement
            var pixelX = x * 6 + mouseX - width/2;
            var pixelY = y * 6

            //getting pixels of the images according to sample grid, and also their brightness
            var theColorAtLocationXY = hughFrontImage.get(pixelX, pixelY);
            var pixelBrightness = brightness(theColorAtLocationXY);

            var theColorAtLocationXY2 = hughSideImage.get(pixelX, pixelY);
            var pixelBrightness2 = brightness(theColorAtLocationXY2);


            //draws the front face if mouse is on left-ish side of the frame
            if (mouseX < (5/8)*width){

                //maps pixel brightness for the width of rectangles created
                var rWidth = map(-pixelBrightness, -255, 0, -4, 7)
                var rHeight = 10;
                //maps pixel brightness to the darkness of the rectangles
                G = map(pixelBrightness, 0, 200, 255, 0)
                fill(255, G, 255)
                
                rect (pixelX,pixelY, rWidth, rHeight)
                
                }

            //draws the "turn"
            //draws the side face if mouse is on right-ish side of the frame
            if (mouseX > (5/8)*width){

                var rWidth = map(-pixelBrightness2, -255, 0, -4, 7)
                var rHeight = 10;
                G = map(pixelBrightness2, 0, 200, 255, 0)
                fill(255, G, 255)

                rect (pixelX,pixelY, rWidth, rHeight)
                
                }

        }
    }

}

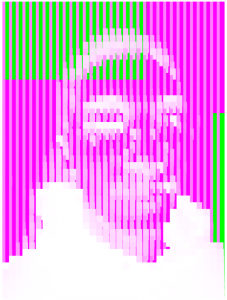
I created a portrait of Hugh and wanted to emphasize horizontality, especially with the turning of the face when you move the mouse. The code was really slow so I tried making the images even smaller, but it is still slow. I don’t know what to do.

front face

turned face

selinal-Project-09

sketch

var underlyingImage; //global variable for image that is not shown

function preload() {
    var myImageURL = "https://i.imgur.com/wSnQo5j.jpg"; //image of dad
    underlyingImage = loadImage(myImageURL);
}

function setup() {
    createCanvas(700, 600); 
    background(0); //black background
    underlyingImage.loadPixels(); //load pixels
    frameRate(10); //slow placement of objects when pixels called
}

function draw() {
    var px = random(width); //random x and y variables to place something at 
    var py = random(height);
    var ix = constrain(floor(px), 0, width-1); //constrain the x and y variables for color sake
    var iy = constrain(floor(py), 0, height-1);
    var theColorAtLocationXY = underlyingImage.get(ix, iy); //getting color of each pixel
	var r = theColorAtLocationXY[0]; //r value of color
    var g = theColorAtLocationXY[1]; // g value of pixel color
    var b = theColorAtLocationXY[2]; //b value of color
    var r2 = 255- r; //opposite r value
    var g2 = 255-r; //opposite g value
    var b2 = 255 - r; //opposite b value
    noStroke(); 

    if(g < 150 & b < 150) { //if g and b values are lower, make a clear ellipse of that pixel color and a smaller circle inside that is slightly redder
    	fill(r, g, b, 170);
    	ellipse(px, py, 20, 20);
    	fill(r + 10, g - 10, b - 10);
    	ellipse(px, py, 5, 5);
    }

    if(b > 230) { //if the b value is large, make an ellipse that is bluer than the pixel and make an arrangement of other blue circles surrounding it
    	fill(r- 10, g - 10, b + 10, 150);
    	ellipse(px, py, 5, 5);
    	var numObjects = 5;
    	var angleObject = 360/numObjects;																																																							
    	for(var i = 0; i < numObjects; i++) {
    		var posX = px + random(2, 7) *cos(radians(angleObject*i) );
			var posY = py + 5 *sin(radians(angleObject*i) );
			ellipse(posX, posY, 10, 10);
    	}
    } 
    if(g > 150) { //if the green value is low, make a circle slightly greener that is random in radius
    	fill(r, g + 10, b, 100);
    	var pointSize = random(10, 60);
    	ellipse(px, py, pointSize, pointSize);
    }

    if(r > 200) { //if the r value is large, make an arrangement of circles with strokes that is slightly redder
    	var numObjects = 8;
    	var angleObject = 360/numObjects;
    	for(var i = 0; i < numObjects; i++) {
    		var posX = px + random(-5, 5) *cos(radians(angleObject*i) );
			var posY = py + 5 *sin(radians(angleObject*i) );
			noFill();
			stroke(r +20, g - 10, b - 10);
			strokeWeight(random(.25, 5));
			ellipse(posX, posY, 10, 10);
    	}
    }
    if(r < 50 & g < 50 && b < 50) { //if all r g b values are on the lower end, make a row of five circles of that color which is moving downwards to the right
    	for(var i = 0; i < 5; i++) {
    		fill(theColorAtLocationXY, 300 - i*40);
    		ellipse((px - 15) +5* i, (py-15)+ 5* i, 2, 2);
    	}
    }
    else {
    	noFill(); //if the pixel does not meet any of the conditional statements, make a blank circle with the strokeWeight random and the stroke of the color at the pixel
    	stroke(theColorAtLocationXY);
    	strokeWeight(random(1, 8));
    	ellipse(px,py, 10, 10);
    }

    var sx = mouseX; //when the mouse runs over the canvas
    var sy = mouseY;
    var mx = constrain(floor(sx), 0, width-1); //constrain the mouse value for color
    var my = constrain(floor(sy), 0, height-1);
    var theColorAtLocationMxMy = underlyingImage.get(mx, my); //color at point of mouse

    var drawSize = dist(pmouseX, pmouseY, mouseX, mouseY); //distance between mouse coordinates at previous to current point
    fill(r2, g2, b2, 200); //opposite color
    ellipse(sx, sy, drawSize/10, drawSize/10); //draw a circle with mouse stroke depending on the mouse speed
	
	if(mouseIsPressed) { //if the mouse is pressed, make a circle the color of that pixel
		fill(theColorAtLocationMxMy);
		ellipse(mouseX, mouseY, 7, 7);
	}
}


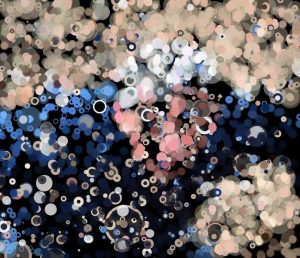
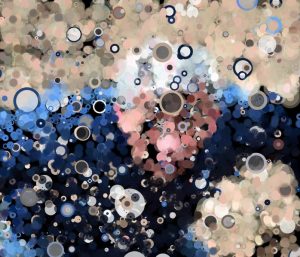
I liked playing with opacity in the shapes we make in class. I think the randomization of pixels along with the overlapping of the colors is nice.
ssharada-project-09-computational-portrait

project09.js

//shariwa sharada
//ssharada@andrew.cmu.edu
//section a
//project 09

var pinkShari;
var blueShari;
var sAngle = 1;
var sRadius = 5;
var sFrameCount = 0;
var pEllipseW = 5;
var bEllipseW = 5;


var pinkShariArray = []

function preload(){
    //initialising my portraits 
    var pinkShariUrl = "https://i.imgur.com/Kglw2lq.png"
    var blueShariUrl = "https://i.imgur.com/4ODxlV0.png" 
 
    //loading my portraits 
    pinkShari = loadImage(pinkShariUrl);
    blueShari = loadImage(blueShariUrl);


}

function setup(){
    createCanvas(400,480); 
    background(255,255,0);
    noStroke(); //the ellipses should have no border 

    //initiallising the pixels in each of my portraits 
    pinkShari.loadPixels(); 
    blueShari.loadPixels();

}

//creating the spirals for the pink portrait 
function pinkDrawSpiral(){
    push();
    //the image begins at a part of the canvas determined by the trasnslate
    translate(300, 100);
    //creating variables to relate the spirals to the pink image 
    var pinkShariCenterX = 0;
    var pinkShariCenterY = 0;
    var pX = cos(radians(sAngle)) * sRadius; 
    var pY = sin(radians(sAngle)) * sRadius;

    //getting the colour of each of the pixels 
    var pinkColourAtpXpY = pinkShari.get(width/2 - pX, height/2 + pY);
    fill(pinkColourAtpXpY);

    //alloting the pixels so that each one matches up to the above obtained colour
    ellipseMode(CENTER);
    ellipse(pinkShariCenterX - pX, pinkShariCenterY + pY, pEllipseW, pEllipseW);

    //setting up the sizing of the pixels 
    sAngle = sAngle +3;
    sRadius = sRadius + 0.035;
    sFrameCount = sFrameCount + 1;
    pEllipseW = pEllipseW + 0.0002;


    //my image has borders but since the canvas borders aren't the image's
    //border, i had to accoung for the spiralling to only go to a certain
    //limit otherwise it would look very tacky

    //if there are more than 4750 pixels made, the spiralling will restart
    if (sFrameCount > 4750){
        sAngle = 5;
        sFrameCount = 0;
        sRadius = 1;
        pEllipseW = 5;
    }
    pop();

    print(frameCount)
}

//creating the spirals for the blue portrait 
function blueDrawSpiral(){
    push();
    //the image begins at a part of the canvas determined by the translate
    translate(100, 380);
    //creating variables to relate the spirals to the blue image 
    var blueShariCenterX = 0;
    var blueShariCenterY = 0;
    var bX = cos(radians(sAngle)) * sRadius;
    var bY = sin(radians(sAngle)) * sRadius;

    //getting the colour of each of the pixels 
    var blueColourAtpXpY = blueShari.get(width/2 - bX, height/2 + bY);
    fill(blueColourAtpXpY);

    //alloting the pixels so that each one matches up to the above obtained colour
    ellipseMode(CENTER);
    ellipse(blueShariCenterX + bX, blueShariCenterY - bY, bEllipseW, bEllipseW);

    //setting up the sizing of the pixels 
    sAngle = sAngle +3;
    sRadius = sRadius + 0.035;
    sFrameCount = sFrameCount + 1;
    bEllipseW = bEllipseW + 0.0002;

    //my image has borders but since the canvas borders aren't the image's
    //border, i had to accoung for the spiralling to only go to a certain
    //limit otherwise it would look very tacky

    //if there are more than 4750 pixels made, the spiralling will restart
    if (sFrameCount > 4750){
        sAngle = 5;
        sFrameCount = 0;
        sRadius = 1;
        bEllipseW = 5;
    }
    pop();

    print(frameCount)
}


//Creating the spirals using the ellipses of colour from the images 
function draw(){

    pinkDrawSpiral();

    blueDrawSpiral();

}


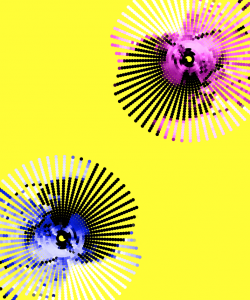
For this project I wanted to use a photo of me in two different colour filters. To do this I edited the same photo of me in photoshop in a magenta filter and in a blue filter. I then wanted to create this gradual emergence of me from the centre of the image, and then the two images would almost blend into each other.

For each of my images I had the issue of where to place it on the canvas because I had to take into account that each image was a PNG and it had no background but the code would still read the entire image and then draw the ellipses which is why I chose to mirror and translate the images.

^initial run of the spiral

^possible final outcome