sntong-Project-09-Portrait

sketch

// Scarlet Tong
// sntong@andrew.cmu.edu
// Section A
// Project 09 - Computational Portrait (Custom Pixel)

// variable to store the image
var pic;

function preload(){
  // load image into variable
  pic = loadImage("https://i.imgur.com/fLLh0am.jpg")
}

function setup(){
  createCanvas (280,480);
  imageMode(CENTER);
  background(255);
}

function draw(){
  // extract pixes from image
  pic.loadPixels();
  // select random x and y values to generate the "cross"
  var x = floor(random(pic.width));
  var y = floor(random(pic.height));
  // extract color from that pixel
  var pixCol = pic.get(x, y);
  //set stroke color to color of the pixel
  stroke(pixCol);
  // distance to allow to draw ther lines to form a cross
  var dis = random(10);
  // draw crosses
  line(x,y,x+dis,y+dis);
  line(x,y+dis,x+dis,y);
  // create small cicles that are located at the center of the crosses
  fill(pixCol);
  ellipse(x+(dis/2)+0.5, y+(dis/2)+0.5,dis/3,dis/3);
}

I decided to make a pixel that is a cross with a dot in the middle, which I will use to trace a self portrait of myself. I used random to select where every new pixel is drawn to create the image.

Portrait generated from code

ablackbu-Project-09-Computational Portrait

Press mouse!!!

sketch

var micah;
var diam = 6;

function preload() {
    //load image
    var image = "https://i.imgur.com/XqeXMOd.png";
    micah = loadImage(image);
}

function setup() {
    createCanvas(300, 300);
    background(0);
    textSize(8);
    textAlign(CENTER);
}

function draw() {
    for(var x = 0; x < width; x+=6){
        for(var y = 0; y < height; y+=6){
            //get pixle color
            var pix = micah.get(x,y);
            strokeWeight(0);
            fill(pix);
            //draw dollar signs collored to var micah
            text("$",x,y);
        }   
    }
}

function mousePressed() {
        //if mouse is pressed, change text size and flash dollar signs
        fill(255);
        textSize(100);
        for(i = 0; i < 5; i++){
            for(j = 0; j < 5; j++){
                text("$",i*80,j*80);  
            }
        }
}

For this project I chose my little brother as the subject. Our family always makes jokes about how much money he spends on clothes so I wanted to create him out of dollar signs. When a key is pressed, a frame flashes and the signs grow so make a more interesting portrait. I decided to steer away from all the examples where dots filled in the image and do something a little different more artistic, and a little more interesting. I feel like I am finally getting a hang of image preloading and the get() function. Hope you enjoy.

aboyle-Project 09-Portrait

aboyle portrait

var underlyingImage;

function preload() {
    var myImageURL = "https://i.imgur.com/znMO3pp.jpg";
    underlyingImage = loadImage(myImageURL);
}

function setup() {
    createCanvas(470, 410);
    background(255);
    underlyingImage.loadPixels();
//framerate is low, so random dots appear slowly
    frameRate(3);
}

function draw() {
//creates random dots
    var px = random(width);
    var py = random(height);
    var ix = constrain(floor(px), 0, width-1);
    var iy = constrain(floor(py), 0, height-1);
//makes dots match the color of the photo
    var theColorAtLocationXY = underlyingImage.get(ix, iy);
//varies size of random dots
    var ellipseSize=random(3,7)
    noStroke();
    fill(theColorAtLocationXY);
    ellipse(px, py, ellipseSize);

}


function mouseDragged() {
//if you drag mouse, you get line of randomly sized dots
    var ellipseSize=random(3,7)
    var theColorAtMouse=underlyingImage.get(mouseX,mouseY)
    fill(theColorAtMouse)
    ellipse(mouseX, mouseY, ellipseSize);
}


function mousePressed(){
//if you press mouse, you get randomly sized dot
    var ellipseSize=random(3,7)
    var theColorAtMouse=underlyingImage.get(mouseX,mouseY)
    fill(theColorAtMouse)
    ellipse(pmouseX, pmouseY, ellipseSize);
}

//My name is Anna N Boyle, so I made my picture appear faster
//if you type in the letters A N B O Y L E
//each section is the width of the canvas and 60 pixels down
//and each ellipse is 10 pixels and spaced evenly
//the color variables make the ellipses match the photo color

function keyTyped(){
    if (key==='a'){
      for(i=0; i<width; i+=10){
        for(w=0; w<60; w+=10){
        var theColorAtTheA=underlyingImage.get(i,w)
        fill(theColorAtTheA)
        ellipse(i,w,10)
    }
  }
}
    if (key==='n'){
        for(i=0; i<width; i+=10){
          for(w=60; w<120; w+=10){
            var theColorAtTheN=underlyingImage.get(i,w)
            fill(theColorAtTheN)
            ellipse(i,w,10)}
          }
          firstNCheck=1
        }
    if (key==='b'){
      for (i=0; i<width; i+=10){
        for(w=120; w<180; w+=10){
          var theColorAtTheB=underlyingImage.get(i,w)
          fill(theColorAtTheB)
          ellipse(i,w,10)}
    }
  }
    if (key==='o'){
      for (i=0; i<width; i+=10){
        for(w=180; w<240; w+=10){
          var theColorAtTheO=underlyingImage.get(i,w)
          fill(theColorAtTheO)
          ellipse(i,w,10)}
      }
}
    if (key==='y'){
      for (i=0; i<width; i+=10){
        for(w=240; w<300; w+=10){
          var theColorAtTheY=underlyingImage.get(i,w)
          fill(theColorAtTheY)
          ellipse(i,w,10)}
        }
      }
      if (key==='l'){
        for (i=0; i<width; i+=10){
          for(w=300; w<360; w+=10){
            var theColorAtTheL=underlyingImage.get(i,w)
            fill(theColorAtTheL)
            ellipse(i,w,10)}
          }
        }
        if (key==='e'){
          for (i=0; i<width; i+=10){
            for(w=360; w<height; w+=10){
              var theColorAtTheE=underlyingImage.get(i,w)
              fill(theColorAtTheE)
              ellipse(i,w,10)}
            }
          }
}

//If you press the enter key, the portrait resets to white screen
function keyPressed(){
    if (keyCode===ENTER){
      background(255);
    }
}

This was a fun project! I went ahead with the “randomly appearing dots” idea, but I made the frame rate very low so they would appear slowly–I wanted to the majority of my portrait to appear as a result of the viewer interacting with it. I made it so if you clicked the mouse a randomly sized dot appears at that point, and if you drag the mouse a line of dots appears. Since this was a portrait of me, I made it so typing my first two initials and my last name would make sections of the portrait appear. Finally, if you press Enter, the portrait resets to a white canvas and lets you start over!


The portrait when you drag and click the mouse 

The portrait when you type in ANBOYLE

The portrait when you use a mix of typing and dragging 

dayoungl Project-09

sketch

//Sharon Lee
//dayoungl@andrew.cmu.edu
//Section E
//Project-09 Portraits
var img;
var smallPoint = 3;
var largePoint = 6;

function preload() {
  img = loadImage("https://i.imgur.com/S4TSChe.jpg");
}

function setup() {
  createCanvas(640,360);
  imageMode(CENTER);
  noStroke();
  background(255);
  img.loadPixels();
}

function draw() {
  var pointilize = map(mouseX, 0, width, smallPoint, largePoint);
  var x = floor(random(img.width));
  var y = floor(random(img.height));
  var pix = img.get(x, y);
  //fill using pixel colours from the iamge
  fill(pix, 50);
  //create random size hearts
  ellipse(x, y, pointilize, pointilize);
  ellipse(x + pointilize,y, pointilize, pointilize);
  triangle(x - pointilize/2 - 1, y, x + pointilize *1.5, y, x + pointilize/2 + 1, y + pointilize);
}


daphnel-Project 09-Portrait

dance

var dancers;

function preload() {
    //loading the image;
    var image = "https://i.imgur.com/vEGDVWM.jpg?1";
    dancers = loadImage(image);
}

function setup() {
    createCanvas(480, 480);
    background(0);
    dancers.loadPixels();
    frameRate(70);
}

function draw() {
    //setting random vars to use as location of dots drawn;
    var x = random(width);
    var y = random(height);
    var col = dancers.get(x, y);

    noStroke();
    fill(col);
    var size=random(5,20);
    var diam=random(30,100);
    ellipse(x, y, size,size);//random sized balls;
    stroke(col);

}

BEFORE
Final Result

I decided to choose one of my favorite photos taken of my friend and I this past weekend at a dance competition. The theme was T-Rex arms so we both looked really awkward but had big smiles! I started off trying to make a myriad of things. I tried to use the dots as the main base and tried adding ripples to the photo to make it more interesting but while experimenting, I also ended up just making a lot of lines of different thicknesses. I wasn’t a big fan of how the lines and ripples(not seen in photo below) sometimes weren’t as accurate in getting the colors like the points did though. I ended up sticking to my points even though it was quite simple because I just loved the way it ended up depicting the image.

ifv-Project-09

sketch

//Isabelle Vincent
//ifv@andrew.cmu.edu
//Section E
//Project-09
var underlyingImage;
var dpx = 0;
var dpy = 0;

function preload() {
    var myImageURL = "https://i.imgur.com/u2jqeuv.jpg";
    underlyingImage = loadImage(myImageURL);
}

function setup() {
    createCanvas(480, 480);
    background(0);
    underlyingImage.loadPixels();
    frameRate(10);
}

function draw() {
  //expand region where drawing outwards in all directions starting frm center
  var xxc = (width/2) - dpx;
  var xyc = (width/2) + dpx;

  var yxc = (height/2) - dpy;
  var yyc = (height/2) + dpy;


    dpx += 1;
    dpy += 1;
//wait til dpx is greater than width to reset in center so program has time to draw in entire canvas
    if (dpx >= width){
      dpx = 0;
      dpy = 0;
    }
    var px = random(xxc,xyc);
    var py = random(yxc,yyc);
    var ix = constrain(floor(px), 0, width-1);
    var iy = constrain(floor(py), 0, height-1);
    var theColorAtLocationXY = underlyingImage.get(ix, iy);
//vary 'pixel' size
    var rd = random(6,14);

    noStroke();
    fill(theColorAtLocationXY);
    rect(px, py, rd, rd);
    if(mouseIsPressed){
//draw accurate pixels by moving mouse over canvas while clicking & dragging
      var theColorAtTheMouse = underlyingImage.get(mouseX, mouseY);
      fill(theColorAtTheMouse);
      rect(pmouseX, pmouseY, rd, rd);
    }

}

My portrait randomly displays pixels within a constrained region, this region expands originating from the center of the canvas and once it has reached a certain point outside of the canvas (to provide more draw-time) starts again at the center. You can also click and drag to draw pixels to speed up the image making process. Theres a slight randomized difference in pixel size, I liked the effect this had on the image, making it blocking but more precise.

rsp1-Project-09-Portrait

sketch

/*Rachel Park
rsp1@andrew.cmu.edu
Section B @ 10:30AM
Project 09: Pointilism Portrait*/

//initializing global variables
var img;
var Psmall;
var Plarge;
var x;

function setup() {
  createCanvas(480,480);
  background(255);
  img = loadImage("http://i.imgur.com/lSfjznd.jpg");//loading image uploaded onto imgur
  Psmall = 4;//ellipse size; small
  Plarge = 20;//ellipse size; large
  imageMode(CENTER);
  noStroke();
  frameRate(50);//speed at which ellipses are drawn
}

function draw() {
  var pointy = map(x, 0, width, Psmall, Plarge);//remapping different sizes of ellipses
  x = int(random(img.width));//setting random values gained from width of image as integer to use as location of ellipses drawn
  y = int(random(img.height));

  Pcolor = color(img.get(x,y));//initializing new variable where color of ellipses follows color of image being drawn
  fill(Pcolor, 255);
  ellipse(x, y, pointy, pointy);//drawing each ellipses
}

I decided to go with a selfie for this project. I chose to use a pose which engages the whole canvas and shows the features of the face. I really enjoyed the concept of this project because it is so abstract, and at the same time fun to see actual images of yourself emerge from a conglomerate of shapes.

final version of portrait

creyes1-Project-09-Portrait

creyes1 Project-09 (Portrait)

//Christopher Reyes
//Section D
//creyes1@andrew.cmu.edu
//Project-09 (Custom Pixel)

var underlyingImage;

function preload() {
    underlyingImage = loadImage('https://courses.ideate.cmu.edu/15-104/f2017/wp-content/uploads/2017/10/creyes1_15104pic.jpg');
}

function setup() {

    createCanvas(480, 480);
    background(255);

    underlyingImage.loadPixels(); //Loads pixel data
    frameRate(60);

}

function draw() {
    //Creates randomly spawning rectangles with color according to underlyingImage
    var px = random(width);
    var py = random(height);
    var ix = constrain(floor(px), 0, width-1);
    var iy = constrain(floor(py), 0, height-1);

    var theColorAtLocationXY = [red(underlyingImage.get(ix, iy)) + 20,
                                green(underlyingImage.get(ix, iy)),
                                blue(underlyingImage.get(ix, iy)),
                                70];

    var rectSize = random(10, 20);

    rectMode(CENTER);
    noStroke();
    fill(theColorAtLocationXY);
    rect(px, py, rectSize, rectSize*3);

    //Draws smaller squares for more detail...
    //At eyes
    drawDetailPixel(width/2, 50, 145, 200, 10);
    //At mouth
    drawDetailPixel(width/2 - 10, 50, 240, 300, 10);

}

//Samples underlying image data for pixel color, then draws a rectangle
//in a random position with a Gaussian distribution
function drawDetailPixel(xmin, xmax, ymin, ymax, pixelSize) {
    var dpx = randomGaussian(xmin, xmax);
    var dpy = random(ymin, ymax);
    var dix = constrain(floor(dpx), 0, width-1);
    var diy = constrain(floor(dpy), 0, height-1);
    var detailColXY = [red(underlyingImage.get(dix, diy)) + 20,
                                      green(underlyingImage.get(dix, diy)),
                                      blue(underlyingImage.get(dix, diy)),
                                      35];
    fill(detailColXY);
    rect(dpx, dpy, pixelSize, pixelSize);
}

//Draws a large transparent ellipse according to underlying image color
function mousePressed() {
    fill(red(underlyingImage.get(mouseX, mouseY)) + 20,
         green(underlyingImage.get(mouseX, mouseY)),
         blue(underlyingImage.get(mouseX, mouseY)),
         35);
    stroke(255, 255, 255, 35);
    strokeWeight(1);
    ellipse(mouseX, mouseY, random(150, 250));
}

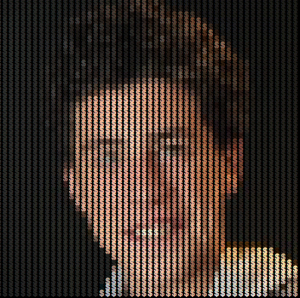
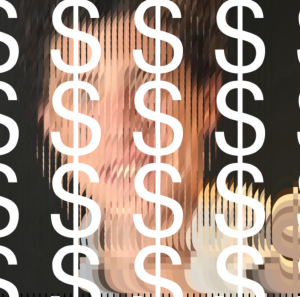
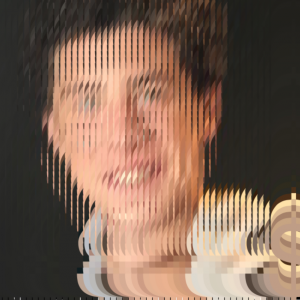
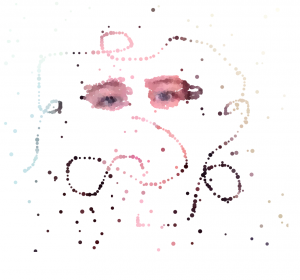
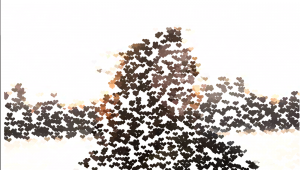
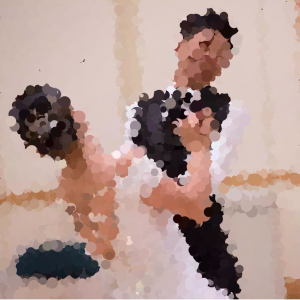
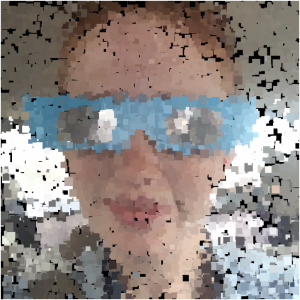
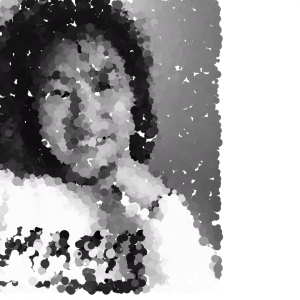
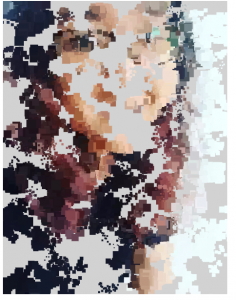
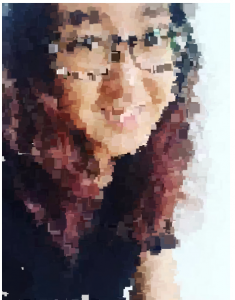
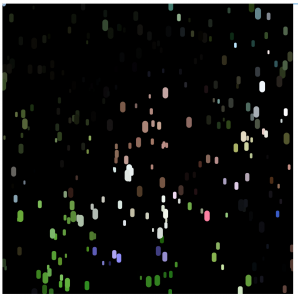
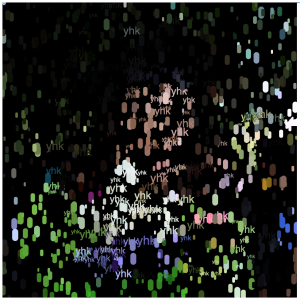
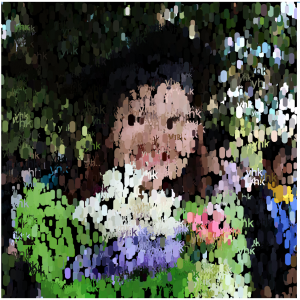
While I didn’t run into too many issues with this project in terms of implementation, I did have some issues with finding a balance between keeping it visually interesting while avoiding having too much visual noise that it becomes confusing to look at. I really liked the idea that this was a program that would continue to loop and build upon itself, and so opted for various degrees of transparency so that the image would become more clear as the program ran. I also made it a point to highlight certain areas of the image, such as the eyes and mouth, with smaller transparent squares to build up some more defined shapes so that it would be easier to pick out a face from the constantly layering rectangles. I really like the interaction between the analog brush marks in the portrait with the computational pixels in the program, where it creates something almost painterly, yet not quite glitch art, but a really interesting in-between.


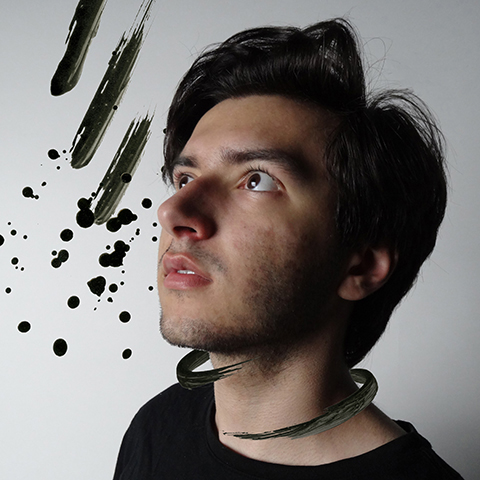
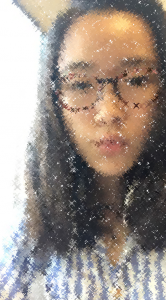
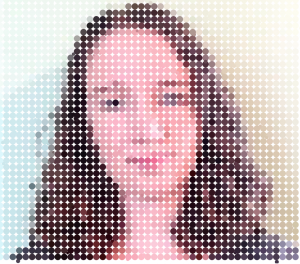
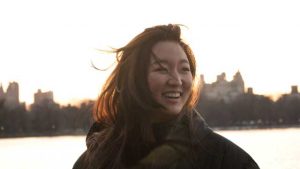
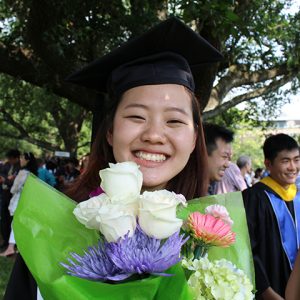
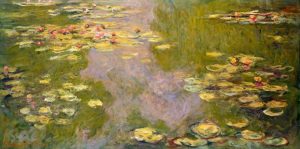
Original Self Portrait


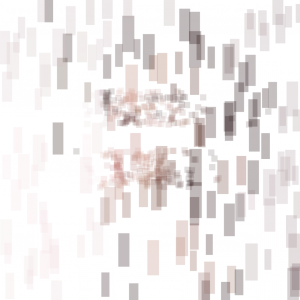
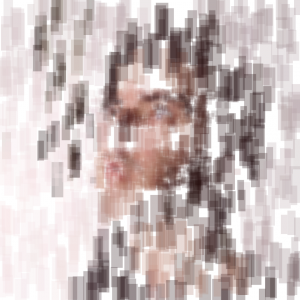
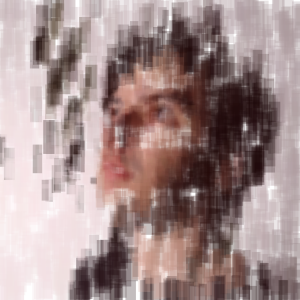
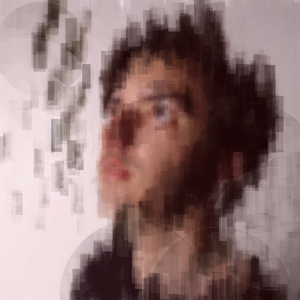
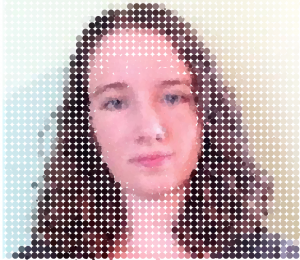
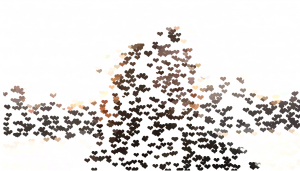
Development of the portrait as the program runs and manual mouse clicks are introduced

ashleyc1-SectionC-Project-09-Portrait

sketch

//Ashley Chan
//Section C
//ashleyc1@andrew.cmu.edu
// Project-09-Portrait

var portrait;

var particles = []; 


function preload () {
    var portraitURL = "https://i.imgur.com/ZaGPL9g.jpg?7";
    portrait = loadImage(portraitURL);

}


function setup() {
   createCanvas(230, 300);
    frameRate(10);

    //draw a cloud of particles that will draw face
    for (var i = 0; i < 200; i++) {

        //drawing a bunch of new particles and having them start at random origins
        particles[i] = new Particle(random(width), random(height));

    }

    background(210);

}

function draw() {
    //image(portrait, 0, 0);
   portrait.loadPixels();

       //draw a bunch of pixels
       for (var i = 0; i < particles.length; i++) {
            particles[i].update();
            particles[i].show();
        }
}


//define the pixel particles
function Particle(x, y) {

    //controls positions
    this.x = x;
    this.y = y;
    //controls sizes of ellipses
    this.r = random(1, 10);

    //new pixel particles drawn in random directions within 5 pixel radius
    this.update = function() {
        this.x += random(-5, 5);
        this.y += random(-5, 5);
    }

    //physical appearence of pixel particles and associated constraints
    this.show = function() {
        //setting parameters to draw using color of pixels in image
        var ix = constrain(floor(this.x), 0, width-1);
        var iy = constrain(floor(this.y), 0, height-1);
        var col = portrait.get(ix, iy);

        //getting the pixel particle to draw using color of pixels in image
        noStroke();
        fill(col[0], col[1], col[2]);
        rect(this.x, this.y, this.r, this.r);

        //sets default forces to pixel particles to mimic brush strokes 
        //rather than random pointalism
        var pxv = random(-1, 1); //velocity of x
        var pyv = random(-1, 1); //velocity of y
        var drag = 1; //force that pushes in opposite direction of velocity

        //applies forces
        this.x += pxv;
        this.y += pyv;

         pxv -= pxv * pxv * drag;
         pyv -= pyv * pyv * drag;

        //if pixel particles exceeds canvas height, reset to origin
        if (this.y > height) {

            this.x = 0;
            this.y = 0;

            }
        }
    }

For this project I was really inspired by Dan Shiffman’s Painting with Pixels video where you can recapture videos by using a painterly effect to replicate the image. To make it my own creation, I applied what we learned in lecture about forces to manipulate the pixels to “paint” with specific directions, sizes and motions.

Here are some process shots:

yoonyouk-project09-portrait

sketch

//Yoon Young Kim
//Section E
//yoonyouk@andrew.cmu.edu
//Project09


var portraitImage;

function preload(){
    var ImageURL = "https://i.imgur.com/7QWRw4B.jpg";
    portraitImage = loadImage(ImageURL);
}

function setup() {
    createCanvas(480, 480);
    background(0);
    portraitImage.loadPixels();
    frameRate(200);
}

function draw() {
    var px = random(width); //x location where the new pixel will draw
    var py = random(height);//y location where the new pixel will draw

    //constraining the pixels within the canvas
    var ix1 = constrain(floor(mouseX), 0, width-1); 
    var iy1 = constrain(floor(mouseY), 0, height-1);
    //
    var colorofthepixel = portraitImage.get(floor(px), floor(py));

    //determining the thickness and length of the stroke
    var linesize = random(3, 10);

    stroke(colorofthepixel);
    strokeWeight(linesize);
    line(px, py, px, py + linesize);


    //accessing the color of the pixel that the mouse is hovering above
    var colorofthepixelmoused = portraitImage.get(floor(mouseX), floor(mouseY));
    //variety of text sizes when drawing the initials
    textSize(random(5, 20));
    noStroke();
    fill(colorofthepixelmoused);
    //writing initials wherever the mouse hovers
    text("yhk", ix1, iy1);


}

For the portrait, I chose to use my older sister as the subject.

The original image of the portrait

I made the unique pixel a stroke of different weights and lakes to imitate Monet’s water lilies paint strokes, one of my sister’s favorite paintings. In addition, because I wanted add a pixel that would draw according to the mouse, I decided to use her initials (yhk) as this new pixel.

Claude Monet’s water lilies
https://www.claude-monet.com/waterlilies.jsp

I had some help with this project from my 104 tutor who helped my understand that the important components of this project code was the “portraitImage.get” and retrieving the colors of each individual picture. Once I understood this concept, I found it quite easy to create a unique pixel that would develop a portrait image.

The following images display what the portrait looks like throughout the development of frames.

Beginning frames
After a while, with the mouse hovered over to display the initials
A more complete image of the portrait