project-09-portrait

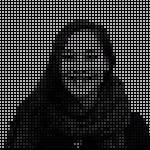
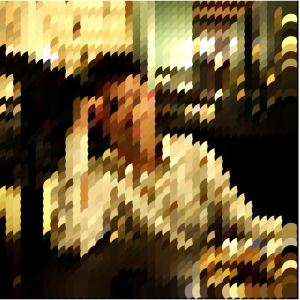
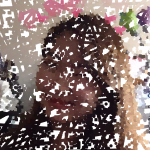
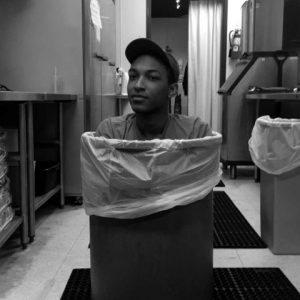
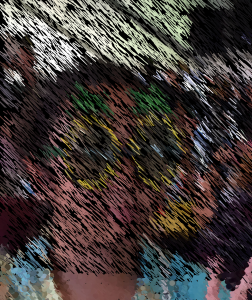
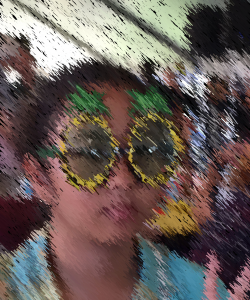
For this assignment I chose to use a colorful picture of a high school friend.

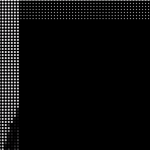
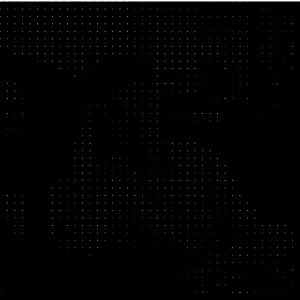
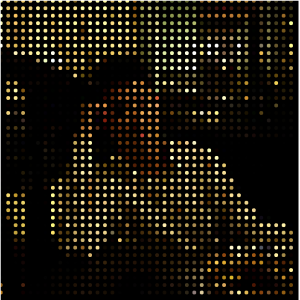
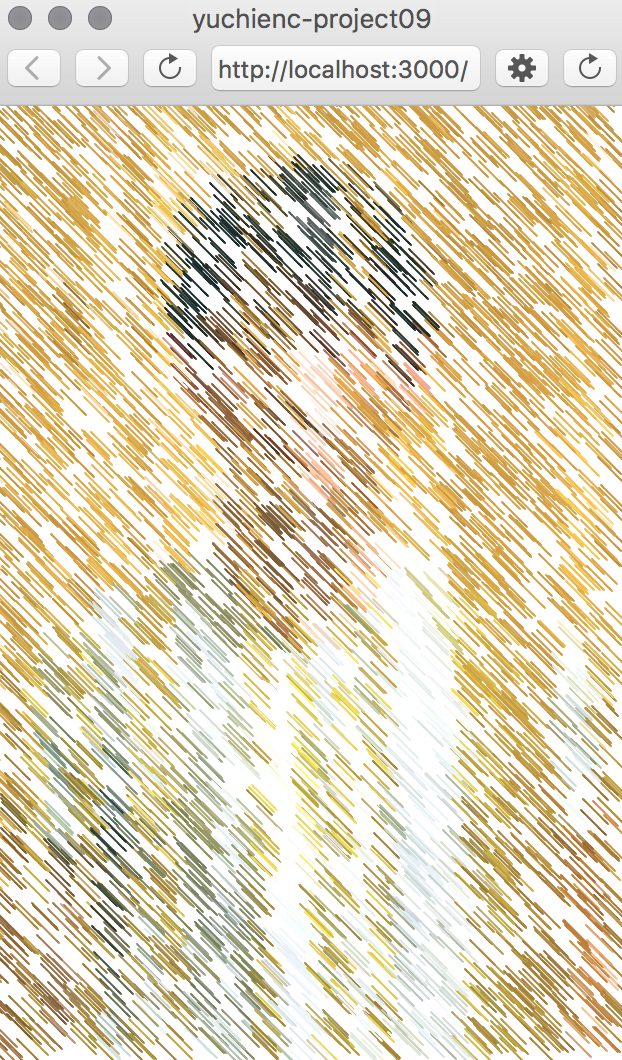
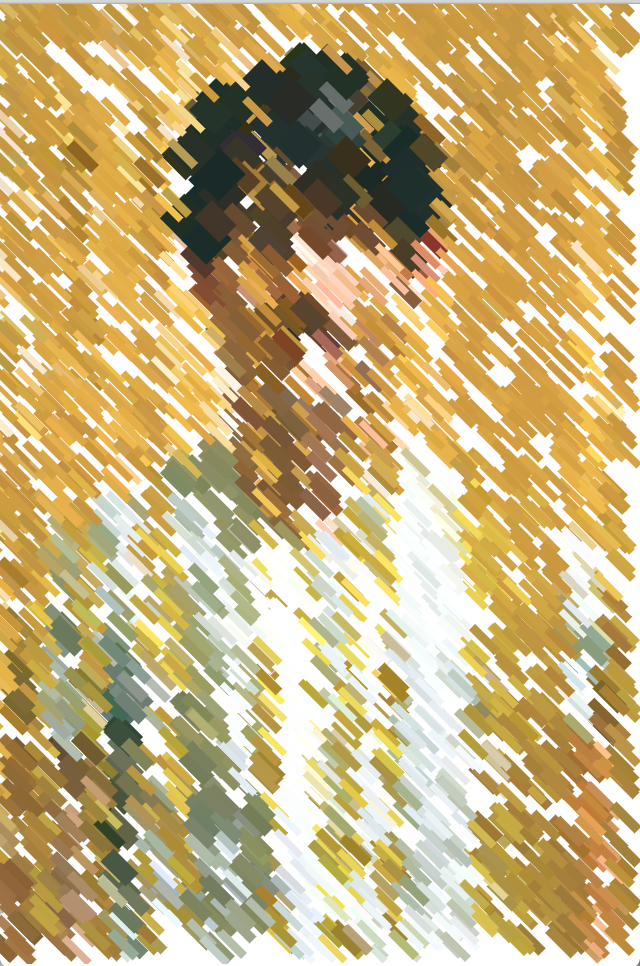
Initially, I wanted the interaction to be like painting on a canvas; as the mouse drags, part of the image appears. However, I felt that given the small size of the squares that appear while “painting”, it would take too long to paint the entire image. Therefore, I added random squares that would simultaneously appear as mouse drags and paints.

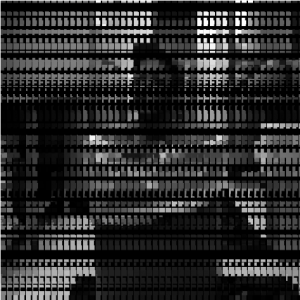
At first, I also randomized the size of the squares, however the random larger squares were too large and not detailed enough to create the image.

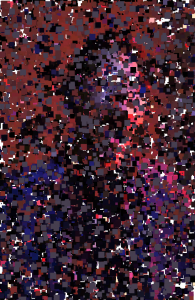
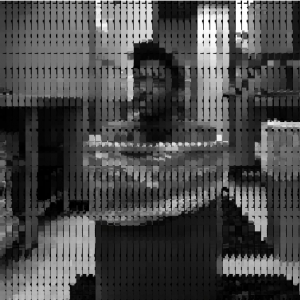
Then, I changed the size of the dots to be consistently small and decided to add two more lines of squares that would appear to the upper right and lower left of the mouse as it dragged. I also sped up the appearance of the random dots.

sketch

var photo;

function preload(){
    var URL = "https://i.imgur.com/wxV6HZw.jpg"; //image URL
    photo = loadImage(URL); //loaded image into variable
}

function setup(){
    createCanvas(314, 480);
    background(255); //black background
    frameRate(500); //sped up the frame rate
}

var rSize = 3;

function draw(){
	noStroke(); //no outline
	fill(photo.get(mouseX, mouseY)); //fill of square is color of background photo
	var locX = random(0, width); //random x coordinate
	var locY = random(0, height); //random y coordinate
	rect(locX, locY, rSize, rSize); //draw square
}

function mousePressed(){
	fill(photo.get(mouseX, mouseY)); //fill of square is color of background photo
	rect(mouseX, mouseY, rSize, rSize); //square drawn when mouse is clicked
	fill(photo.get(mouseX - 50, mouseY + 50, mouseY)); //fill of square is color of background photo
	rect(mouseX - 50, mouseY + 50, rSize, rSize); //square drawn towards upper right 
	fill(photo.get(mouseX + 50, mouseY - 50)); //fill of square is color of background photo
	rect(mouseX + 50, mouseY - 50, rSize, rSize); //square drawn towards lower left
}

function mouseDragged(){
	fill(photo.get(mouseX, mouseY)); //fill of square is color of background photo
	rect(mouseX, mouseY, rSize, rSize); //squares drawn as mouse is dragged
	fill(photo.get(mouseX - 50, mouseY + 50)); //fill of square is color of background photo
	rect(mouseX - 50, mouseY + 50, rSize, rSize); //squares drawn towards upper right
	fill(photo.get(mouseX + 50, mouseY - 50)); //fill of square is color of background photo
	rect(mouseX + 50, mouseY - 50, rSize, rSize); //squares drawn towards lower left
}

afukuda-Project09

sketch

/* 
 * Name | Ai Fukuda 
 * Course Section | C 
 * Email | afukuda@andrew.cmu.edu
 * Project | 09
 */ 

var underlyingImage; 

function preload() {  // load image 
    var myImageURL = "https://i.imgur.com/HE5yzx9m.jpg";
    underlyingImage = loadImage(myImageURL);
}

function setup() {
    createCanvas(300, 300);
    background(0);
    underlyingImage.loadPixels(); // load pixel data of image 
    frameRate(15);
}

function makeCorner(x, y) {  // x-coordinate & y-coordinate 
    noStroke();
        for (var i=0; i<width; i+=6) {                      // horizontal lines of dots 
            var colorLocationH = underlyingImage.get(i, y); // gets color value of image at (i,y)

            noStroke();
            fill(colorLocationH);                           // fills circles with color of image at (i,y)
            ellipse(i, y, 2, 2);

                                                            // vertical lines of dots 
            var colorLocationV = underlyingImage.get(x, i); // gets color value of image at (x,i)

            noStroke();
            fill(colorLocationV);                           // fills circles with color of image at (x,i)
            ellipse(x, i, 4, 4);
        }
}

var timer = 0;

function draw() {             // draw at a defined time (0, 6, 12, etc.)
   makeCorner(timer, timer);
   timer += 6;
}


Using the sample code given for this project as a starting point, I wanted to create more directionality & structure in how the points aggregated to create the underlying portrait. Starting at the top-left corner of the canvas, I wanted the pixels to aggregate horizontally until the edge of the canvas, then vertically (see sketch). I ended up writing a code which does all the horizontal and vertical pixels in each row simultaneously, however, through the variance in point sizes I was able to make the aggregate of the pixels more engaging and interesting and am overall content with the result.


karinac-Project-09

karinac-Project-09

//Karina Chiu
//Section C
//karinac@andrew.cmu.edu
//Project-09

var portrait;
var x = 230;
var y = 0;


function preload() {
    var portraitURL = "https://s1.postimg.org/1qix3ahu5r/IMG_6211.jpg";
    portrait = loadImage(portraitURL);
}

function setup() {
    createCanvas(230, 300);
    background(229,203,170);
    portrait.loadPixels();
    frameRate(60);

}

function draw() {
    //finding color
    var px = x;
    var py = y;
    var ix = constrain(floor(px), 0, width);
    var iy = constrain(floor(py), 0, height);
    var colorOfPoint = portrait.get(ix, iy);

    //generates waterfall effect
    push();
    y += 2.5;
    noStroke();
    fill(colorOfPoint);
    rect(x, y, 2, 2);
    pop();

    if (y > height) {
        x -= 2.5;
        y = 0;
    }
}

This is a portrait of my friend, Amara. At first, I really wanted to code a waterfall effect into the picture, but I was unsuccessful. Still, I spent a lot of time of this project and learned a lot, and I am pleased with the results.

ziningy1 – section c – project 09

After being inspired by Professor Golan’s work, I decided to approach this project by laying a grid of circles on the picture. The grid using the nested for loop will create a sense of geometric order of the display. I also find it interesting that I can play with the visibility of the content by adjusting the size of the circles. So I added the Mouse Pressed so that when pressed the circle will become larger, which will gradually shows a clearer version of the picture.

*Please load my project in Safari browser, the chrome browser does not really load, thanks.

First look

After few clicks

After more clicks

sketch 

//Zining Ye 
//15104 lecture 1 recitation C
//ziningy1@andrew.cmu.edu 
//Project-08

var backimage;

var size1=1; 

function preload() { //preload the image 
    var ImageURL = "https://i.imgur.com/JuT5ojz.jpg"
    backimage = loadImage(ImageURL);
}

function setup() {
    createCanvas(400, 400);
    background(0);
    
    backimage.loadPixels(); //load the pixel of the images 


}

function draw() {

    var space1=10; //spacing of the balls 

    //creating a for loop the circle grids 
    for(var i=0;i < 50; i++){ 

        for(var j=0; j < 50; j++ ){

            
            var ex=i*space1;
            var ey=j*space1; 
            var space=10;
            var brightness = backimage.get(ex,ey) // gets the color from the back image 
            fill(brightness); //fill the color 
            noStroke(); 
            ellipse(ex,ey,size1,size1); // draw the circles 
            
        }
    }
    
}

function mousePressed(){

    size1+= 2 // when mouse pressed the circles become larger so that the image become clearer


}


kyungak-project-09-portrait

sketch

//Kyunga Ko
//15104B
//kyungak@andrew.cmu.edu
//Project 09

var selfportrait; //self portrait image
var x = []; //x position array
var y = []; //y position array
var dx = []; //x velocity array
var dy = []; //y velocity array

function preload() {
    var imageURL = "https://i.imgur.com/pvmAYGW.jpg"
    selfportrait = loadImage(imageURL); // preloads the image
}

function setup() {
  createCanvas(480, 480);
  noStroke();

  //for loop for assigning random values for x,y,dx,dy
  for (var i=0; i<150; i++) {
        x.push(random(width));
        y.push(random(height));
        dx.push(random(-10,10));
        dy.push(random(-10,10));
  }
}

function draw() {
  //image(selfportrait,-250,-50);

  //for loop for 
  for (var j=0; j<x.length; j++) {
    //pixel colors from image is stored into x and y array
    var color = selfportrait.get((x[j]+250), y[j]+50);
        //canvas is filled with image color
        fill(color);
        //ellipse fills the canvas + random movements with dx,dy
        ellipse(x[j],y[j],10,10);
        x[j]+=dx[j];
        y[j]+=dy[j];
    }

    //xpos and ypos is determined by mousex and mousey
    var xpos = floor(mouseX);
    var ypos = floor(mouseY);
    //color is assigned to mousex and mousey
    var color = selfportrait.get((xpos+250), ypos+50);

    fill(color,25);
    noStroke();
    //according to mouse position canvas is colored
    rect(xpos,ypos,10,10);

}


1                               2                              3

  1. A loop of 150 ellipses initially color the canvas
  2. MouseX and MouseY function is used to fill in the blanks
  3. Final portrait is done

For this project, I was able to reuse functions and skills that I previously learned from this class. I set up a series of position and velocity arrays to form a loop of circles that randomly moved across the canvas with the image colors. After most of the image was colored, you can also custom color the blanks with the mousex and mousey function. I thought this project was really interesting, and I am pretty satisfied with the result.

alchan-Project 09-portrait

portrait

var portraitImg;
var rotateAngle;

function preload() {
    var portraitLink = "https://i.imgur.com/pn2LErg.jpg";
    portraitImg = loadImage(portraitLink);
}

function setup() {
    createCanvas(480,480);
    portraitImg.loadPixels();
}

function draw() {
    background(0);
    for(var y = 0; y <= height; y+=15) {
      for(var x = 0; x <= width; x+=15) {
        var pixelColor = 10 + brightness(portraitImg.get(x, y));
        var mouseDist = dist(mouseX, mouseY, x, y);
        strokeWeight(map(mouseDist, 0, 679, 0.5, 8));
        stroke(pixelColor);
        push();
        translate(x, y);
        rotate(map(mouseDist, 0, 679, 0, 360));
        line(0-3, 0, 0+3, 0);
        pop();
        line(x, y-3, x, y+3);
      }
    }
}

For my portrait, I knew I wanted to have the entire picture rendered at first, and user interaction to change the portrait somehow. I decided to go with a somewhat abstract grid of crosses to represent the picture at first, using the source image’s brightness values instead of colors to create a more cohesive image. (The source image is an extremely cropped view of a face from the eyes up, in case you couldn’t make it out.) The crosses change thickness (and the horizontal bar rotates) depending on how far away the mouse is, obscuring areas of the image the mouse is closest to. Unfortunately the program runs a little slow for me, so it’s not quite the experience I had planned, but it’s as close as I could get.

mecha-project09-portrait

sketch

//maddy cha
//section e
//mecha@andrew.cmu.edu
//project-09

var underlyingImage;

function preload() {
    //loads picture of friend in trash can
    var trashCan = "https://i.imgur.com/tAUXO6y.jpg";
    underlyingImage = loadImage(trashCan);
}

function setup() {
    createCanvas(480,480);
    background(0);
    underlyingImage.loadPixels();
    //frameRate(10);
    fill(255);
    
    //tells user what to do
    text("drag mouse to start",180,height/2);
    noLoop();
}

function mouseDragged(){
    //will start drawng pixel rectangles at 0
    var rX = 0;
    //will start drawing pixel rectangles in row at mouseY
    var rY = mouseY;
    var imageX = constrain(floor(rX), 0, width-1);
    var imageY = constrain(floor(rY), 0, height-1);
    
    //take color of image at mouseX, mouseY
    var imageColor = underlyingImage.get(imageX, imageY);
    var incriment = 10;

    if (mouseDragged){
        incriment += 10;
    }
    
    //draws pixels at random width and height from 1-10
    var rWidth = random(1,10);
    var rHeight = random(1,10);
    noStroke();
    
    //for loop allows for pixels to be drawn through entire width
    //rectangles are updated with new color depending on imageX and imageY
    for(var i = imageX; i < width; i++){
        imageColor = underlyingImage.get(imageX, imageY);
        fill(imageColor);
        rect(imageX,imageY,rWidth,rHeight);
        imageX+=10;
    }
    
}

For this project, I decided to use an image of my friend sitting in a trash can.

I started with a similar approach as the sample code, using rectangles at random widths and heights of the color of the background image. I decided that I wanted to display the image using the mouseDragged function, but was concerned with the issue that it would take too long for the image to appear if I had it load rectangle by rectangle. In order to combat this, I decided to load the image in the form of rows. I had issues at first with my rectangle rows all being the same color as the pixel loaded at mouseX, mouseY, but I was able to resolve this by updating the color as mouseX and mouseY updated.

cduong-Project 09-Portrait

sketch

//Name: Colleen Duong
//Email: cduong@andrew.cmu.edu
//Section: D
//Project-09

var jathryn;


function preload() {
  jathryn = loadImage("https://i.imgur.com/ALuxxJ8.jpg");
}

function setup() {
  createCanvas(600, 800);
  background(0);
  jathryn.loadPixels();
  imageMode(CENTER);
  frameRate(2000);

}

function draw() {
    var px = random(width);
    var py = random(height);
    var ix = constrain(floor(px), 0, width-1);
    var iy = constrain(floor(py), 0, height-1);
    var color = jathryn.get(ix, iy);
  	var d = random(5, 20);

//Draws the rain-like lines automatically
    push();
    stroke(color);
    strokeWeight(2);
    line(px-random(10), py-random(10), px + d, py + d);
    pop();
    //ellipse(px, py, d, d);

//Draws the ellipses with your mouse
    var mouseColor = jathryn.get(mouseX, mouseY); //changes color depending on where mouse is located based on picture colors
    noStroke();
    fill(mouseColor); //fills the circle colors according to picture color
    var ellipsesize = random(5, 15);  //randomizes the size
    ellipse(mouseX, mouseY, ellipsesize, ellipsesize);  //creates circles when drawing over
}

I wanted to somewhat mimic rain falling on a window so i tried to make it look random (since rain goes crazy in the wind) and then I allowed the viewer to draw randomly sized circles anywhere your mouse goes on the canvas, which was mostly for me because I was getting a little impatient.


What it looks like when I just let the rain fall


What it looks like after I started drawing circles to get the completed image

Bettina-Project09-SectionC

sketch

// Bettina Chou
// yuchienc@andrew.cmu.edu
// Sectin C
// Project 9: Pixelated Image

var img;

function preload() {
    img = loadImage("https://i.imgur.com/H1lewvj.jpg");
}

function setup() {
    createCanvas(320,480);
    imageMode(CENTER);
    background(255);
    img.loadPixels();
}

function draw() {
      scale(.5,.5); //image is double size of canvas, just scaling down to fit
      var x = floor(random(img.width));
      var y = floor(random(img.height));
      var col = img.get(x, y); //retrives RGBA value from x,y coordinate in image
      //fill(col);
      var weight = 640/(brightness(col));
      stroke(col);
      strokeWeight(weight);
      strokeCap(SQUARE);
        //ellipse(x,y,30);
      line(x, y, x-25, y-25);
      }

I wanted to build off the brightness indicators we learned last week with the eye-tracking project. In art, darker colors have more weight, so I made the thickness of the strokes depend on the darkness. I chose diagonal lines to mimic the motion in the original picture, in which my friend stands within the famous LACMA spaghetti installation. Initially, I tried drawing each line in order by calling each pixel by row and column. However, that method not only was inefficient (taking at least 10 seconds to compile) but the order felt rigid. Instead, I call each pixel randomly. Not only is it more efficient, but the audience can watch the image unfold and the randomness adds a sense of movement to the piece that honors the original photo.

Top: An early iteration. Below: Screenshot of what the final image may look like.

Project-09 Portrait

sub portrait

//Yoonseo(Dave) Choi
//Section B
//yoonseo1@andrew.cmu.edu
//Project 09

var portrait; // global variable for the image
var px = []; // array for storing previous x value
var py = []; // array for storing previous y value
var pp = []; //array for storing previous pixel 

function setup() {
    createCanvas(275,480); //canvas size
    background(0); //set background 0
   
}

function preload(){
    portrait = loadImage("https://courses.ideate.cmu.edu/15-104/f2017/wp-content/uploads/2017/10/yoonseo1_bro-172x300.jpg"); //load image from the asset folder
}
function draw() {
var x = floor(random(portrait.width)); // create x point in random place of image
var y = floor(random(portrait.height)); //create y point in random place of image
var pix = portrait.get(x,y); //get color of image at x,y coordinate
pp.push(pix); //push the color into the array
noStroke(); //no stroke
px.push(x); //append the x coordinate to the array
py.push(y); //append the y coordinate to the array 

for(var i = 0; i < px.length; i ++){
    strokeWeight(0.5); // stroke weight of 0.5
    stroke(pp[i],1); //create stroke color to be color of x,y location. 
    line(px[i],py[i],px[i-1],py[i-1]); //create line between previous x,y and current x,y
}
}

For this project, I have used my brother’s photo for the portrait to use. I wanted to see what are ways to draw a portrait without illustrating direct same image at the location, but rather something that connects with previous point with current. For this project, I have made code to create random lines using randomly generated points. x and y coordinates are randomly generated and lines are created based on current points and previous points with color of the the pixel at the current x and y. By having code to do such a motion allows the portrait to be abstract image of color but end product shows the resemblance of the original image

left is original and right is portrait