jiaxinw-Final Project

Interactive Music Media Installation

This is a project using Kinect connecting with a website which was developed by P5.js.  Therefore, this project cannot be run on WordPress. We recorded the video for our project and hope it can be a good demonstration of the whole concept.

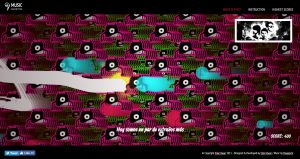
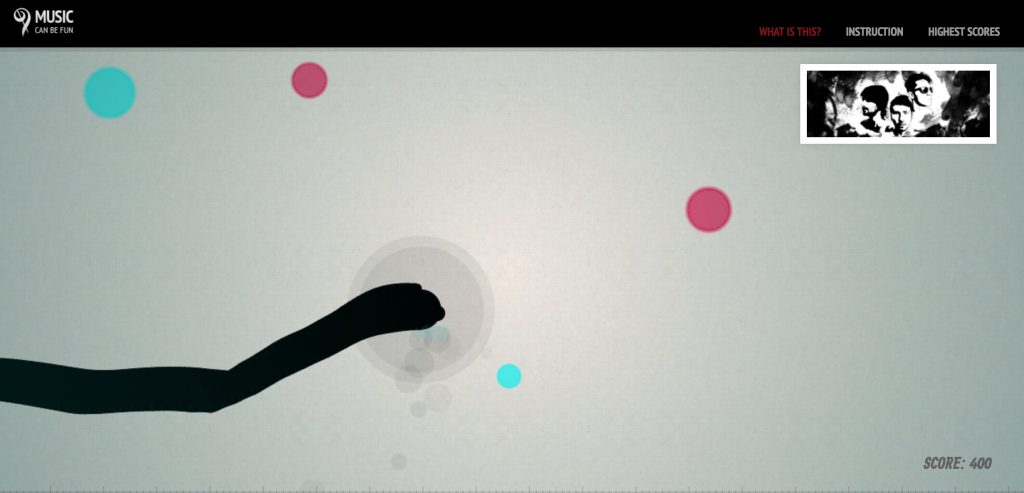
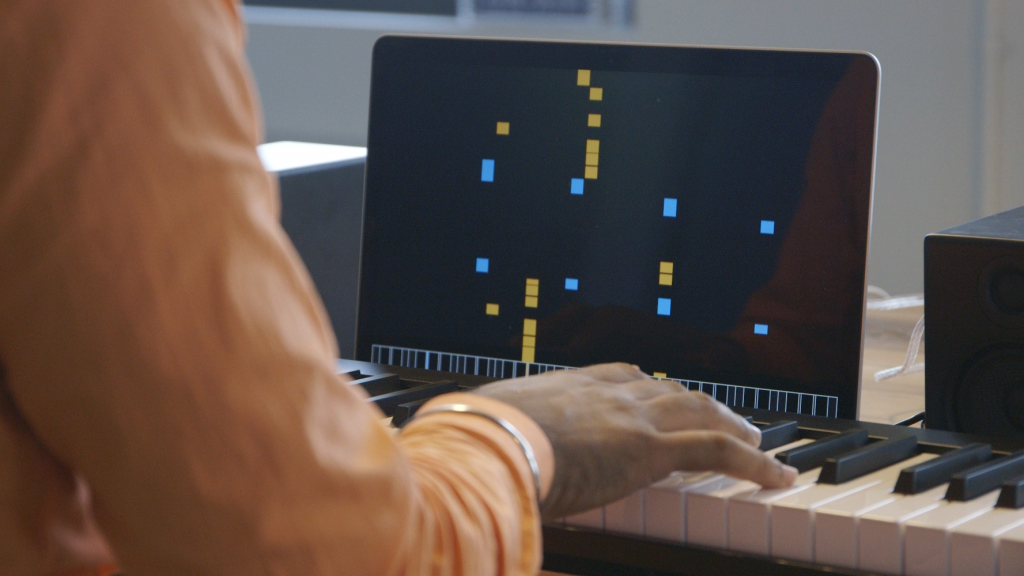
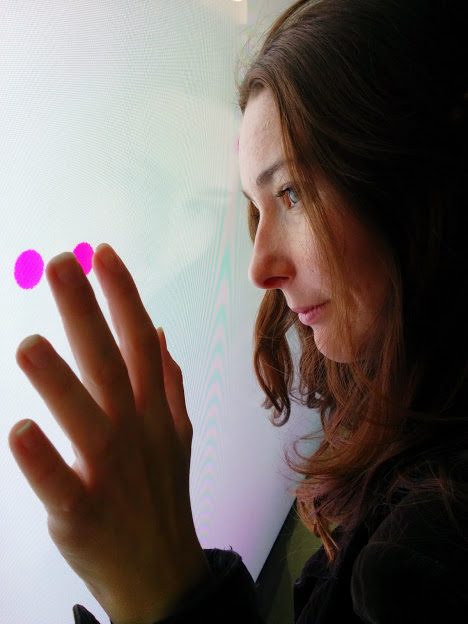
For this project, Nayeon and I worked together to create a new media installation in which people can interact with music by hitting virtual buttons to generate sounds and visual effects. People can follow the music from the background and have fun with moving their body to play music.

I learned a lot and a lot and a lot from this final project and I am so proud that it finally has been done. For this project, I was responsible for the Kinect part,  which included making sure the connection between Kinect and the website (or we can say the Javascript files) work well and also create User Interface (the virtual buttons, particle effects, and sound effects) for the website.  So, the biggest challenge for me at the beginning was figuring out how to connect Kinect and Javascript. I did a lot of research and finally decided to use the Node-Kinect2 library to achieve what I needed.

(Information about Node-Kinect library: https://github.com/wouterverweirder/kinect2)

I followed the instructions of the library, installed all the modules and packages that I needed (which took me a long time to figure out how to properly install the node.js and all kinds of modules. 😉 ). After it, I looked into the sample files carefully, analyzed the logic inside to figure out how I can access the data of Kinect skeleton. I figured out, for using this library to access data, I needed to set up a local server and point it to my local index, uploading my resources and files to the server through the node.js. At last, I need to use the command prompt to open the js file by using node.js. Whoo… to be honest, it was not easy to figure out the whole process clearly, but once I understood the logic behind it, the whole thing went more fluently.

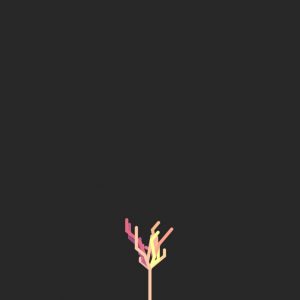
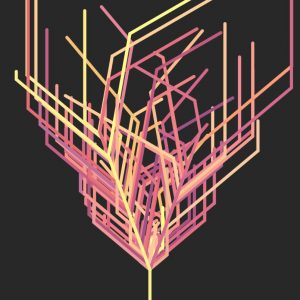
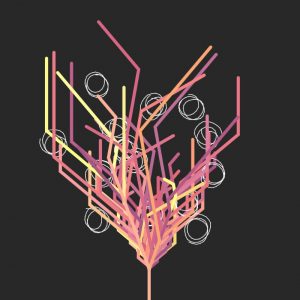
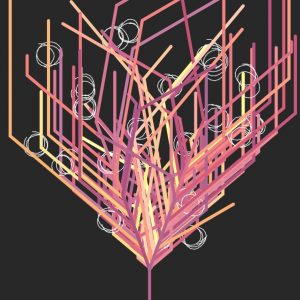
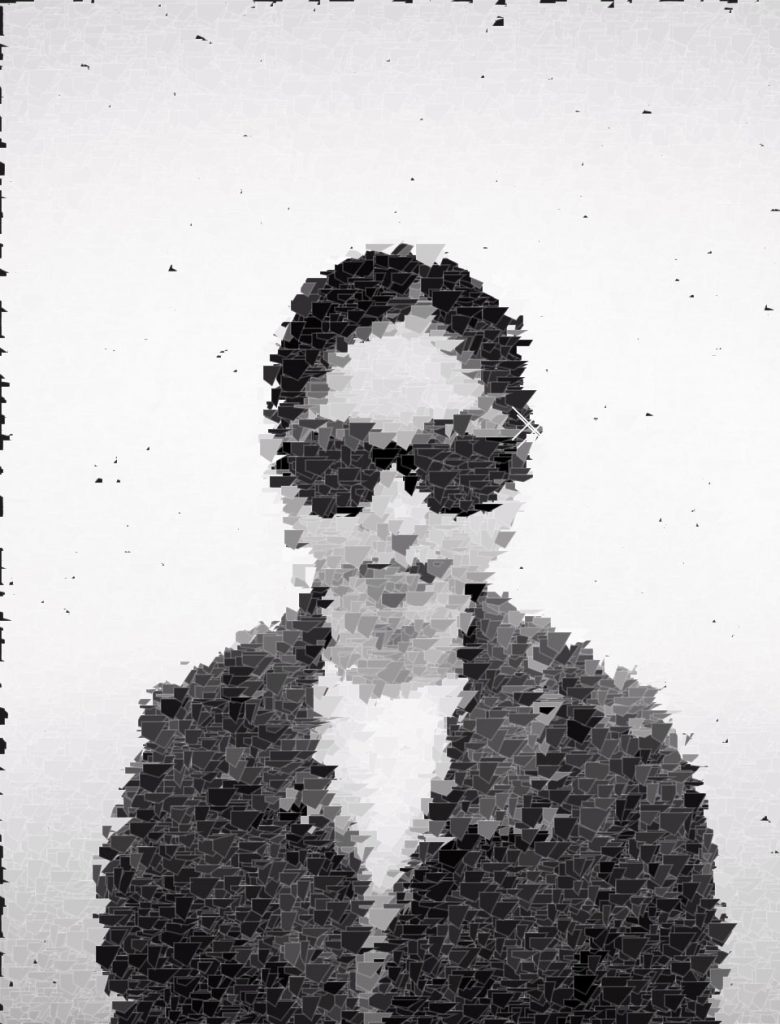
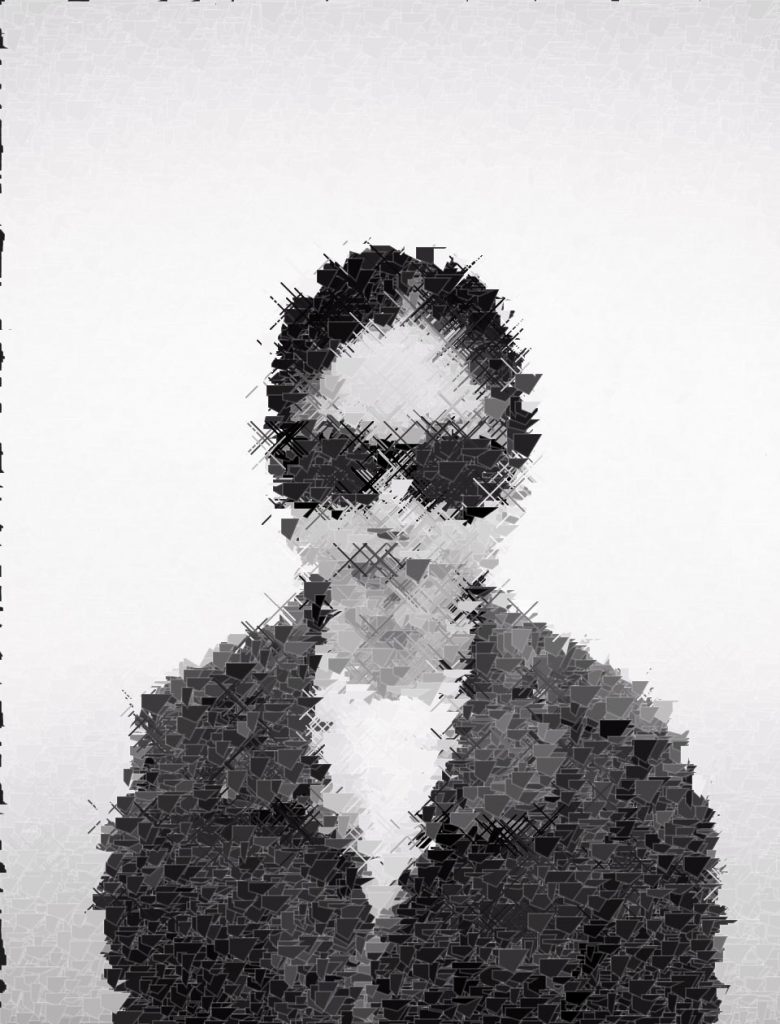
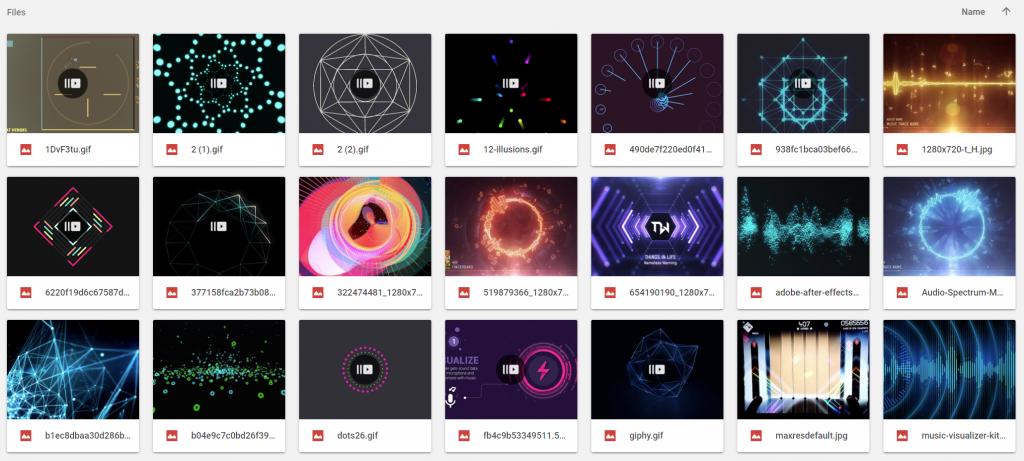
The next step I did was designing how the interface looks like. After communication with Nayeon, we decided to create a project with a Neon art style.  I created a mood board for myself to figured out the feelings of the visual part.

my mood board

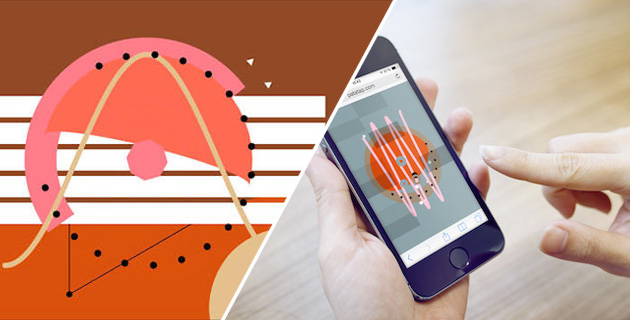
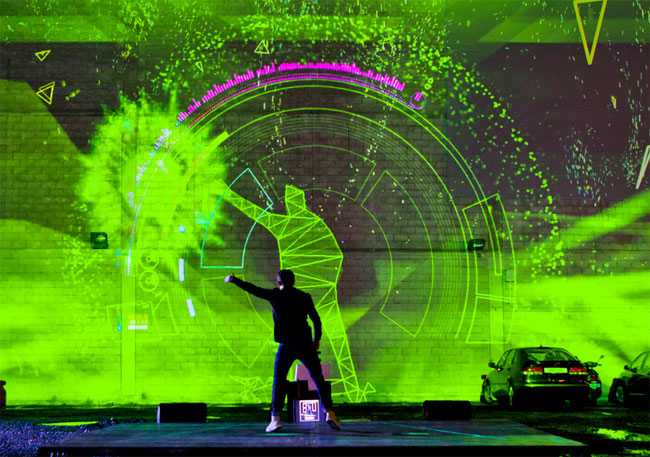
I also looked into a very inspiring and amazing project which is The V Motion Project and decided to do a circling interface for people to play with.

(For more information about V Motion Project: https://vimeo.com/45417241)

The presentation of V Motion Project

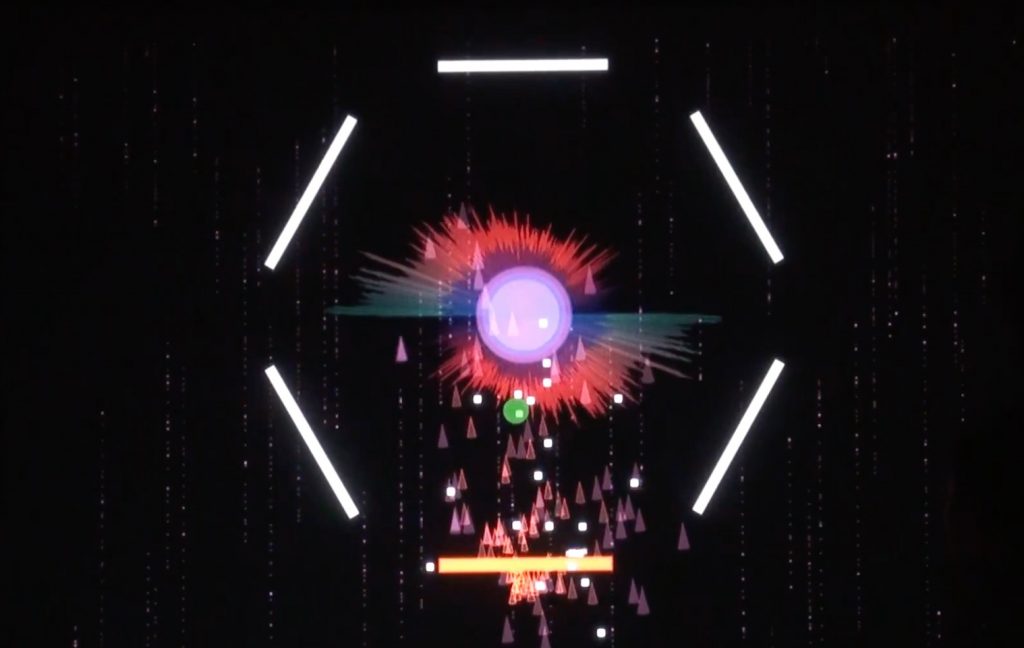
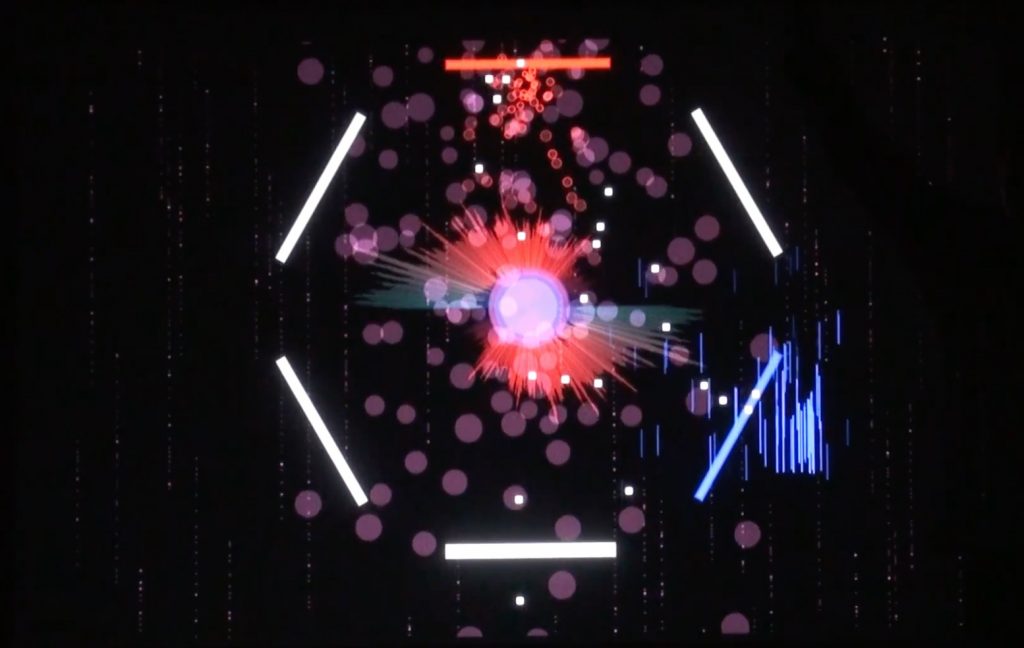
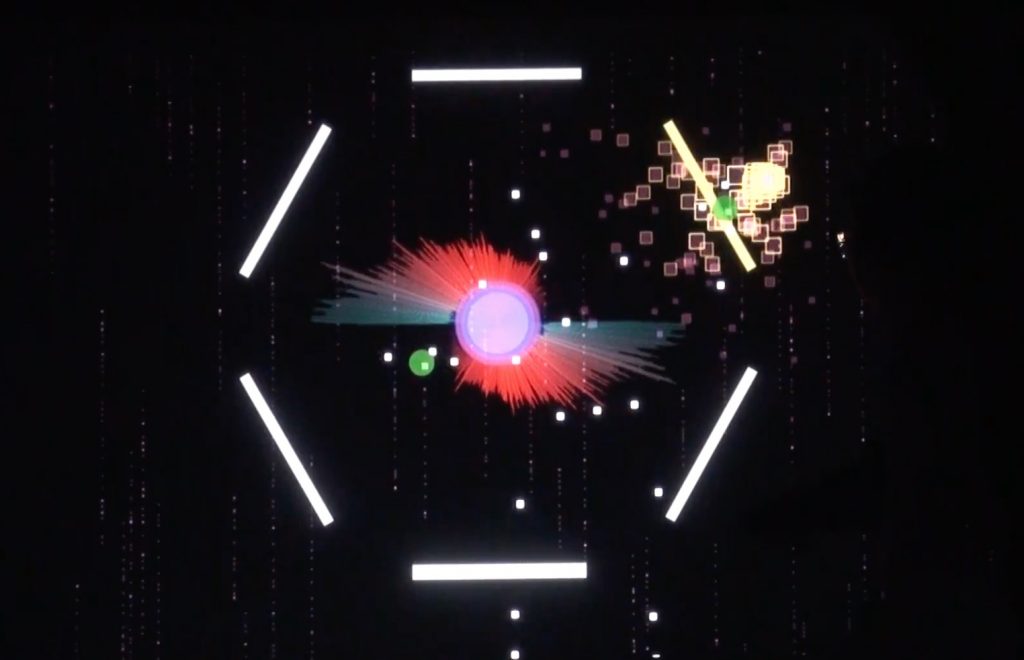
I created 6 virtual buttons on the canvas, and when people hit any of them, a particle effect will be generated along with a sound effect. By standing in front of the Kinect, people can move their hands to touch the buttons and create their own music and visual effects.

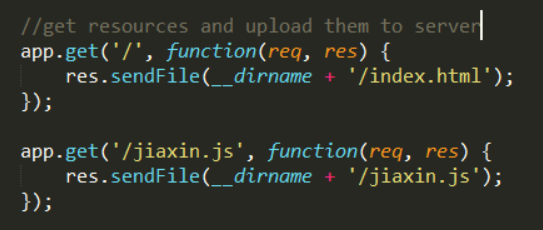
One more thing I have learned from this project is about how to access JS file outside Node.js through Node.js. The trick is you need to follow a very strict syntax to get your directory of the file and upload your resources to it.

you need to follow a special syntax to access your file

Anyway, it is so excited that I have finished this project with Nayeon! We definitely went through some difficulties and I guess this is why I feel very fulfilled when I finished creating everything! Here are some screenshots of the project!  Hope you Enjoy 🙂

Capture of final project

Finally here is the source code (a zip file) we created, please feel free to check it. I was responsible for the Kinect and interface (jiaxin.js) part.

Final project(Jiaxin_Nayeon)

Instruction for opening our project:

  1. Go to https://github.com/wouterverweirder/kinect2   download the Kinect node.js library.
  2. Follow the instruction to install node.js
  3. Connect your Kinect to your PC and make sure it works 🙂
  4. Extract the project zip file, and open your Command Prompt (for windows), go to the directory that you put our project folder. (use “cd + the directory “)
  5. And then use node.js to open the kinect.js file. (simply type “node kinect”)
  6. Open a browser and go to the local server : http://localhost:8000
  7. Stand in front of your Kinect, and have fun with our project!

jiaxinw-LookingOutwards 12

For the final project, I am planning to create a media art installation with music as its subject. In this project, I am going to do some interactive music visualization. Therefore, I am interested how artists and designers created projects like this.

Firstly, I found a very cool website, in which you can use your mouse to move as the canvas is moving, and you try to hit as many as blue circles you can while without hitting the red circles. This is Music can be fun,  Designed & Developed by Edan Kwan / Music by Pasaporte, and this website was created in 2011. Here is the link to Music can be fun:

http://musiccanbefun.edankwan.com/

Screenshot of Music Can Be FUN

The most inspirational thing about this website is the stunning visual design. The animation of this experience changes according to the music changes. It makes the music become more immersive and the engagement of people can be raised.

The second project, I found might be useful for my project is the Patatap by Jono Brandel. This is a portable animation and sound kit. With the touch of a finger create melodies charged with moving shapes. The animations representing different sounds are visually pleasing and creative.

Using a phone to play Patatap

Comparing these two different projects, Patatap gives more freedom to the user to control the sounds and create their own content, while Music Can be Fun was based on a song to create the experience. I think for my project, I would probably combine these two features and make a media art installation with changes of melodies and animations.

Link to Patatap:

https://patatap.com/


jiaxinw-project 12-Final Project Proposal

For the final project, I am going to cooperate with my classmate Nayeon Kim. We are going to create a media art interactive installation, using projection and Makey Makeys. Makey Makeys will be used as input devices, and the projection will project the content created by P5.js. For this media art installation, we are going to create a serious of music visualization animations responding to the input signals from Makey Makeys. The animations will change along with the melody when people interact with the input devices. At the beginning of this installation, there will be a basic melody for people to follow. When people try to use the Makey Makey, they can add new melodies to the existed music,  also change the animations displaying on the projection screen.

Sketch for the final project

jiaxinw-Project-11-Composition

sketch

function preload(){
    img = loadImage("https://i.imgur.com/TKrbX1X.jpg")
}

function setup(){
    createCanvas(480,480);
    background(40);
    img.loadPixels();
}

var d = 20;
var c;
var w = 5;
function draw(){
    frameRate(10);
    var x = width/2;
    var y = height;
    //let the tree grow from the center of the bottom
    myTurtle=makeTurtle(x,y)
    //get random color for each branch
    c = img.get(random(x*2),random(y));
    if (d>=600){
        d =10
        w = 5
    }
    //when the tree is too big, grow black branches to erase the tree
    if (d>400 & d<600){
        c=40
        w=50;
    }
    myTurtle.setColor(c);
    myTurtle.setWeight(w);
    //draw a randomly growing tree
    myTurtle.left(90);
    myTurtle.forward(50);
    myTurtle.turnToward(random(200,280),100,20);
    myTurtle.forward(random(d));
    d += 2;
    myTurtle.turnToward(random(100,380),height,30);
    myTurtle.forward(random(d));
    myTurtle.turnToward(random(width),10,50);
    myTurtle.forward(random(d));
    
};

function mousePressed(){
    //press mouse to draw white fruits 
    var x1 = mouseX;
    var y1 = mouseY; 
    var t1 = makeTurtle(x1,y1);
    t1.setColor(color(255));
    t1.setWeight(1);
    for (var i = 0; i < 50; i++) {
        t1.forward(random(5,7));
        t1.right(random(10,30));
        
    }
    
}


function turtleLeft(d) {
    this.angle -= d;
}


function turtleRight(d) {
    this.angle += d;
}


function turtleForward(p) {
    var rad = radians(this.angle);
    var newx = this.x + cos(rad) * p;
    var newy = this.y + sin(rad) * p;
    this.goto(newx, newy);
}


function turtleBack(p) {
    this.forward(-p);
}


function turtlePenDown() {
    this.penIsDown = true;
}


function turtlePenUp() {
    this.penIsDown = false;
}


function turtleGoTo(x, y) {
    if (this.penIsDown) {
      stroke(this.color);
      strokeWeight(this.weight);
      line(this.x, this.y, x, y);
    }
    this.x = x;
    this.y = y;
}


function turtleDistTo(x, y) {
    return sqrt(sq(this.x - x) + sq(this.y - y));
}


function turtleAngleTo(x, y) {
    var absAngle = degrees(atan2(y - this.y, x - this.x));
    var angle = ((absAngle - this.angle) + 360) % 360.0;
    return angle;
}


function turtleTurnToward(x, y, d) {
    var angle = this.angleTo(x, y);
    if (angle < 180) {
        this.angle += d;
    } else {
        this.angle -= d;
    }
}


function turtleSetColor(c) {
    this.color = c;
}


function turtleSetWeight(w) {
    this.weight = w;
}


function turtleFace(angle) {
    this.angle = angle;
}


function makeTurtle(tx, ty) {
    var turtle = {x: tx, y: ty,
                  angle: 0.0, 
                  penIsDown: true,
                  color: color(128),
                  weight: 1,
                  left: turtleLeft, right: turtleRight,
                  forward: turtleForward, back: turtleBack,
                  penDown: turtlePenDown, penUp: turtlePenUp,
                  goto: turtleGoTo, angleto: turtleAngleTo,
                  turnToward: turtleTurnToward,
                  distanceTo: turtleDistTo, angleTo: turtleAngleTo,
                  setColor: turtleSetColor, setWeight: turtleSetWeight,
                  face: turtleFace};
    return turtle;
}

My original thought was to draw a growing tree with Turtles. I wanted the branches to grow on the canvas. So I began to use the turtle to draw a branch.  And then I think about because I needed a trunk, so I made the first “forward” longer to make a trunk. I needed the branches going spreadly on the canvas, so I made them randomly go around the center line of the canvas. And then I figured out if I let the tree just growing forever, the canvas would be a mess. That’s why I added when the tree is big enough, black branches will grow and “erase” the previous ones. Also, for making the work more interesting, I added when the mouse is pressed, an abstract white “fruit” will be drawn on the tree.

The tree grows from small to big, and fruits can be added to the tree when the mouse is clicked.

jiaxinw-Looking Outwards 11- Computer Music

A.I. Duet by Yotam Mann

Someone is trying AI Duet with the keyboard

Yotam Mann created this experiment for letting people play a duet with a computer. When the user presses some keys on the keyboard, the computer will respond to your melody. I like how this experiment showed a potential of letting human beings interact with computers to create artistic works. One thing surprised Yotam Mann a lot was that some people didn’t wait for the response but tried to play music at the same time with the computer, which was really like a real-time duet with another person.

In this project, Yotam Mann used machine learning to let the computer “learn” how to compose. He used neural networks and gave the computer tons of examples of melody. The computer analyzed the notes and timings and gradually built a map for the relationships between them.  So that when the melody was given to the computer, it can give a response to people based on the map.

Here is the video of A.I. Duet

If you want to know more, please go to : https://experiments.withgoogle.com/ai/ai-duet

jiaxinw-project 10-Landscape

sketch

//var smoke = {x:120, y:365, w:35, h:20, d:0.5, a:150}
var dishes=[];
var smokes=[];
var eyelx=220;
var eyerx=260;
var sushiLinks = [
    "https://i.imgur.com/dMoEprH.png",
    "https://i.imgur.com/69T53Rk.png",
    "https://i.imgur.com/LQ3xxUA.png",
    "https://i.imgur.com/x19Rvvq.png",
    "https://i.imgur.com/d7psp9U.png"]
var sushi = [];

function preload(){
    for (var i = 0; i < sushiLinks.length; i++) {
        sushi[i]=loadImage(sushiLinks[i]);
    }
}


function setup() {
    createCanvas(480,480);
    for (var i = 0; i < 4; i++) {
        dishes[i]=makeDish(-90+i*130);
    }

    for(var j = 0; j<3; j++){
        smokes[j]= makeSmoke(120);
    }
}
    

function draw() {
    background(165,199,199);
    
    drawCurtain();
    
    drawChef();
    
    drawEye();

    drawBody();

    drawBelt()
    
    drawTable();

    drawPlate();

    drawDishPile();

    drawCup();

    //smoke
    updateAndDisplaySmokes();
    removeSmoke();
    addNewSmoke();

    
    //dishes on the belt
    updateAndDisplayDishes();
    removeDish();
    addNewDish();

}

function drawCurtain(){
    noStroke();
    fill(82,106,121)
    rect(0,0,width/2-5,90);
    rect(width/2+5,0,width/2-5,90)
    stroke(106,137,156);
    strokeWeight(5);
    rect(-15,-15,width/2-5,90);
    rect(width/2+20,-15,width/2-5,90)
}

function drawChef(){
    push();
    noStroke();
    rectMode(CENTER);
    //hat
    fill(129,153,160)
    rect(width/2,120,100,30)
    //face and neck
    fill(235,216,190);
    rect(width/2,170,100,70);
    rect(width/2,210,50,20);
}

function drawEye(){
    push();
    fill(37)
    ellipseMode(CENTER);
    ellipse(eyelx,165,12,7)
    ellipse(eyerx,165,12,7)
    eyelx += 0.2;
    eyerx += 0.2;
    if(eyelx>=width/2-5){
        eyelx = 205;
        eyerx = 245;
    }
    pop();
}

function drawBody(){
    //body
    fill(152,178,186);
    rect(width/2,300,130,160);
    //collar
    fill(129,151,158);
    triangle(width/2-45,220,width/2+45,220,width/2,280);
    fill(212,232,238);
    triangle(width/2-30,220,width/2+30,220,width/2,260);
    //arms
    fill(129,153,160);
    quad(width/2-65,220,width/2-90,250,width/2-90,310,width/2-65,310);
    quad(width/2+65,220,width/2+90,250,width/2+90,310,width/2+65,310);
    fill(235,216,190);
    rect(width/2-77,345,24,70)
    rect(width/2+77,345,24,70)
    pop();
}

function drawBelt(){
    noStroke();
    fill(152,151,151)
    rect(0,350,width,height/3)
    fill(133);
    rect(0,360,width,5);
    fill(183);
    rect(0,330,width,30)
}

function drawTable(){
    fill(101,92,85);
    rect(0,440,width,40);
}

function drawPlate(){
    push();
    rectMode(CENTER);
    fill(222,207,175);
    rect(width/2,420,130,15);
    rect(width/2-30,428,20,23);
    rect(width/2+30,428,20,23);
    pop();
}

function drawDishPile(){
    fill(240);
    rect(width/2+110,389,90,7)
    rect(width/2+110,406,90,7)
    rect(width/2+110,423,90,7)
    fill(218);
    rect(width/2+125,396,60,10)
    rect(width/2+125,413,60,10)
    rect(width/2+125,430,60,10)
}

function drawCup(){
    push();
    fill(105,108,91);
    rect(width/2-155,380,45,60,5)
    pop();
}

function drawSmoke(){
    fill(255,this.a)
    ellipse(this.x,this.y,this.w,this.h);
}

function moveSmoke(){
    this.x += this.d;
    this.y -= this.d;
}

function scaleSmoke(){
    this.w -= 0.2;
    this.h -= 0.2;
}

function alphaSmoke(){
    this.a -= 2;
}

function makeSmoke(birthLocationX) {
    var smoke = {x:birthLocationX, 
                 y:365, 
                 w:35, 
                 h:20, 
                 d:0.3, 
                 a:150,
                 move:moveSmoke,
                 scale:scaleSmoke,
                 alpha:alphaSmoke,
                 drawS:drawSmoke}
    return smoke;
}

function updateAndDisplaySmokes(){
    // Update the smoke position, scale, alpha 
    for (var i = 0; i < smokes.length; i++){
        smokes[i].move();
        smokes[i].scale();
        smokes[i].alpha();
        smokes[i].drawS();
    }
}

function removeSmoke(){
    var smokesToKeep = [];
    for (var i = 0; i < smokes.length; i++){
        if (smokes[i].a > 0) {
            smokesToKeep.push(smokes[i]);
        }
    }
    smokes = smokesToKeep; 
}

function addNewSmoke(){
    if(frameCount%45==0){
    smokes.push(makeSmoke(120))
    };
}

function makeDish(dishX) {
    var dish = {x:dishX,
                speed:1,
                move:moveDish,
                display:displayDish,
                type:1}
    return dish;
}

function updateAndDisplayDishes(){
    // Update the dishes's positions, and display them.
    for (var i = 0; i < dishes.length; i++){
        dishes[i].move();
        dishes[i].display(dishes[i].x, dishes[i].type);
    }
}

function removeDish(){
    var dishesToKeep = [];
    for (var i = 0; i < dishes.length; i++){
        if (dishes[i].x < 480) {
            dishesToKeep.push(dishes[i]);
        }
    }
    dishes = dishesToKeep; 
}

function addNewDish(){
    if(frameCount%120==0){
    var newDish = makeDish(-90);
    newDish.type = random([0,1,2,3,4]);
    dishes.push(newDish)
    }
}

//create dish and sushi
function displayDish(x,type){
    push();
    translate(this.x,314);
    fill(240);
    rect(0,0,90,7)
    fill(218);
    rect(15,7,60,10);
    pop();
    drawSushi(x + 45, type);
}

function moveDish(){
    this.x += this.speed;
}

function drawSushi(x, type){
    imageMode(CENTER)
    image(sushi[type], x, 302);

}


This project, I thought about making a sushi conveyable belt. I thought about making different dishes of sushi moving on the screen and the different sushi need to appear randomly. Therefore, at first, I drew out the scene of a sushi restaurant, where we could see a plate, a cup of tea and some empty dishes on the table. Above the table, there was the conveyable belt with sushi. Behind the belt, there was a sushi chef who kept looking at the sushi. The final result is fun! I liked how I could translate my sketch into a moving webpage 🙂

sketch of the sushi restaurant

jiaxinw-LookingOutwards 10

SUPERHYPERCUBE (published in autumn 2016) by Kokoromi collective 

Screenshot of SUPERHYPERCUBE

SUPERHYPERCUBE is a VR “first-person perspective” 3D puzzle game developed by Kokoromi collective, and Heather Kelly is a member of this group. In this game, the player needs to switch the direction of a shape in order to go through different panels.

Heather Kelley

SUPERHYPERCUBE was a VR game with a high-stylized art style and interesting first-person perspective interaction. I enjoyed watching the gameplay video of this game, the sharp sound effect response and simple but modern visual design offer a very clear yet attractive world for the game. I like how this game combining first-person perspective and VR puzzle solving together. The whole game was a simple but funny VR game experience.

Heather is Adjunct Faculty at the Entertainment Technology Center, at Carnegie Mellon University. Heather’s extensive career in the games industry has included design and production of AAA next-gen console games, interactive smart toys, handheld games, research games, and web communities for girls. She was named as one of the five most powerful women in gaming by Inc. magazine in 2013.

Here is the promo video of SUPERHYPERCUBE:


jiaxinw-Project 09-Computational Portrait

sketch

function preload() {
    img = loadImage("https://i.imgur.com/rHE8Y7e.jpg");
}

function setup() {
    createCanvas(480, 630);
    background(30);
    img.loadPixels();
}

function draw() {
    // pick x,y randomly from the image
    var x = floor(random(img.width))
    var y = floor(random(img.height))
    // set random values for creating irregular shapes
    var rw = random(5,20);
    var rh = random(2,15);
    //get color from x,y point of the image
    var pcolor = img.get(x,y)
    //fill irregular shapes with the x,y point color
    fill(pcolor)
    stroke(255,40)
    quad(x,y,x+rw,y,x+rw/2,y+rh,x,y+rh/1.5)
}

function mouseDragged(){
    //when mouse is dragged, keep drawing crosses 
    //and get color from the mouseX, mouseY point
    var dcolor = img.get(mouseX,mouseY);
    var l = 10;
    stroke(dcolor);
    line(mouseX,mouseY,mouseX+l,mouseY+l);
    line(mouseX,mouseY,mouseX-l,mouseY+l);
    line(mouseX,mouseY,mouseX+l,mouseY-l);
    line(mouseX,mouseY,mouseX-l,mouseY-l);

}


function mousePressed(){
    //when mouse is dragged, draw one cross 
    //and get color from the mouseX, mouseY point
    var dcolor = img.get(mouseX,mouseY);
    var l = 10;
    stroke(dcolor)
    line(mouseX,mouseY,mouseX+l,mouseY+l);
    line(mouseX,mouseY,mouseX-l,mouseY+l);
    line(mouseX,mouseY,mouseX+l,mouseY-l);
    line(mouseX,mouseY,mouseX-l,mouseY-l);
}

I wanted to use irregular shapes to “draw” the image, so I decided to use quad() and add random numbers to change the shapes randomly. Since I wanted to make the image become interactive, I used mousePressed() to make the image change when the mouse is clicked. The reason why I put crosses in the image since I thought about when I was a child, I liked to draw lines on pictures to “destroy” it. 🙂

jiaxinw – LookingOutwards 09

Nayeon talked about this interesting project THE TRANSFINITE (2011) from Ryoji Ikeda, a Japenese sound and media artist in her LookingOutwards-04. (Here is the link to Nayeon’s post: https://courses.ideate.cmu.edu/15-104/f2017/2017/09/22/nayeonk1-lookingoutwards-04/)

This is the project video:

Nayeon mentioned that she was attracted by how Ryoji Ikeda has created a dimension for combining the sound and installation art together, and I would like to say I totally agree with it. The video is very immersive for me to feel the changing vision and audio inside the big art installation space. The vision went well with the sound, and the whole wide empty space created a feeling of the theater with all the media going on. Even the audience who just stood at or randomly walked by the installation, as an outsider I considered they were a part of the stage. One interesting point that Nayeon mention in her post is that ” In his work, sound, time and space are composed by a mathematical way so that physical features of sound could reach to audience’s perception and feeling”, and it is very surprising for me. I was impressed by how Ryoji Ikeda uses technology to help convey his ideas but give audience better experience at the same time.

THE TRANSFINITE by Ryoji Ikeda

jiaxinw-LookingOutwards 08

Kate Sicchio

Photo of Kate Sicchio

Kate Sicchio is a choreographer, media artist, and performer. She is currently a Visiting Assistant Professor in Integrated Digital Media at New York University. Kate’s Ph.D. focused on the use of real-time video systems within live choreography and the conceptual framework of ‘choreotopolgy’ a way to describe this work. She works on exploring the interface between choreography and technology. Her works show a very interesting relationship between dance and technology.

I admire the way she tries to re-think the choreography of dance and transform it into another technical form.  “Hacking the Body” is one of her projects, in which she and other artists explored the interaction between dances and wearable technology. In “Hacking the Boday 2.0”, two wearables were designed to put on two dancers body when they performed. The wearables transformed the movements from dancers to signals and turned them into sounds. This research was described as “using the concept of hacking data to re-purpose and re-imagine biofeedback from the body.” This project showed an impressive possibility of how to combine live-performance and real-time technology together. It is a great inspiration for people to think about the messages from the human body in a different way.

She usually performs her works with dancers with wearables or other devices together. She used visual and audio feedback as the outward performance for the technical part. By watching the live performance with the real-time technical feedback, the audience can get a sense of connection between these two aspects.

This is the eyeofestival page and speech video for Kate Sicchio.

Kate Sicchio


Here is the video of “Hacking the Boday 2.0”

If you want to know more, please go to her website: http://blog.sicchio.com/biog/