Looking Outwards-03-Section D

99 Failures Pavilion

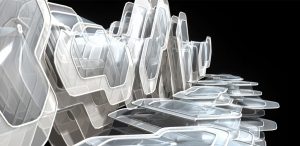
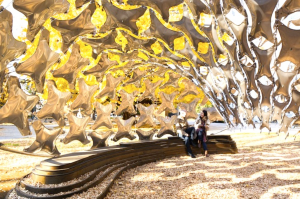
This is the 99 Failures Pavilion, a temporary pavilion which was named in support of the idea that failure is beneficial to knowledge and success. It was created by Architecture graduate students and design professionals at the Digital Fabrication Lab at the University of Tokyo in November of 2013.

Many structural models were tested in order to find the right geometry that would allow this flat, stainless steel to become sturdy in its 3D form.  The stainless steel sheets were then welded together and formed to mimic pillows. I find it fascinating that even steel can appear as soft as it does in this project. It looks weightless and balloon-like.

Another element that I believe has helped this pavilion’s success is the golden tree behind it. Since it’s autumn, the structure seems more like a shelter for the cold days to come, and makes the steel more comforting. This ability to transform a material is what I appreciate most about this work. Architecture should not only be about functionality, but also about creating spaces with feeling.

karinac-Project-03

karinac-Project-03

//Karina Chiu
//Section C
//karinac@andrew.cmu.edu
//Project-03

var bgRed = 0;
var bgGreen = 0;
var bgBlue = 64;


function setup() {
    createCanvas(600,400);
    drawSky();
}


function drawSky() {

	//background color changes using mouse movement

   	background(bgRed,bgGreen,bgBlue);

   	var bgX = mouseX
    
   	//day time bgcolor(187,228,248)
	if (bgX > 200 & bgX < 400) {
		bgX = 200
	}

    //transition to night time
    if (bgX >= 400) {
		bgX = 200 - (mouseX-400)
	}


	//day time transition to blue
	//bgcolor(187,228,248)
	//200 is the starting point of blue sky

	bgRed = bgX*((187-0)/200) + 0;
	bgGreen = bgX*((228-0)/200) + 0;
	bgBlue = bgX*((248-64)/200) + 64;


	//call drawSky function
	window.setInterval(drawSky, 100);
}


function draw() {

	//sun

	var sunSize = 0.4*mouseX
	var sunX = mouseX
	//parametric equation for path of sun
	var sunY = 80 + 0.0033*Math.pow(sunX-300,2)


	if (sunX <= 50) {
		sunX = 50
	}

	if (sunX >= 550) {
		sunX = 550
	}


	fill(255,201,14);
	noStroke();
	ellipseMode(CENTER);
	ellipse(sunX,sunY,sunSize,sunSize);


	//skyline

	fill(0);
	noStroke();

	//left buildings
	rect(0,height-200,45,200);
	rect(50,height-250,75,250);
	rect(55,height-260,65,10);
	rect(60,height-270,55,10);
	rect(65,height-280,45,10);

	//disproportionate building - right
	triangle(475,height-220,525,800,575,height-200);
	triangle(482,height-240,525,650,570,height-260);
	triangle(487,height-280,525,500,562,height-270);

	//dome building
	rect(150,height-110,200,110);
	rect(160,height-125,180,125);
	rect(165,height-130,170,130);
	ellipseMode(CENTER);
	ellipse(250,height-130,160,130);
	rect(240,height-198,20,10);
	rect(248,170,5,100);

	//bottom skyline
	rect(0,height-150,100,150);
	rect(100,height-100,100,100);
	rect(350,height-220,70,220);
	rect(380,height-300,50,325);
	rect(420,height-200,20,200);
	rect(440,height-120,60,120);
	rect(520,height-150,80,150);

	//windows
	fill(240);
	rect(388,120,22,5);
	rect(388,130,34,5);
	rect(388,140,34,5);
	rect(60,160,5,5);
	rect(70,160,5,5);
	rect(80,180,5,5);
	rect(90,180,5,5);
	rect(100,180,5,5);
	rect(110,180,5,5);
	rect(70,190,5,5);
	rect(110,190,5,5);
	rect(100,200,5,5);
	rect(110,200,5,5);
	rect(60,220,5,5);
	rect(70,220,5,5);
	rect(90,220,5,5);
	rect(110,230,5,5);
	rect(60,240,5,5);
	rect(80,240,5,5);
	rect(90,240,5,5);
	rect(100,240,5,5);
	rect(180,282,20,3);
	rect(210,282,20,3);
	rect(240,282,20,3);
	rect(270,282,20,3);
	rect(300,282,20,3);
	rect(490,200,10,20);
	rect(530,210,5,5);
	rect(540,210,5,5);
	rect(550,210,5,5);
	rect(520,220,5,5);
	rect(530,220,5,5);
	rect(510,240,5,5);
	rect(540,240,5,5);
	rect(550,240,5,5);
	rect(490,170,5,5);
	rect(500,170,5,5);
	rect(530,170,5,5);
	rect(550,170,5,5);
	rect(540,160,5,5);
	rect(550,160,5,5);
	rect(500,140,5,5);
	rect(510,140,5,5);
	rect(360,190,5,15);
	rect(370,210,5,15);
	rect(370,230,5,15);
}

The part I struggled with the most was definitely trying to come up with equations for the parabolic pathway of the sun as well as the color equation for the sky. After a lot of trial and error on paper, I was finally able to come up with something and transfer it to the computer and work from there.
mecha-lookingoutwards-03

In 2014, the design studio Nervous System created a kinematic dress utilizing generative technology and 3D printing. To do this, the studio first created a program coined Kinematics Cloth App, a web application utilizing javascript with the ability to generate dresses, shirts, and skirts that could be printed in 3D. Through the app, users have the option to customize the pattern of the dress as well as the fit and style.

What first drew me to this project was the combination of computer generated art and fashion. Although it makes sense that algorithms and the like are capable of creating such pieces, it still amazes me to even think of how one would go about taking into consideration all of the combinations of shapes that could go into customization.

Not only this, but the way that the web app is designed allows for users who are inexperienced with CAD modeling. Having the ability to give accessibility to such advanced technology to the everyday person without losing the customizability of the designs seems simple in theory, but takes a lot of strategic design.

kyungak-project-03-dynamic-drawing

sketch

//Kyunga Ko
//15104B
//kyungak@andrew.cmu.edu
//Project-03

var angle = 0;

function setup() {
    createCanvas(640, 480);

}

function draw() {
    background(mouseX-70,mouseY-30,mouseY);

    //WHen the mouse is on the right side of the canvas

    if (mouseX > 250) {

        var length = max(min(mouseX,640),0);
        var size = length * 600 / 640;
        
        //outer left white eye + black boarder 
        fill(255);
        strokeWeight(10);
        ellipse(100 + length,170,size,size);

        //inner left black iris
        fill(0);
        ellipse(100 + length,170,100,100);

        //inner left grey pupil
        fill(70);
        ellipse(100 + length,170,50,50);

        //outer right white eye + black baorder
        fill(255);
        strokeWeight(10);
        ellipse(500 - length,170,size-100,size-100);

        //inner right black iris
        fill(0);
        ellipse(500 - length,170,size-200,size-200);

        //inner right grey pupil
        fill(70);
        ellipse(500 - length,170,size-250,size-250);

        //mouth
        fill(209,65,65);
        triangle(250,330,340,330,300,380);

    }

    //When the mouse is on the left side of the canvas

    if (mouseX < 250) {

    //green mouth
    strokeWeight(10);
    fill(71,135,100);
    ellipse(mouseX,mouseY,100,random(0,30));

     //green eyes
     fill(71,135,100);
    ellipse(mouseX-50,mouseY-50,30,30);
    ellipse(mouseX+50,mouseY-50,30,30);
    sizeX = 50;
 
    //red mouth
    fill(198,41,88);
    ellipse(mouseX+100,mouseY+200,100,random(0,30));

    //red eyes
    fill(198,41,88);
    ellipse(mouseX+50,mouseY+150,30,30);
    ellipse(mouseX+150,mouseY+150,30,30);
        
    //blue mouth
    fill(42,149,199);
    ellipse(mouseX+200,mouseY,100,random(0,30));

    //blue eyes
    fill(42,149,199);
    ellipse(mouseX+150,mouseY-50,30,30);
    ellipse(mouseX+250,mouseY-50,30,30);

    //line
    push();
    translate(mouseX,mouseY);
    rotate(radians(angle));
    rectMode(CENTER);
    line(mouseX,mouseY,100,100);
    fill(30,60,100);
    rect(mouseX+50, mouseY+50, 50, 50);
    fill(100,240,245);
    rect(mouseX+70, mouseY+150, 70, 70);
    text("BABABA", mouseX+30, mouseY+30);
    pop();
    angle = angle + 0.5;

    }

}


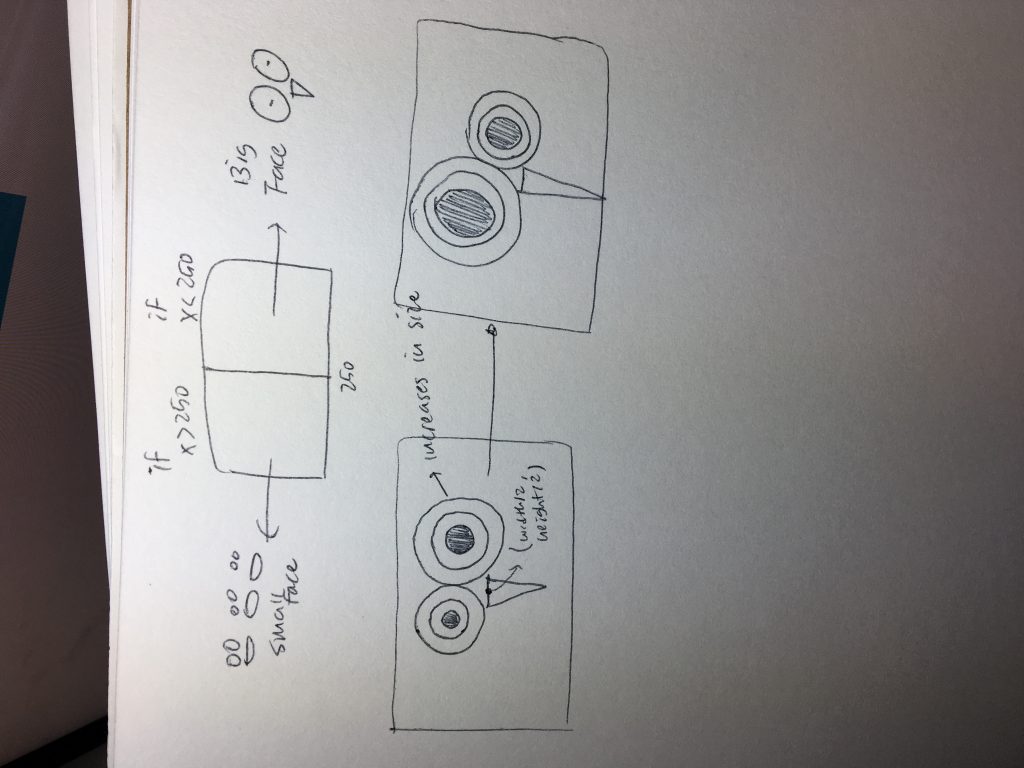
For this project, I wanted to divide the drawing into two parts: left and right. I tried to integrate two different parts into a single painting and continue with the “face” theme that we have been practicing in our previous works. While working on this project, I was able to learn from my mistakes and overcome problems. Although stressful, I believe I can now understand the language better.


(The picture is straight up on my desktop, but it turns around like this as soon as I attach it…)

juyeonk – project03 – dynamicdrawing

sketch

// Brandon Hyun
// 15-104 Section B
// bhyun1@andrew.cmu.edu
// Project 04

var increase = 15;
var xInt = 15;

var x1 = 0;
var y1 = 550;
var x2 = 550;
var y2 = 0;
var red;
var green;
var blue;

function setup() {
  createCanvas(400, 300);
}

function draw() {
  background (red,green,blue);
  var m = 400/25;
	for(var i = 0; i < m; i += 1) {
        strokeWeight(1);
		    stroke(40,40,40);


        for(var j =0; j<10; j+=1){
          line(mouseX+40*j, increase * i, increase * i +40*j, y1);
        }

		    for(var z =0; z<10; z+=1){
          line(mouseY+ x2 - increase * i, y2+40*z, x1, increase * i+ 40*z);
        }

	}
}

function mousePressed() {
  red = random(0,255);
  green = random (0,255);
  blue = random (0,255);
}

The most difficult part of this project was to code each strand of rain. It was more tedious than hard, but assigning random lengths and speed to each strand was definitely not easy.

You can move around the mouse to change the location of the umbrella.

I wish I could make the code take the mouseY into account as well so that the person wouldn’t smiling if the umbrella was below him/her.

jamieh-LookingOutwards-03

The Silk Pavilion by the MIT Media Lab consists of 26 polygonal panels and silk threads woven by a CNC (computer-numerically controlled) machine. The algorithm used to weave out the silk threads was based upon study of silk worms, their natural behavior and how they use something 2-dimensional to create a space that is 3-dimensional. The shape of the pavilion uses an algorithm that uses a continuous thread to weave the panels with differing degrees of density. Once the machine-aspect of the pavilion was finished, 6500 silkworms were placed onto the pavilion was to bring in the natural aspect by allowing them to reinforce any gaps neglected by the CNC machine.

This project is a synthesis between man-made, digital form and natural form. It’s introducing something controlled to the natural environment and introducing something natural to the machine. What is also admirable about this project is the focus on studying the silkworms and its natural instincts, which the team was able to transfer into code for the machine to develop an architecture for the silkworms.


jamieh-Project-03-Dynamic-Drawing

sketch

/*
Jamie Ho
10:30
jamieh@andrew.cmu.edu
Project 03
*/

var rectSize = 10;
var d = 75; //distance from edges and distance between each rectangle's corner

function setup() {
    createCanvas(640, 480);
    rectMode(CORNER);
    angleMode(DEGREES);
}

function draw() {
    background(0);
    fill(256);
    
    //to create array of rectangles
    for(var x = 0+d; x <= width-d; x+=d){
        for(var y = 0+d; y <= height-d; y+=d){
            
            //dis = distance between mouse pointer and rectangle
            var dis = dist(x, y, mouseX, mouseY);
            var inCanvas = d < mouseX & mouseX < width-d && d < mouseY && mouseY < height-d;
                
                
        //CHANGING COLOURS
            //if rectangles are far from mouse: rectangles are white
            //far = more than half the width of canvas
            if(dis > width/2 & inCanvas){            
                fill(256, 256, 256);
            }

                //if rectangles are close from mouse: rectangles flash in colour
                //close = less than half the width of canvas
                else if(dis < width/2 & inCanvas){
                    fill(random(0, 256),random(0, 256),random(0, 256));
                }


        //ROTATING + TRANSLATION
            
            //Top L = "starting point" 
                //no rotation no translation no shear, just size change
            
            //Top R = rotates a bit
            if(mouseX > width/2 & mouseY < height/2 && inCanvas){
                rotate(random(-0.05, 0.05));
            }

            //Bottom R = rotates double of Top R + translates
            if(mouseX > width/2 & mouseY > height/2 && inCanvas){
                rotate(random(-0.1, 0.1));
                translate(x*random(0.005, 0.0075), y*random(0.005, 0.0075));
            }

            //Bottom L = rotates quadruple of Top R/double of Bottom R + translates + shears
            if(mouseX < width/2 & mouseY > height/2 && inCanvas){
                rotate(random(-0.2, 0.2));
                translate(x*random(0.005, 0.0075), y*random(0.005, 0.0075));
                shearX(PI/16);
            }


        //CHANGING SIZE
            //if mouse is within borders of "new" canvas, 
            //then rectangles change size based on distance of pointer to rectangle
            if(inCanvas){
                rect (x, y, dis*0.1, dis*0.1);
            }

                //if mouse is not within canvas, then rectangles are small AND rotates
                else{
                    rect (x, y, rectSize, rectSize)

                }

        }
    }
   
}


For this project, I made use of for loops to create an array of the same shapes, then used conditional statements to make modifications. The dynamic drawing starts off static with the original rectangles, but when the mouse moves, the rectangles change in size based on each of their distances from the mouse. When the mouse moves into a different quadrant, the rectangles react differently through rotation, translation, shear. From the top left quadrant to the bottom left quadrant (clockwise), the movements to the rectangles become more dramatic. The hardest parts of this project were making the for loop work, making sure the conditional statements made sense and adjusting the numbers assigned to variables to an appropriate range so that the shapes appear on canvas.

alchan-Project 03-dynamic drawing

alchan project 03

//Scarlet Tong
//sntong@andrew.cmu.edu
//Section A
// Project 5: Wallpaper

//x and y coordinates the tip of the tear drops
var x = 0;
var y = 0;
// scale
var Large = 25;
var Medium = Large-1;
var Small = Large-5;
// for loop coordinates
var transY = 0;
var transX = 30;

function setup() {
    createCanvas(480, 480);
    background (243,117,117);//hot pink!
}

function draw() {
  //array the pattern on the odd rows
  for (var transY = 0; transY < width; transY+= Large*6+15) {
    for (var transX = 0; transX < width+30; transX+= Large*2+10) {
      pattern(transX,transY);
    }
  }
  // array the pattern for even rows and offset them so they fill the gap
  for (var transY = -Large*3-8; transY < width; transY+= Large*6+15) {
    for (var transX = Large+5; transX < width; transX+= Large*2+10) {
      pattern(transX,transY);
    }
  }
}

function pattern(transX,transY){
  stroke(255);
  strokeWeight(1);
  //deep blue tear drop, aka large drop
  push();
  translate(transX,transY);
  fill(48,78,109);
  beginShape();
  curveVertex(x,y);
  curveVertex(x,y);
  curveVertex(Large,Large*3);
  curveVertex(x,Large*4);
  curveVertex(x-Large, y+Large*3);
  curveVertex(x,y);
  curveVertex(x,y);
  endShape();
  pop();
  //pale orange tear drop, medium drop
  push();
  translate(transX,transY+Large*6);
  fill(237,168,131);
  angleMode(DEGREES);
  rotate(180);
  beginShape();
  curveVertex(x,y);
  curveVertex(x,y);
  curveVertex(Medium,Medium*3);
  curveVertex(x,Medium*4);
  curveVertex(x-Medium, y+Medium*3);
  curveVertex(x,y);
  curveVertex(x,y);
  endShape();
  // teal tear drop, small drop
  fill(43,188,177);
  beginShape();
  curveVertex(x,y+10);
  curveVertex(x,y+10);
  curveVertex(Small,Small*3+10);
  curveVertex(x,Small*4+10);
  curveVertex(x-Small, y+Small*3+10);
  curveVertex(x,y+10);
  curveVertex(x,y+10);
  endShape();
  //yellow circle
  fill(253,185,74);
  ellipse(x,Small*5,Large,Large);
  //small dark blue circle on the tip of the shape
  fill(48,78,109);
  ellipse(0,0,10,10);
  pop();
}

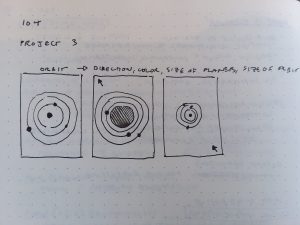
I wanted to play around with rotation for this project and was inspired by stylized/ simplified representations of the solar system (or atoms). I did a few quick sketches of how I wanted the drawing to change as the mouse moved, and from there figured out how I was going to implement the design.

I think the trickiest part of this was figuring out how to change the size of all of the components with the movements of the mouse without making them too large or too small.


danakim-LookingOutwards-03

Michael Hansmeyer; L-Systems in Architecture

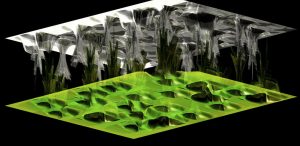
Michael Hansmeyer’s L-Systems in Architecture explores the possibilities that L-Systems can open up in architecture. L-Systems is a string-rewriting algorithm that was created by biologist Aristid Lindenmayer. Lindenmayer created this algorithm to model simplified plants and their growth processes. Hansmeyer’s is an architect and programmer. His interests lie in the idea that architecture should be judged by the experiences that it produces. He takes advantage of computational methods to enhance these experiences intellectually and sensually.

There are two parts to the project. The first half explores which qualities of a design are essential to the logic of the algorithm. It considers methods for visualizing L-Systems. The second half incorporates aspects of parametric systems to expand the algorithm’s language. This part of the project explores the different ways that the L-System can react to its environment and how these adaptations can physically be applied to architectural design.

Nature has been the muse of many architects due to it’s forms and geometries. Many times the product of nature’s inspiration is executed too literally. Hansmeyer utilizes these characteristics as ways to improve the function of a building rather than to solely determine it’s form.

Michael Hansmeyer; L-Systems

Michael Hansmeyer; L-Systems


aranders-project-03

aranders-project-03

//Anna Anderson
//Section D
//aranders@andrew.cmu.edu
//project-03

var pbsize = 30
var pbcolor = 0
var pbposition = 275
var jellysize = 30
var jellycolor = 0
var jellyposition = 25

function setup() {
  createCanvas(600, 400);
}

function draw() {
  background(218, 145, 223)
  noStroke();

  //left bread
  fill(255);
  rect(50, 100, 200, 200);
  ellipse(50, 125, 50, 50);
  ellipse(250, 125, 50, 50);

  //right bread
  fill(255);
  rect(350, 100, 200, 200);
  ellipse(350, 125, 50, 50);
  ellipse(550, 125, 50, 50);

  //peanut butter color
  pbcolor = min(max(0, mouseX), 100);
  fill(216, 152, pbcolor);

  //peanut butter position and size
  pbsize = max(min(mouseX, 150));
  pbposition = max(min(mouseY, 375));
  rect(pbposition, 125, pbsize, pbsize);

  //jelly color
  jellycolor = min(max(0, mouseX), 100);
  fill(225, jellycolor, 225);

  //peanut butter position and size
  jellysize = max(min(mouseX, 150));
  jellyposition = max(min(mouseY, 75));
  rect(jellyposition, 125, jellysize, jellysize);

}

I really like peanut butter and jelly and thought this was a good opportunity to digitally spread the goodness. This project went relatively smoothly and was fun to create!